Your next picture day hairstyle can be simple and still look polished. With a few smart choices, you’ll feel ready the moment you step in front of the camera.
These hairstyles focus on quick prep, comfy wear, and photo-friendly style. Each one is built for real mornings and real hair textures.
1. Quick Bubble Pony With a Soft Center Twist
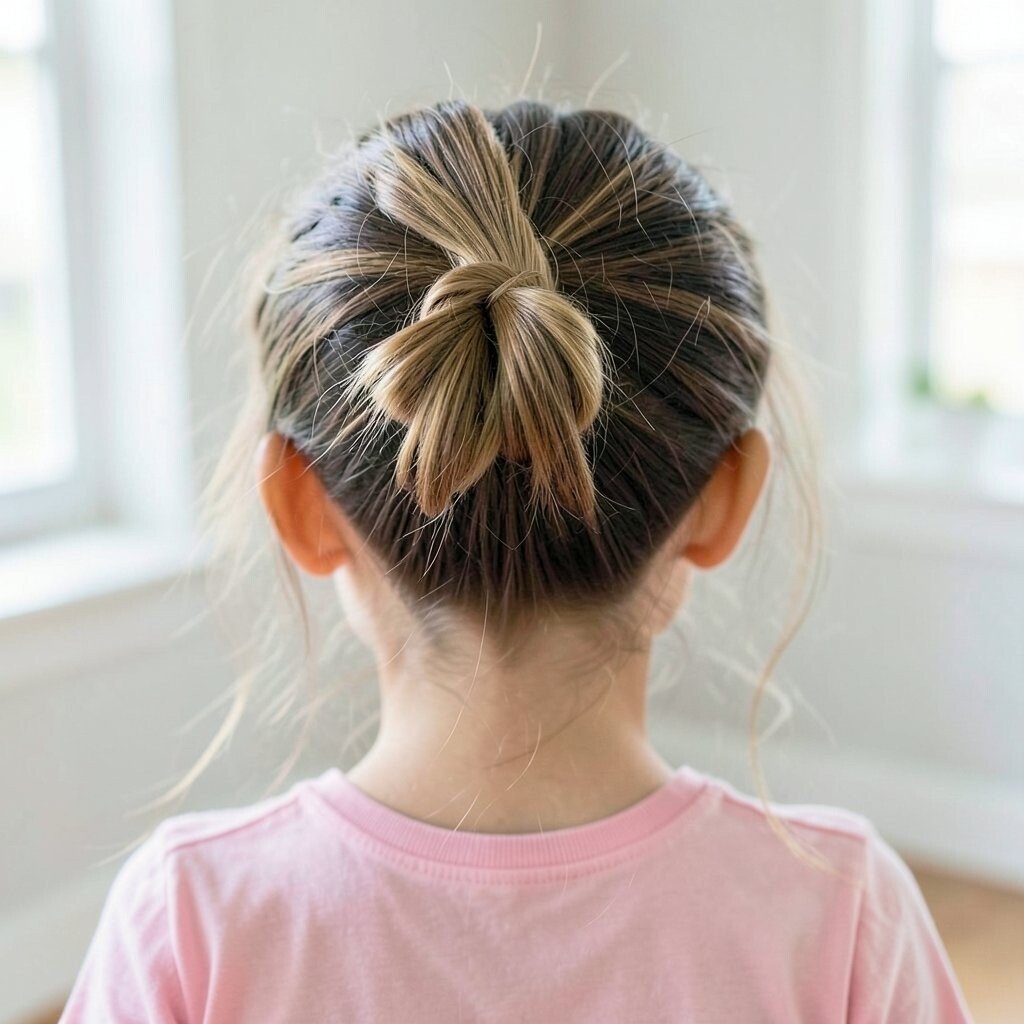
This bubble pony looks fun, neat, and camera-ready. Start by parting your hair slightly to the side and securing a mid-height ponytail.
Use small clear elastics to section the pony into rounded “bubbles,” spacing them evenly. Lightly tug each bubble outward for a fuller shape, and twist a small front strand around the elastic for a soft center detail. Finish with a gentle mist of hair spray so the bubbles stay smooth all day.
2. Sleek Side Pony With a Ribbon-Tucked Finish
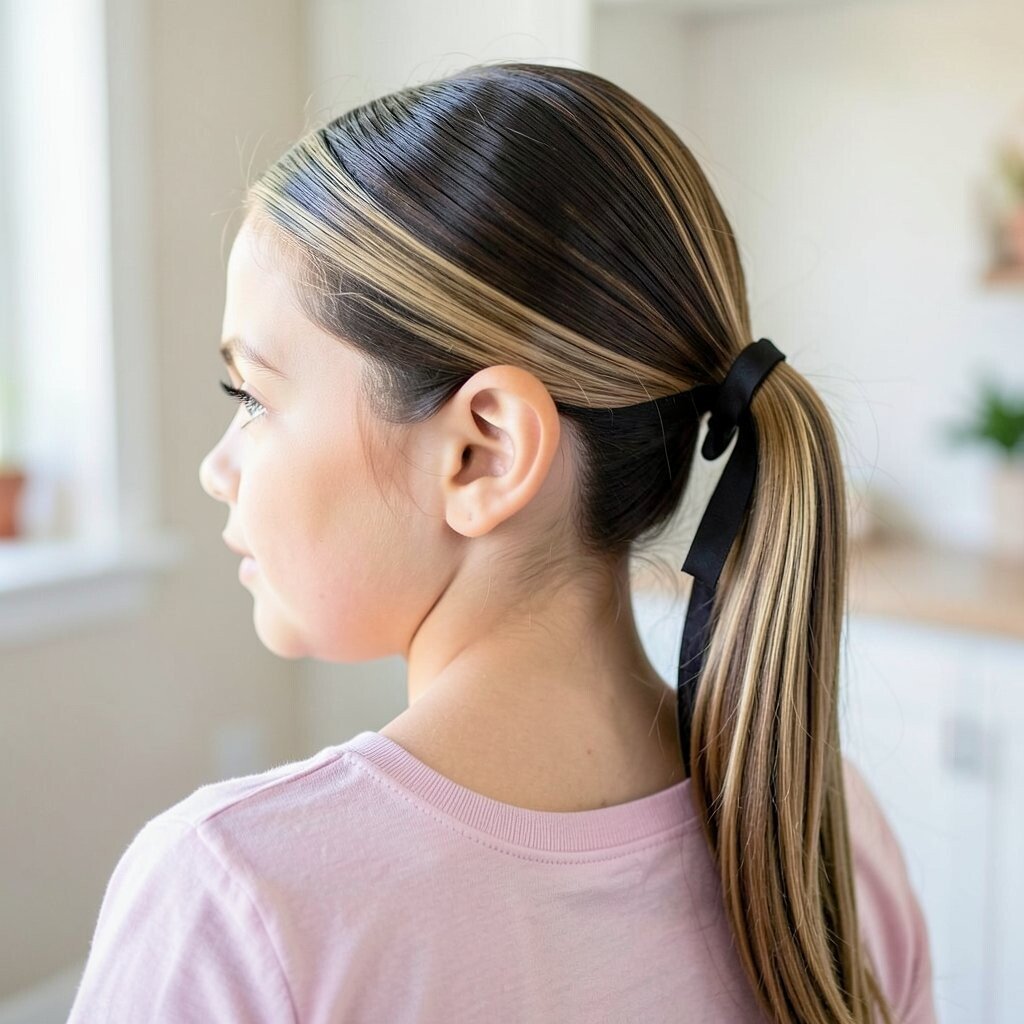
A sleek side pony frames the face and keeps flyaways calm in photos. Gather hair to one side and smooth it with a brush and a dab of styling cream.
Secure the pony with an elastic, then wrap a thin ribbon or fabric strip around the base. Tuck the ends under the elastic for a tidy look that feels extra cute without extra time. This style works well for straighter hair and also for wavy hair when you smooth the top first.
If your hair is slippery, use a light gel at the roots before brushing. For personalization, choose a ribbon color that matches a school-approved outfit, and add one small hair clip for sparkle. Keep a travel-size spray in your bag for quick touch-ups if you feel static or humidity.
3. Half-Up Crown Braid for the “Done” Look
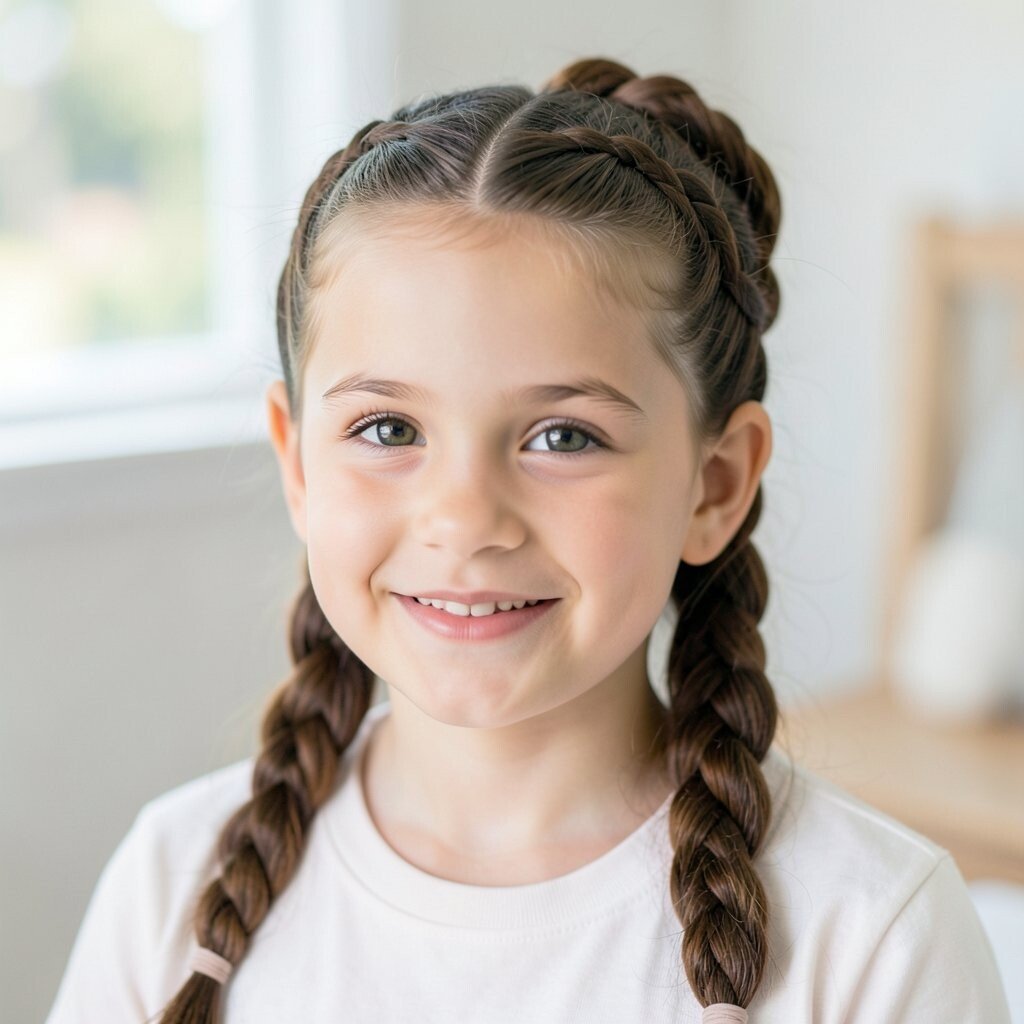
A half-up crown braid gives a dressed-up vibe while staying easy. Separate the top section from ear to ear and smooth the hair back so it lies flat.
Create two small braids on each side, starting near the temples, and pull them toward the center. Secure both braids with a small elastic, then gently lift and tuck the ends for a rounded crown effect.
This hairstyle highlights your face and adds texture without needing a full braid all the way down. If you have shorter layers, leave a few pieces out around the face so it looks intentional. For today’s trend toward natural-looking texture, you can skip perfect tightness and just keep the crown neat.
To personalize, weave in a thin braided cord or add a single charm clip near the elastic. Cost stays low since elastics and a couple of bobby pins are usually enough. Finish with a light hold spray and you’re set for a long photo day.
4. Messy-But-Polished Claw Clip Updo
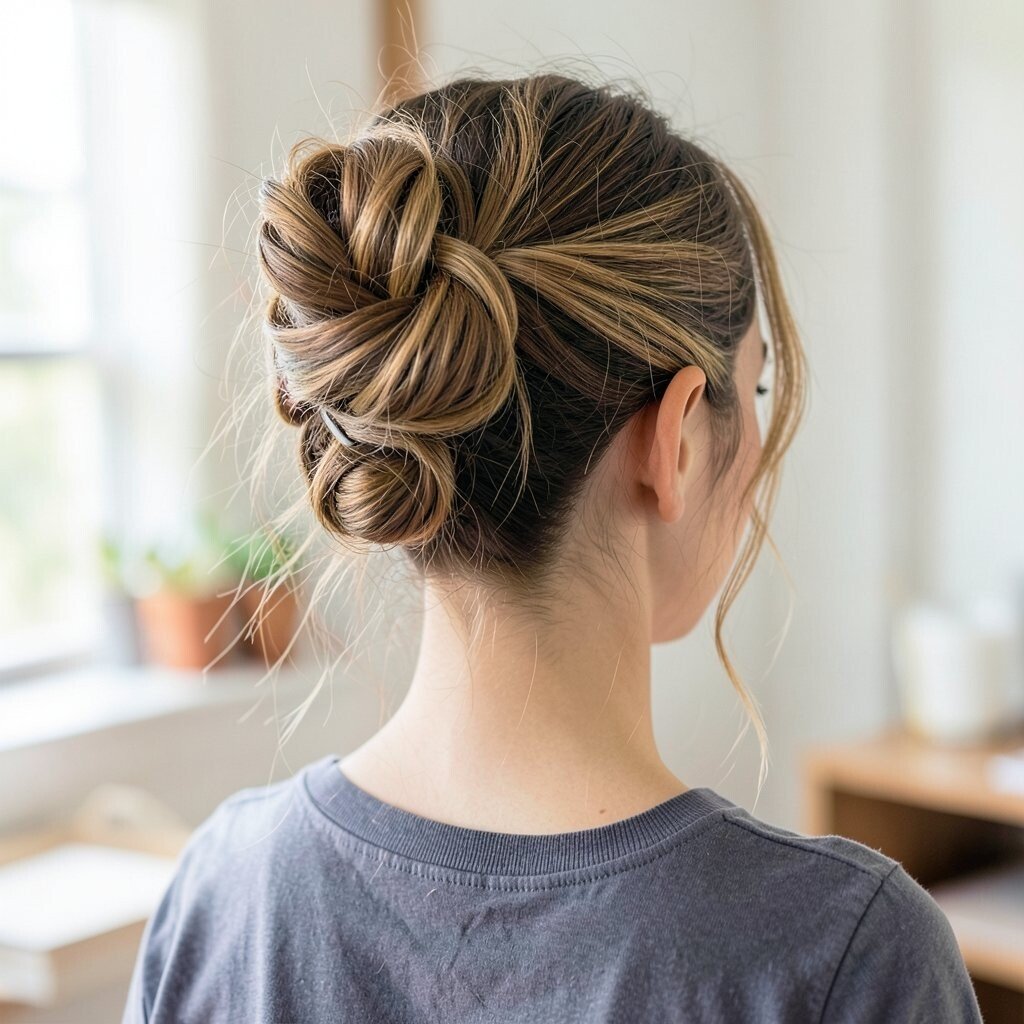
A claw clip updo is fast, forgiving, and great when your hair won’t cooperate. Gather hair loosely at the back of your head and twist it into a simple roll.
Slide a sturdy claw clip over the roll and adjust the shape until it feels balanced. Pull one or two face-framing strands forward so it looks soft, not stiff. This style is perfect for busy mornings because it takes seconds and hides minor cowlicks.
5. Two-Minute Twisted Low Bun With Side Flair
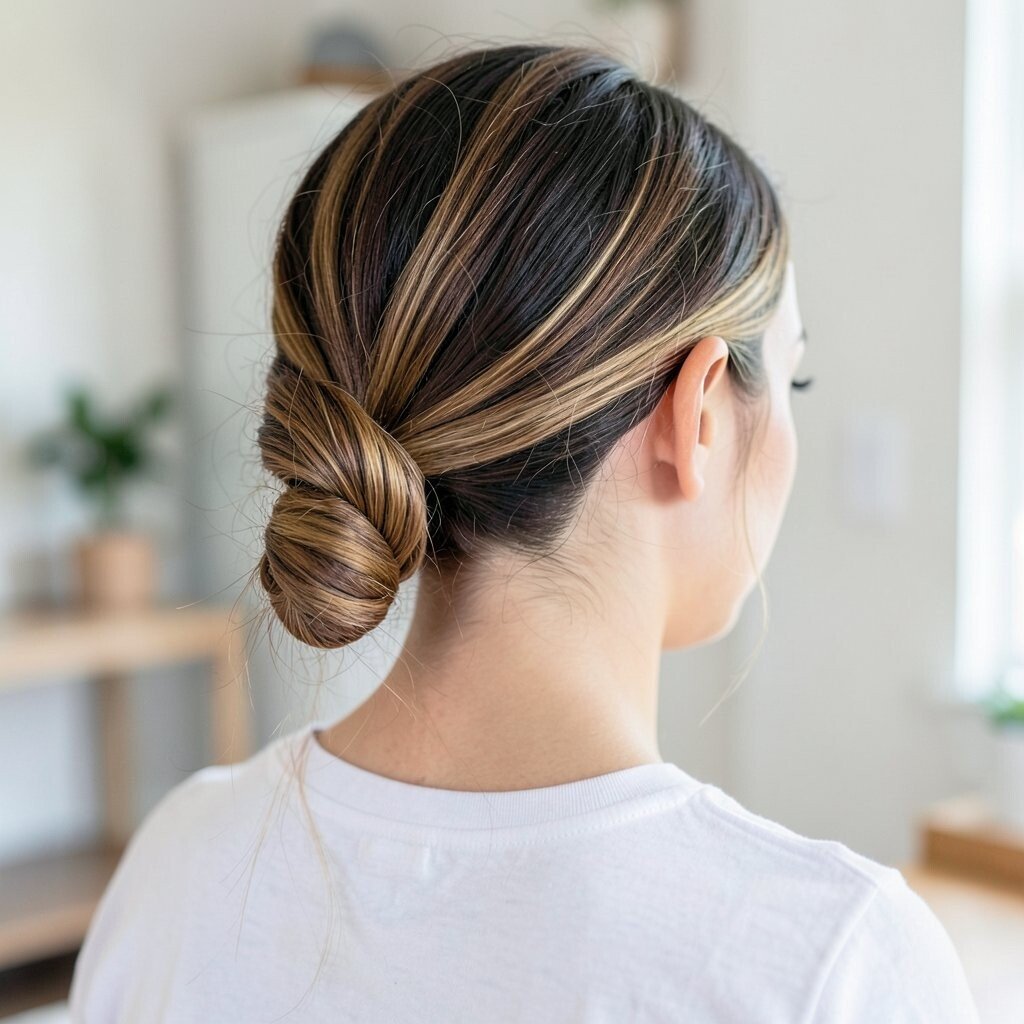
This low bun looks neat from every angle and doesn’t require complicated steps. Gather hair at the nape of your neck and split it into two sections.
Twist each section inward, then wrap them together and pin the ends underneath. Use two or three bobby pins to secure, and add a tiny braid or twist detail on one side for uniqueness. If your hair is fine, hold the ends in place with a quick spritz of water or styling mist before pinning.
For personalization, vary the part line and let the twists start higher for a more lifted look. Budget-wise, bobby pins, a brush, and a small mist are the only essentials. Keep the bun smooth by using a soft bristle brush on the top before you begin.
6. Straight Hair Slicked Half-Up With Micro Fringe Clips
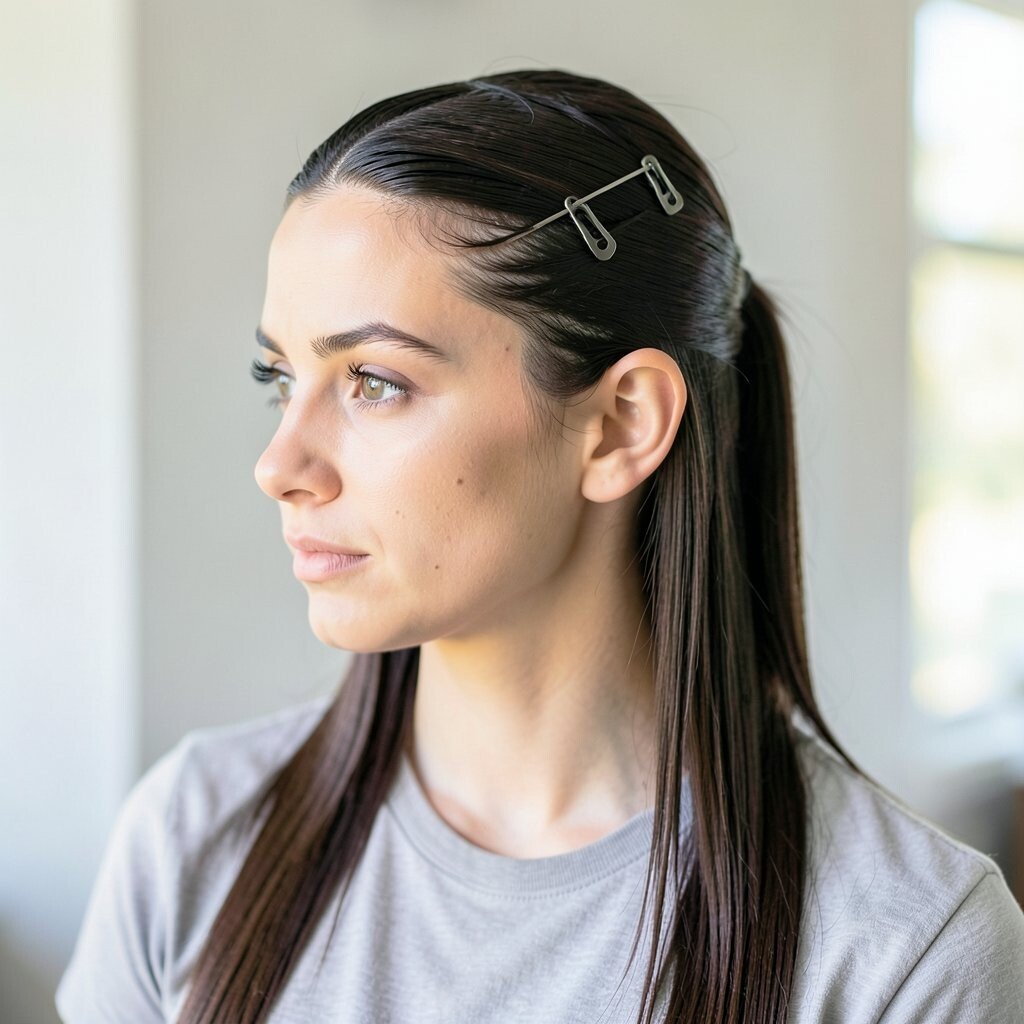
Sleek half-up hair is a favorite for picture day because it keeps attention on your face. Start with dry hair and brush the top section forward slightly to remove bumps.
Clip the half-up section at the back with two small clips, then smooth the rest down. If you have bangs or a fringe, use tiny clips to guide them into a tidy shape without flattening everything. This style looks modern and clean, especially with current trends favoring minimal texture up top and calm ends.
If you want extra lift, tease gently at the crown before clipping. Choose clips that match your outfit tones so the look feels coordinated. For cost savings, borrow matching clips from your everyday collection and refresh with a quick wipe if needed.
7. High Pony With a Wrapped Elastic “Cap”
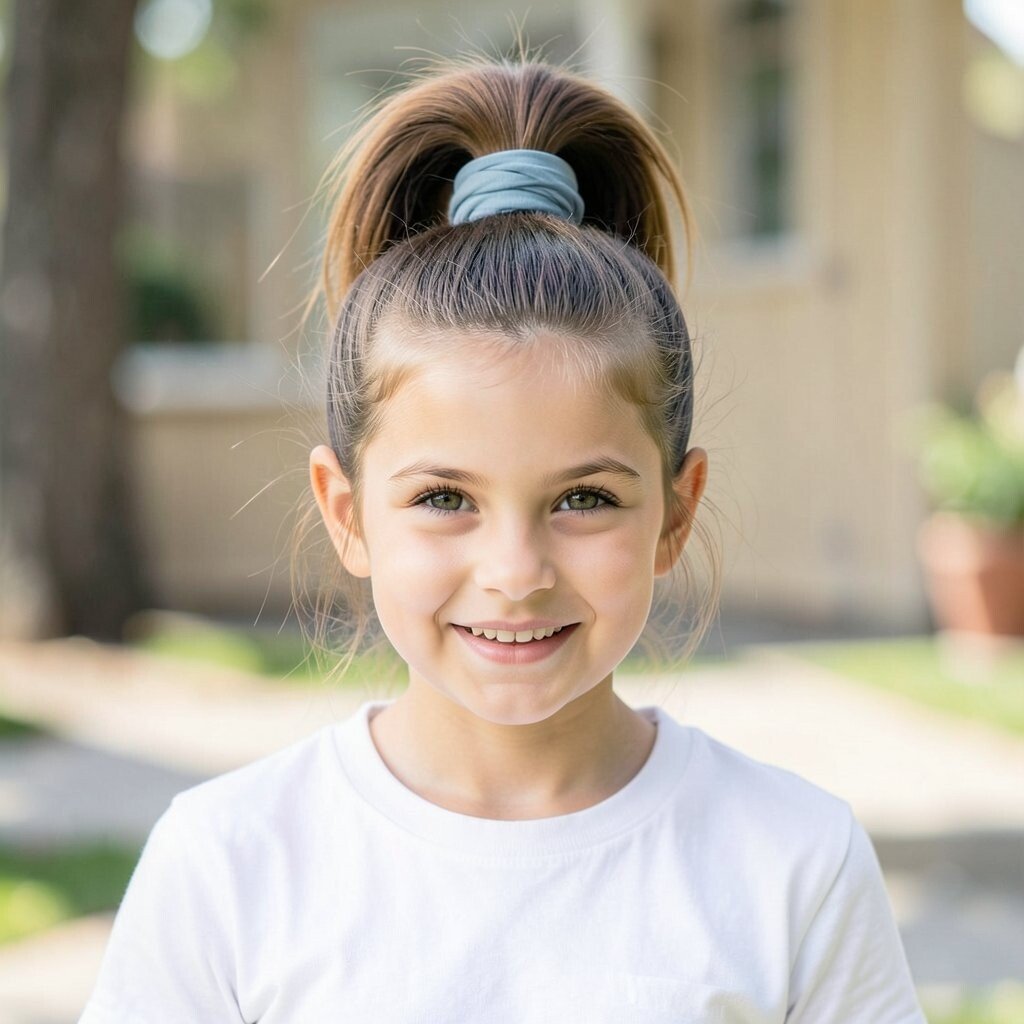
A high pony is classic, bold, and super photo-friendly. Brush your hair up high and secure with one strong elastic that won’t stretch out quickly.
Wrap a thin strand of hair around the base to hide the elastic, then tuck the end under with a pin. Add a light wave to the ponytail ends if you want a more lively look in pictures. This style works best when the top is smooth, so spend an extra moment on the crown.
To personalize, leave a small swoop at the front instead of pulling everything back straight. If you’re dealing with frizz, apply a tiny amount of anti-frizz serum to your palms and smooth it over the pony. Keep a small hair tie backup on hand for those mornings when one elastic feels too loose.
8. Side-Chain Braid Over One Shoulder
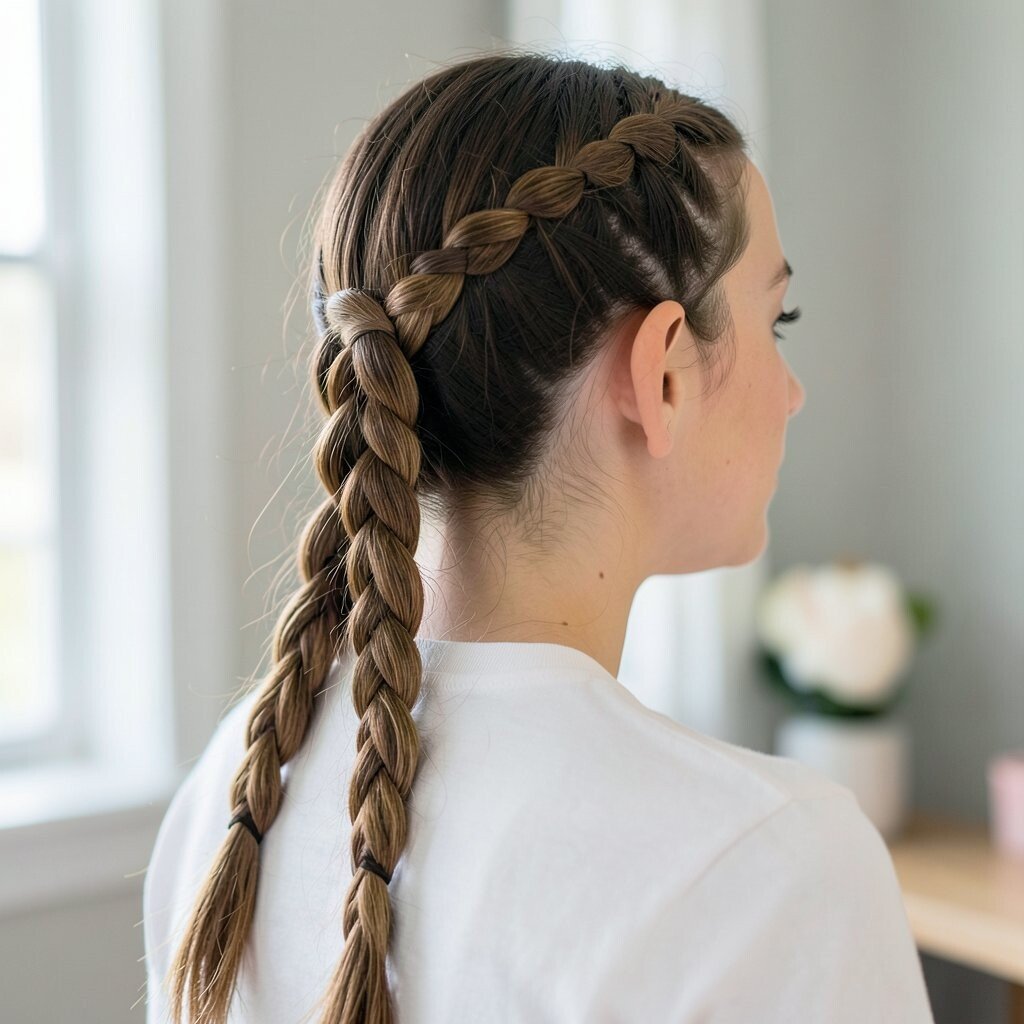
This side braid looks intricate but stays simple once you know the pattern. Start with a deep side part and gather hair over one shoulder.
Create a regular three-strand braid, but cross strands as if you’re making a slightly “chunky” look. When you reach the end, secure with an elastic and tug lightly to widen the braid. The result looks airy and trendy, great for wavy hair and also for straight hair when you add volume.
9. Twisted Ribbon Headband With Loose Waves
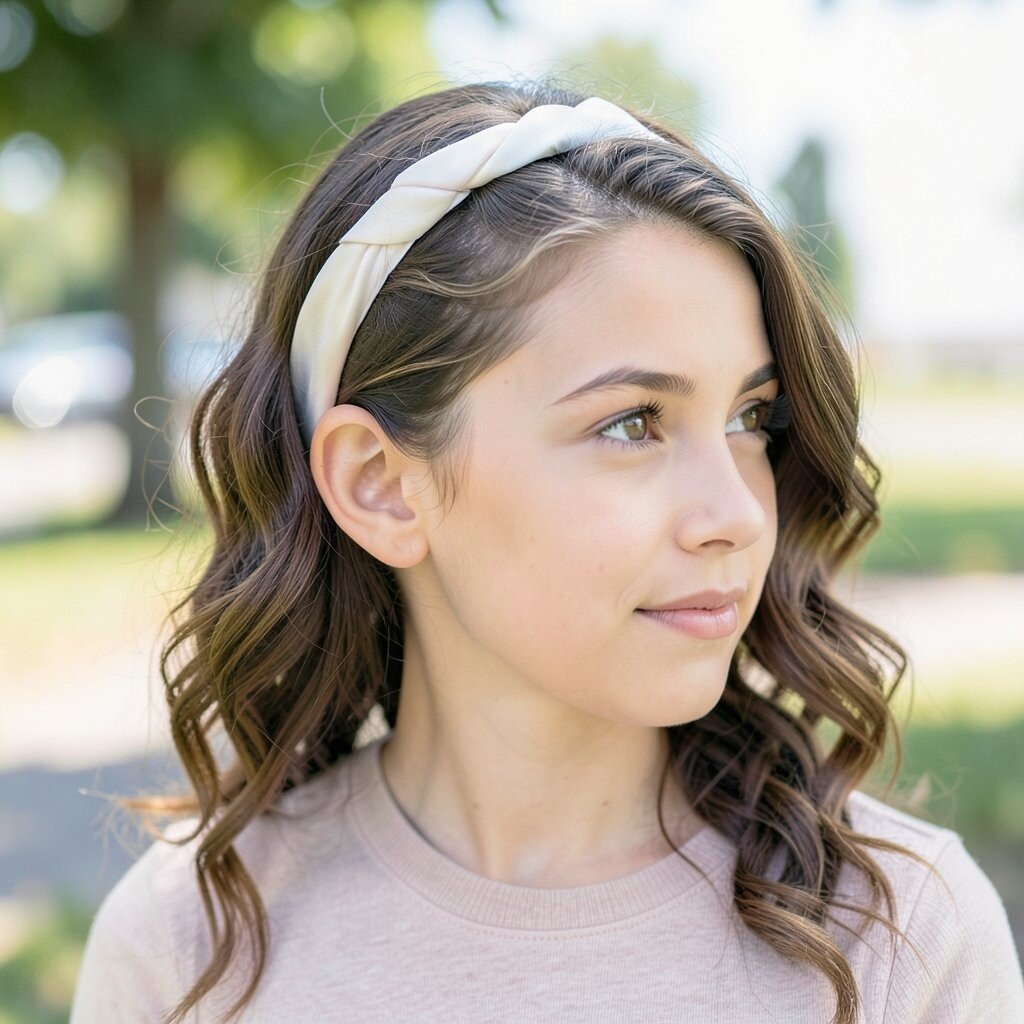
Loose waves plus a ribbon headband makes your hair look styled without hours of work. Create soft waves if your hair is naturally straight by using quick finger-coiling or a warm tool only on the ends.
Place a ribbon headband over your head, then twist small front sections toward the back. Tuck the ends under the ribbon so they look secure but relaxed. This style is unique because it blends classic accessories with a modern soft wave feel.
For personalization, choose a ribbon color that matches your outfit or school theme. Keep cost low by using an old scarf turned into a ribbon strip. If your waves fade fast, use a light spray before styling and avoid heavy brushing afterward.
10. Rope Braid Ponytail Hybrid
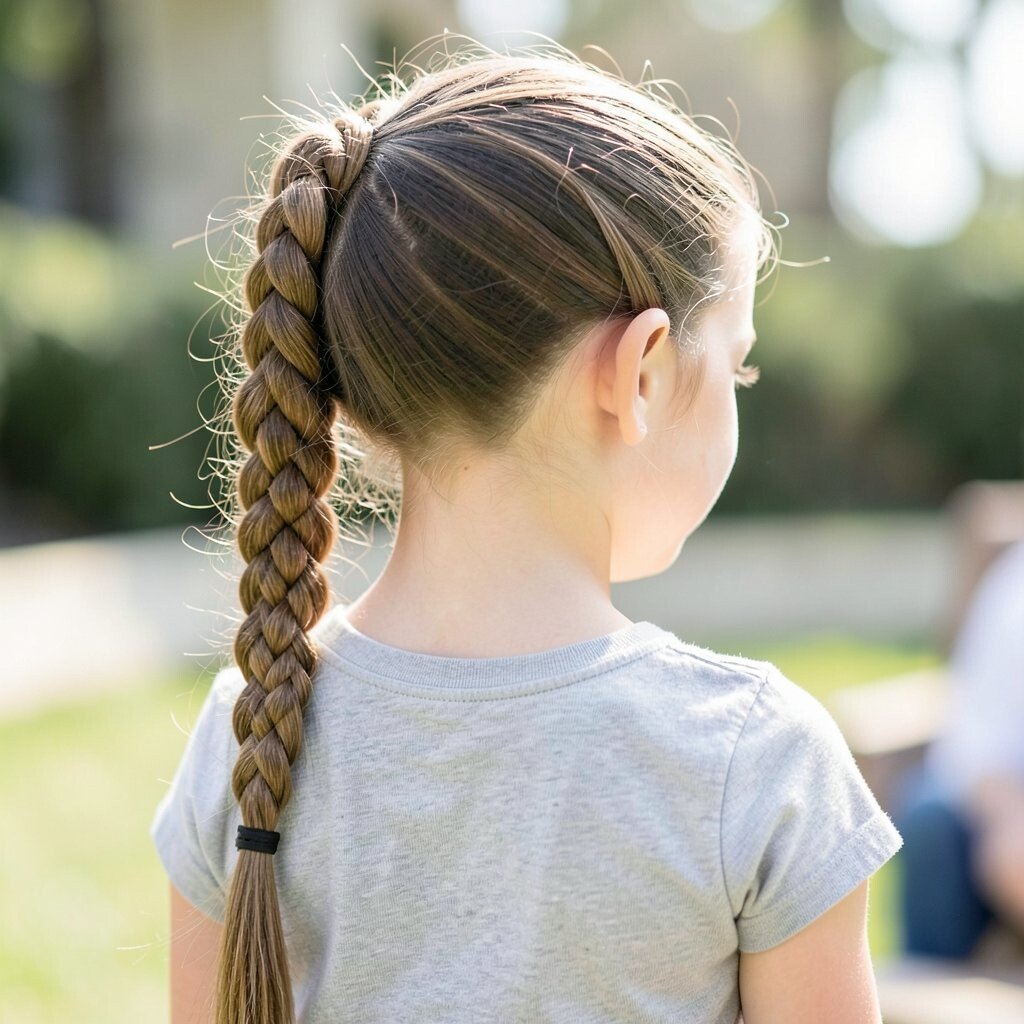
This rope braid ponytail hybrid is tidy, quick, and hard to mess up. Secure a low ponytail first, then split it into two sections.
Twist both sections in the same direction, then wrap them together in the opposite direction to form a rope effect. Hold the twists gently so they stay defined, and secure the end with an elastic. Finish by pulling the braid slightly for a fuller look that reads well in photos.
If you want more softness, leave a few wispy pieces loose at the front. For fine hair, add a tiny bit of volume at the roots before you tie the initial pony. This style is budget-friendly since you only need elastics and pins if you want extra security.
11. Sleek Top Knot With a Clean Middle Part
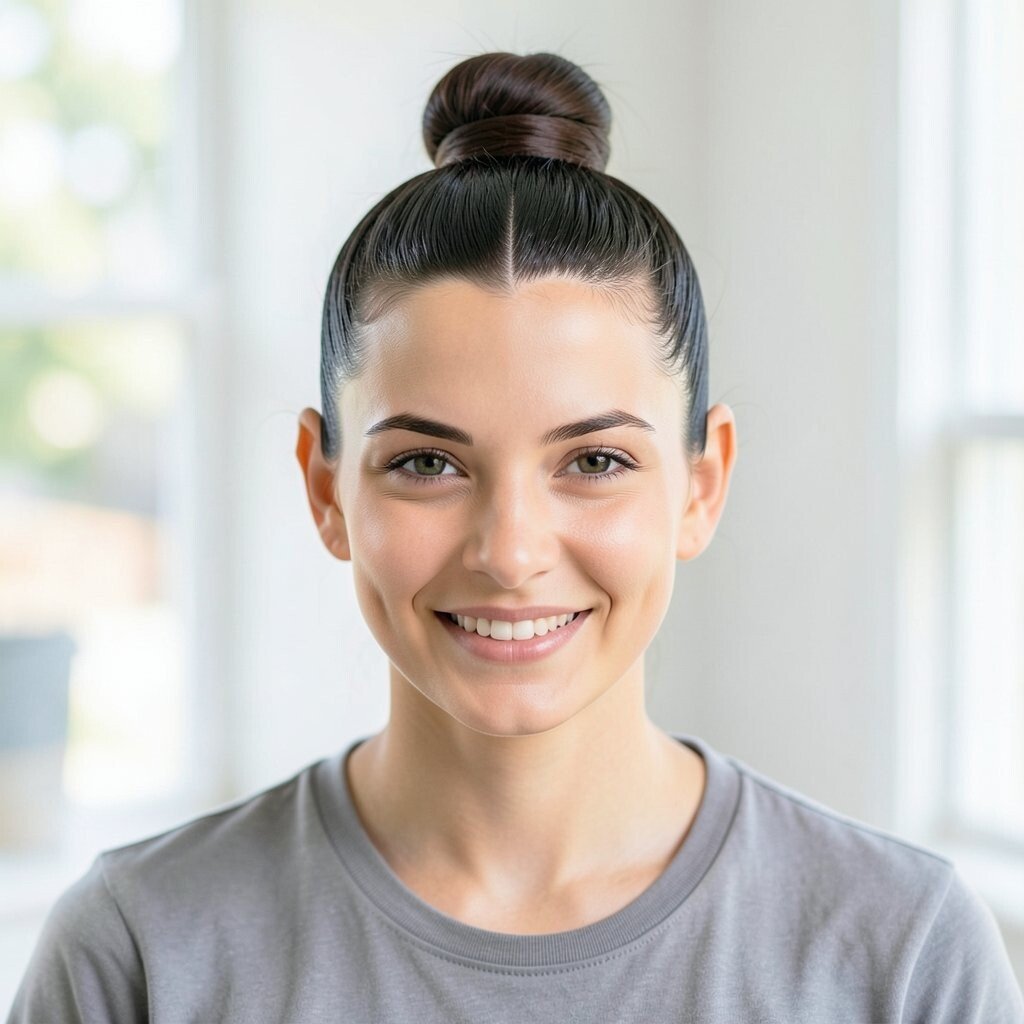
A sleek top knot makes your hair look intentional, even when time is short. Part your hair in the middle, brush it up, and gather it into a high bun.
Twist hair into a bun and pin it tightly so it stays put during the photo session. Use smoothing cream on the top to keep the part crisp and tidy. This hairstyle is great for straight hair and also works for curly hair when you gather carefully.
12. Half-Up Waterfall Faux Braid
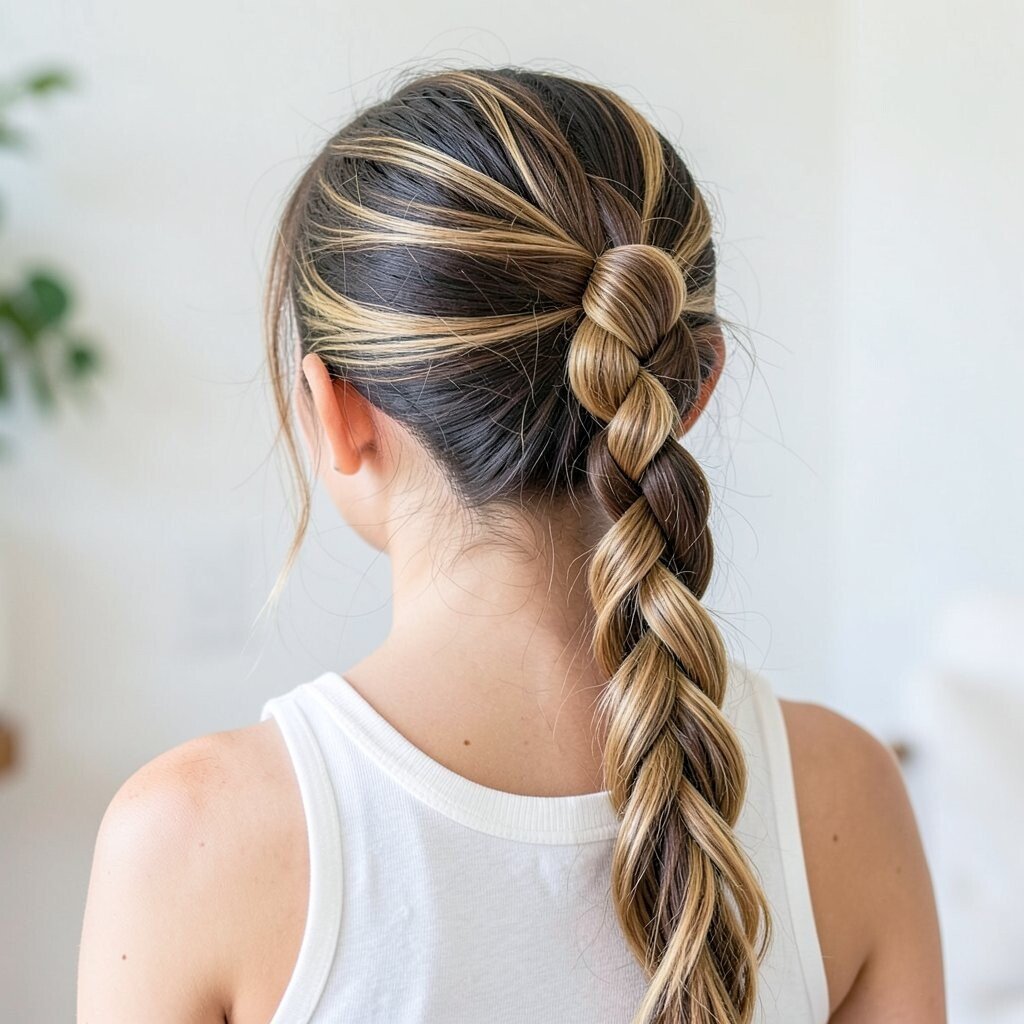
A faux waterfall effect adds movement and softness to your hair without a real full braid. Start by parting hair and sectioning a small top strip from one side.
Twist that strip back, then take a new thin section to continue the pattern. Allow the middle pieces to “fall” down while the top twists secure them lightly. Secure the ends at the back with a clip, then lightly smooth the surface so it looks neat.
This style looks unique because it blends flowing strands with tidy hold. For personalization, keep the twists thicker for a bold look or thinner for a delicate vibe. If your hair is thick, use smaller sections to prevent bulk at the back. A light mist of setting spray helps the waterfall pieces stay in place without feeling crunchy.
13. Side Part Fishtail-Inspired Mini Braid
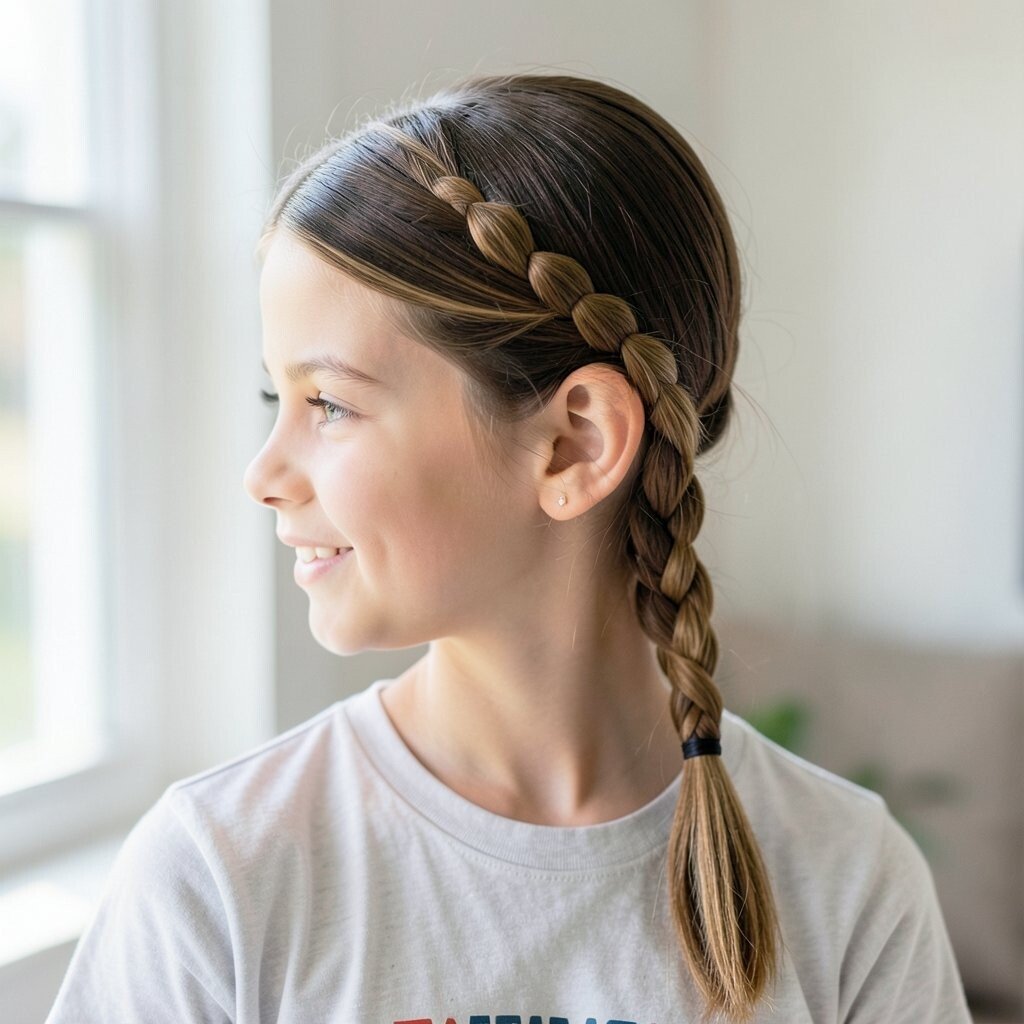
A mini braid on the side adds a fancy touch while keeping most hair down. Create a side part and take a small section near the temple.
Braid it into a simple fishtail-inspired pattern by weaving tiny outer pieces over each other. Keep the braid small and secure it with a clear elastic, then tuck the end under nearby hair with a pin. This gives a trendy look that still feels easy and comfortable.
For personalization, match the braid size to your hair thickness. If you want a more modern look, tug gently to loosen the braid for a slightly messy texture. Budget stays low because you can make it work with the elastics you already use for braids.
14. Classic French Twist With Comfort Pins
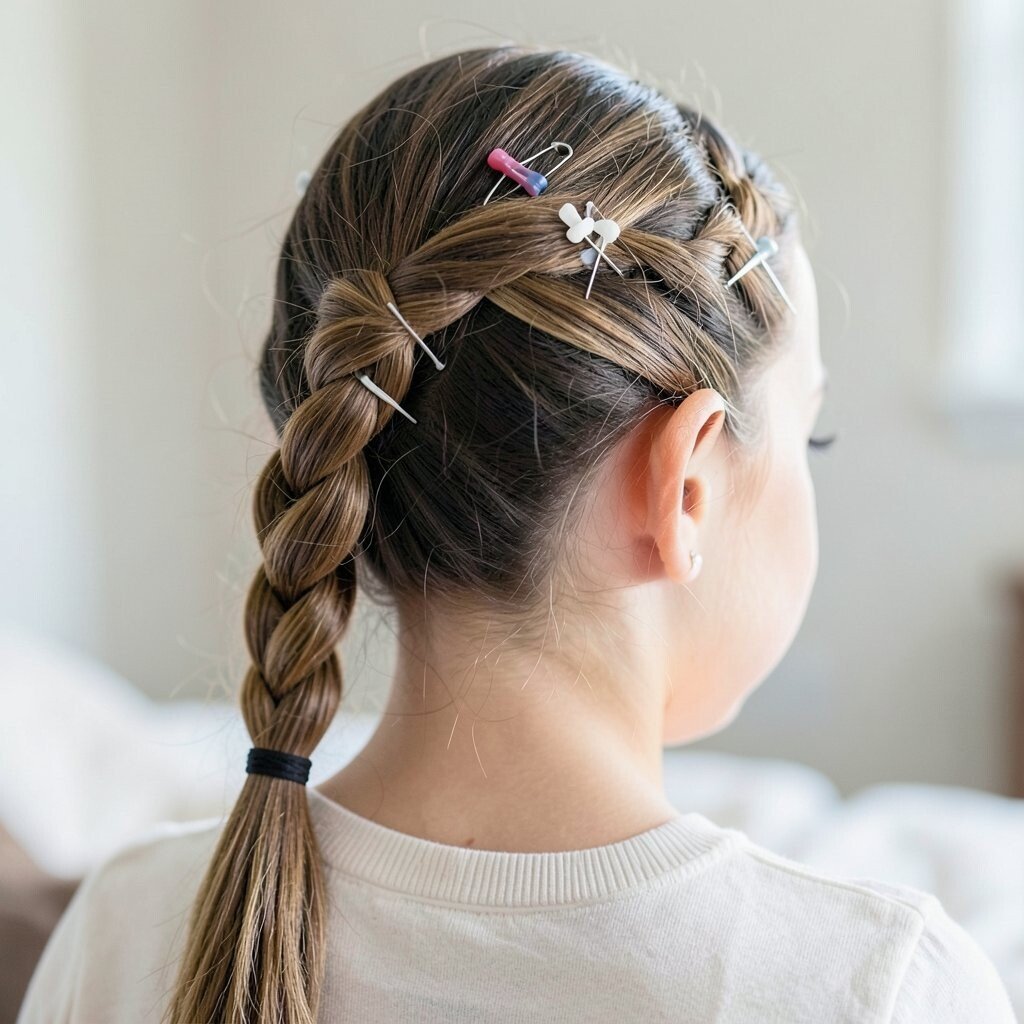
A French twist looks elegant and holds up well for pictures. Start with hair slightly damp, then brush it back and gather it into a loose twist at the nape.
Roll the twist upward, tucking the ends inside as you go, and secure with comfort grip pins. Keep the twist snug but not painful, especially if your scalp gets tender in a tight style. This hairstyle is a great choice if you want your hair off your neck during busy morning routines.
To personalize, smooth the front with a light shine serum and leave soft strands near the face if you want a softer look. Current trends often favor polished edges, so take a second to align the twist neatly. Cost is minimal since most people already own pins and a brush.
If the twist feels too formal for your outfit, loosen it slightly and let a tiny wave peek out at the side for balance. For extra staying power, use one quick spray around the base before the final pins go in.
15. Low Loose Braid With a Bow at the Base
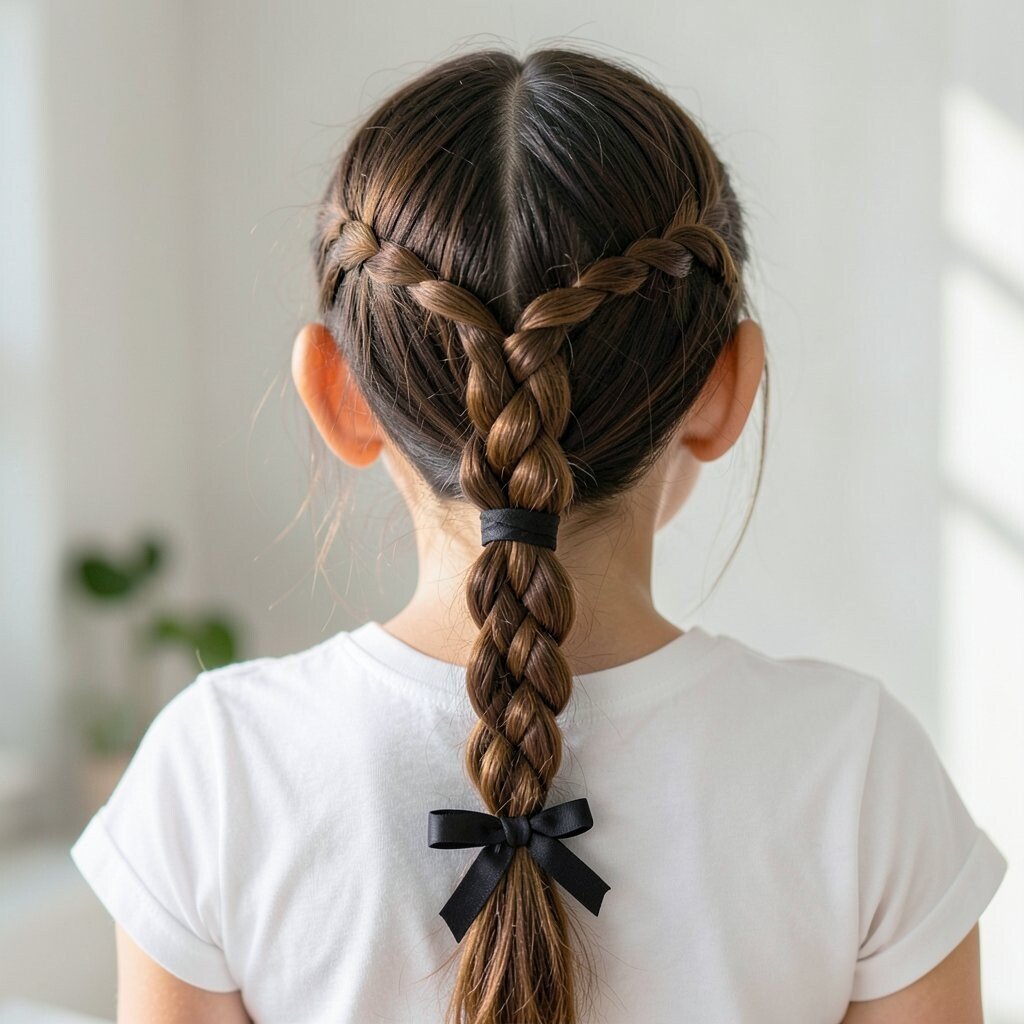
A low braid with a bow looks sweet and photo-worthy without heavy styling. Gather hair into a low pony at the back and braid it loosely.
Secure the braid end with an elastic, then wrap a ribbon or fabric bow around the base near the pony. Fluff the braid slightly by gently tugging along the braid strands so it looks thicker in pictures. This hairstyle stands out because the bow adds a pop of personality even if the braid stays simple.
For personalization, pick a bow that matches your school colors or your outfit pattern. If you have shorter hair, braid closer to the top and tie it securely so it doesn’t slip. Cost considerations are easy here since bows are often inexpensive, and you can reuse them for other events.
16. Sparkly Headband With Soft Side Sweeps
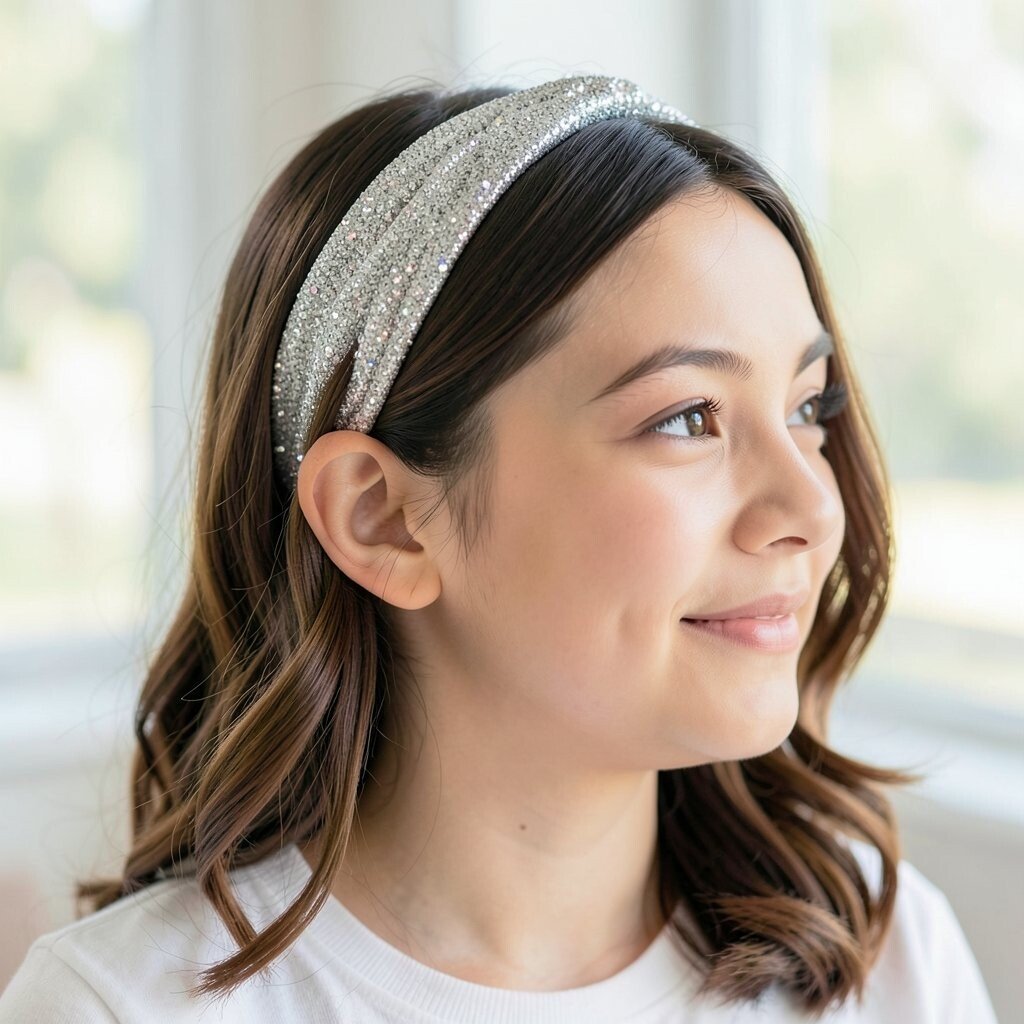
A sparkly headband makes even basic hair look styled in an instant. Brush hair smooth, then sweep a small amount from each side toward the back.
Place the headband slightly above the eyebrows so it frames your face. Tuck the side sweeps under the headband for a secure hold, then gently smooth the rest. This hairstyle is unique because the headband does most of the work, which is great for busy mornings and unpredictable weather.
Choose a headband size that feels comfortable, not too tight, and opt for secure materials that won’t slide. For trends, subtle sparkle is popular right now, and it photographs beautifully without needing extra styling. Keep a spare headband in your bag for quick fixes if you sweat or if your hair gets staticky.
17. Sleek Pony With Two Mini Buns at the Base
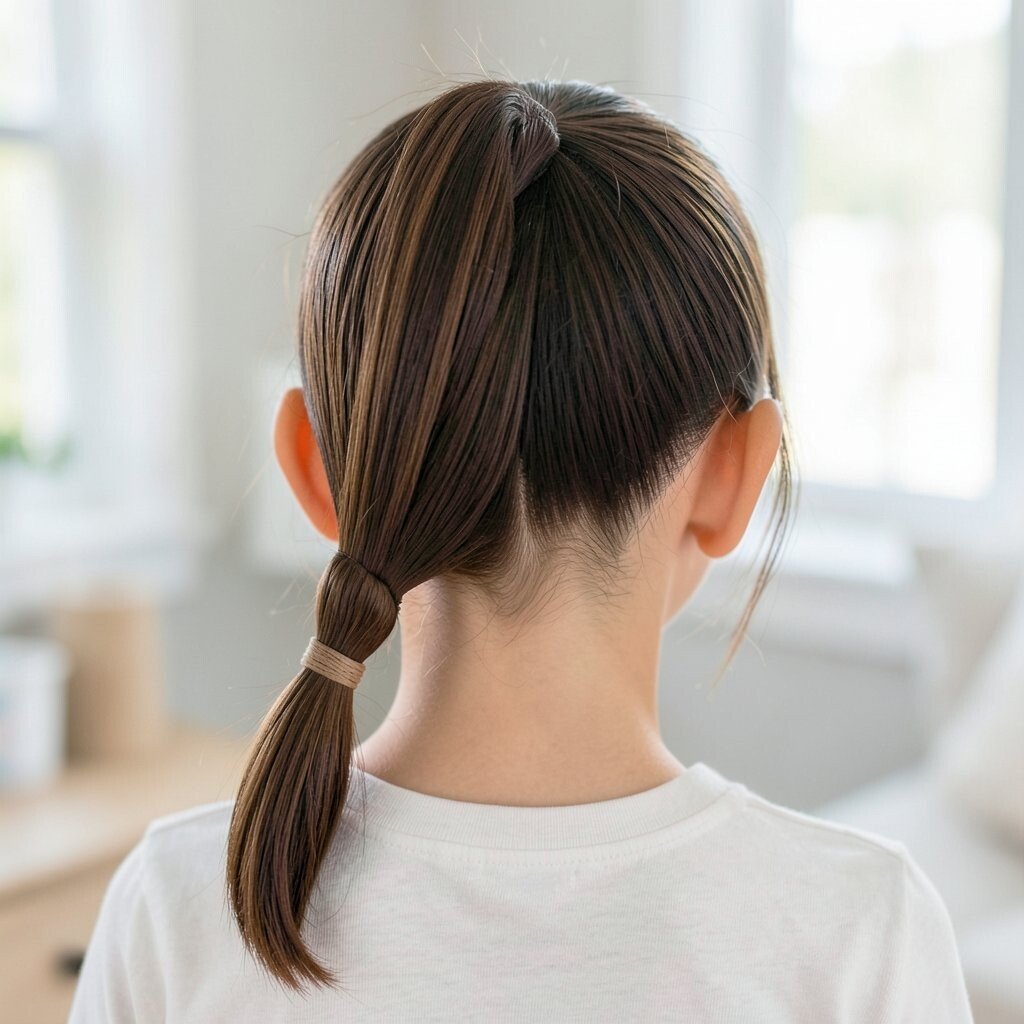
This pony with two mini buns is playful, neat, and perfect when you want something different. Start by brushing hair into a medium-high ponytail and securing it tightly.
Split the pony into two sections, then twist each section into a small mini bun and pin them around the base. Make sure the buns sit evenly so the look looks balanced from the front and sides. Smooth any bumps with a little gel or cream, and mist lightly for control.
For personalization, adjust bun size depending on your hair thickness and your comfort level. If your hair is fine, keep the pony section slightly thicker before creating the buns to avoid gaps. Cost stays low because the style relies on elastics, bobby pins, and a small amount of product.
This hairstyle has a trendy vibe that still feels age-friendly and practical. When you take photos, lift the bun area gently with your fingers so it catches light and looks extra polished.