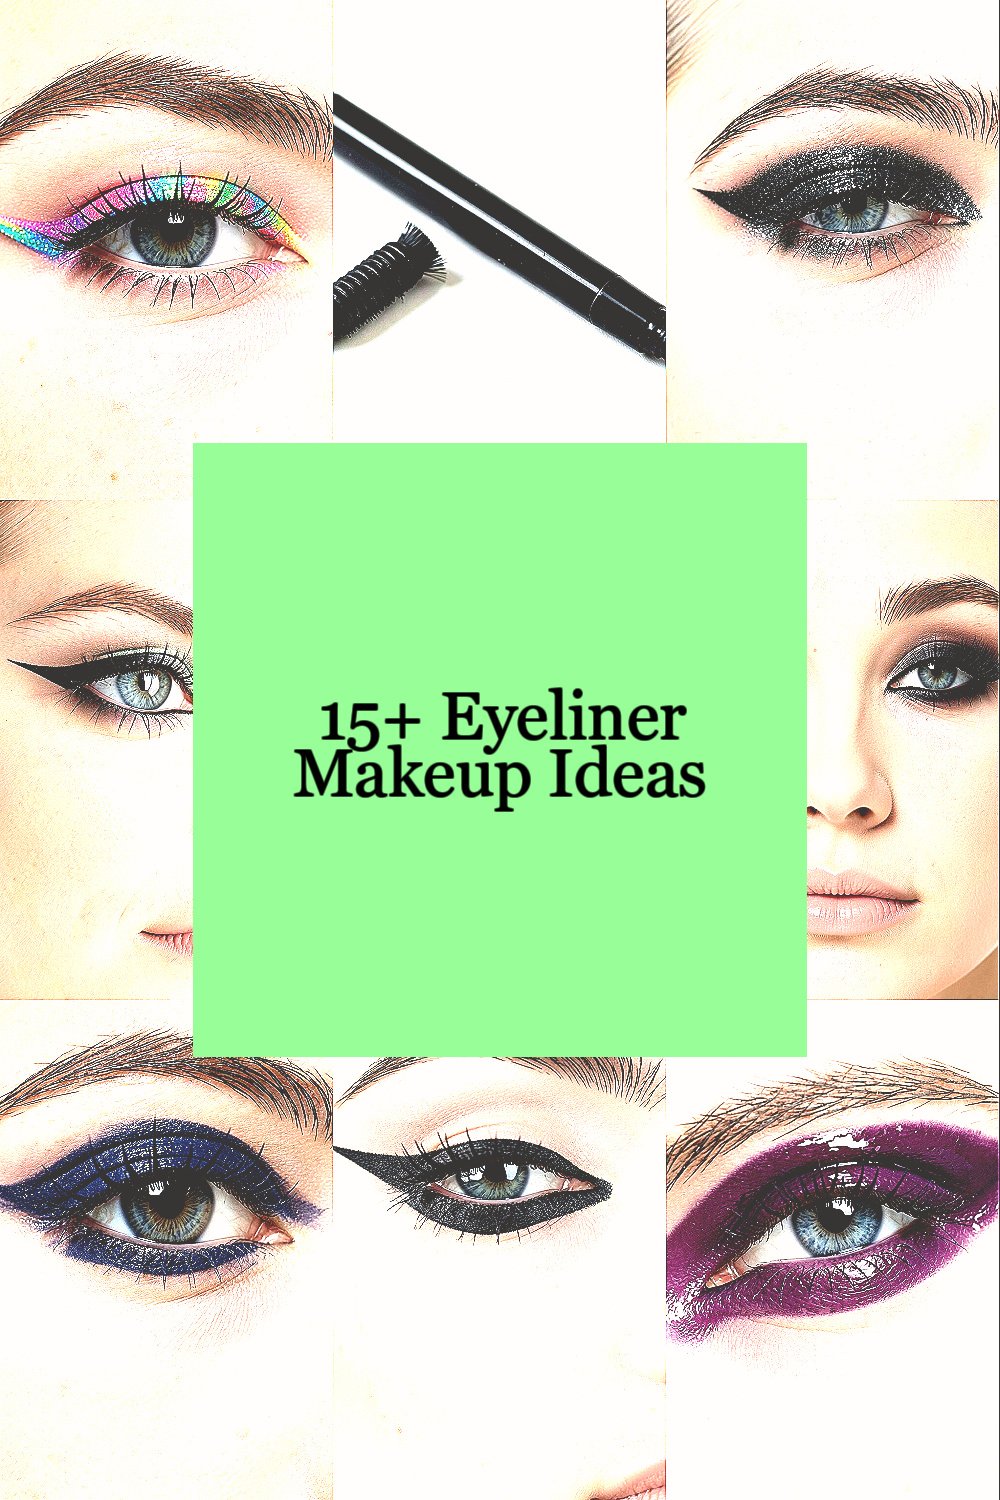
Bold eyeliner can make your eyes look sharper and brighter in minutes. The best part is that it can be fun, dramatic, and totally you.
1. Candy-Colored Pop Wing

Think of a smooth, glossy wing in a playful color like electric blue or candy pink. It should sit right at the outer corner, lifting your eye like a little graphic sticker.
Use a gel liner for the most control, then set it with a matching shadow if you want extra staying power. Keep the inner corner closer to your natural lash line and let the color build as you move outward. For cost-smart shopping, buy a single bright liner in a small size and pair it with a neutral palette you already own.
2. Thick Black Pencil With Feathered Edges
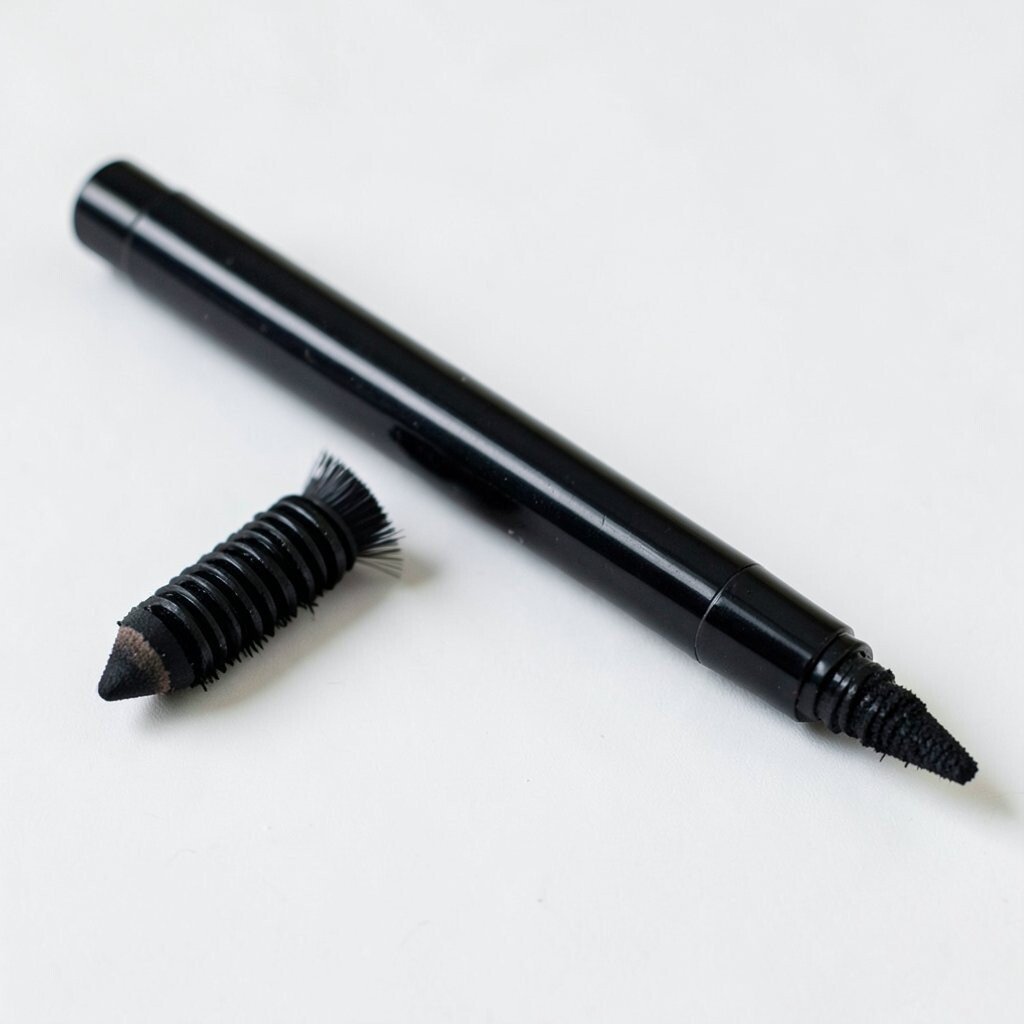
Start with a super bold pencil line that you press a little harder than usual. Then softly smudge the outer edge so it looks styled, not streaky.
This works especially well if you want a smokey vibe without heavy eyeshadow. Try using a fluffy brush or a fingertip to blur only the outer third, keeping the center crisp. For a modern look, keep the wing short and slightly messy, like it’s drawn in real life.
To personalize it, match the smudge to your outfit’s undertone, like warm browns with golden tones or cool grays with silver accessories. If you want longer wear, set the top line with a thin layer of black or charcoal powder shadow. Budget-wise, a good drugstore pencil plus one blending brush can be enough.
3. Metallic Liner on Top of Classic Black

Draw a classic thick black line first, then place metallic pigment along the top edge. The shine should catch light when you blink, giving a shiny “lid highlight” effect.
Choose a topper shade that fits your mood, like champagne for soft glow or emerald for a bold twist. This layering method helps metallic liner look richer and less patchy than applying metallic alone.
For practical results, tap a small amount of setting spray onto a flat brush, then press the pigment over the black. You can keep the rest of your eye simple so the liner stays the star. If you’re watching cost, use one metallic shade and reuse it with both black and brown liners.
4. Graphic Side-Look Liner With Angled Tail
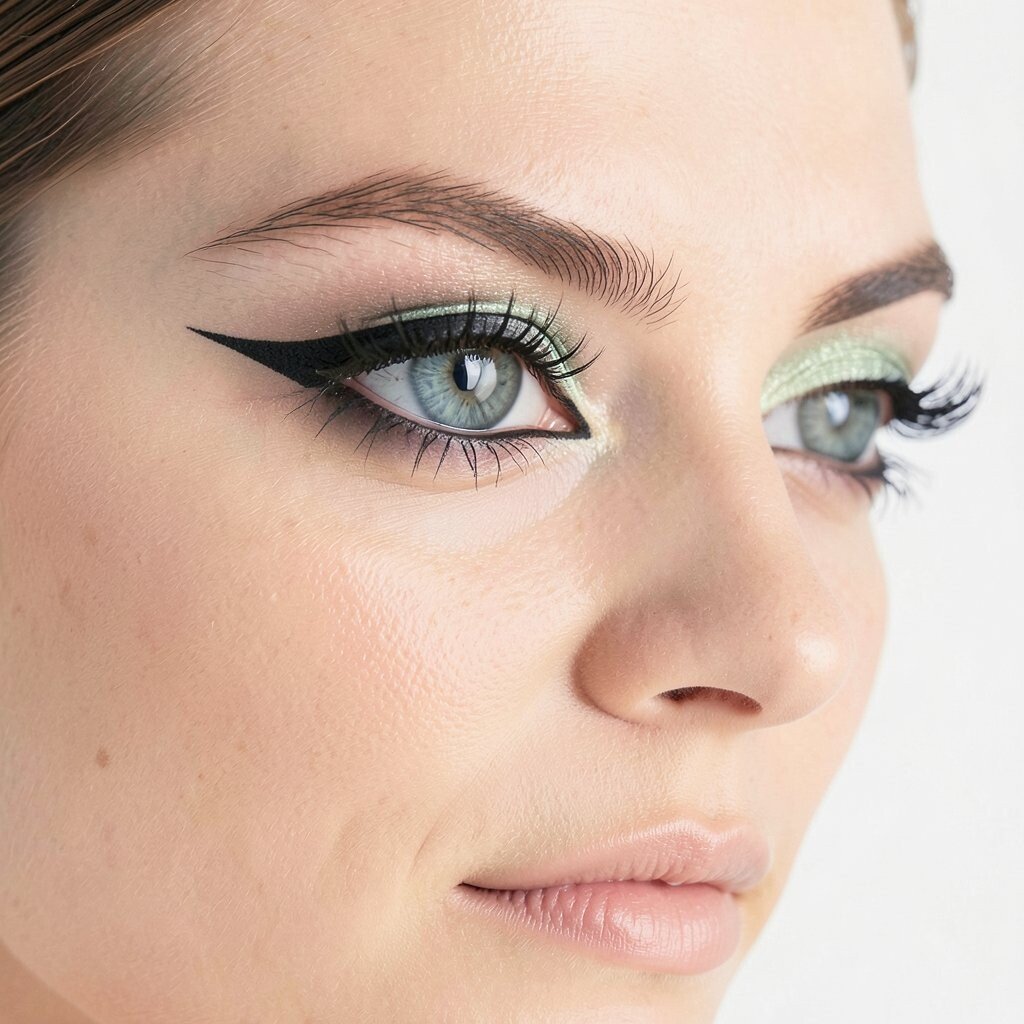
Make a thick line that stays close to your lashes, then extend it into a sharp angle outward. Imagine a bold arrow pointing slightly upward instead of a curved wing.
This style flatters many eye shapes because the angle can lift the outer corner. Use tape or a spoon handle for cleaner lines, and remember to remove the tool while the liner is still slightly tacky. If you want a trend feel, add a tiny gap at the tip filled with a second color, like white or shimmer.
5. Double-Stacked Wing Lines
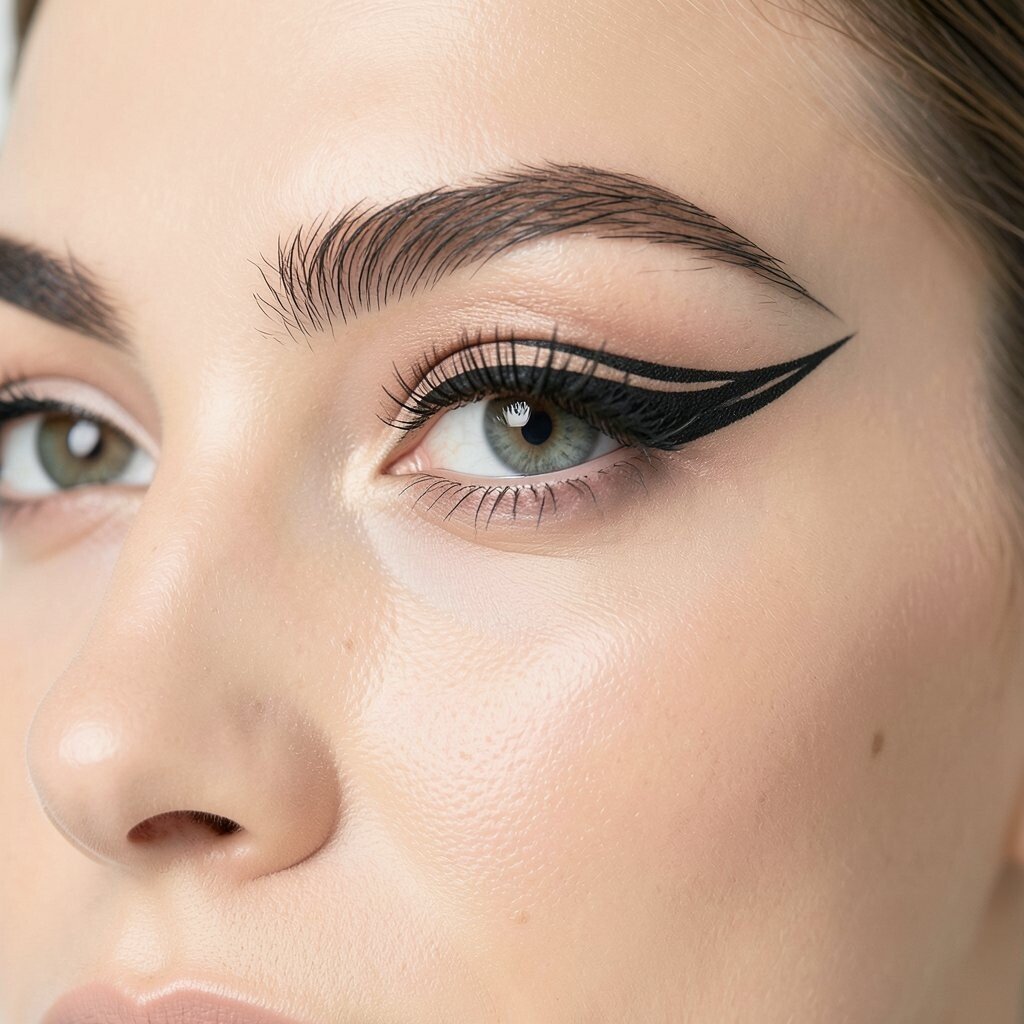
Create a main wing in black, then draw a second thinner line just above it. The space between them looks like a stacked frame around your eye.
This gives a fashion-forward look while still reading as bold and wearable. Try using liquid liner for the first wing and a felt tip for the second, since felt tips are great for precision.
To personalize it, switch the second line to brown, navy, or even burgundy. If you struggle with even spacing, practice on one eye with a few light strokes and mirror it on the other. For cost, one dependable liquid liner and one small felt tip pen can cover the whole idea.
6. Jet Black Tightlining Only

Tightlining means lining the upper waterline area so it looks like your lashes are thicker. Use a creamy black pencil and apply it carefully where lashes grow.
This bold-but-clean approach makes your eyes look defined without needing a dramatic wing. It’s also a smart choice for hot days because you can keep the lid mostly bare. For personalization, try deep brown tightlining if you want softer drama that still looks intense.
7. Navy Eyeliner With Slightly Smudged Outer V

Swap black for deep navy and extend the line into a tiny “V” at the outer corner. Leave the V soft enough to look smoky, but keep the center close to your lashes.
Navy feels more unique than plain black and brings out warm and cool eye colors. To get that outer V effect, angle your brush from the outer corner back toward the crease, then press gently. If you want it to stay put, set the navy with a similar tone of eyeshadow over the smoked edge.
For practical wear, choose waterproof liner if you deal with watery eyes. Cost-wise, navy is a shade many people already own in shadow form, so you can use an eyeshadow applied with a liner brush if you want to skip buying a new product. Trends right now favor rich blues that look “editorial” rather than heavy.
8. Thick Eyeliner Halo on the Lower Lid

Instead of focusing only on the upper lash line, go bold on the lower lid too. Draw a thick line along the lower lashes and connect it outward for a soft halo effect.
This makes your eyes look larger and gives a playful, graphic finish. Keep the lower line slightly heavier on the outer half, and blend the edges just a little for a smoother look. For personalization, add a thin highlight line under the smudge using a nude pencil so the whole frame looks lifted.
9. Stained-Look Plum Liner With Glossy Finish
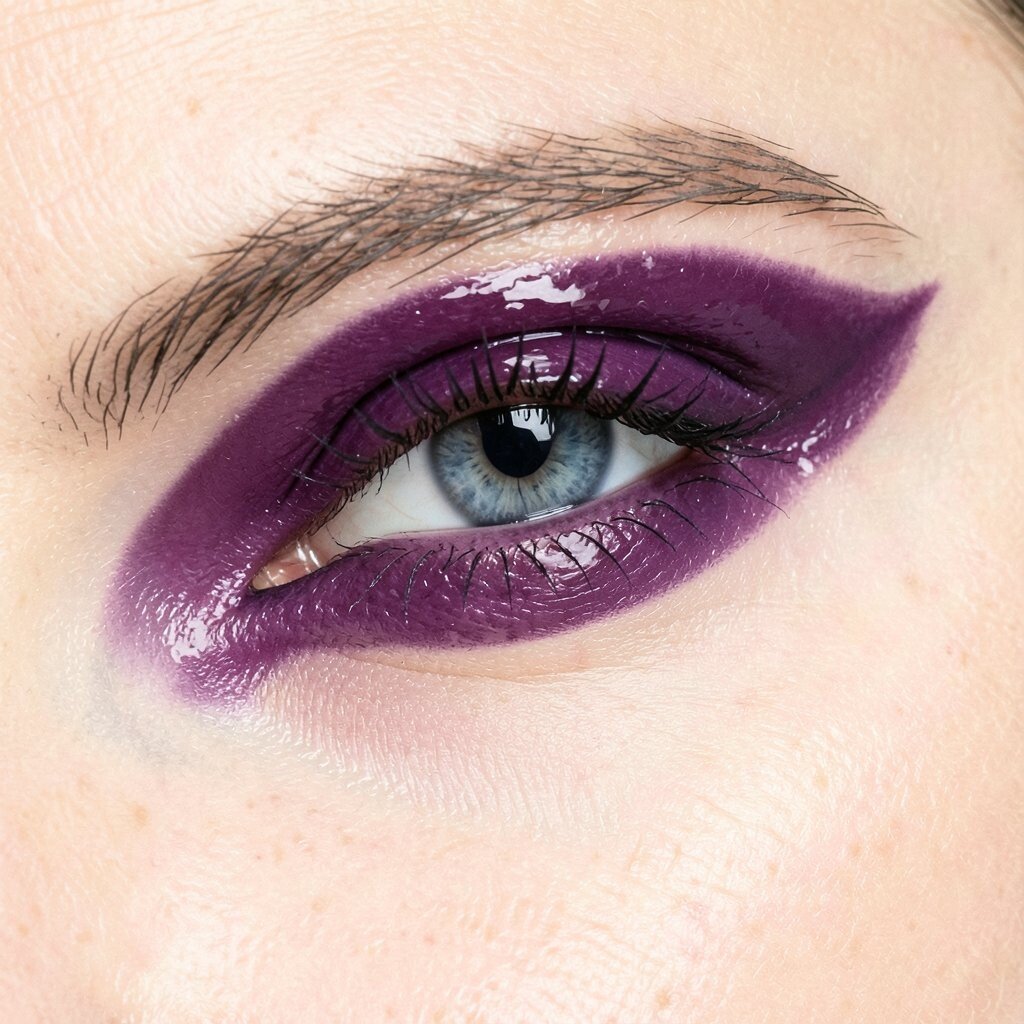
Use a deep plum liner that looks like it’s tinted into your lashes rather than drawn as a hard line. Blend it outward so it resembles a stain, while still staying bold.
A glossy finish can make plum feel fresh instead of heavy. Try pressing a small amount of clear or berry-toned lip gloss on the liner after it sets, or use a liner with a naturally glossy formula. This look is unique because it feels artsy but still wearable for everyday plans.
To keep it practical, start with a light touch and build the thickness gradually. If you’re on a budget, plum can double as an eyeshadow applied wet with a liner brush. Pick a plum shade that matches your undertone, like more warm-leaning plum for bronze makeup or cool plum for silver tones.
10. Reverse Wing With Clean Inner Corner Cut
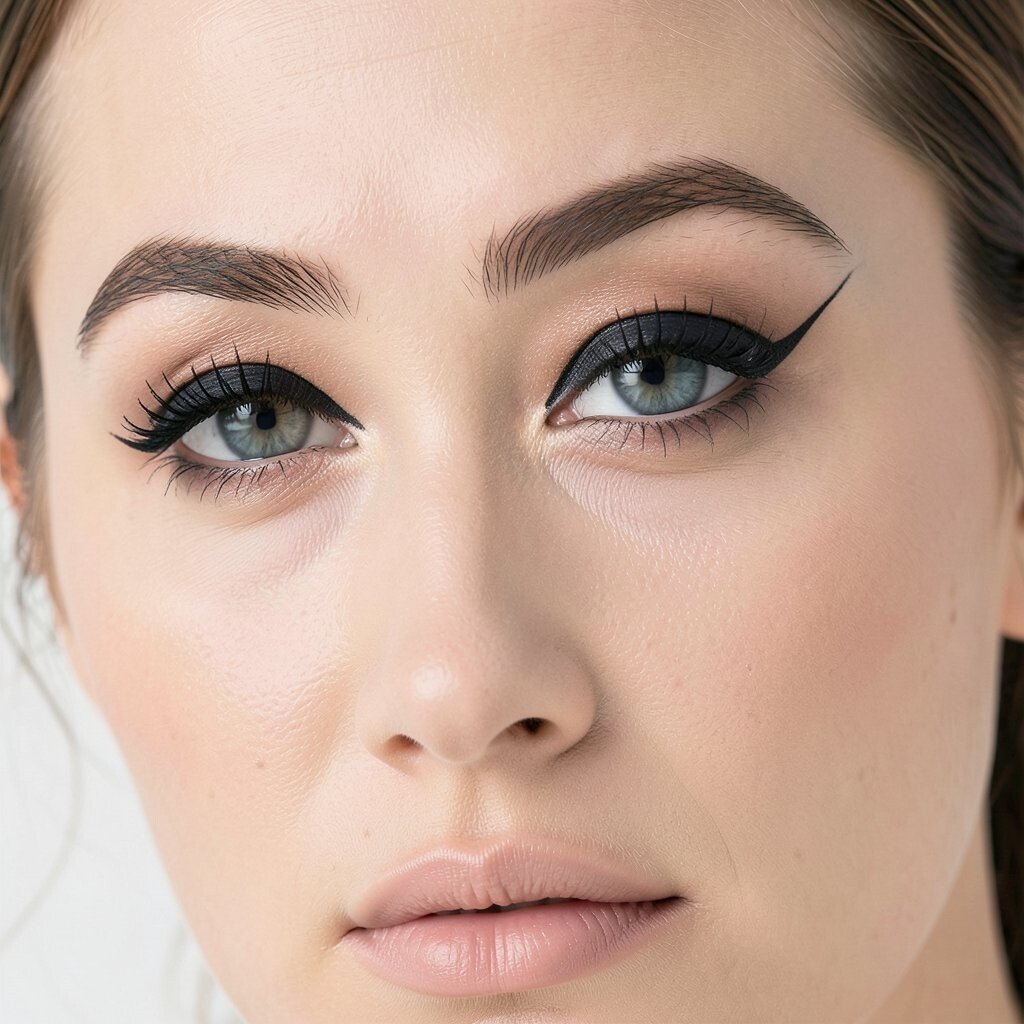
Draw a bold wing that focuses on the outer corner, then clean up the inside with a sharp cut. The goal is a crisp inner edge that makes the wing look extra structured.
This gives a “reverse cat-eye” vibe that feels modern and edgy. Use concealer on a small flat brush to carve a neat line where the liner should stop, then blend the edges lightly so it looks intentional. If you want a trendy twist, add a micro dot of shimmer at the inner corner for a fresh pop.
11. Leopard Dots Along the Upper Lash Line
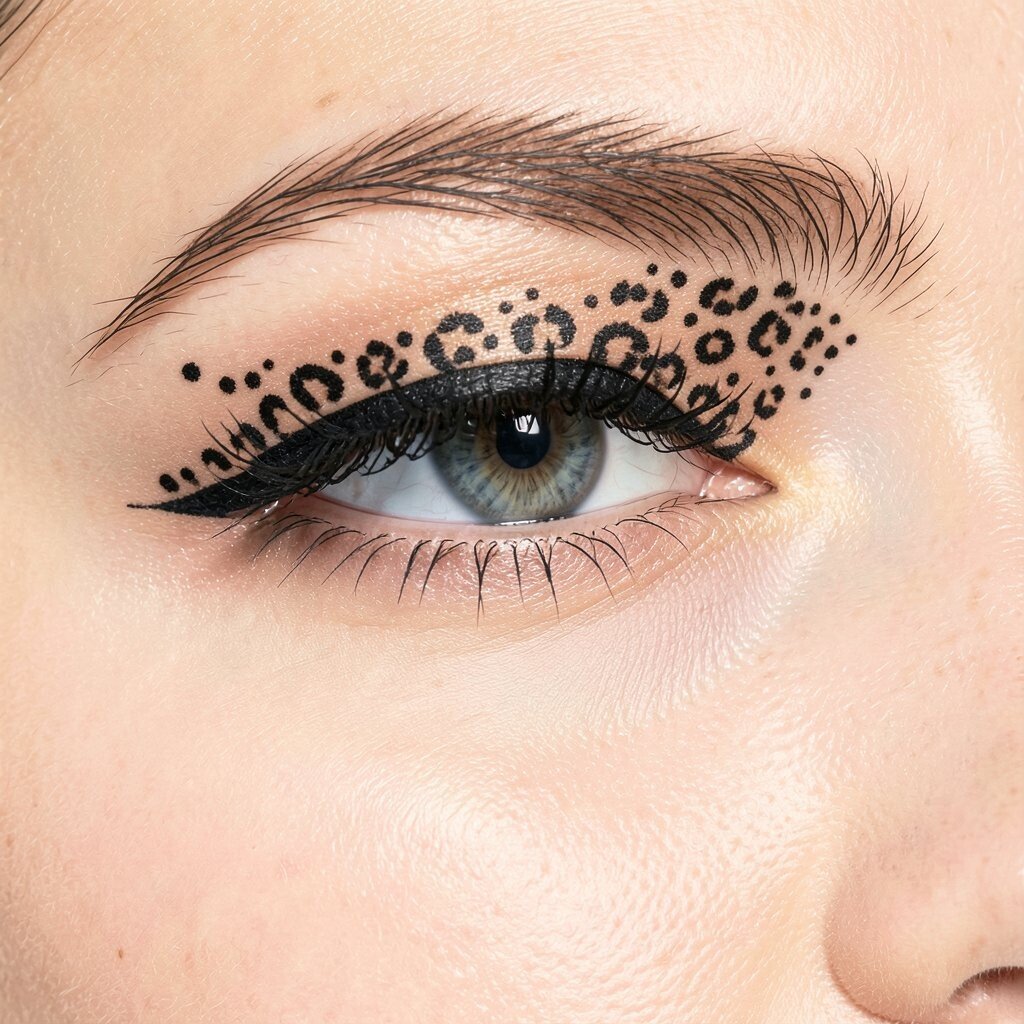
Instead of a solid line, draw tiny leopard-like dots that follow your upper lash line. Start small near the inner corner and make the dots slightly larger as you move outward.
This style is playful and unique, and it still reads as bold because the dots are tight to the lashes. Use a fine eyeliner brush or a toothpick to place dots evenly without smearing. For personalization, choose dot colors like black and brown, or mix in a greenish liner for a fun editorial twist.
If you want it to last, let the dots dry fully before you blink too much and set with a matching eyeshadow. Cost considerations are simple here because you can use any eyeliner shade you love and build the look with only a tiny amount. Right now, dotted and “pattern” liner looks are trending because they feel creative and different.
12. Red Scorpion Liner With Floating Dot at the Center

Create a vivid red liner with a sharp outer wing, then add a small dot of red shimmer at the center of the lid. The center dot should hover near your pupil area so it draws attention to your eyes.
This is the kind of look that turns heads without needing complex eyeshadow. Use a waterproof red eyeliner if you want the wing to stay crisp, especially if you’re going out at night. For personalization, swap the shimmer dot to gold or rose gold so it matches your jewelry.
To keep it practical, draw the wing first, then place the center dot while the liner is still close to the surface so it blends nicely. Budget-wise, one red liner plus a small shimmer sample or even a tap of glitter shadow is enough. The “floating detail” is a current trend because it adds movement and shine in a simple way.
13. Clear Base Liner With Bright Under-Eye Outline

Start with a thin clear or nude liner along the upper lashes to create a clean base. Then outline the under-eye with a bright color like teal, coral, or electric yellow.
This creates a bold contrast that looks fresh and artsy. If you’re worried it will feel too loud, keep the bright line only on the outer half under the eye. Personalize it by matching the under-eye color to your blush or nail polish for a coordinated look.
For practical tips, use a small smudge brush to soften only the outer edge so it doesn’t look harsh. If you don’t want to buy a new clear liner, a nude pencil works as a substitute to create a smooth surface for the bright color. Cost can be kept low by using a bright eyeshadow pressed with a damp brush instead of purchasing multiple liners.
14. Smoked Burgundy Liner That Drags Into the Crease
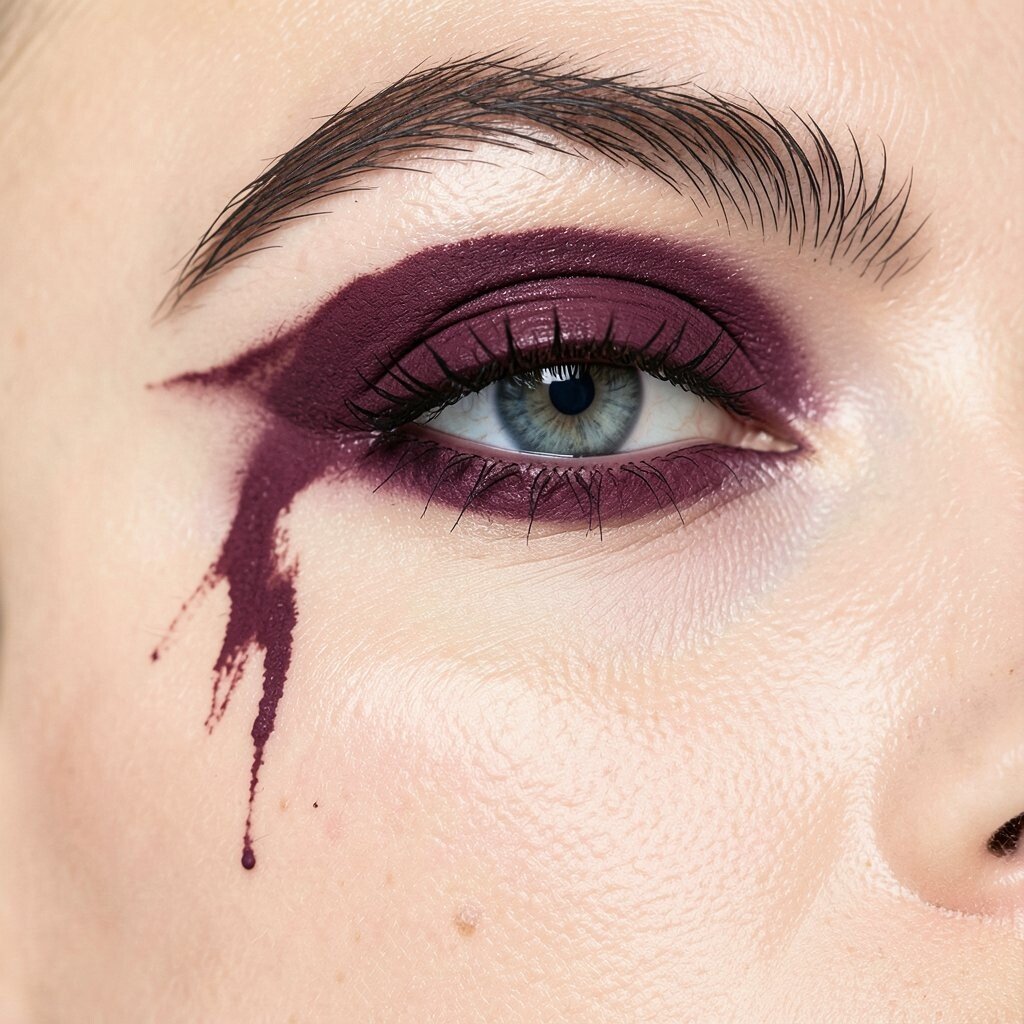
Draw a thick burgundy liner on the upper lid and gently drag it backward toward the crease. The goal is smoky and blurred, not perfectly sharp.
Burgundy feels bold and flattering because it adds depth without looking like pure black. Use a small blending brush to soften the edges, focusing more on the outer third. For personalization, pair it with warm gold shadow or keep your lid neutral to let the burgundy steal the show.
15. White Waterline Pop With Black Wing Frame
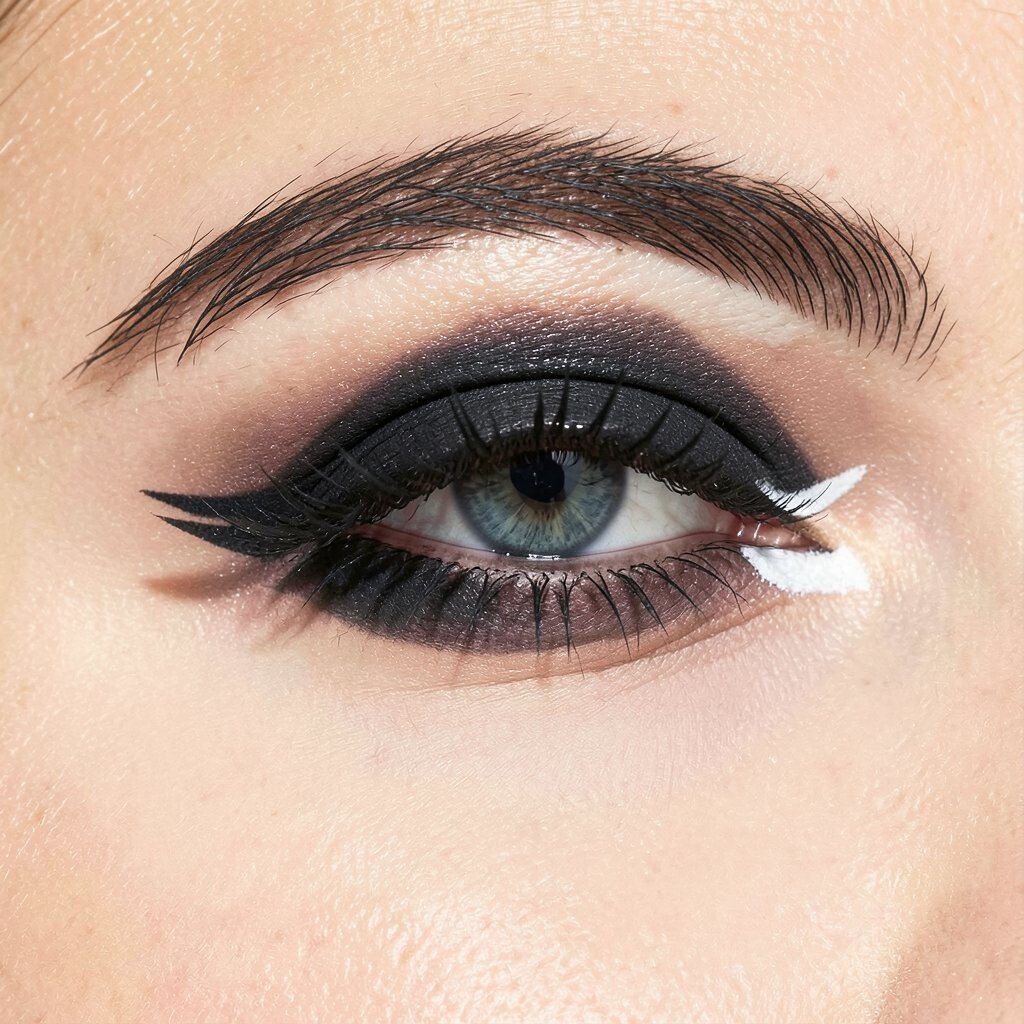
Line the waterline with a bright white pencil, then frame it with a thick black wing. This makes your eyes look bigger and more awake while keeping the overall look bold.
The clean contrast is unique and super flattering, especially if you wear mascara and curl your lashes. Use a long-lasting white pencil to avoid fading and use a gentle hand around the inner corner. For cost considerations, many people already have a white pencil hidden in their kit from older looks, and it’s easy to repurpose.
To personalize it, try a soft cream shade instead of stark white if you want a subtle lifted effect. If your eyes water, apply the white right before you leave so it stays fresh. This style is popular because it looks crisp in photos and brightens the whole face.
16. Thick Black Eyeliner Circle in the Outer Corner
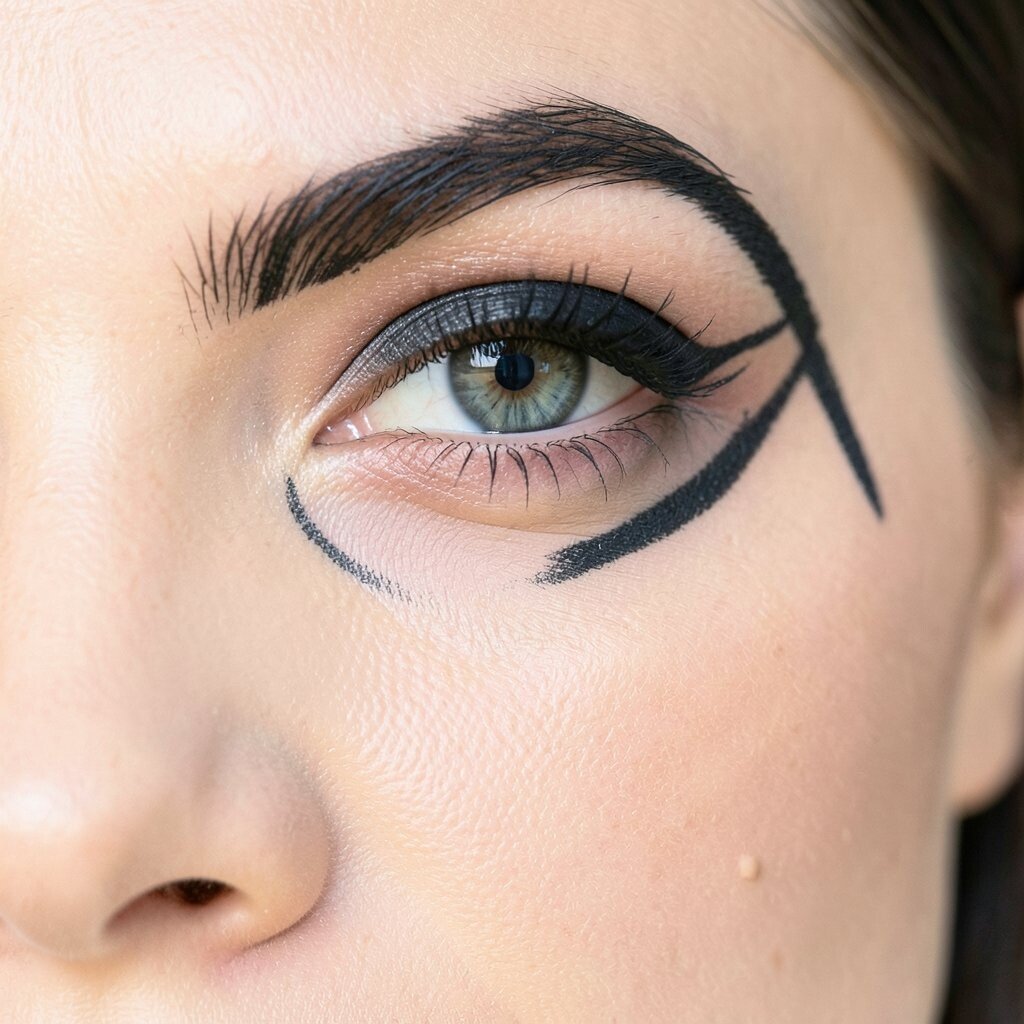
Draw a thick black wing, then loop it slightly inward to form a circular shape at the outer corner. Think of it like a tiny bold frame that curves around the eye.
This design feels artistic and unique because it goes beyond the usual straight wing. Use a liquid liner for the main line, then reinforce the circle with a matching pencil so it looks smooth and opaque.
For practical tips, sketch the circle lightly with a pencil first, then trace over it with liquid once you like the shape. Personalize it with a second color by adding a thin inner ring in navy or silver. Cost-wise, you can achieve the whole look with one black liner and one small accent shade you already own.