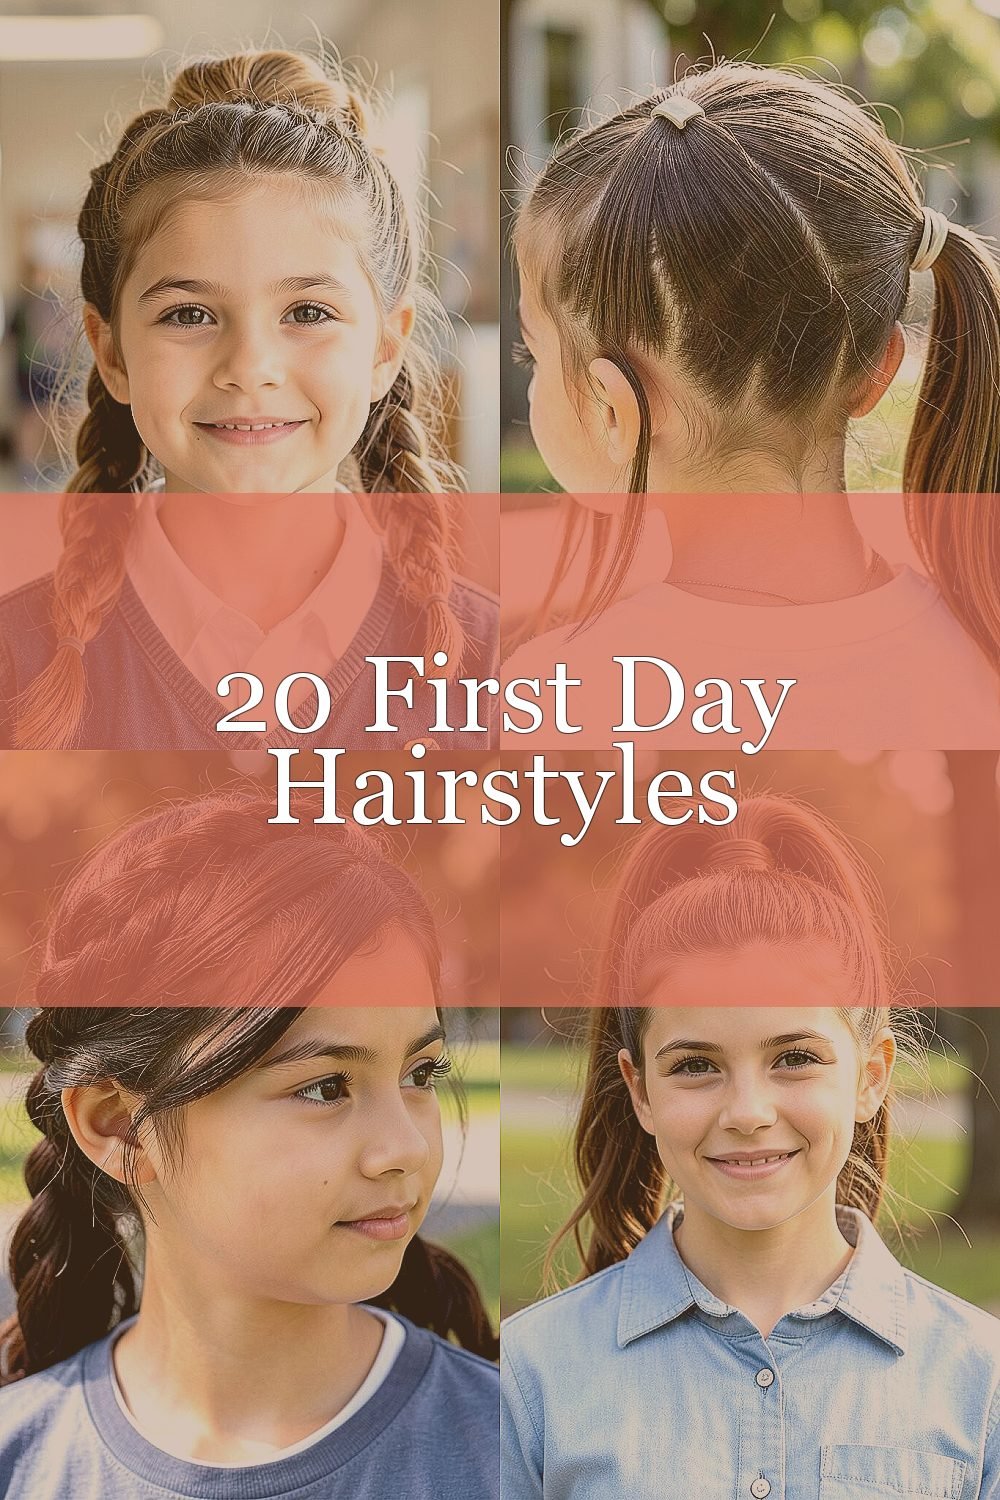
The first day has a way of making hair feel like part of your outfit. A great style can help you walk in with confidence and feel totally ready.
Whether you want something quick, soft, bold, or super neat, these ideas are made for real school mornings. Pick one that fits your hair and your mood, and make it your own.
1. Cloud-Soft Half-Up Twist
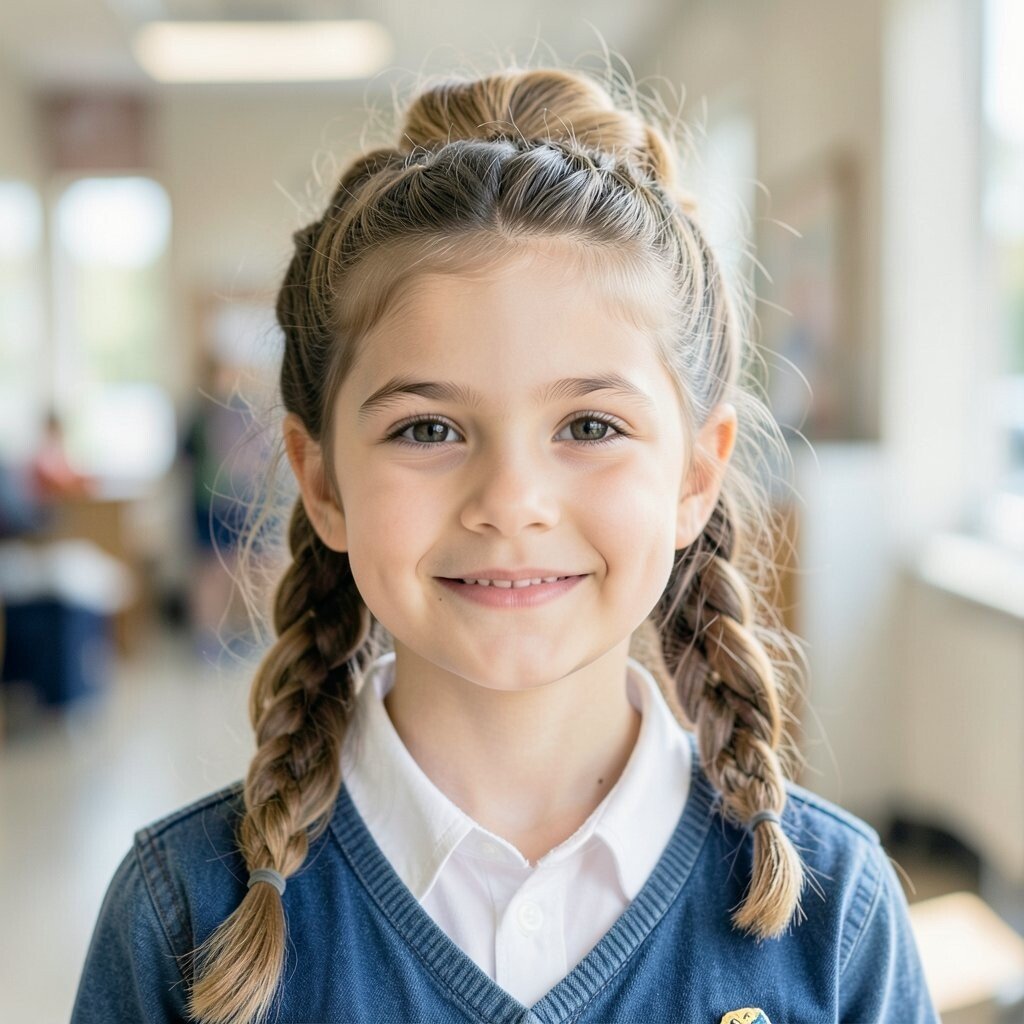
Start with slightly damp hair so the twist holds better. Gather the top section, twist it loosely, and fasten it with a small clip so it looks like a little wave crown.
The sides should fall naturally and frame your face, while the twist gives a tidy shape. This style is great for busy mornings because it looks polished without needing much effort. For extra staying power, spritz a light hold spray only on the twisted area and avoid soaking the lengths.
2. Sleek Bubble Pony With Mini Bands
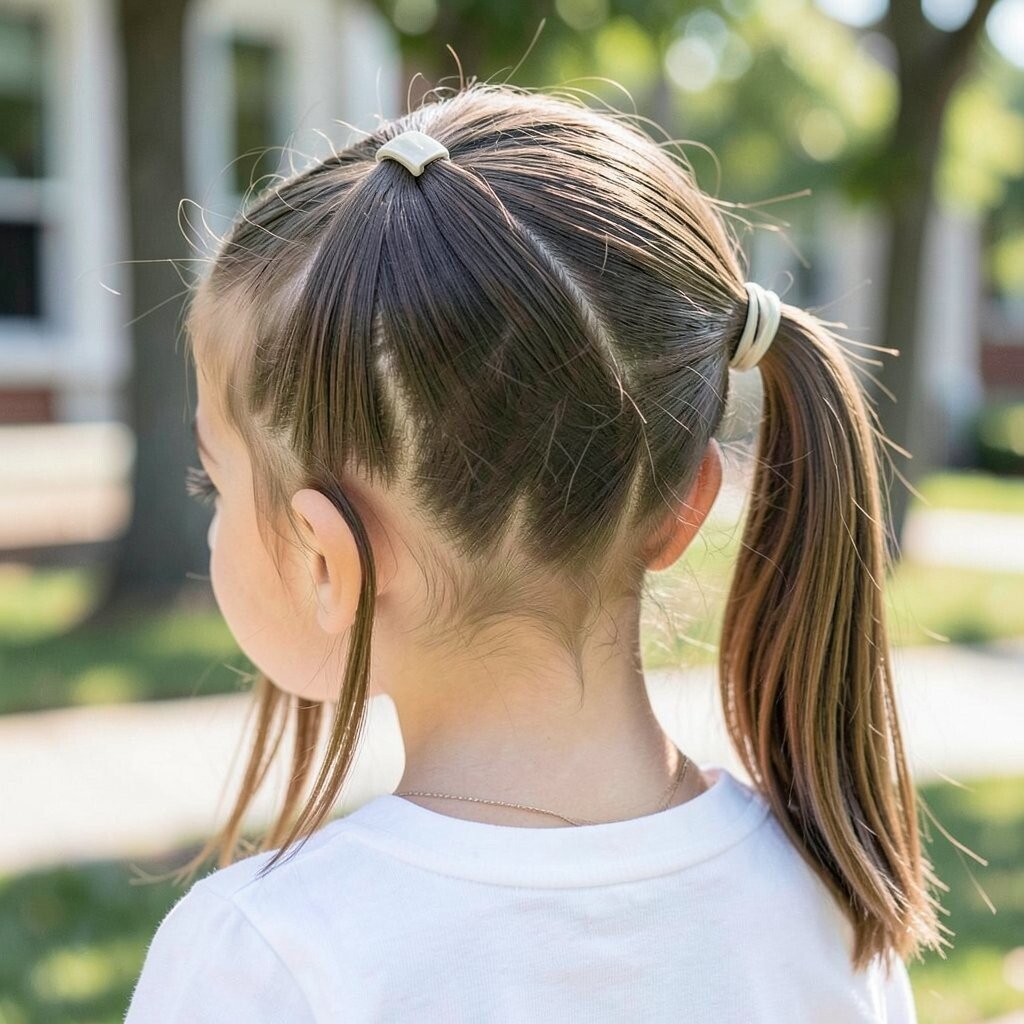
Part your hair neatly and secure a ponytail at your preferred height. Add small elastic bands along the ponytail, spacing them evenly to create bouncy bubble sections.
It looks fun and modern, and the texture helps your pony feel fuller even if your hair is fine. Keep the bubbles smooth by pulling each section gently, not tight. If you want a more grown-up vibe, use bands the same color as your hair instead of bright ones.
This style works beautifully with current “neat-but-playful” trends seen on school and social videos. Try it with straight hair for a clean shine or with light waves for extra bounce. For cost, elastic bands are inexpensive, and you can reuse them for multiple hairstyles with care.
3. Side-Swept Twist Crown
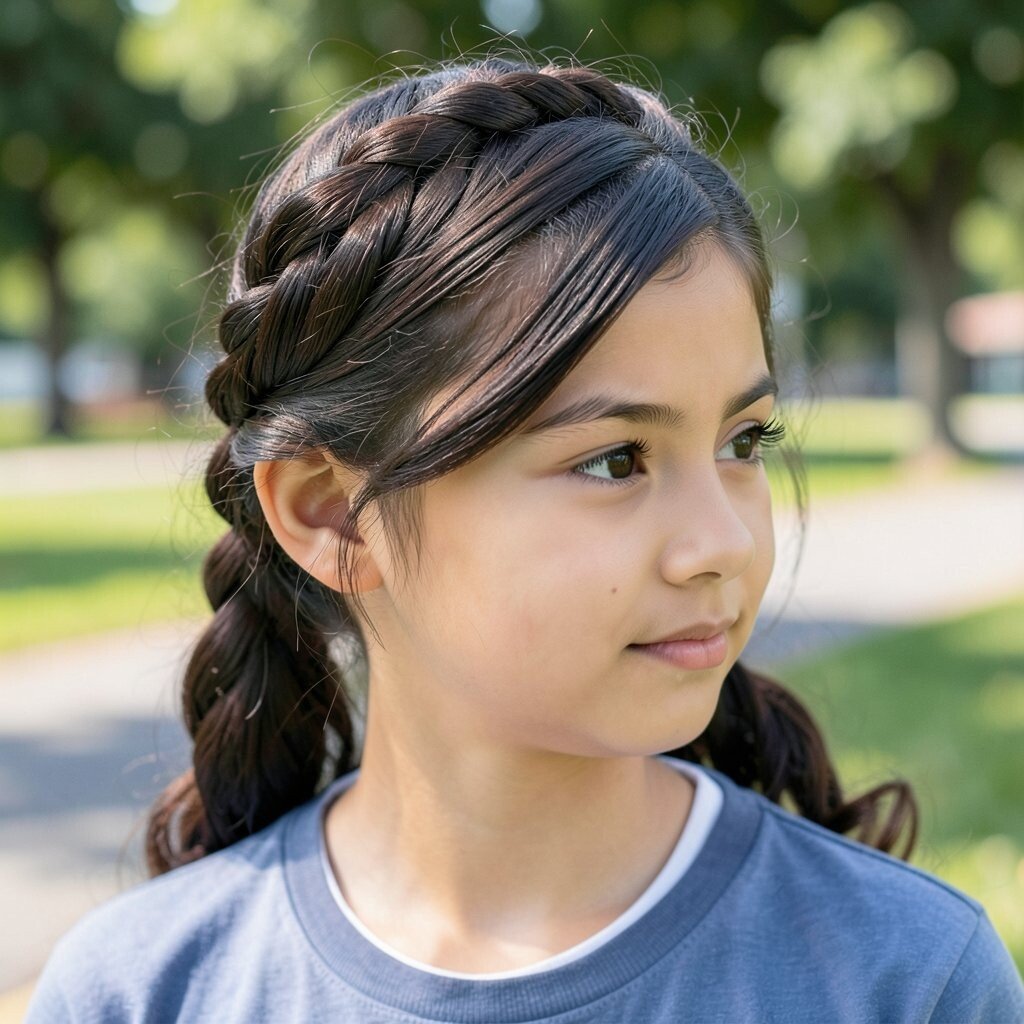
Brush hair to one side and take two small sections near your part. Twist each section backward and connect them with a pin so the crown sits like a soft headband.
Let the remaining hair spill over your shoulder for an easy, face-flattering look. This is unique because it mixes the comfort of a loose style with the structure of a crown. If you’re dealing with flyaways, smooth a tiny amount of gel or cream on your fingertips and lightly press it along the twist.
To personalize it, add a charm clip or a ribbon where you secure the twists. It’s practical for classrooms too since the front stays controlled. For a budget option, use bobby pins you already own and focus on making the twists clean and even.
4. Classic High Pony With Wrapped Base
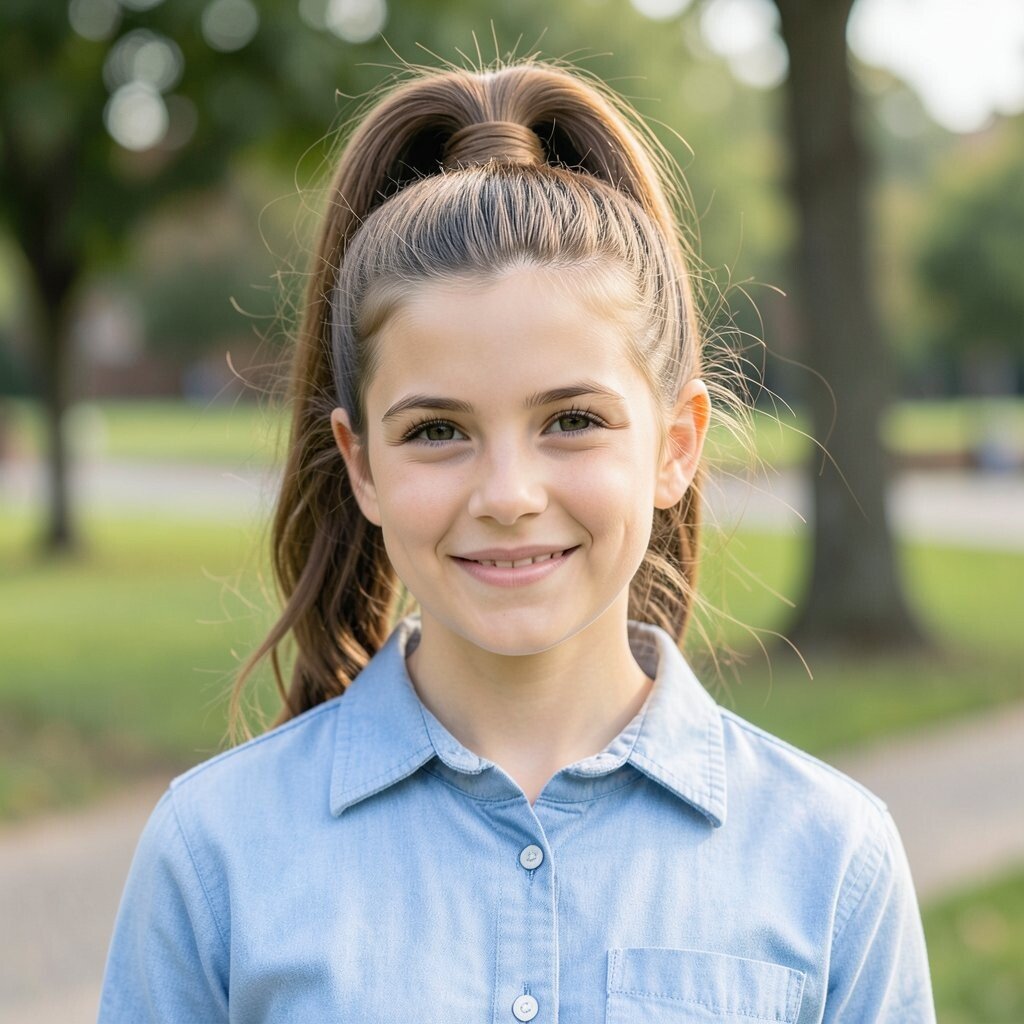
Gather your hair into a high ponytail and secure it with a strong elastic. For a finished look, take a small strand from the pony base, wrap it around the elastic, and pin it underneath.
This style looks sharp, bold, and ready for photos, but it still feels comfortable for all-day wear. Wrap-down hair also helps your style last longer during movement, like walking to classes or heading to the bus. If your pony is hard to tame, use a soft brush and a light mist of water before brushing.
5. Waterfall Braid With Two-Minute Adjustments
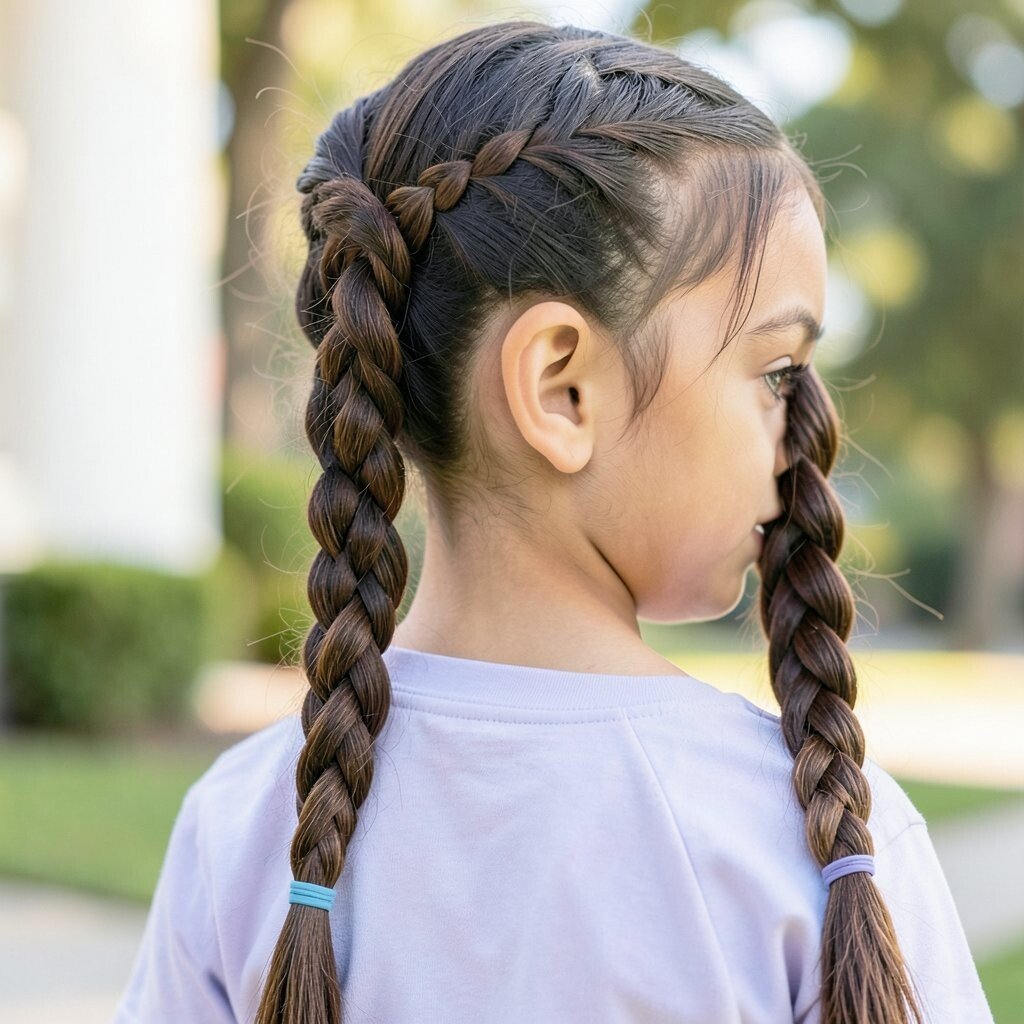
Create a simple braid along the side of your head, leaving small sections of hair to fall through. As you braid, drop a thin strand and pick up a new one so it looks like flowing waterfalls.
The visual effect is delicate and pretty, and it stands out more than a plain braid. You can make it practical by keeping the braid slightly tighter near the top so it doesn’t slip. For personalization, use a tiny clip where the waterfall starts to add a sparkle.
This hairstyle feels trendy because “half-braid waterfall” looks are popular right now. If your hair is slippery, apply a small amount of styling cream to the sections you’ll braid. Budget-wise, you only need a few hair ties and pins, which usually cost very little or are already in your drawer.
6. Braided Headband With Soft Loose Ends
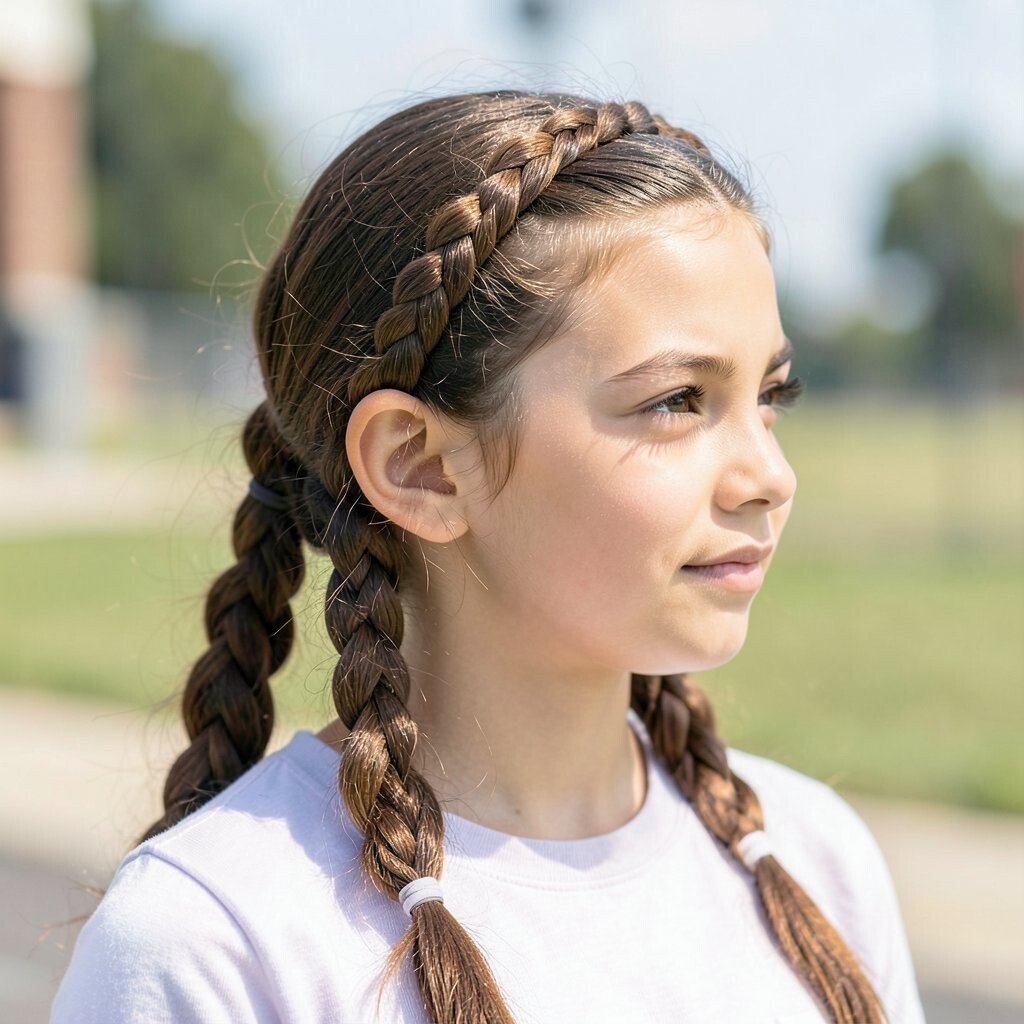
Part your hair slightly off-center and braid a thin section along one side. Bring the braid across the top of your head and secure it on the opposite side like a headband.
Keep the rest of your hair loose so it looks airy and easy, not heavy. This is a great option when you want your face open but still want your hair controlled. To make it look more unique, choose a braid size that matches your hair thickness and pin it with a contrasting clip.
For practical school wear, use an extra pin at the end of the braid so it stays put during the day. Try adding a small wave to the loose ends with a quick clamp if you have time. The materials are usually cheap, and a couple of pins go a long way.
7. Bubble Braid From Low Pony
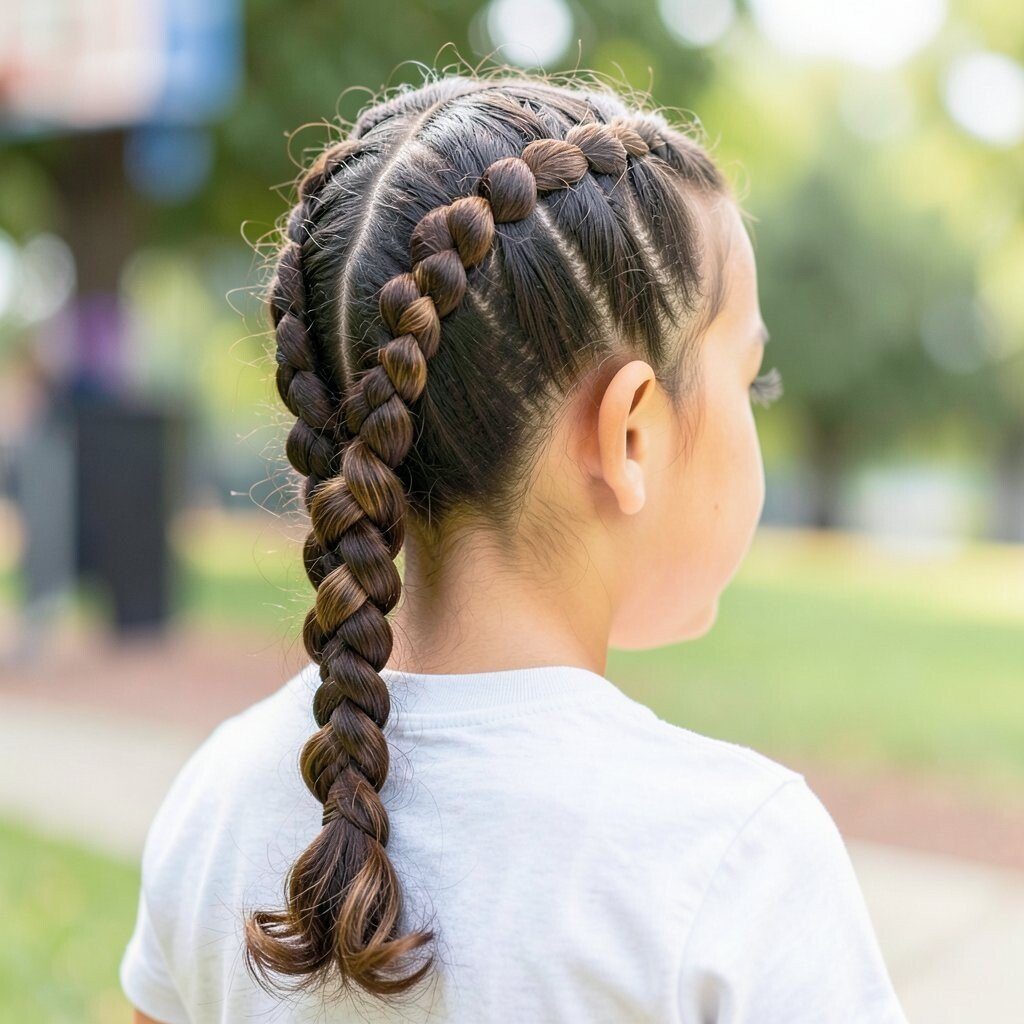
Start by securing your hair into a low ponytail. Then braid small bubble sections using elastic bands, sliding them down a little for a soft shape.
The result looks cute and playful, like tiny puffs lined up along the braid. It’s also helpful because the braid holds your hair back without pulling at your scalp too much. If you want your braid to last through gym day, tighten the elastic bands gently rather than leaving them too loose.
This style feels fresh because bubble textures are showing up a lot in school-friendly looks. Personalize it by adding one small ribbon or clip at the end of the braid. Cost stays low since elastics and clips are inexpensive and easy to replace.
For best results, smooth your hair first so the bubbles look even. A quick brush-through with a detangling comb helps you avoid lumps. When your hair is thick, use slightly larger elastics so the bubbles don’t feel crowded.
8. Half-Up Bow Pony With a Twist Knot
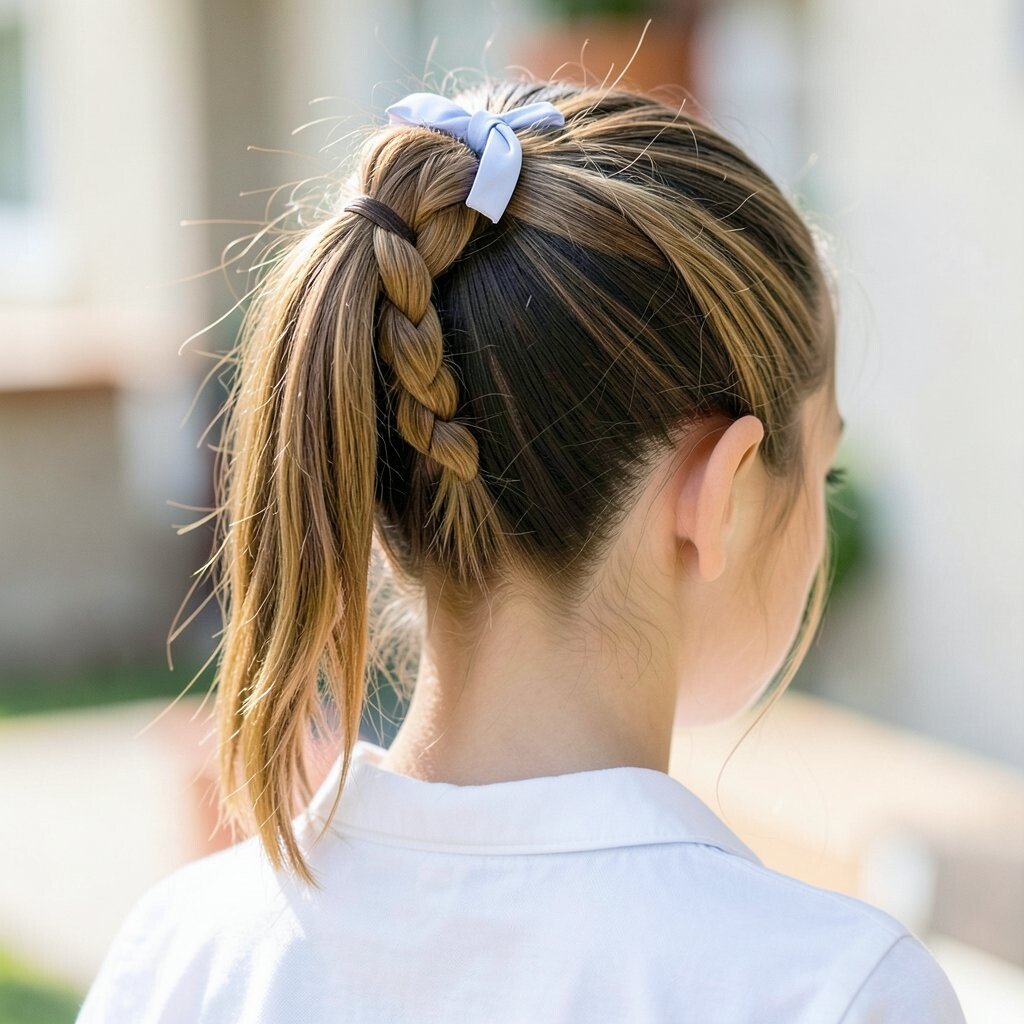
Pull the top half of your hair into a ponytail and secure it with an elastic. Make the pony, then on the last loop of the elastic, leave it partially folded so you can shape it into a bow-like knot.
This gives a sweet, school-appropriate “bow” look without needing a big accessory. It’s unique because the bow shape comes from your own hair, not from extra products. For personalization, tuck a small decorative pin near the base where the bow forms.
The benefit is that your front hair stays out of your face, which helps when you’re writing notes or reading aloud. If your bow droops, hold the sides in place with a couple of bobby pins. Budget-wise, the only cost is the same elastic and pins you already use for half-up styles.
9. Sleek Low Bun With Two Front Face-Framing Strands
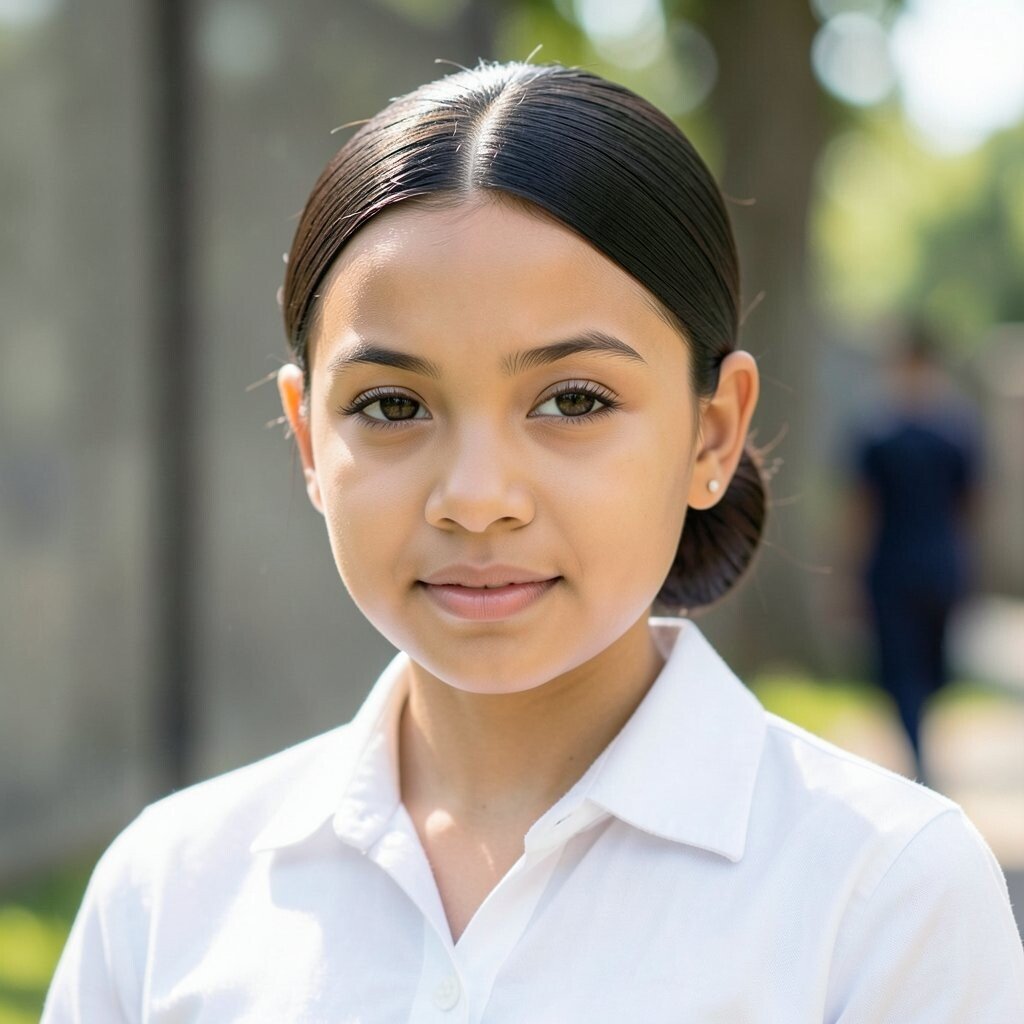
Brush your hair into a low bun, keeping the base smooth and the bun secure. Leave two thin strands at the front so your face has a soft, framed look.
This style looks classy and tidy, and the face-framing strands make it feel less strict. It’s great for keeping hair off your neck during warm school days. Use a small amount of gel at the hairline so flyaways don’t pop up after you move.
Right now, minimalist buns are trending because they look clean in photos and comfortable in real life. Personalize by choosing a slightly messy bun if you want a relaxed vibe, or keep it tight for a polished finish. For cost, buns are usually free because you can use a simple scrunchie or hair tie as your base.
If your hair is short, try a bun with hair donuts or mini sponges, then pin it well. If your hair is long, wrap the ends around the base and secure with bobby pins in a crisscross pattern.
10. Side Ponytail With Dutch Braid Accent
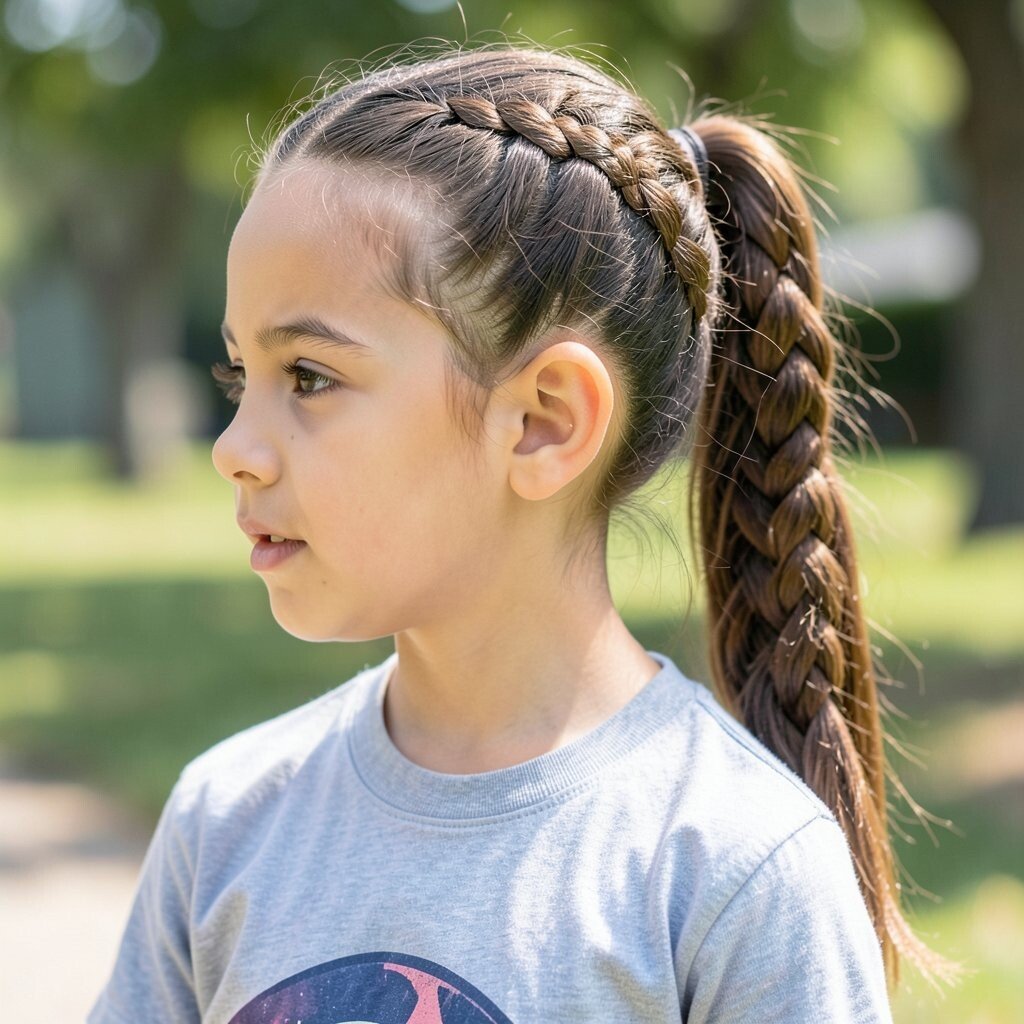
Make a side ponytail at the height you like and secure it. Before you braid, take a small section from the front and create a Dutch braid that travels toward the pony.
The braid gives a strong visual pop while the pony keeps everything practical. This style is unique because it blends an elegant side pony with a sporty braid accent. To keep it from slipping, pin the end of the Dutch braid under the pony elastic.
For a trendy touch, keep the braid tight and glossy with a bit of shine spray or smoothing cream. Personalize by swapping the pony tie color for something fun like navy or burgundy. Cost stays low because you only need elastics and a few pins, plus whatever braid products you already own.
11. Topsy Tail With Ribbon Ends
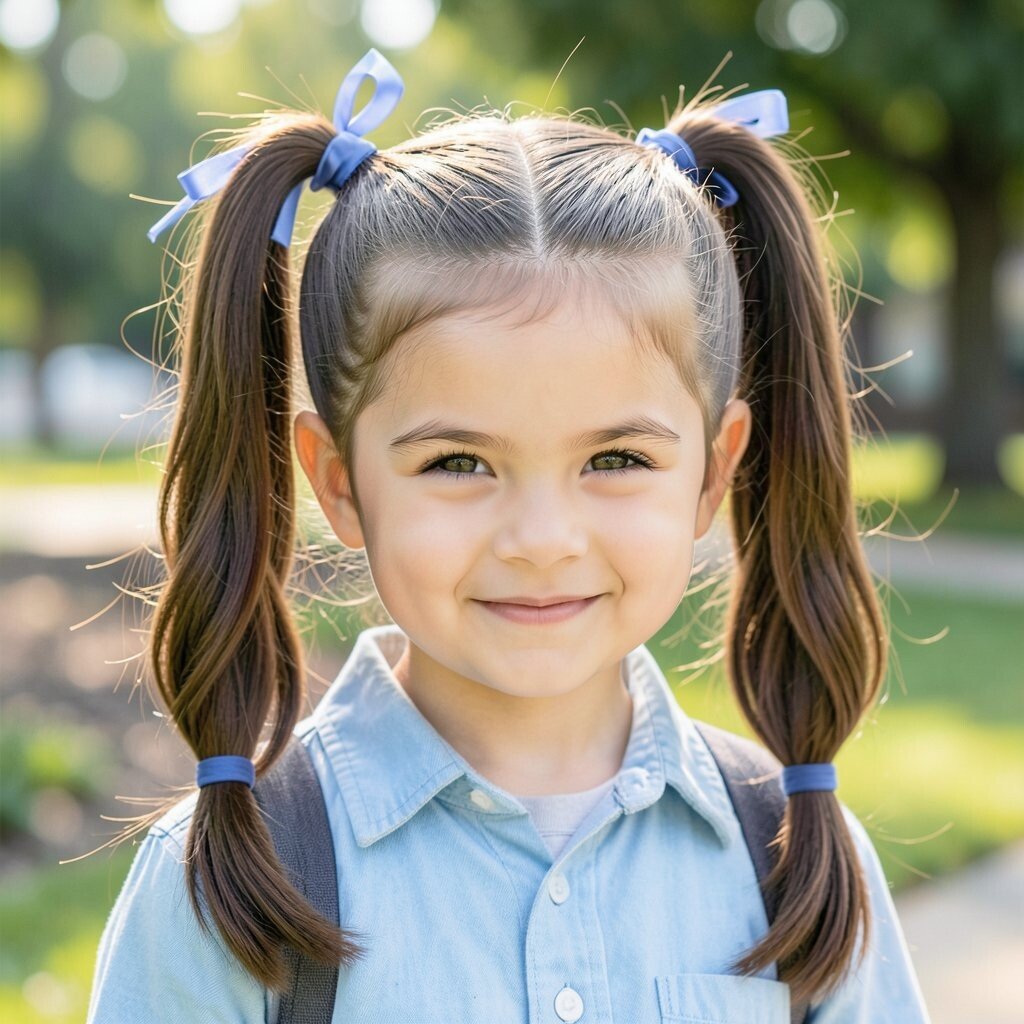
Secure hair into a mid ponytail, then split the section above the elastic and flip the ponytail through for a topsy-tail. This creates a lifted, gathered shape that looks like a knot.
It’s a fun style that feels different from a standard pony, and it’s surprisingly easy to do. For school mornings, it’s practical because it keeps hair gathered without a lot of extra steps. To personalize, tie a thin ribbon around the base so it looks special in a simple way.
12. Classic Three-Strand Braid With Sparkle Pin
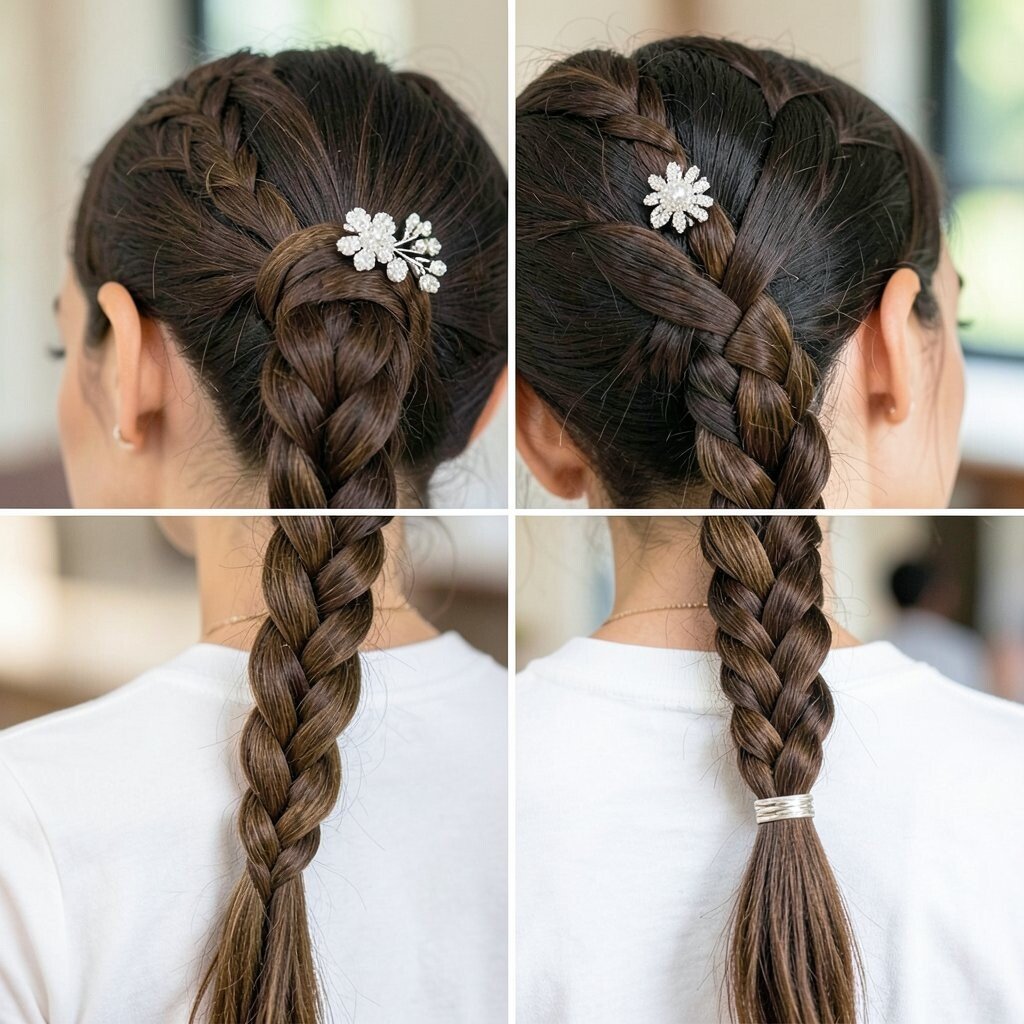
Start with a smooth, brushed base and braid your hair down the back. Keep the braid consistent so it looks neat from every angle as you move.
This is the most timeless choice on the list, but adding one sparkle pin makes it feel new. The braid keeps hair secure, which helps you avoid tangles during the day. If you want a modern twist, gently pull at the braid edges to make it look slightly fuller.
In terms of benefits, a classic braid works for all hair types and holds well for hours. Personalize with a small clip at the braid’s start or a tiny charm attached near the end. Cost considerations are easy since you only need hair ties and one nice pin, which can be reused.
13. Half-Up Twist and Pinwheel Clips
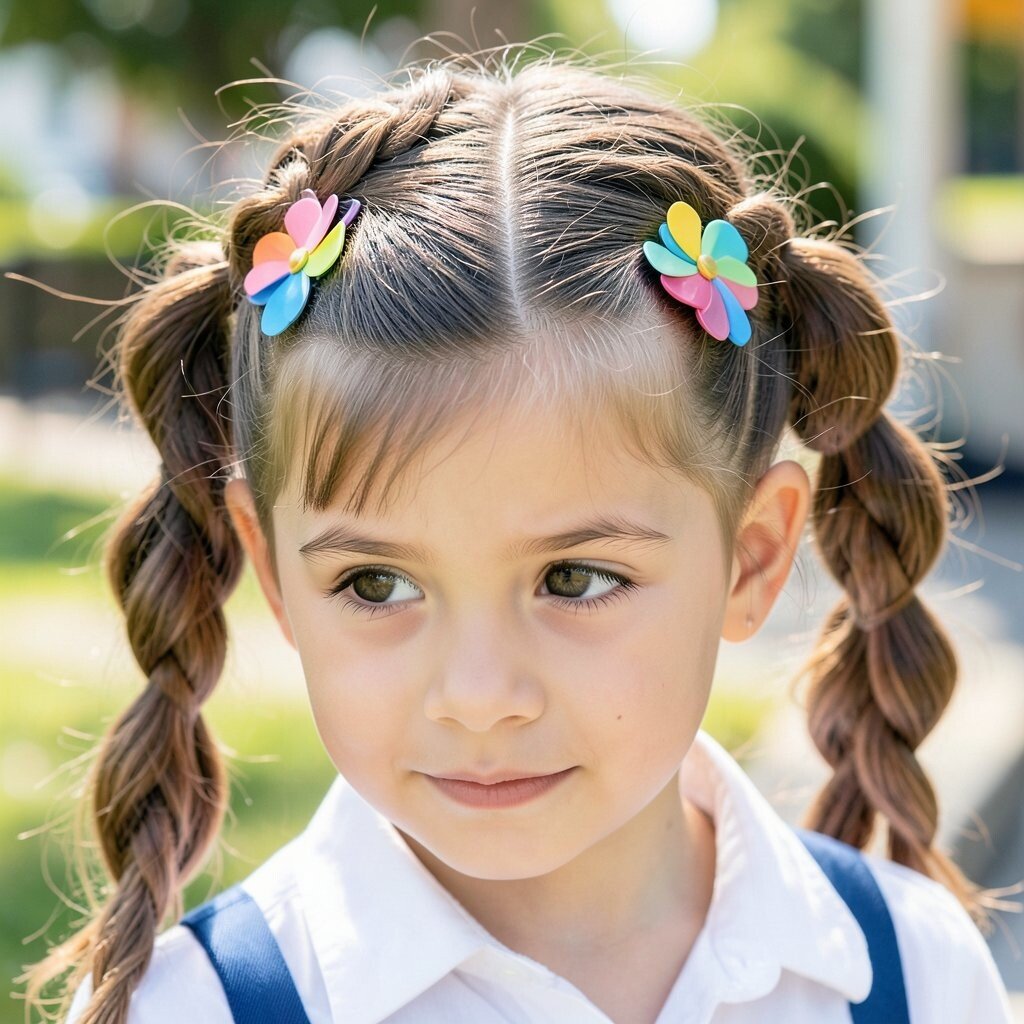
Take two top sections from both sides, twist them slightly, and bring them back. Secure with bobby pins so the twist looks like it wraps around your crown.
Then add a pinwheel-style clip or cute bow clip for a playful look. This style is unique because the twists create structure while the clip adds personality without extra braiding. It’s also practical for school since the pinned sections help prevent hair from falling into your eyes.
Current trends lean toward small accessories, so a clip can make the look feel fresh. Personalize by matching the clip with your backpack color or your favorite hoodie. If you’re thinking about cost, one good clip can replace several accessories because it works with many hairstyles.
For a clean finish, smooth your hair with a brush before twisting so the twists look neat and not lumpy. If your hair is curly, stretch the top slightly with your fingers for a smoother pinned area.
14. Full Braided Bun for Active Days
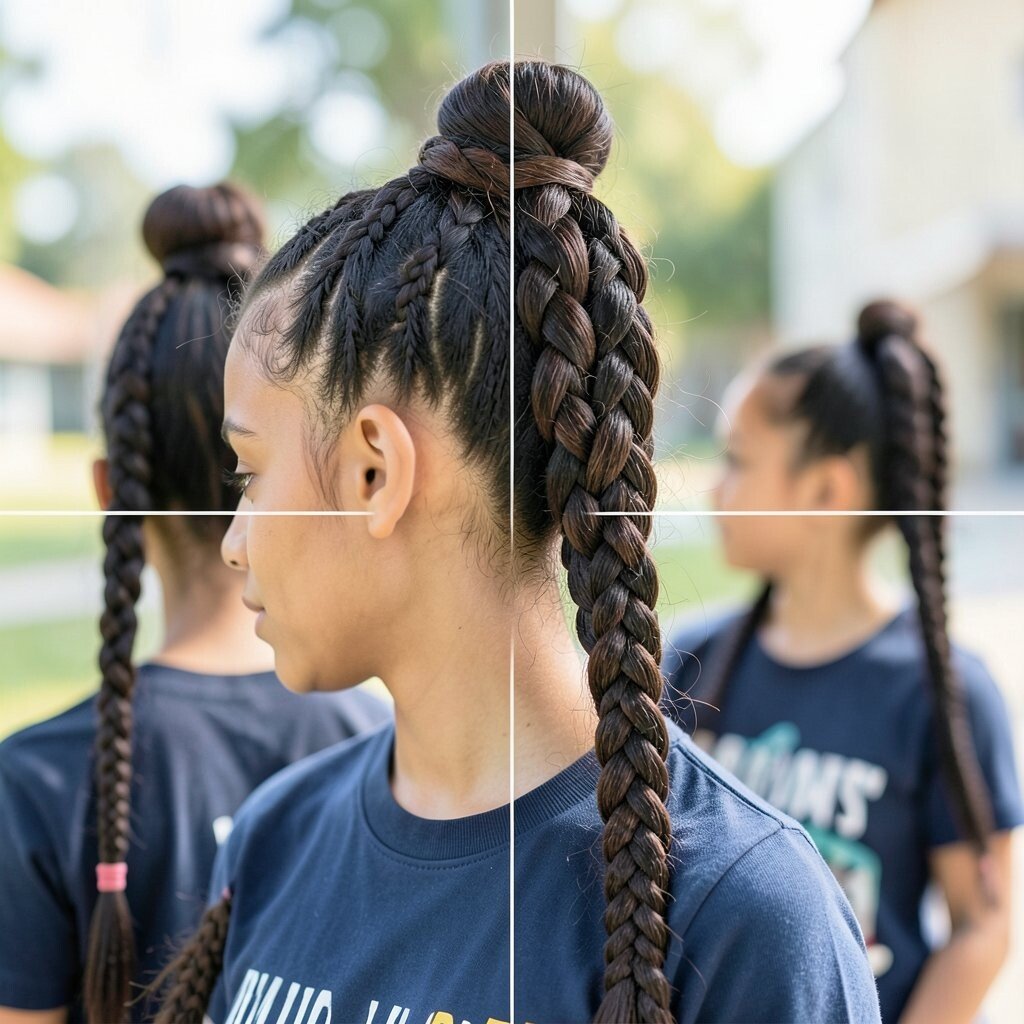
Create one or two braids depending on your hair thickness, then coil them into a bun. Secure with strong pins and a hair tie if needed so it stays put during movement.
This hairstyle is perfect for active school days because it keeps hair locked in place. The visual texture from the braids looks detailed, making a simple bun feel special. If you want it more comfortable, avoid pulling too tight at the braid base.
15. Low Loose Dutch Braid With Top Lift
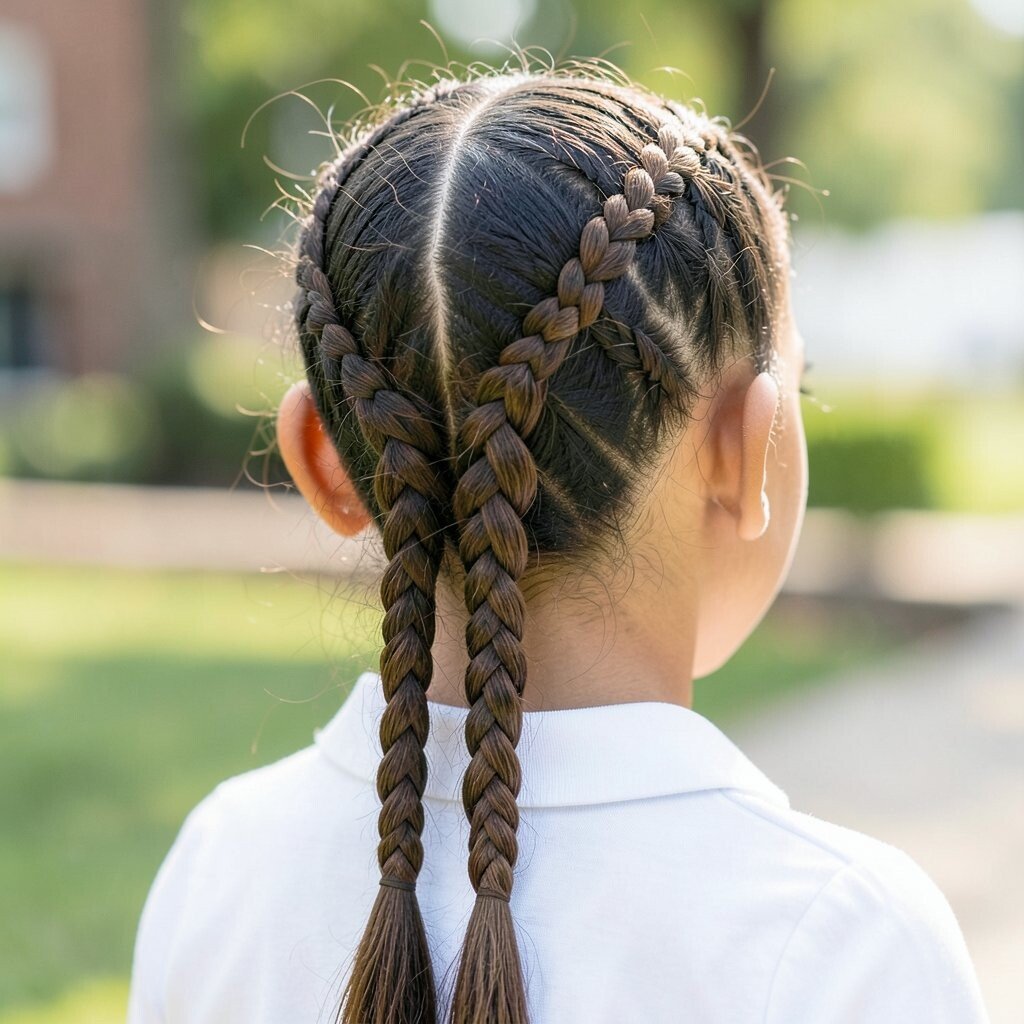
Start a Dutch braid near the crown but keep it looser so it looks airy. As you braid, add extra hair from the sides and let the braid sit lower on your head.
The benefit is that it creates volume and direction, which looks great for different face shapes. It’s unique because it combines a lifted start with a laid-back braid finish. For practical tips, use smaller elastics as you go so the braid doesn’t sag too soon.
To personalize, leave a thin strand out near your cheek and lightly curl it for a soft look. Current trends show more “loose braid” styles, and this one fits right in. Cost stays reasonable since you just need elastics and pins, and you can skip expensive hair extensions.
If your hair is fine, use a light mousse at the roots so the braid has more grip. If your hair is thick, keep the braid slightly tighter so it doesn’t feel bulky by lunch.
16. Sleek Half-Up Top Knot
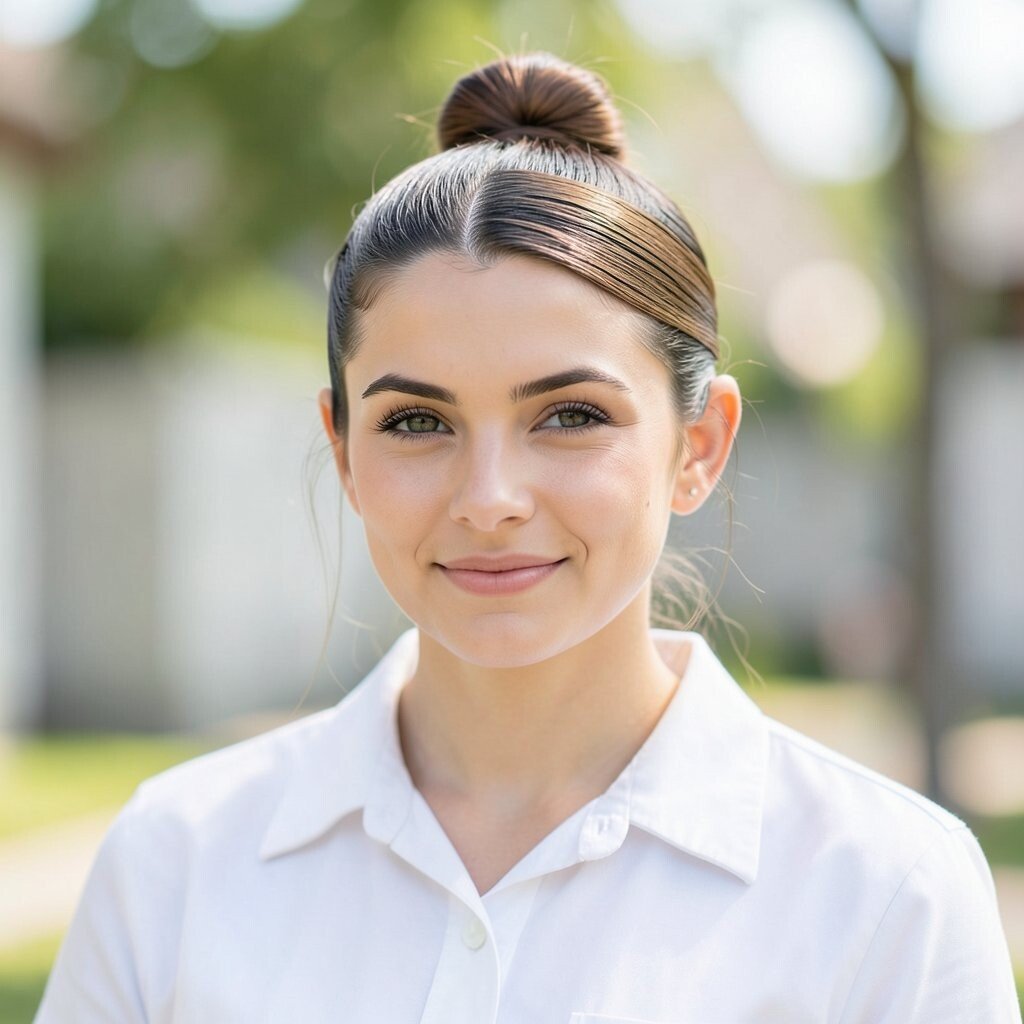
Sweep the top half of your hair up and secure it into a tiny top knot. Smooth the front first, then twist the pony base into a bun shape and pin it firmly.
This look is both cute and practical because it clears your face and keeps hair from tangling. It’s unique because it’s half-up, half-down, so you get the style of a bun with the freedom of loose hair. For personalization, add a small clip on the side where the knot meets your hair.
If you’re following current trends, top knots are still popular because they look good on straight or wavy hair. For cost, a single strong elastic and a few pins are enough, and you can reuse them for multiple days. Use a tiny hair serum on the front for shine, but keep it small so it doesn’t look greasy.
17. Curly Ribbon Twists for Naturally Wavy Hair
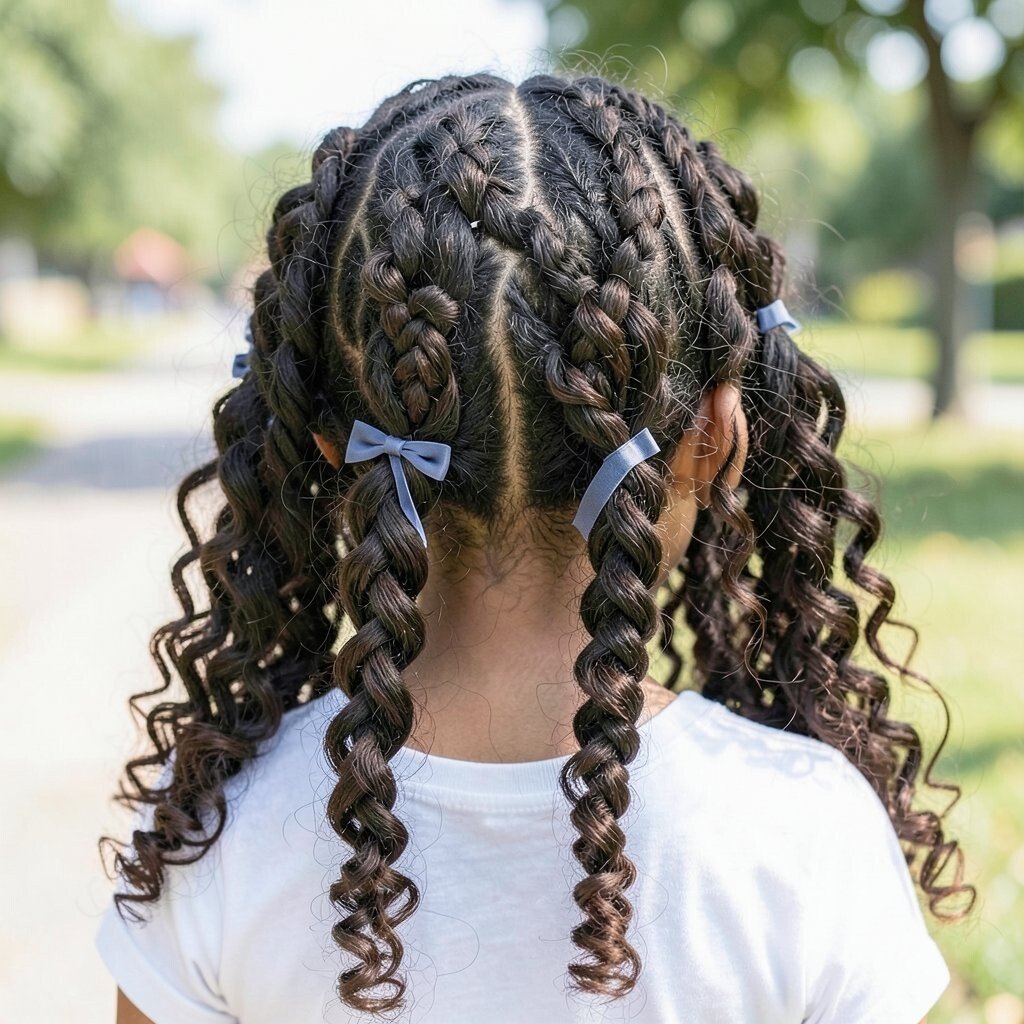
If you have natural waves or curls, keep your texture and twist two small sections from the front. Add a ribbon or scarf strip around the twists and tie it gently so it sits flat.
This hairstyle is great because it celebrates your natural pattern instead of fighting it. It’s unique since the ribbon gives movement and color while the twists keep hair from dropping over your eyes. For practical school wear, choose a lightweight ribbon that won’t snag on clothing.
To personalize, use a ribbon color that matches your favorite hoodie or nail polish. Current trends include scarf-style accessories, and they look especially fresh on textured hair. Cost is usually low because ribbon can be found cheaply, and you can tie it into other styles later.
18. French Braid Pony With a Ribbon Tie
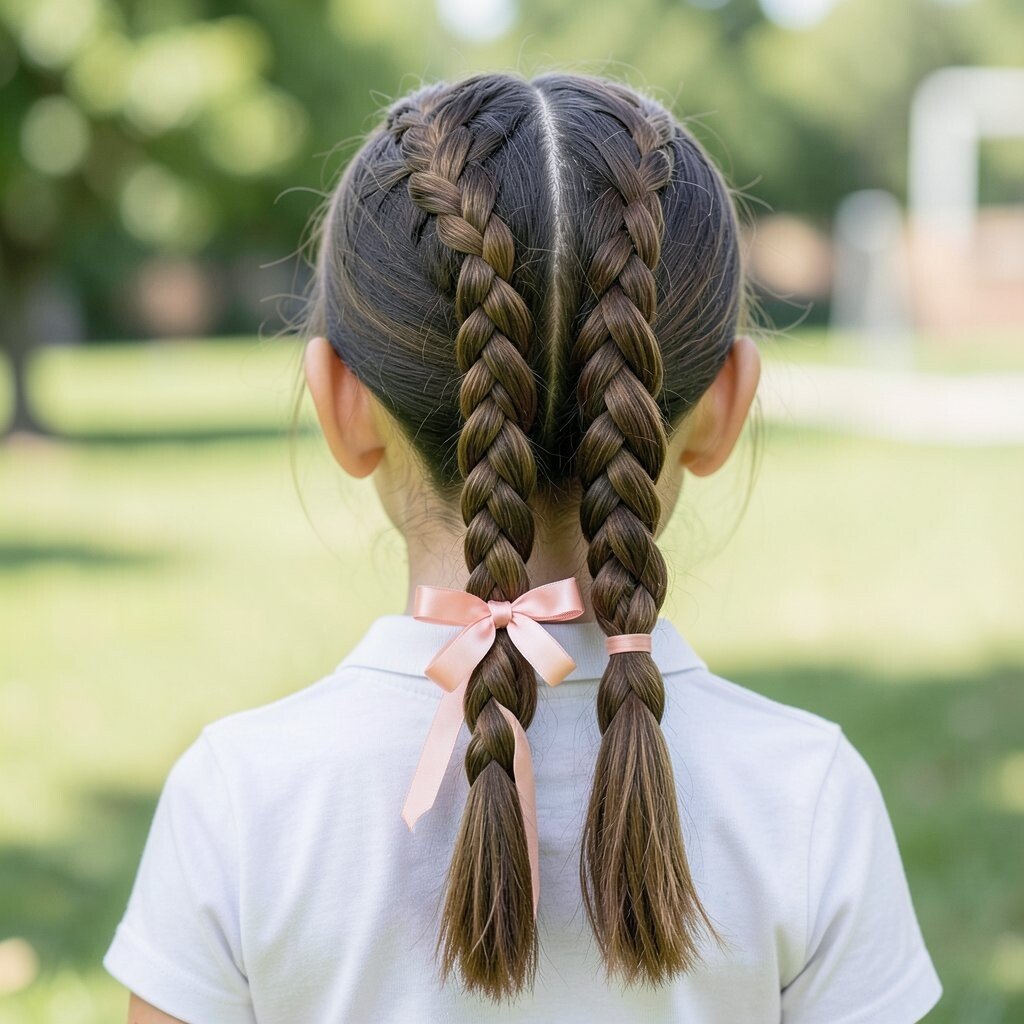
Begin a French braid along the back of your head and keep it centered for a symmetrical look. When you reach the end, finish with a braid or gather it into a pony shape and secure it.
This style looks polished and feels “main character” without needing a fancy salon visit. The benefit is that the braided section helps prevent tangling, which is a big win during school. For practical tips, make sure the braid is tight at the roots but comfortable on your scalp.
Personalize by adding a ribbon tie at the very end so the style has a sweet finish. French braids remain a strong trend because they’re classic with a neat, structured look. Cost considerations are easy since braids need mostly your hair and basic elastics and pins.
19. Crown Braid With Tiny Hidden Pins
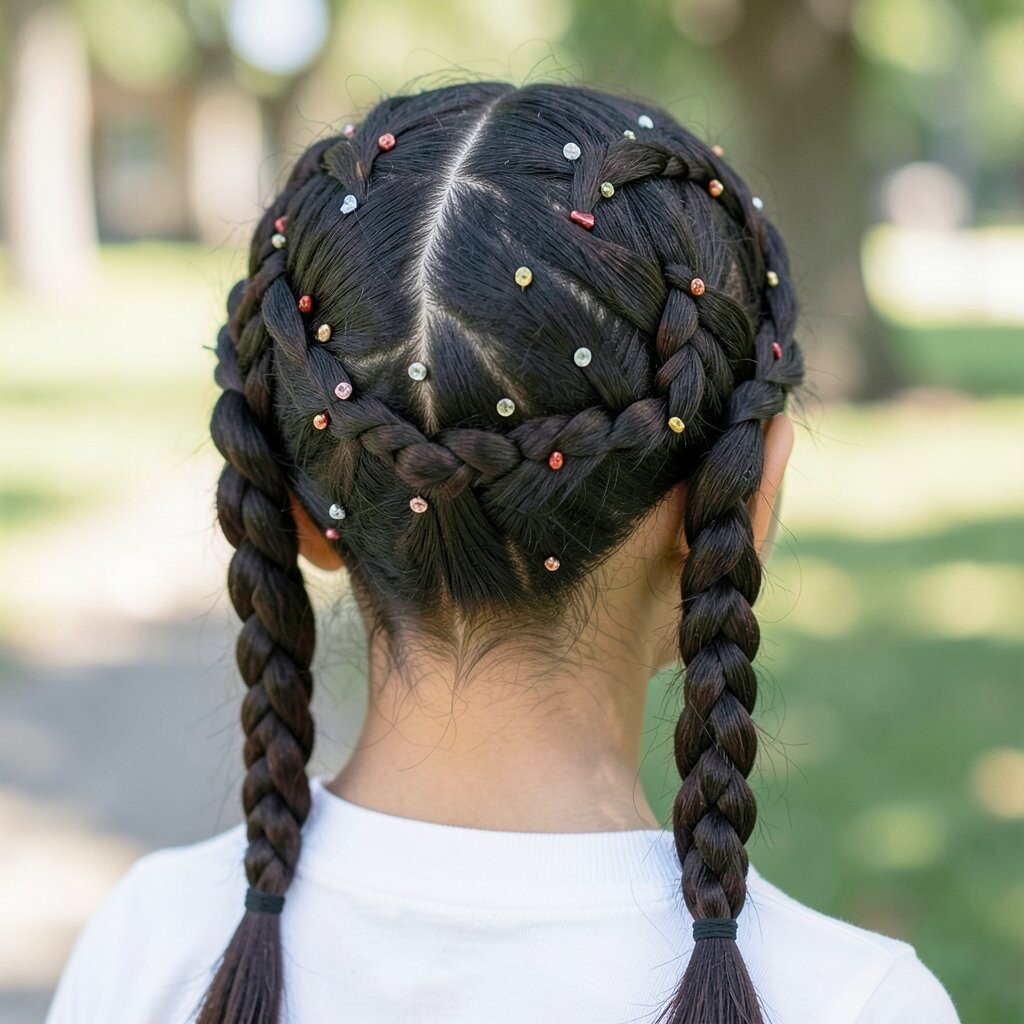
Create a braid that wraps along the top of your head like a crown. Use smaller bobby pins and place them where the braid overlaps so they stay hidden.
This hairstyle is unique because the crown braid looks delicate, but it’s secure enough for the whole school day. It’s great for benefits like keeping hair away from your face and reducing flyaways near the hairline. If you want it to last, lightly mist the braid with a flexible hairspray before you pin it down.
For personalization, add one tiny star-shaped pin or a neutral clip to match your outfit. Crown braids are trending in a “soft and intricate” way, especially for first day photos. Budget-wise, you can keep costs low by using the pins you already have and investing only in one cute accessory.
If your hair is slippery, lightly backcomb the braid start for extra grip. If your hair is thick, split the hair into smaller sections so the braid stays smooth instead of bulky.
20. Sleek Side Part With Pin-Straight Hair Clips
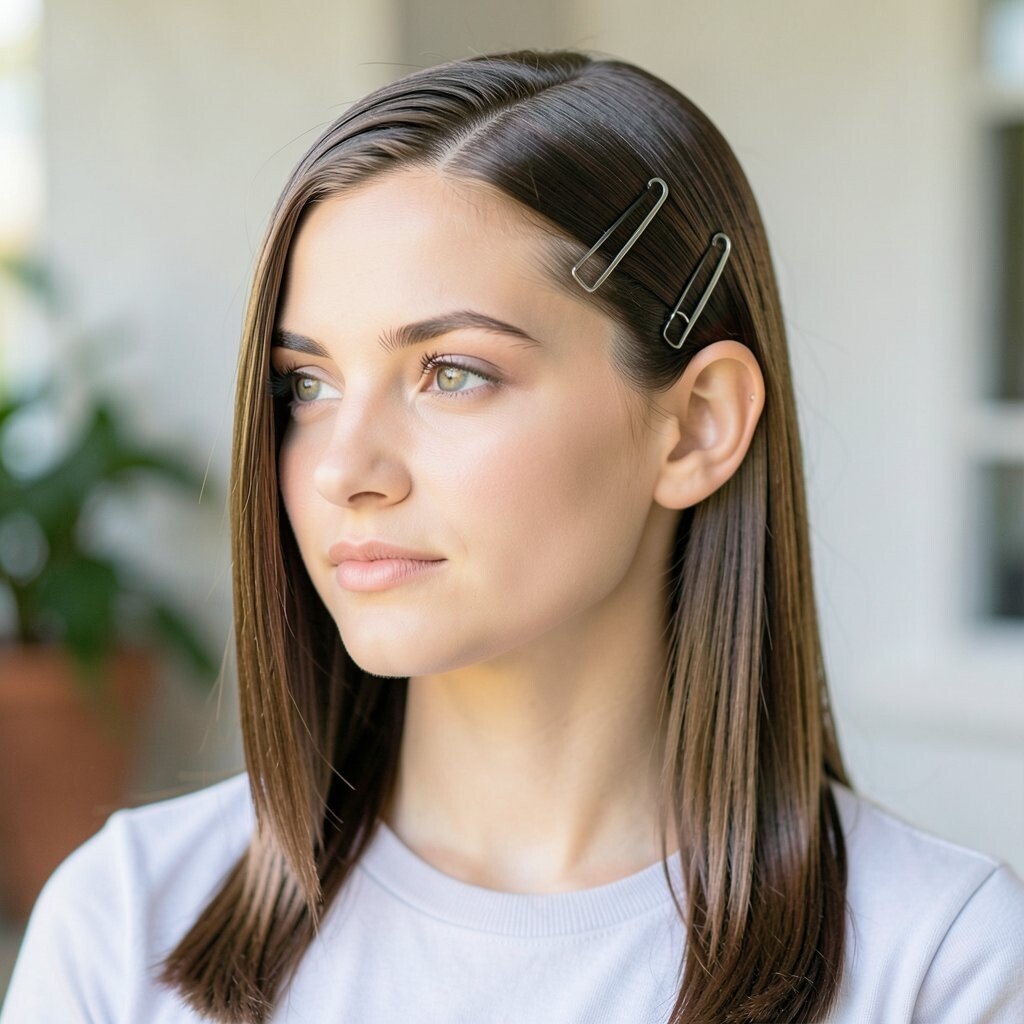
Make a deep side part, then smooth hair so it lays neatly over your shoulder. Add a few decorative clips along the side to create a clean, intentional pattern.
This style looks modern and sharp, and it’s especially good for straight or blow-dried hair. The visual benefit is that the clips add interest at the front, while the side part creates instant shape. For practical tips, choose clips that grip well so they don’t slide when you move your head.
To personalize, pick clip colors that match your backpack charm or earrings. Current trends favor sleek hair with small accessories, and this one is easy to recreate at home. Cost is usually low because clips come in many price ranges, and you can rotate them for different hairstyles.
If you have wavy hair, use a quick flat-iron on the top layer only for a tidy look. Finish with a light shine spray so the side stays glossy during the morning rush.