The first day of school is all about confidence, comfort, and a look that feels like you. A great hairstyle can make your morning feel smoother and your whole day feel brighter.
1. Bubble Ponytails With a Sweet Middle Part
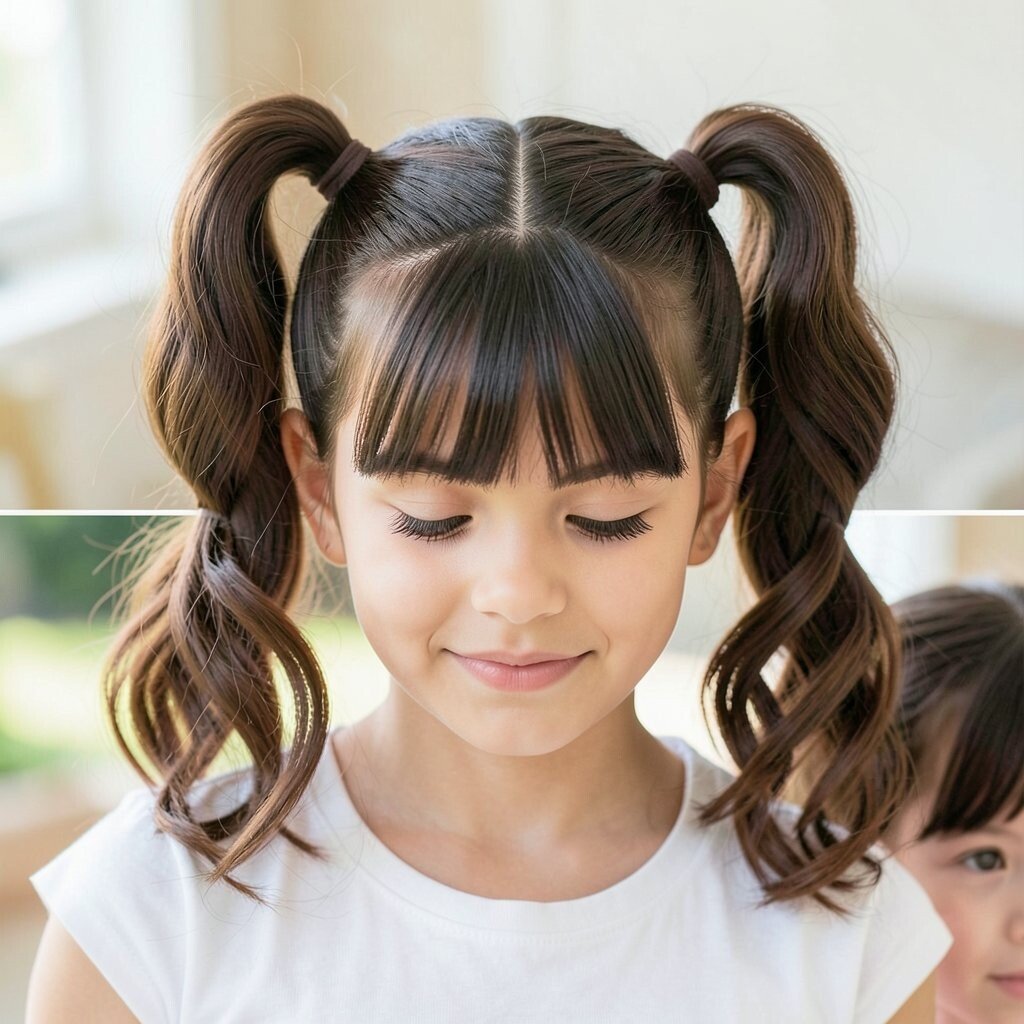
Part your hair in the middle and split it into two roomy sections. Roll each section into a high ponytail, then create small bubble bands down the length.
This style looks playful from every angle, with soft circles that catch the light. It also helps keep hair out of your face during class, and it stays neat even when you’re moving a lot.
2. Side-Swept Half-Up Twist With Clips
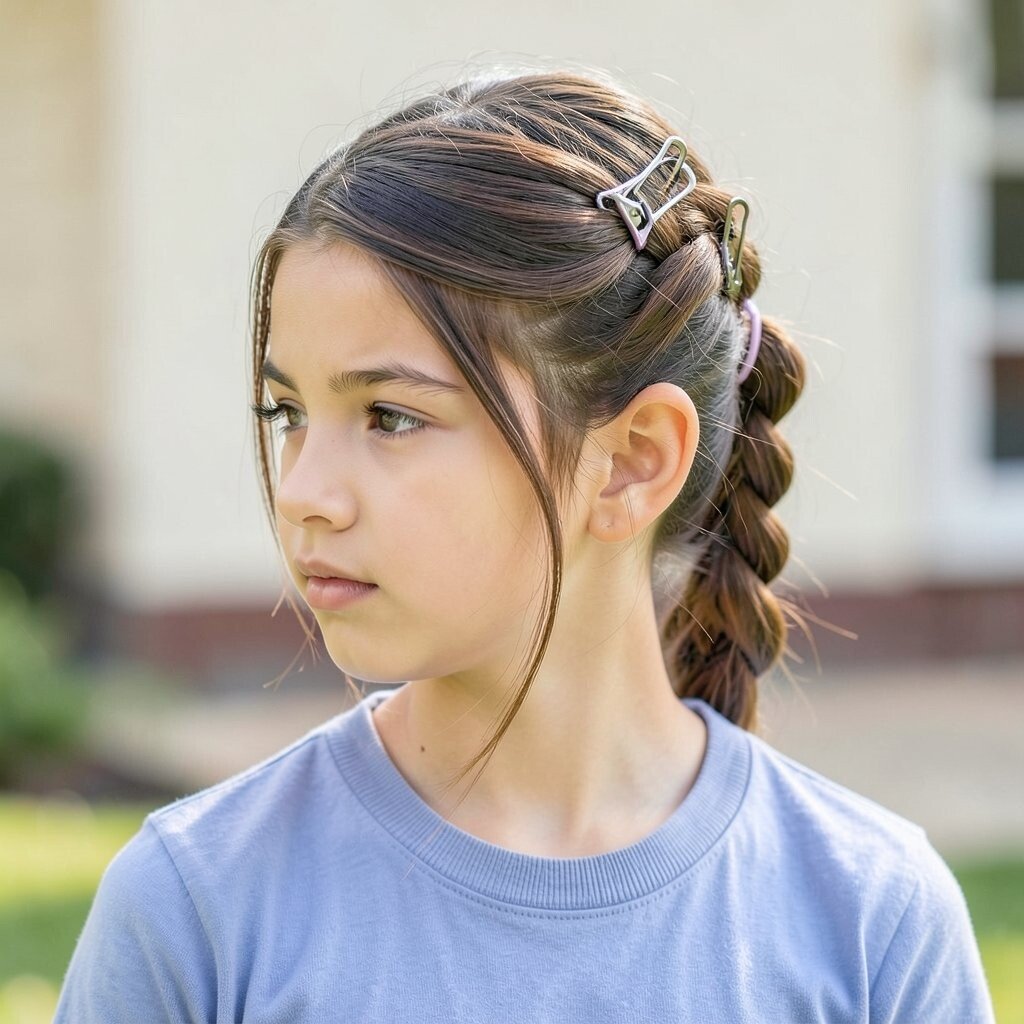
Take the top layer from one side and twist it back toward the opposite ear. Secure it with a couple of small clips, letting the rest fall naturally.
The twist adds shape while still letting your hair move. For a fresh touch, pick clips in your favorite color or match them to your scrunchies for a coordinated vibe.
3. Braided Crown Starter With Two Mini Braids
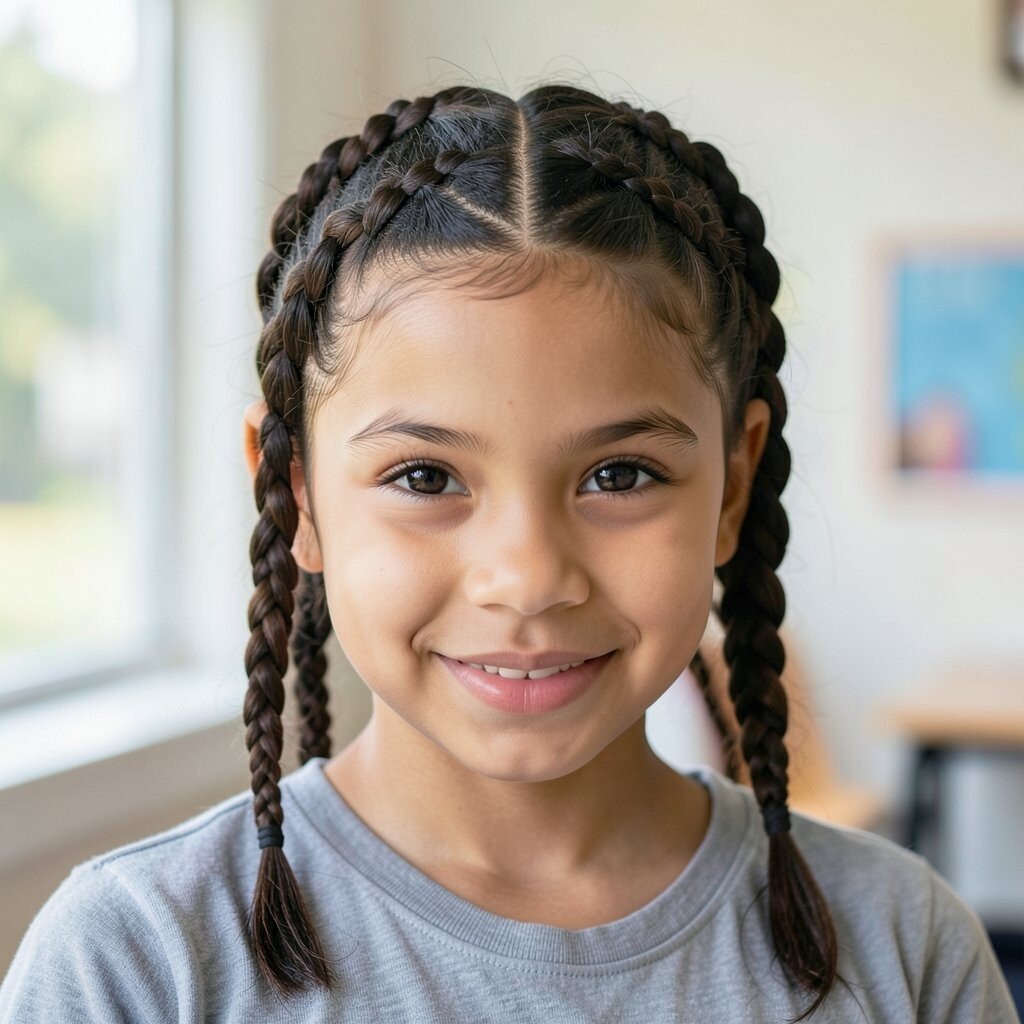
Create two mini braids along your part, starting near your forehead. Bring both braids around the top of your head and pin them like a soft crown.
This look feels royal but still easy, especially if you keep the braids tight and small. It’s great for keeping hair secure at the front while your ends stay fluffy and fun.
If you want it to look more “done,” gently tug each braid for a slightly fuller look. For personalization, add a tiny charm clip near the pins, and consider using a light styling cream so flyaways behave without feeling heavy.
4. Sleek High Ponytail With a Wrapped Elastic
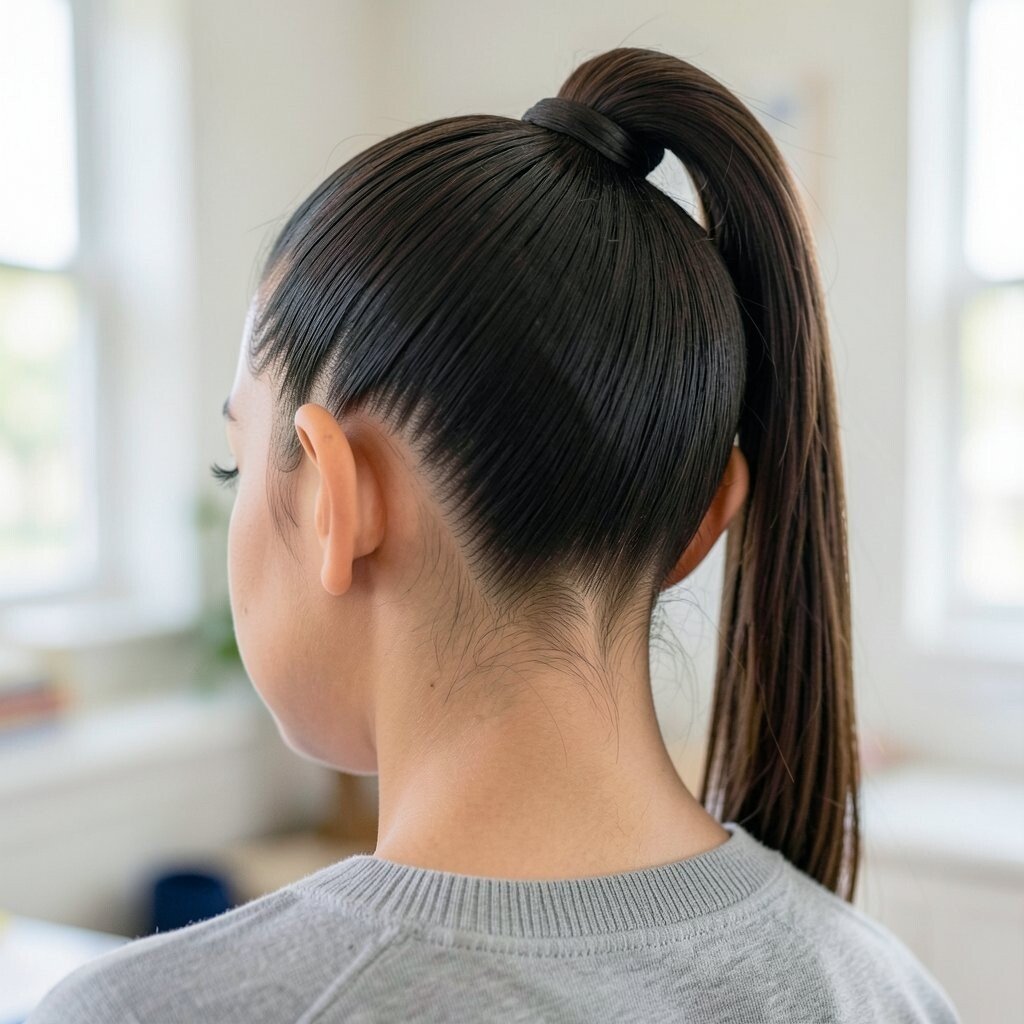
Brush hair smooth, then gather it high into a ponytail. Wrap an extra strand around the elastic and tuck the end underneath.
This style looks polished and it’s perfect for mornings when you’re in a hurry. It also gives your face a clear frame, which can make your smile stand out in photos.
5. Messy Bun With Face-Framing Strands
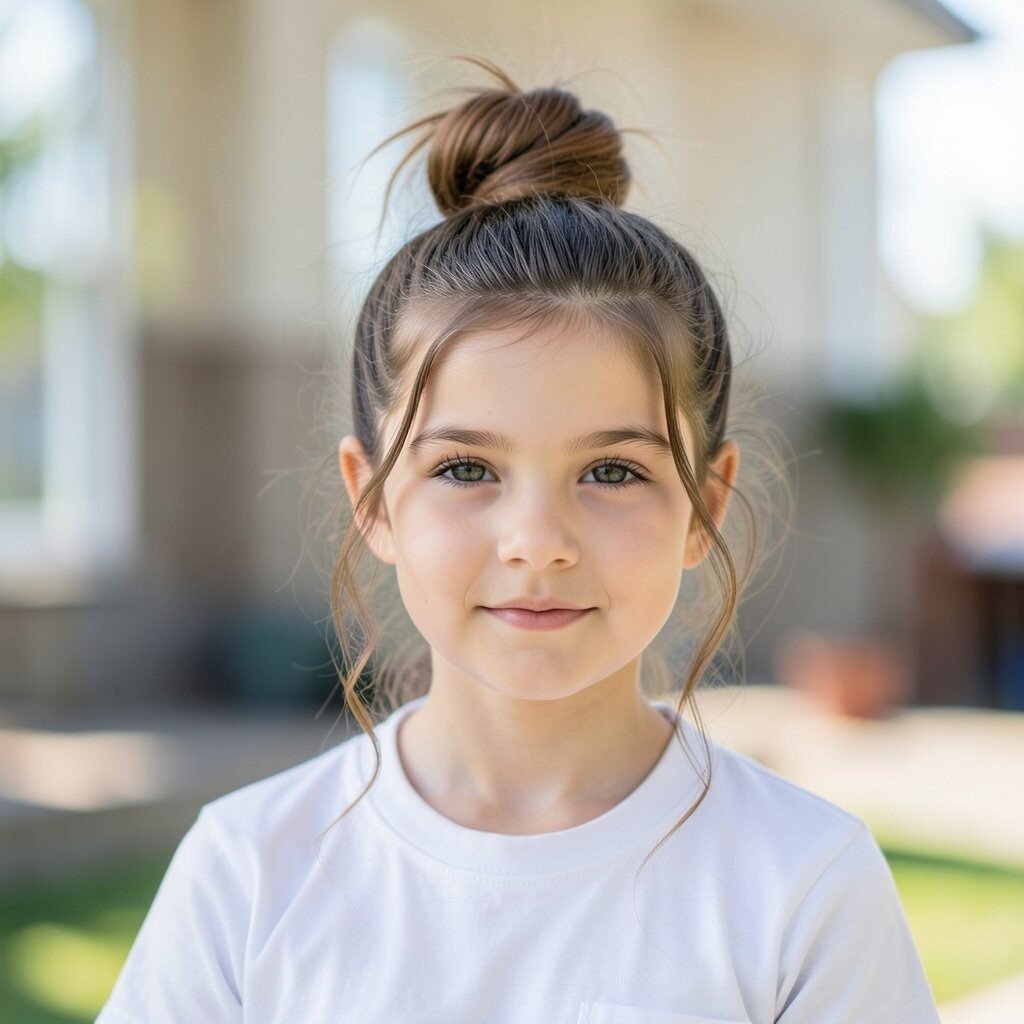
Pull hair into a loose bun at the back of your head, letting a few strands fall out near your cheeks. Lightly pull at the bun to loosen it for that effortless, airy shape.
You’ll get a cool, lived-in look that still feels intentional. To keep it from falling apart, use a couple of bobby pins and a little hairspray, especially if your hair is fine or slippery.
6. Waterfall Braid With Loose Ends
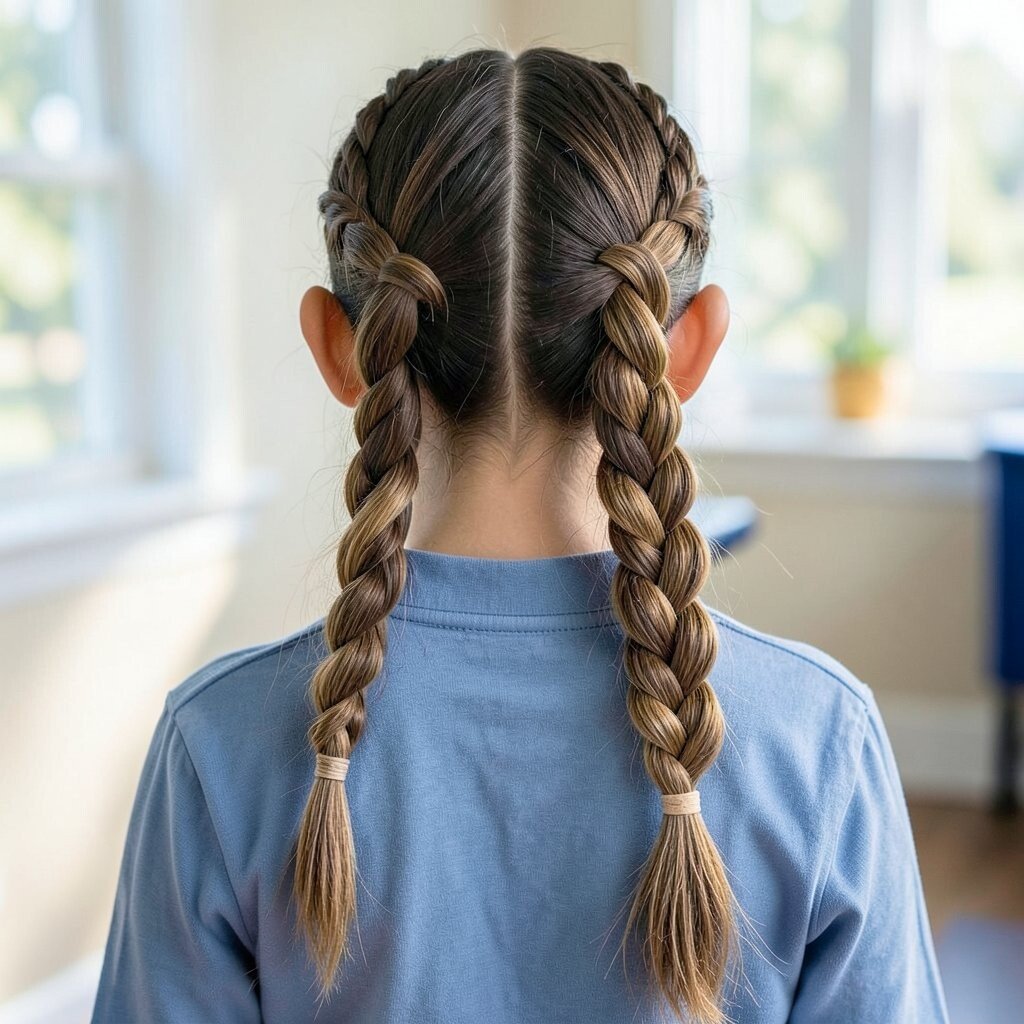
Start a braid on one side and weave sections so some strands “cascade” down instead of joining the braid. Continue across with a smooth, steady rhythm.
The waterfall effect gives a soft, flowing look that stands out without needing extra accessories. It’s a trendy option that works for different hair textures, and it’s great when you want movement but still want some control near your face.
To personalize it, try a braid that starts slightly higher for a more dramatic look. If your hair is thick, you might need smaller sections, while thinner hair may benefit from a light texturizing spray for grip.
7. Low Ponytail With a Twisted Rope Front
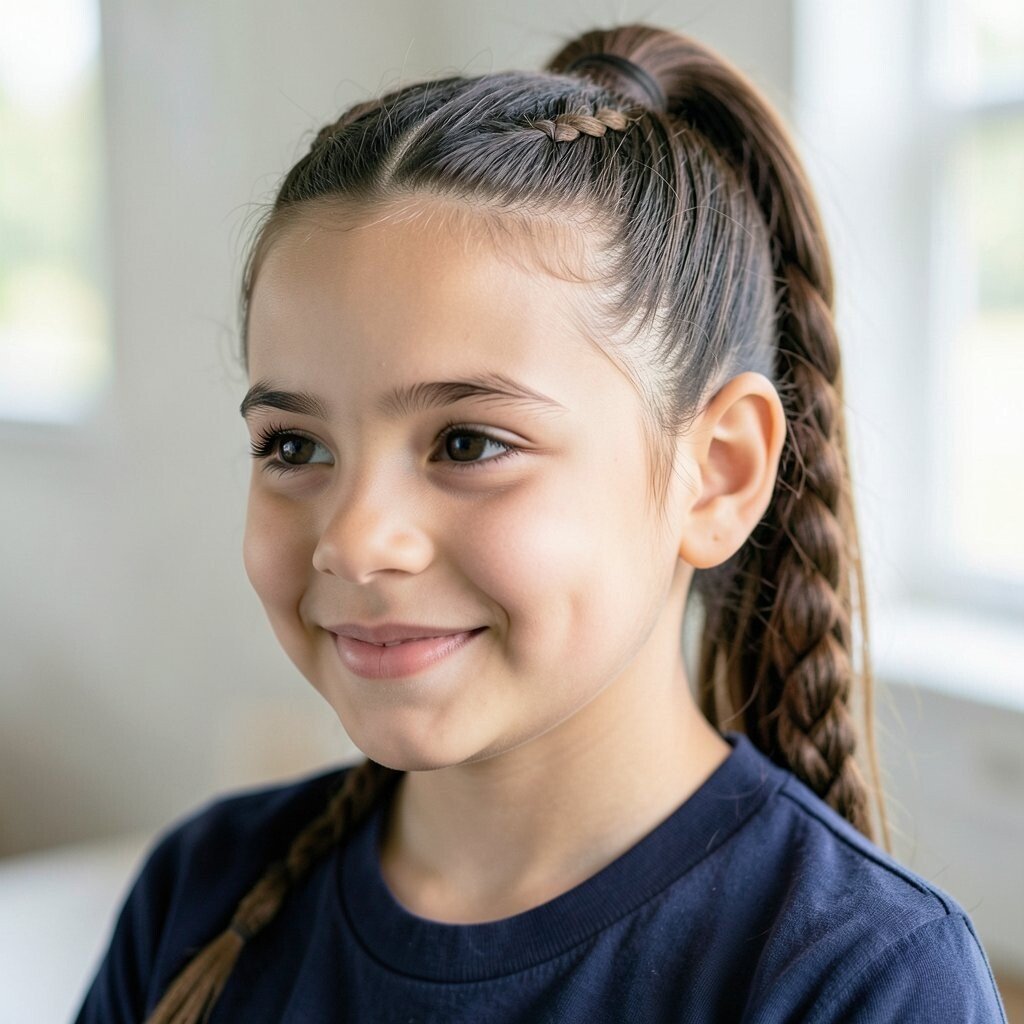
Smooth hair into a low ponytail, then take a small front section and twist it like a rope. Wrap the rope around the base and pin it in place.
This creates a classy shape with a little twist of personality. It also keeps the front from flipping around, which is helpful on breezy bus rides or windy school days.
8. Half-Up Space Buns With Mini Braids on Top
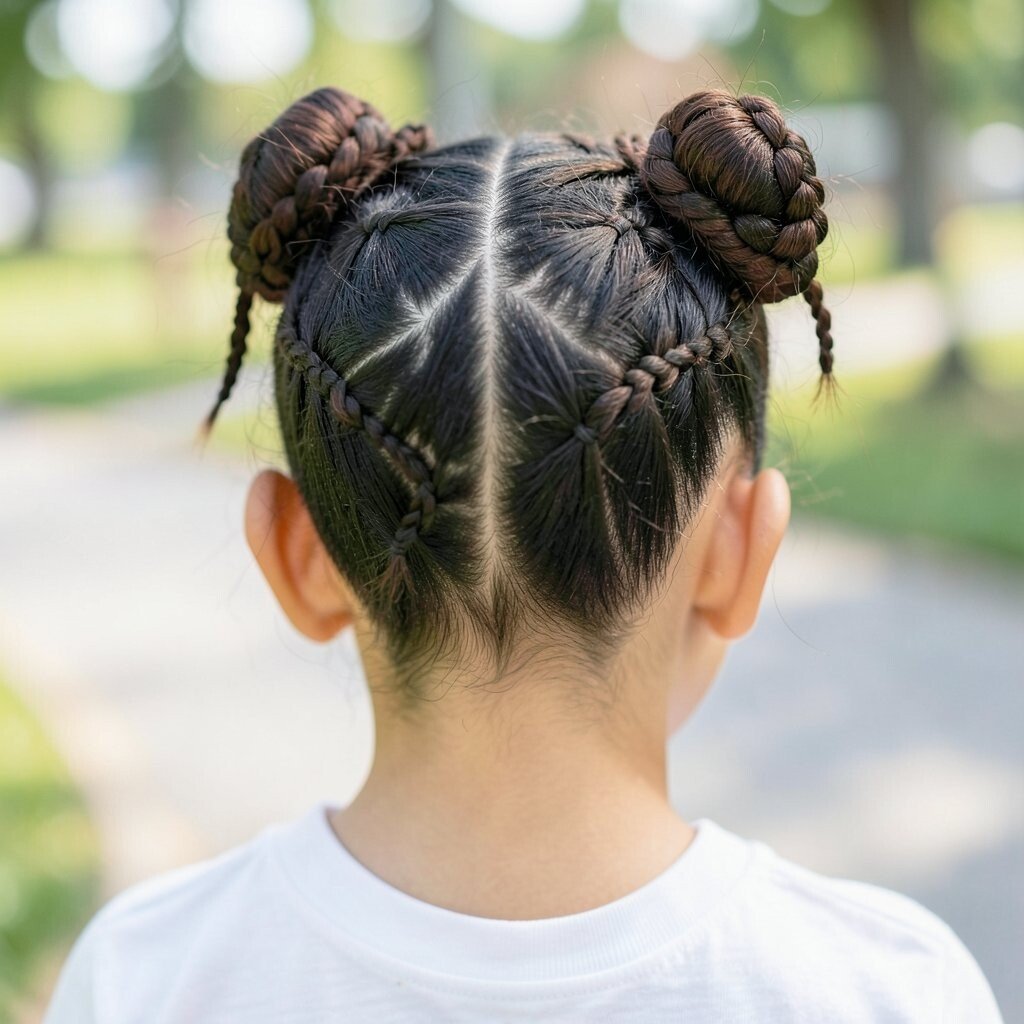
Split your top section into two small buns and secure them with elastics. Add a tiny braid to each bun base, so the buns look extra cute.
Space buns are playful and super photogenic, and mini braids make them feel more polished. Use a hair gel or styling cream to keep the top neat, then let the lower hair fall freely for a balanced look.
9. Straight-Back Sleek With a Scarf-Style Ribbon Tie
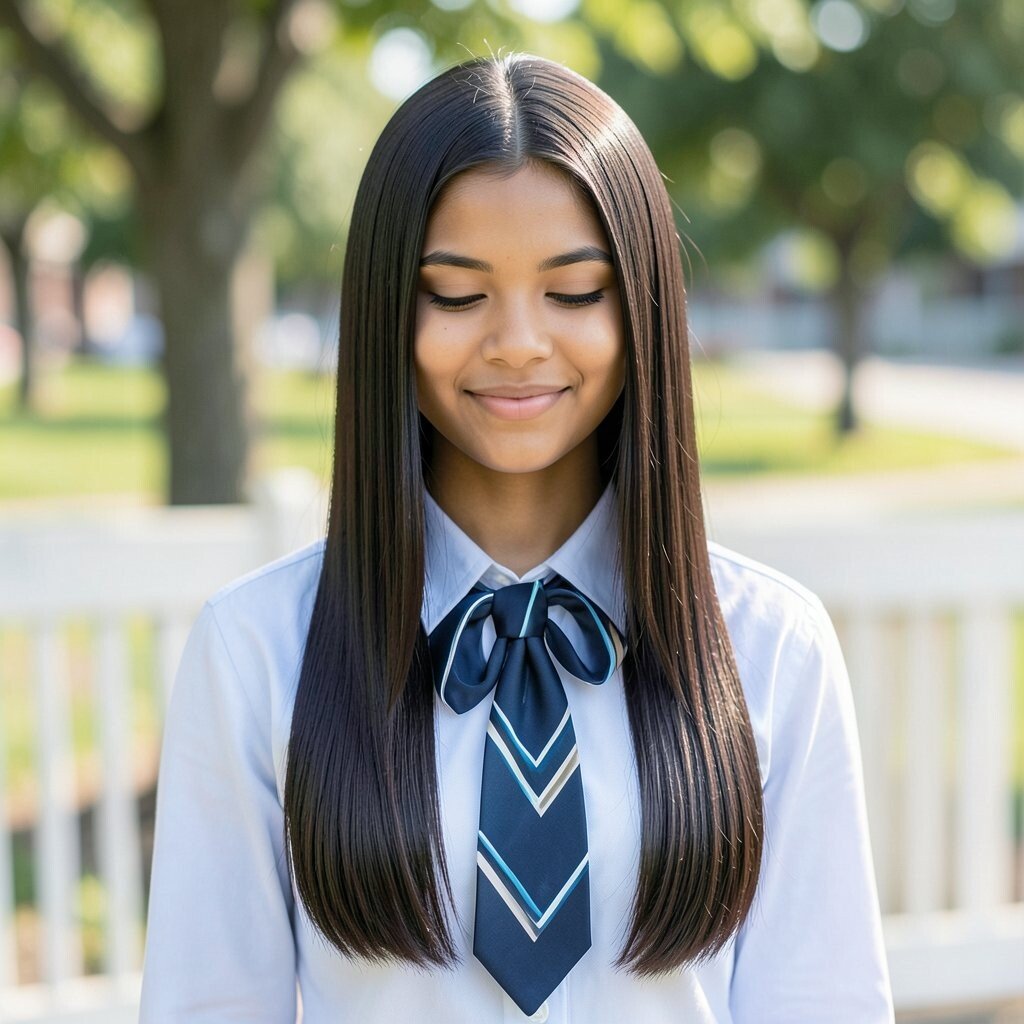
Brush hair straight back and secure it with a ribbon tied like a soft headband. Keep the hair smooth by using a little shine serum or lightweight gel.
This style looks modern and bright, especially when the ribbon matches your outfit. It’s also an easy way to add color without buying a new hairstyle tool.
If you have short hair, place the ribbon closer to the hairline for a strong look. For cost control, reuse a clean ribbon you already own or pick up a simple fabric strip for a quick upgrade.
10. Side Braid Into a Low Knot
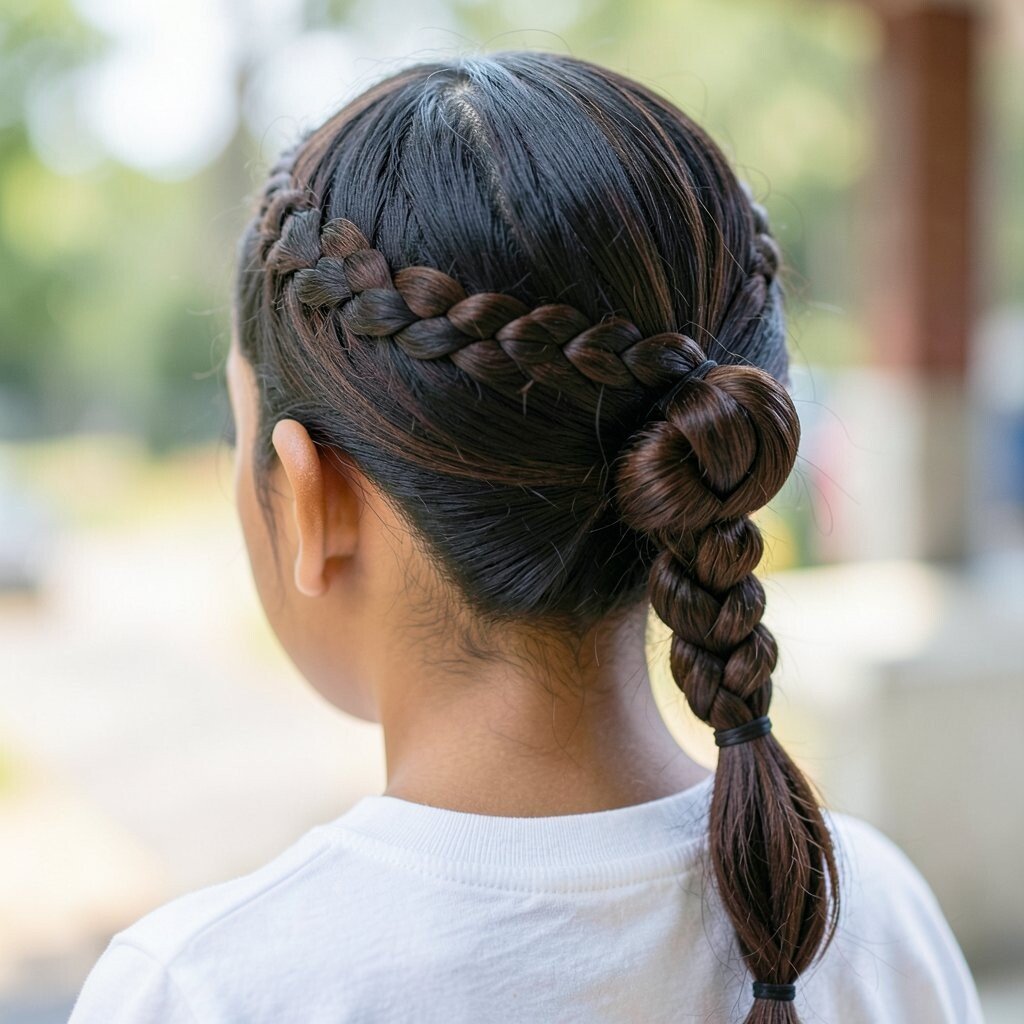
Create a side braid that runs from your temple to the back of your head. Secure the braid, then wrap it into a low knot and pin it.
That mix of braid and knot looks creative while staying practical for a long day. The knot helps keep the ends contained, which means less tangling and fewer flyaways.
11. Faux French Braids With a Ribbon Center Accent
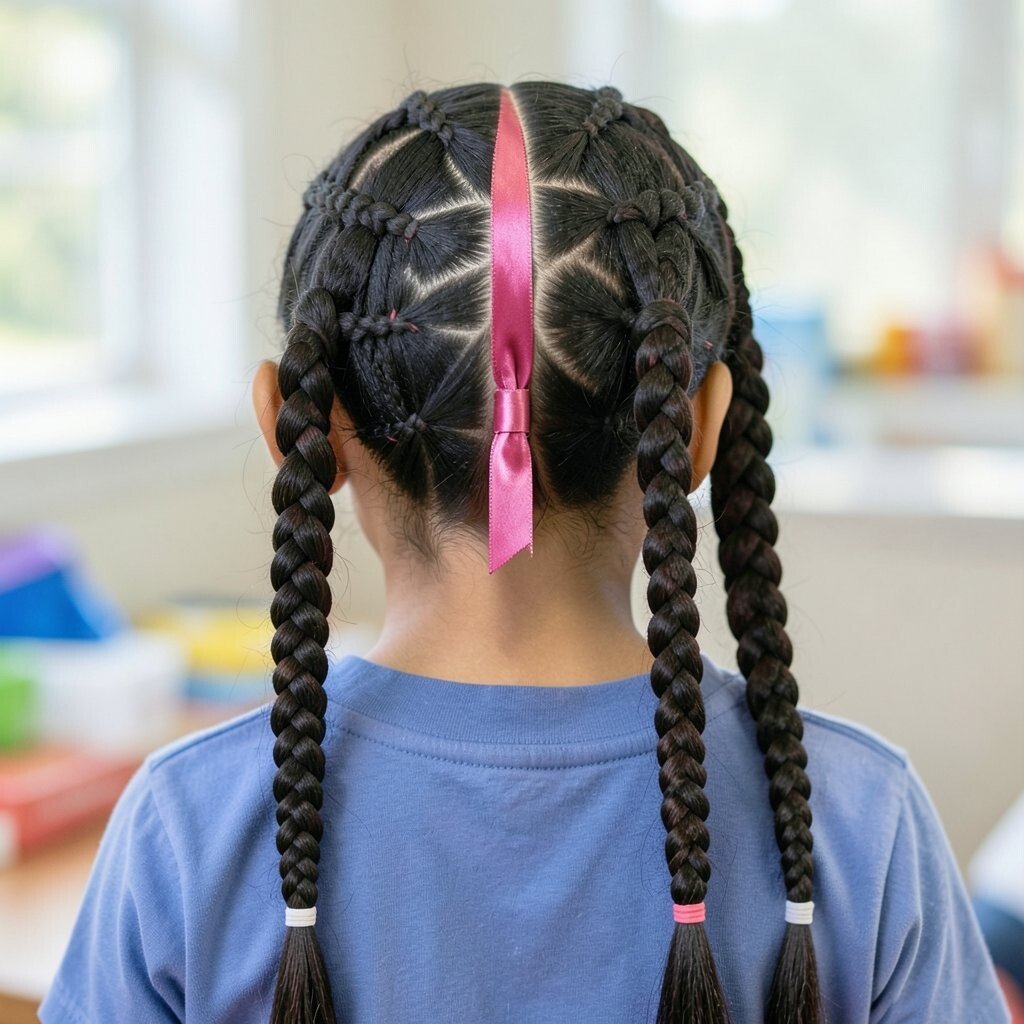
Section hair into two “braid-looking” paths by using a tight, smooth style and pinning as you go. Leave a small gap at the center front and tuck a ribbon there for a fun pop.
This gives the feel of French braids while letting you keep it simpler than a full braid. The ribbon center makes it unique, and it draws attention to your part and face.
For personalization, choose a ribbon color that matches your nails or your backpack. If your hair tangles easily, apply a tiny bit of detangling spray before starting so the pins glide in comfortably.
12. Curly Puff With a Top Clip and Tamed Frizz
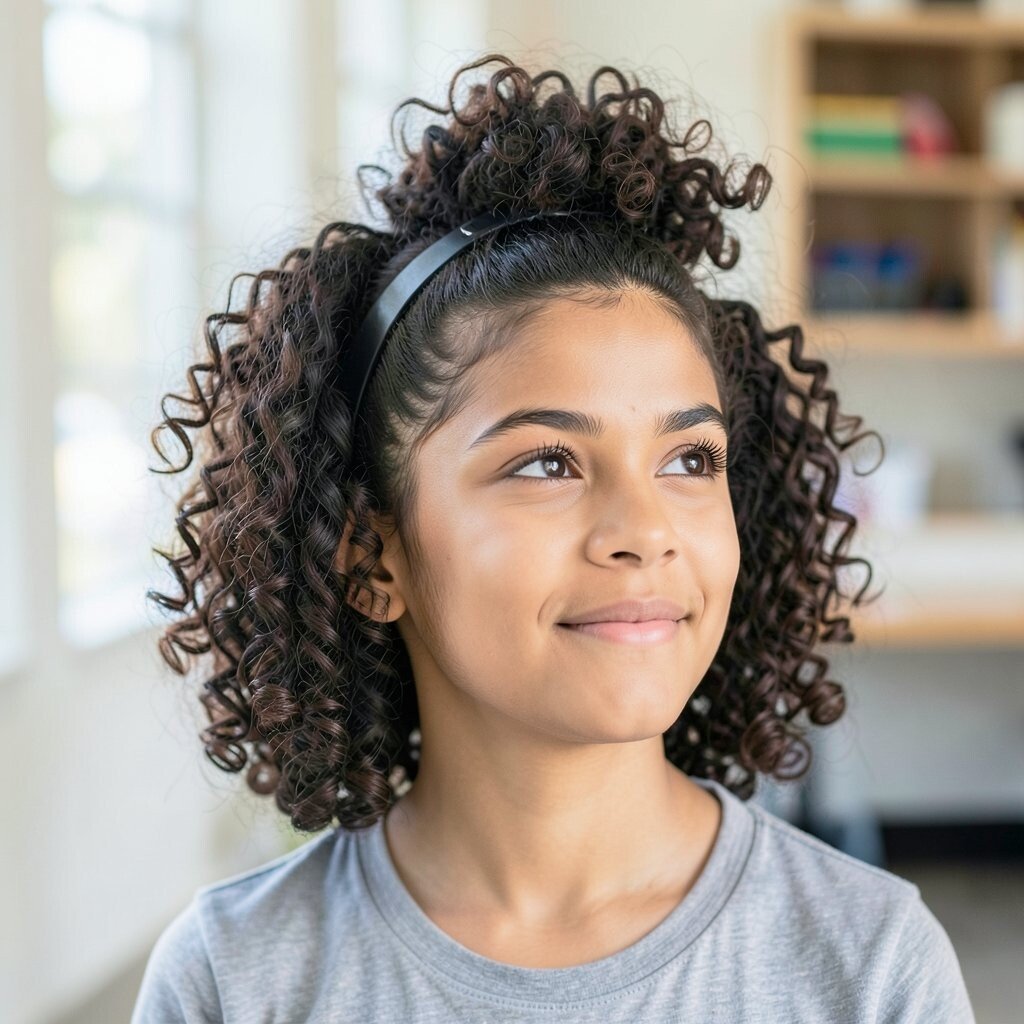
Gather curls into two small puffs or one round puff at the top, then secure with a clip or elastic. Smooth the edges using a curl cream or a bit of gel.
This style celebrates your natural texture, and it looks adorable even if your curls are bouncy. It also keeps curls off your forehead, which can feel extra comfortable on hot days.
13. Classic Three-Strand Braid With a High Pony Twist
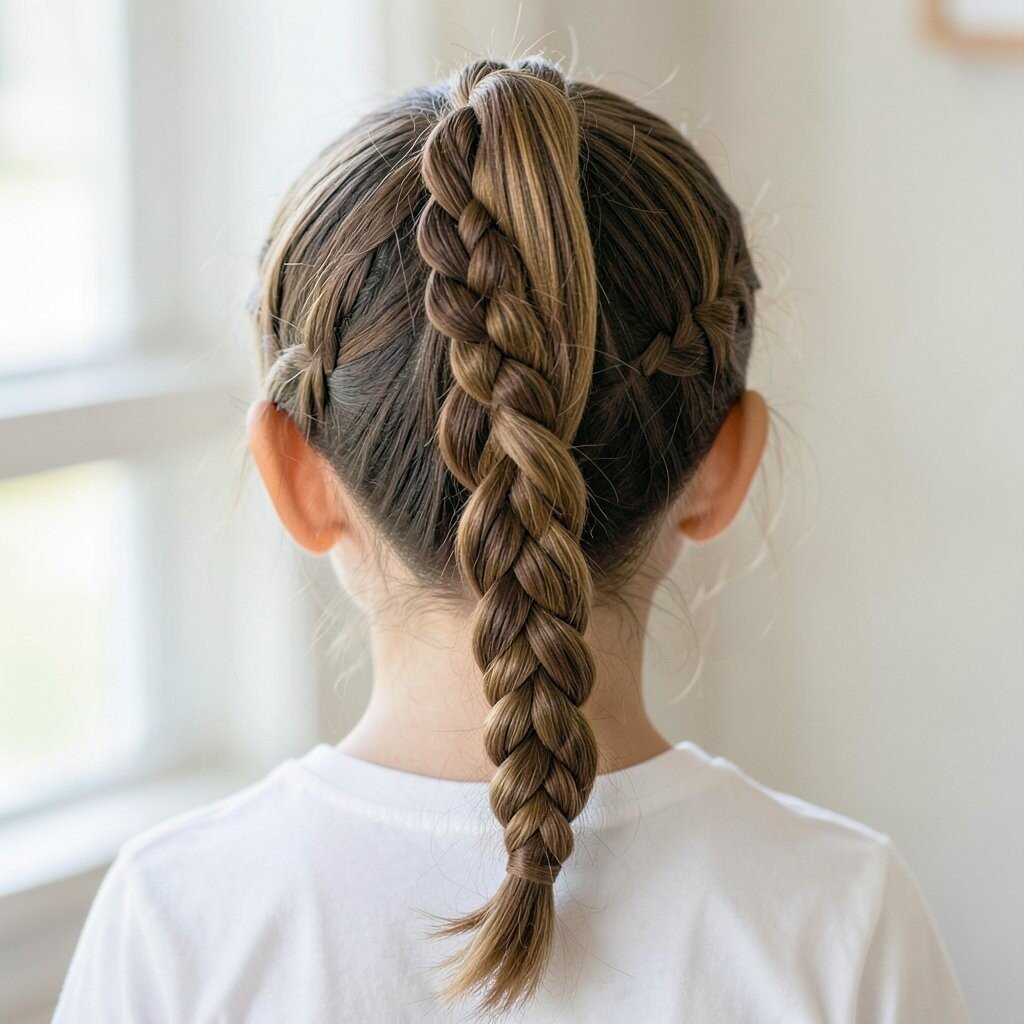
Make a high ponytail, then braid it into a single three-strand braid. Secure the end with a small elastic and lightly shake the braid for volume.
This is a timeless look that always feels school-ready. It’s also great for protecting hair from rubbing against backpacks and collars, which can help reduce frizz.
If you want a trendy twist, do the braid slightly looser and add a small clip near the top. For budget-friendly styling, elastics and bobby pins are usually all you need, so you can focus on technique and comfort.
14. Pigtails With Dutch Braids and Tiny Band Spacing
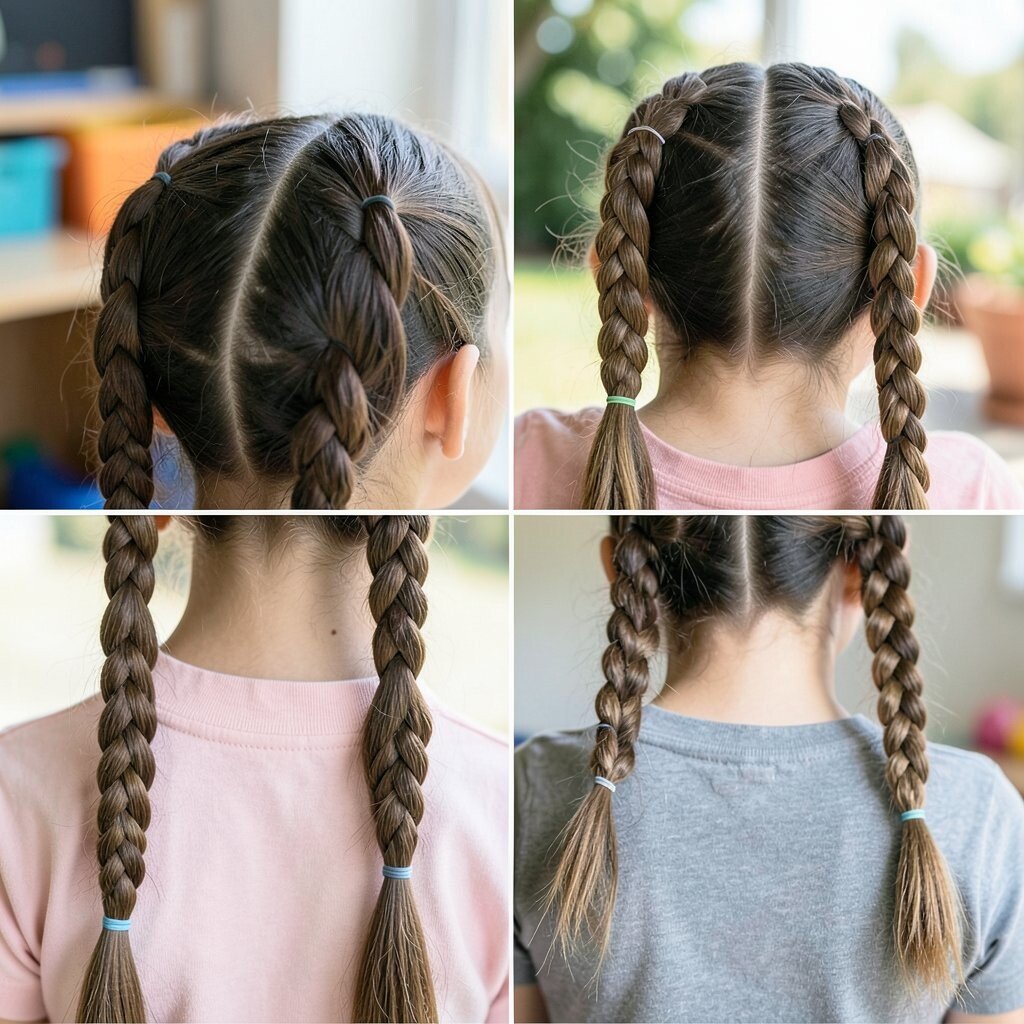
Part your hair into two pigtails and braid each one in a Dutch style. Add small elastics along the braid for spaced “bands” that look fun and neat.
Because Dutch braids sit raised, your braids will look bold and stand out in pictures. The tiny bands also help the braid stay tidy all day, even after lunch.
15. Low Twisted Bun With a Side Part
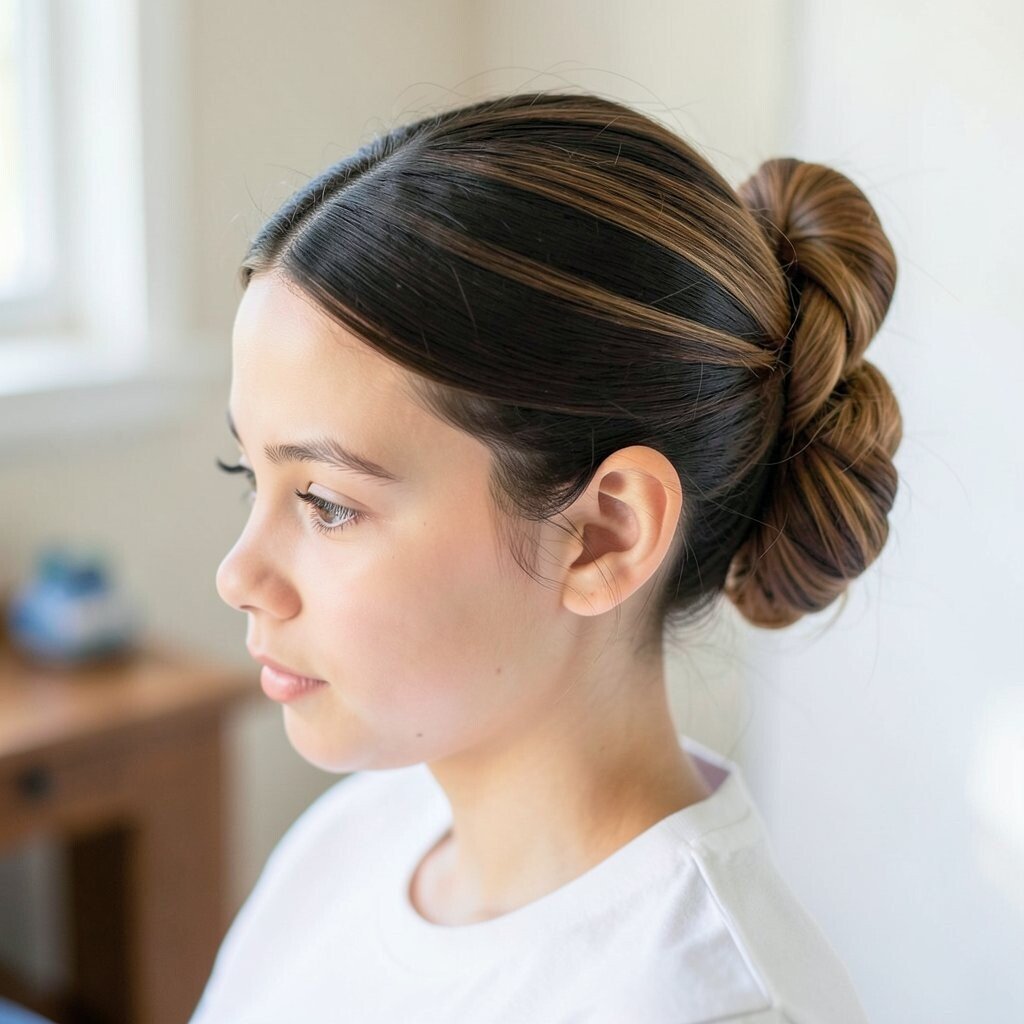
Use a side part and twist two sections of hair toward the back, then wrap them into a low bun. Pin the bun securely and smooth any bumps with a little water on your hands.
This is elegant without looking too formal, and it feels secure for school activities. The side part adds softness and can make your features pop nicely.
To personalize, tuck a single decorative bobby pin at the front of the bun. If your hair is fine, try adding a tiny bit of dry shampoo or texture spray so the twists hold their shape.
16. Tapered Crown Braids With a Middle Clip
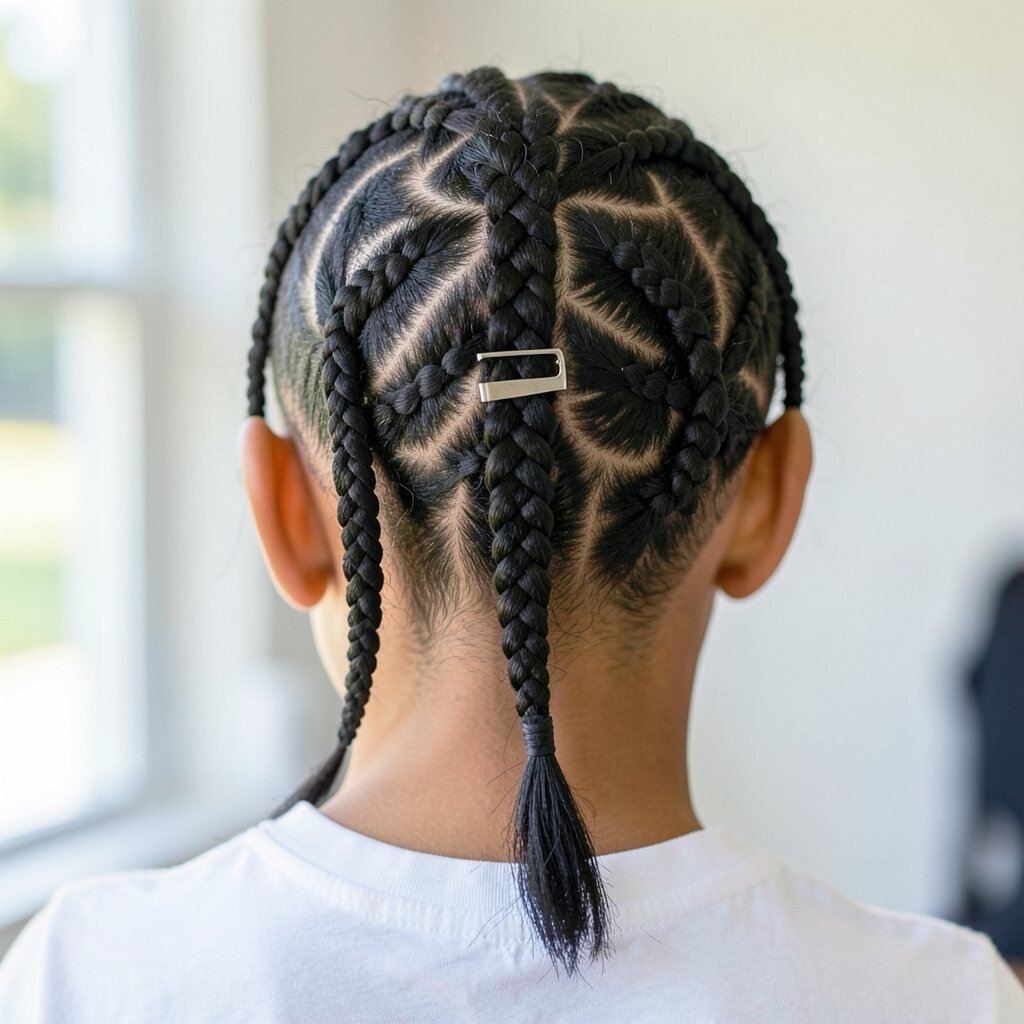
Start two braids near the front and bring them back, narrowing them as you go. When they meet, pin them with one small clip at the center.
The tapered shape looks unique and gives your head a nice silhouette. This also reduces the bulk at the sides, which can feel more comfortable for wearing a hoodie or backpack straps.
17. Sleek Ponytail With a Curly Base Volume Lift
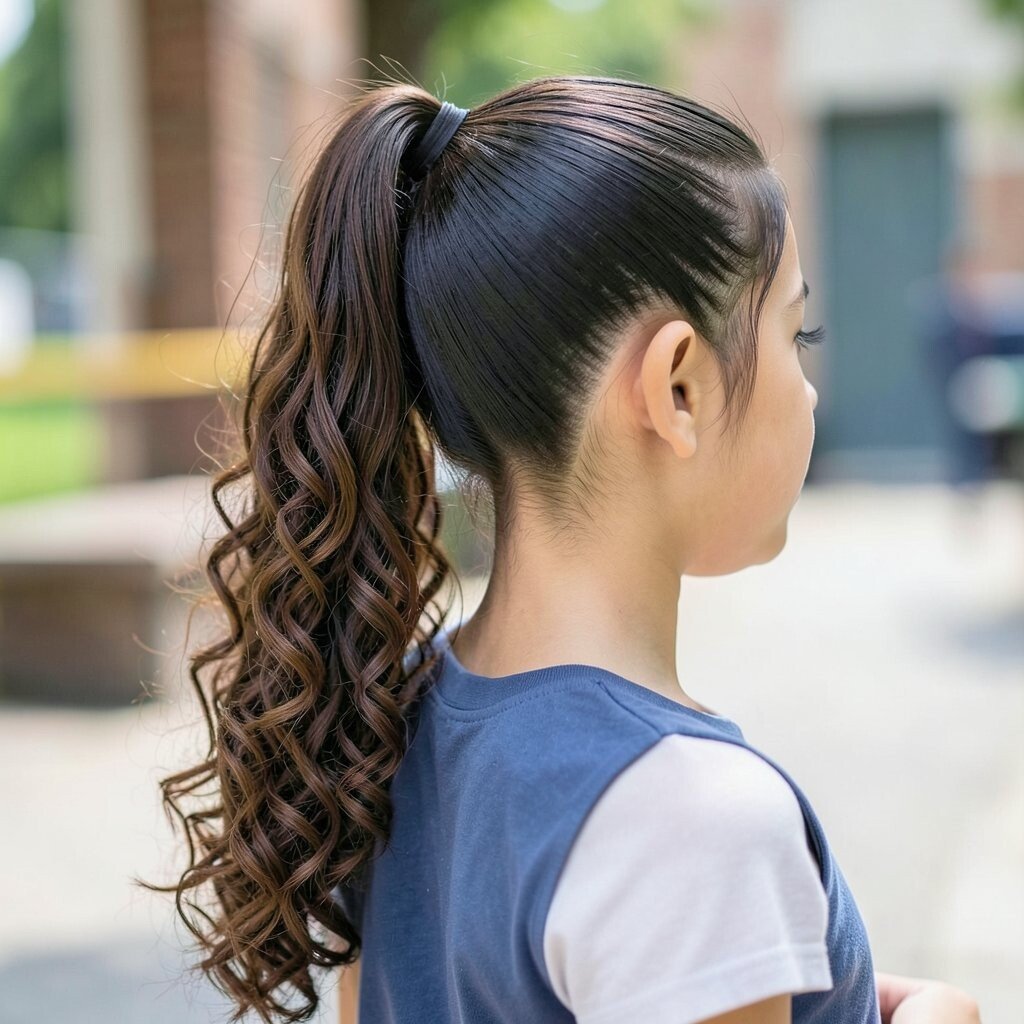
Secure hair into a ponytail, then flip or gently tease the top to create a smooth-but-lifted base. Tuck stray hairs back into the ponytail and finish with a light shine product.
This style gives the look of extra volume without needing complicated tools. It’s a great option for straighter hair that needs a little body for the first-day photo moment.
Personalize it by wrapping the elastic with a thin strand or a colored ribbon. If you’re keeping cost low, you can use a basic teasing comb and a flexible hairspray instead of buying expensive gadgets.
18. Rope Braid Headband Over Soft Waves
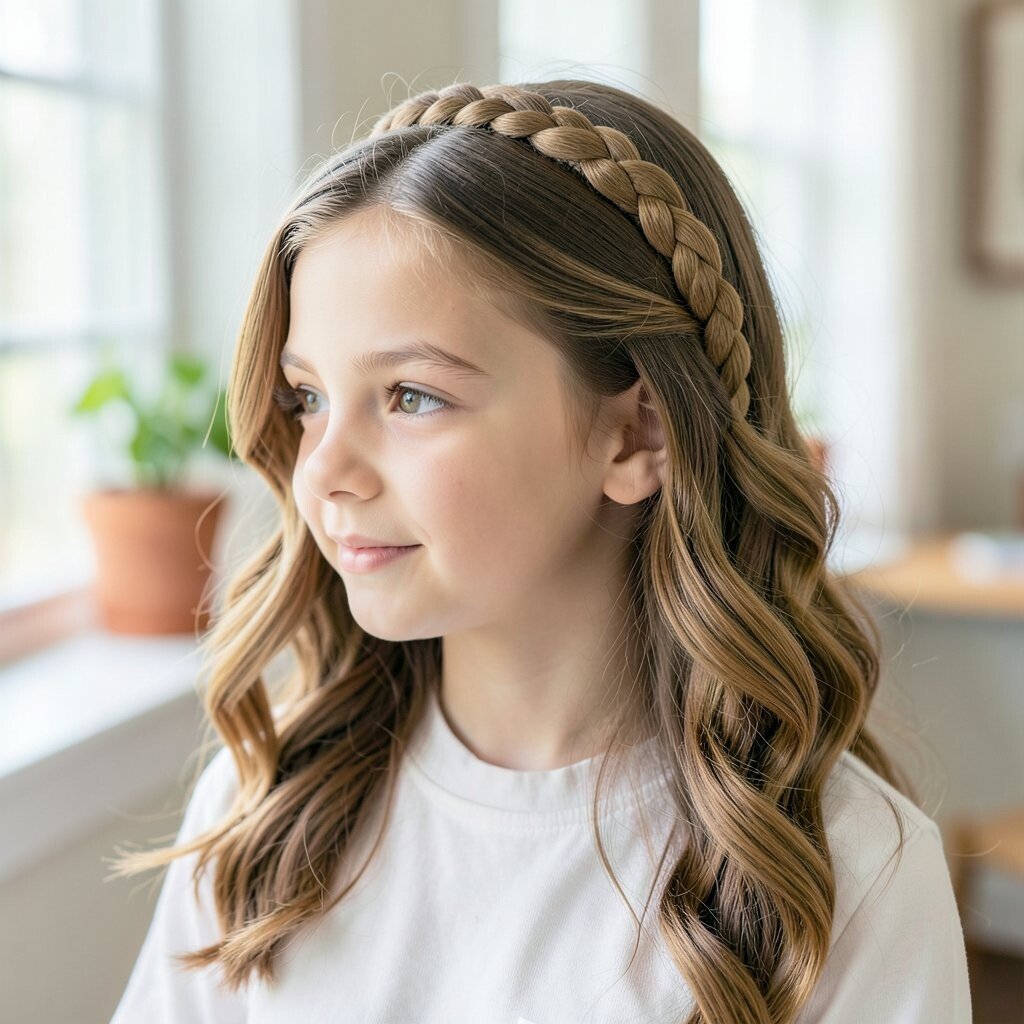
Make two rope twists on each side, then cross them over the top like a headband. Secure the ends at the back, leaving the rest of your hair wavy and free.
The headband braid frames your face and keeps hair from sliding forward. It’s also a current style that looks fancy but still feels easy enough for a school morning.
19. Half-Up Crown Ponytail With Micro Braids
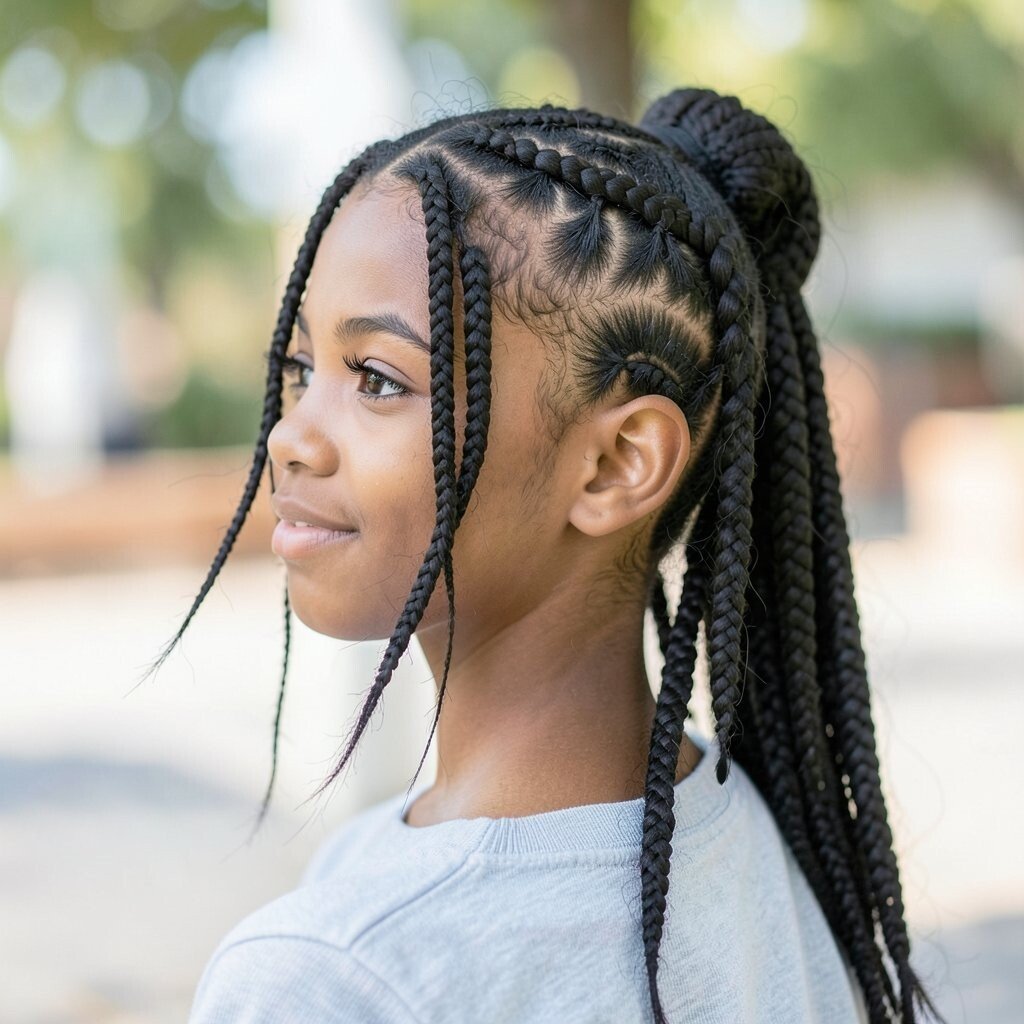
Take a small front section and braid it into micro braids, then pin them into a half-up crown. Combine that crown with a ponytail for the rest of your hair.
You get a fun mix of textures, with braids that look detailed while the ponytail keeps it practical. This is especially helpful if your hair is long and you need something secure for gym class.
For personalization, match braid elastics to your hair color so the focus stays on the shape. If your hair slips out easily, spritz the crown area with water or a light setting mist before you pin.
20. Braided Bangs With a Classic Side Part
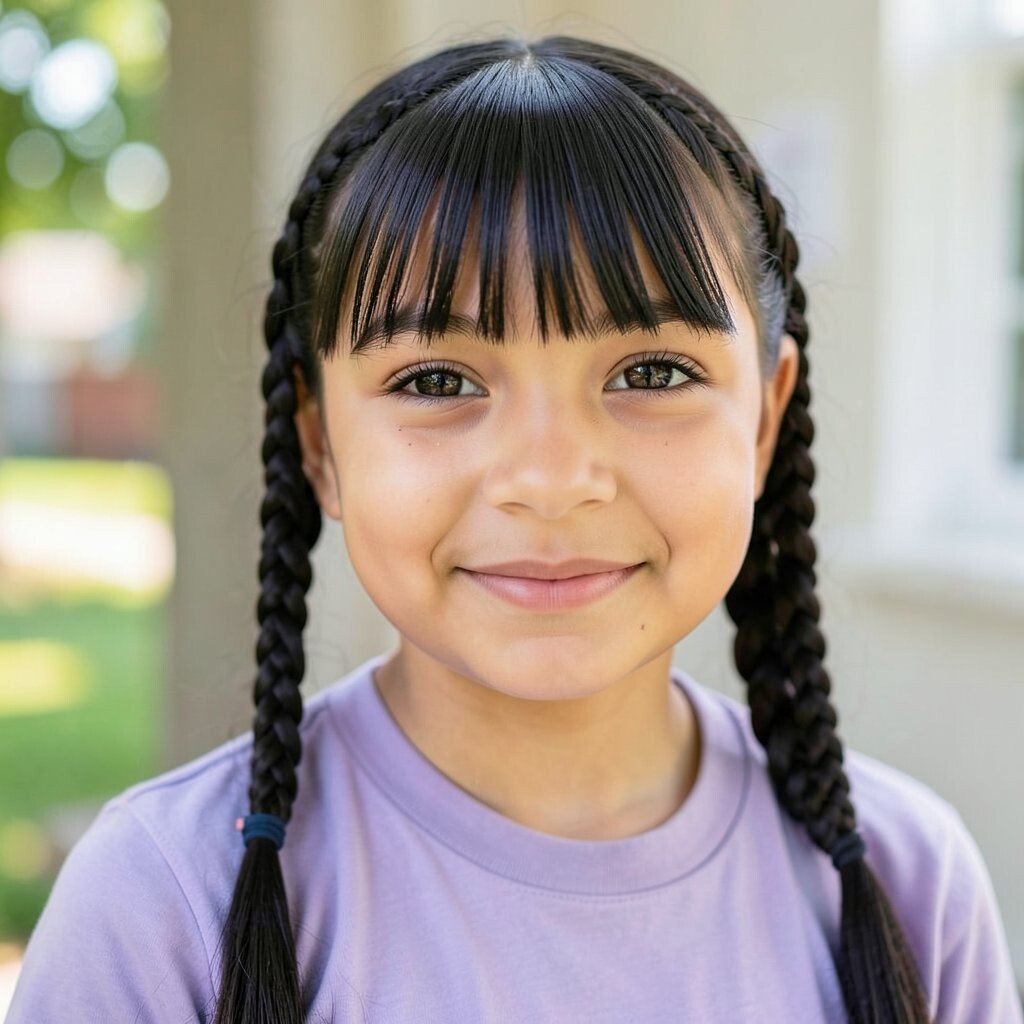
Create a side part and braid a small section along your bangs area. Pin the braid to the side so your fringe stays in place.
This gives a neat, charming look without needing to braid all your hair. It’s also a smart way to tame flyaways at the front, which can be the toughest part of the morning routine.
21. High Ponytail With a Bubble Border and Ribbon End
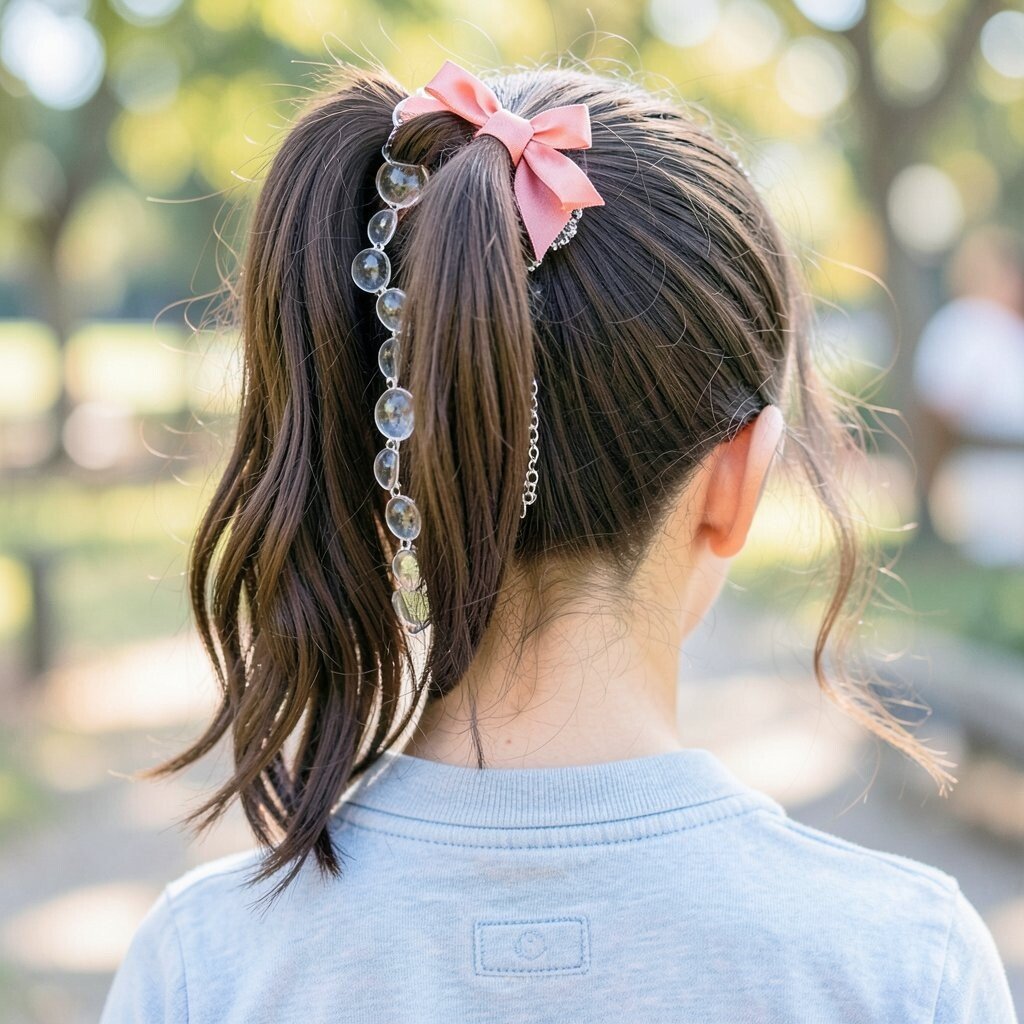
Start with a high ponytail, then add bubble bands down the length. Finish the ends with a ribbon wrap instead of a plain elastic knot.
The bubbles make your ponytail look playful and photo-ready, while the ribbon adds a special touch. It’s easy to adjust too, because you can space the bubbles closer for a fuller look or farther apart for a lighter feel.
To personalize, pick ribbon colors based on your outfit or your favorite school-day mood. For cost considerations, you can reuse ribbon from gifts or craft stores and save money by using what you already have.
22. Low Wreath Braid With a Ribbon Keeper
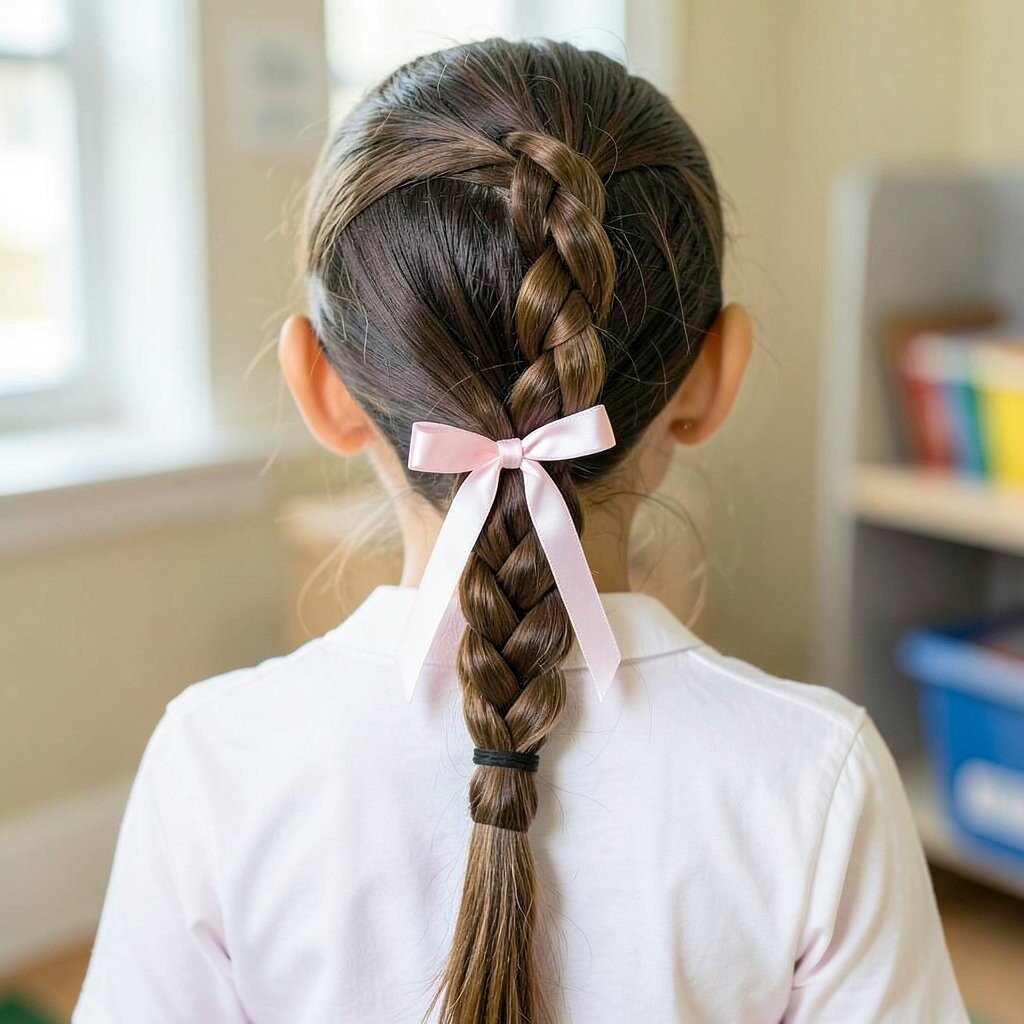
Braid your hair into a low braid, then coil it in a wreath shape around the back of your head. Add a small ribbon as a “keeper” to hold the coil steady while you pin it.
This style looks like a soft wreath and feels unique compared to the usual ponytail. It also helps protect your hair ends all day, which is great for reducing knots when you get home.
If you want a more modern vibe, keep the wreath slightly looser and flatter instead of tight and round. For personalization, use a ribbon in your favorite color, and consider a light hold spray so it stays fresh through the school day.