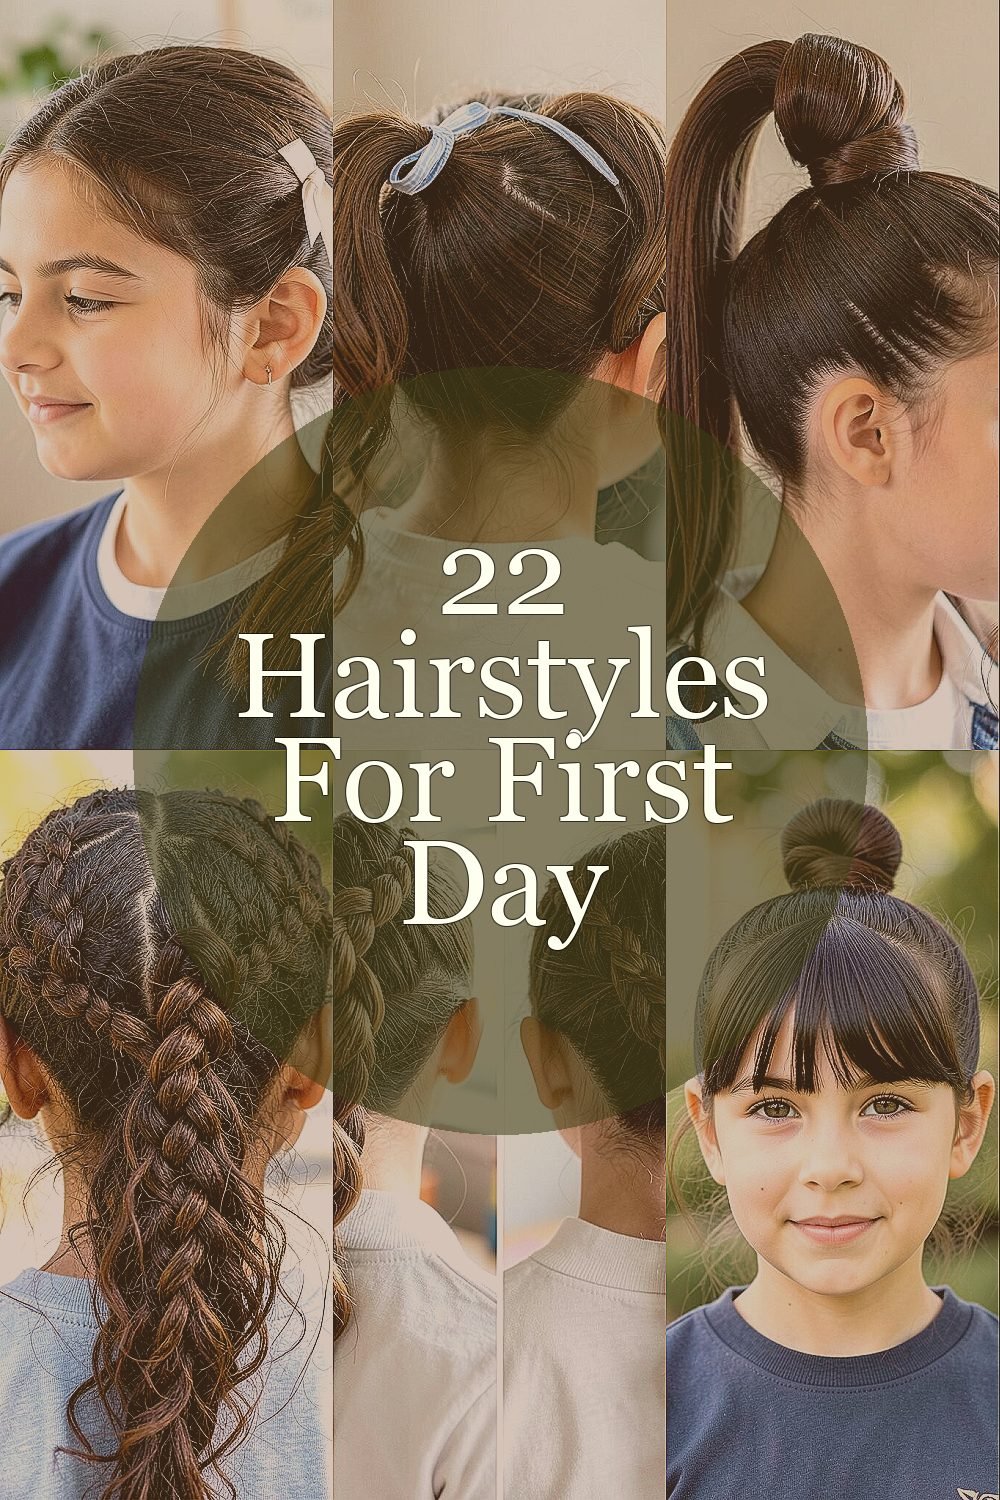
The first day should feel exciting, not stressful. A great hairstyle can make you walk in with confidence and comfy energy.
1. Soft Half-Up Ribbon Twist
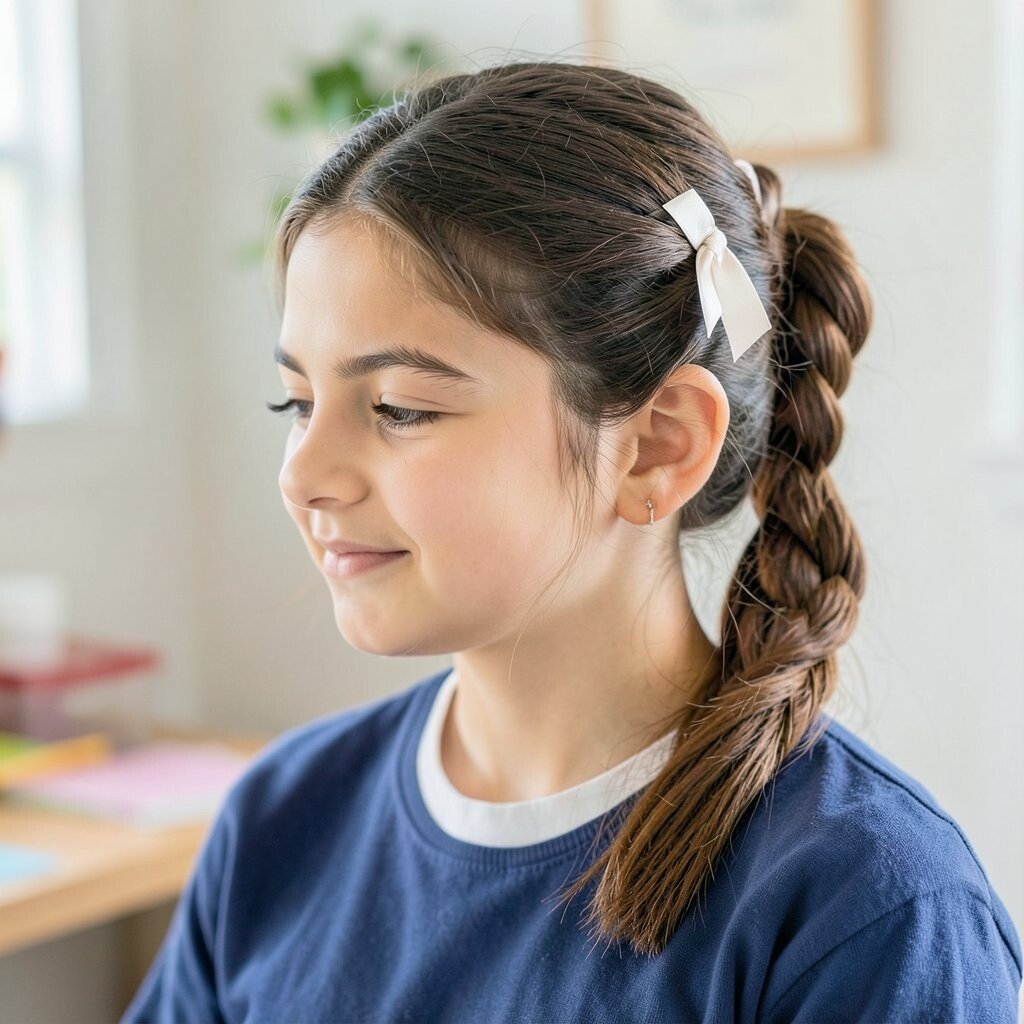
Start by parting your hair slightly off-center, then gather the top half. Twist each side gently toward the middle and secure with a small elastic, leaving the rest to fall smooth.
For a pretty finish, weave a satin ribbon through the elastic so it looks like a tiny bow without being too bulky. This style frames your face and keeps hair out of your eyes during class. If your hair is fine, use a light mousse before you twist so it holds longer. For thick hair, use two smaller elastics instead of one big one so the twist stays flat and neat.
2. Classic Bubble Ponytail With Mini Ties
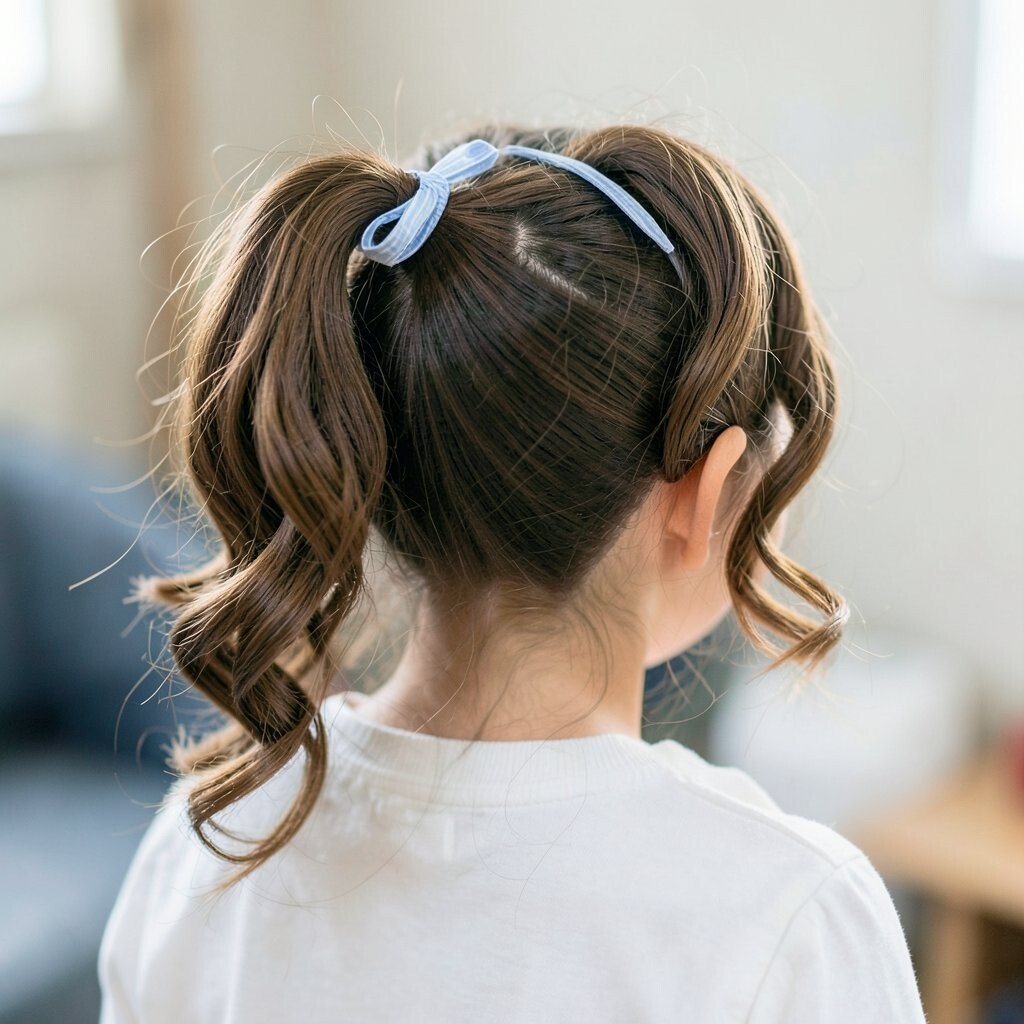
Gather your hair into a mid-height ponytail and secure it with a strong elastic. Then add several smaller elastics down the ponytail, spacing them evenly to form bubbles.
The result looks playful and polished at the same time. It also helps reduce tangles because hair is held in sections.
Try using one matching elastic color for a clean look, or mix two shades for a fun first-day vibe. If you have layers, smooth the top with a touch of leave-in conditioner so the bubbles stay tidy. For cost-friendly styling, reuse elastics you already have and just add a couple more small ones. This look matches the current trend of “cute structure,” where hair feels organized but still cheerful.
3. Sleek High Pony With A Twisted Crown
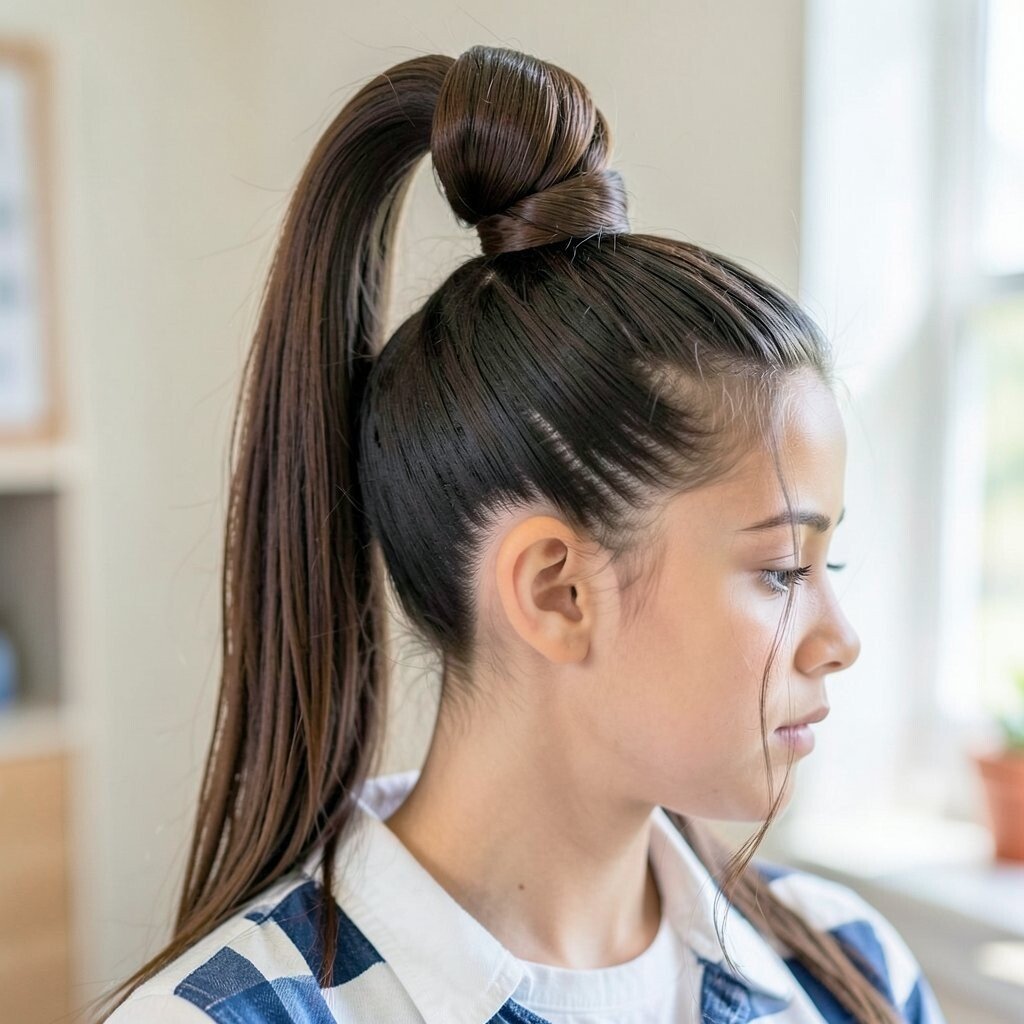
Brush your hair tight at the roots and make a high ponytail. Then take a thin strand from the ponytail base and twist it around the elastic to cover it.
To create a twisted crown, add two tiny twists at the front and tuck them under the ponytail. This style looks sharp, helps hair stay off your face, and makes even simple outfits feel upgraded.
If your hair is wavy, lightly blow-dry the top so the crown looks smooth. For personalization, use a sparkly clip near the twist point or switch to a velvet-covered tie. A good smoothing serum is usually worth the money because it can make your hair shine without needing heat every day. Keep flyaways down by tapping a small amount of gel onto a toothbrush and gently brushing edges.
4. Braided Side Pony With Loose Texture
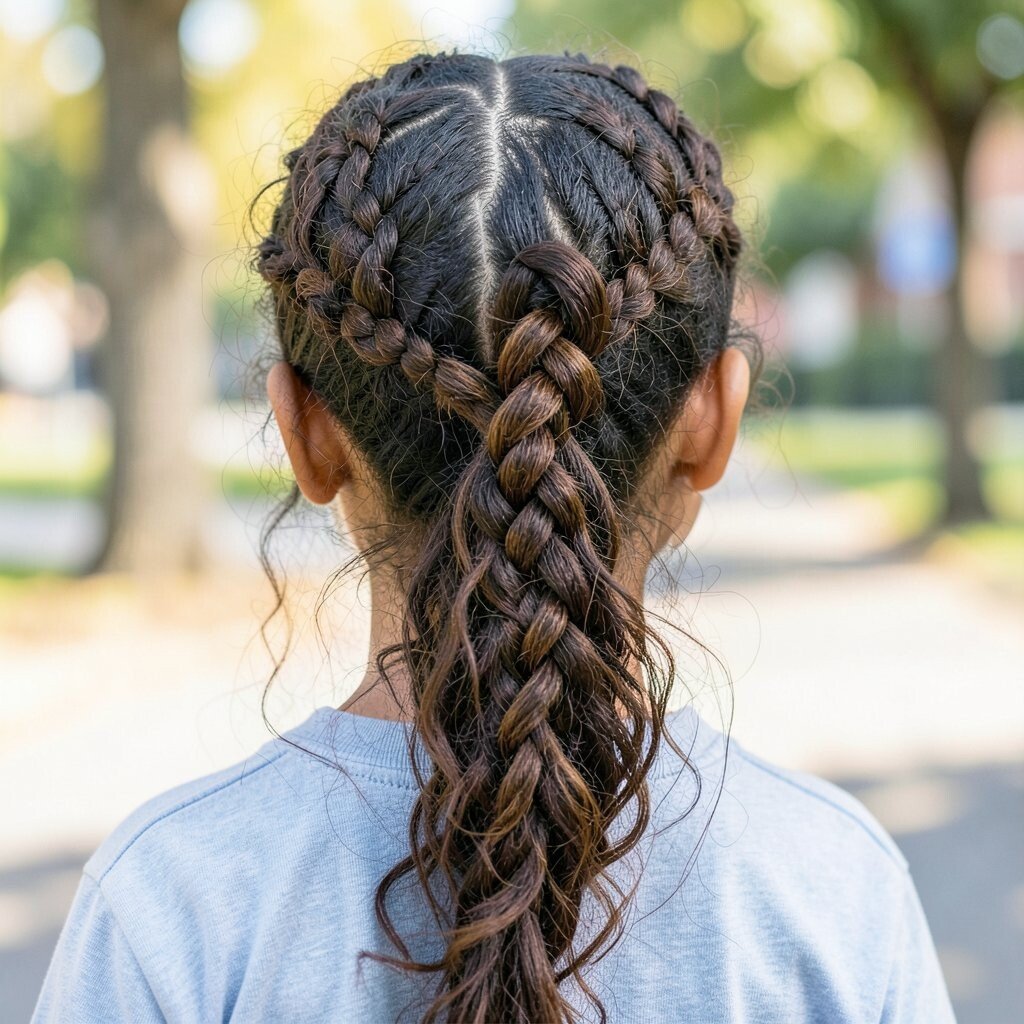
Pull your hair into a side ponytail and braid it loosely from the base. Leave a few soft strands out in the front so the style looks relaxed, not stiff.
This is great for people who want movement, since the braid still sways while staying secure. To keep it school-friendly, tighten the braid near the top and loosen it toward the bottom for a natural look. If your hair is thick, use a wider braid so it doesn’t feel too tight. Add a small hair cuff at the braid end for a trendy touch that still feels practical.
5. Two-Loop Faux Waterfall Braid
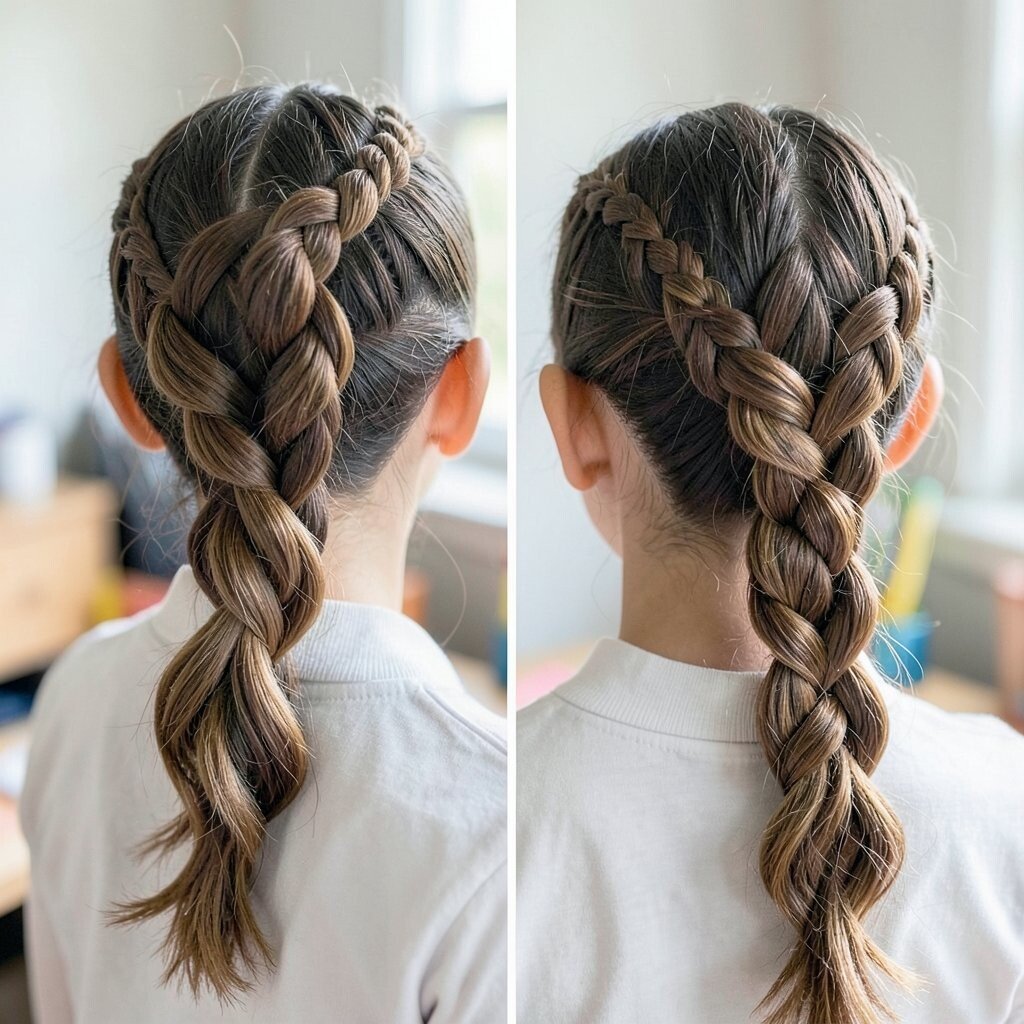
Create a side part, then take a small section near your temple. Start a gentle braid that moves backward, letting two sections “fall” like a waterfall.
When you reach the back, secure the braid with a hidden elastic and tuck the ends under. This hairstyle looks artsy and pretty, and it also helps you keep hair controlled without making it fully tight. For a personal twist, match the hidden elastic to your hair color so it feels seamless.
To make it easier, use a detangling spray and smooth the hair as you braid. This can be budget-friendly because you only need elastics and maybe a small clip for holding. The waterfall vibe is popular right now because it adds softness even when your day gets busy. If your hair is short, try smaller sections and pin the ends with bobby pins in an “X” shape so they stay put.
6. Top Knot With Swoop Bangs
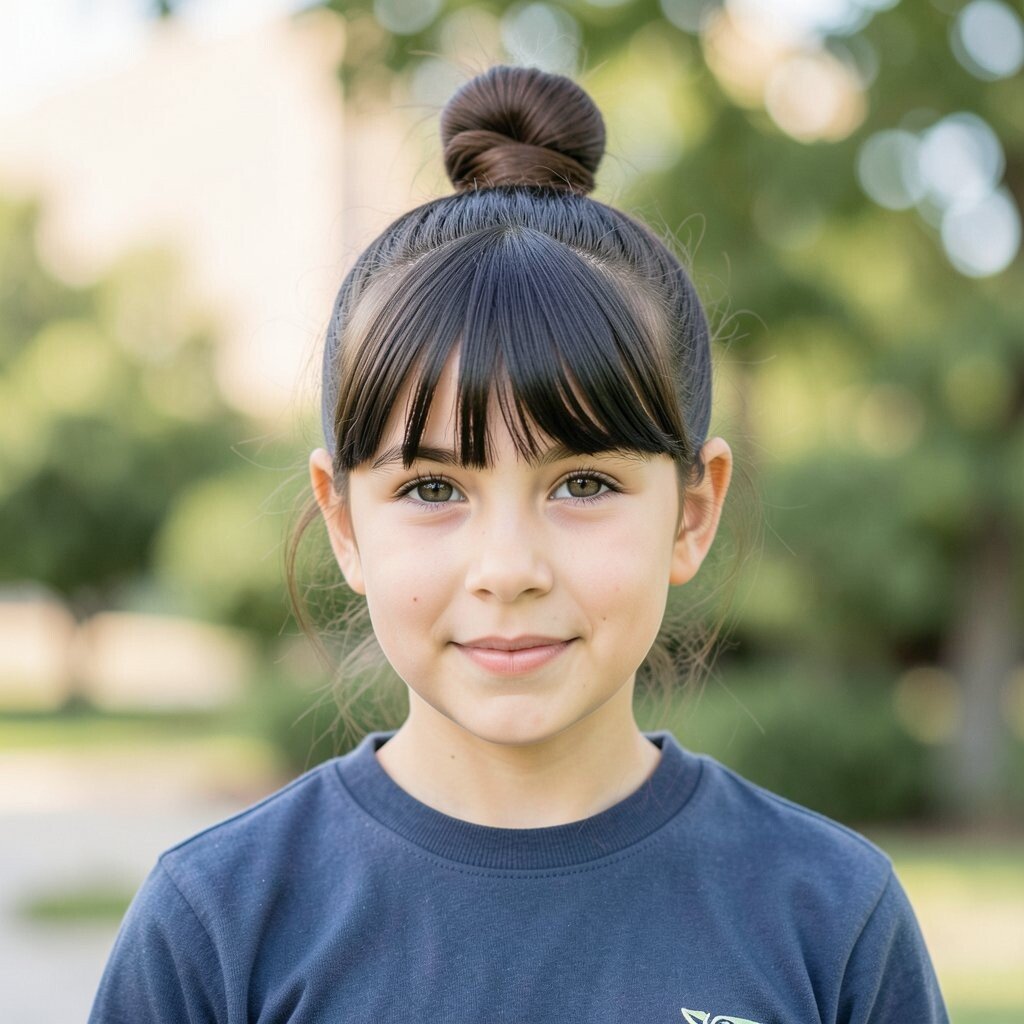
Gather your hair into a high top knot and secure it with an elastic, then wrap a bun holder if you have one. Keep the front section loose and shape it into a swoop with your fingers.
A top knot keeps everything off your neck, which feels awesome when you’re moving around. For personalization, add a headband or a small scarf tied around the base for a pop of color. If your hair is slippery, use a tiny bit of dry shampoo or texturizing spray at the roots for grip. This look often trends because it’s fast, tidy, and still looks styled even on rushed mornings.
7. Low Braided Bun With A Center Part
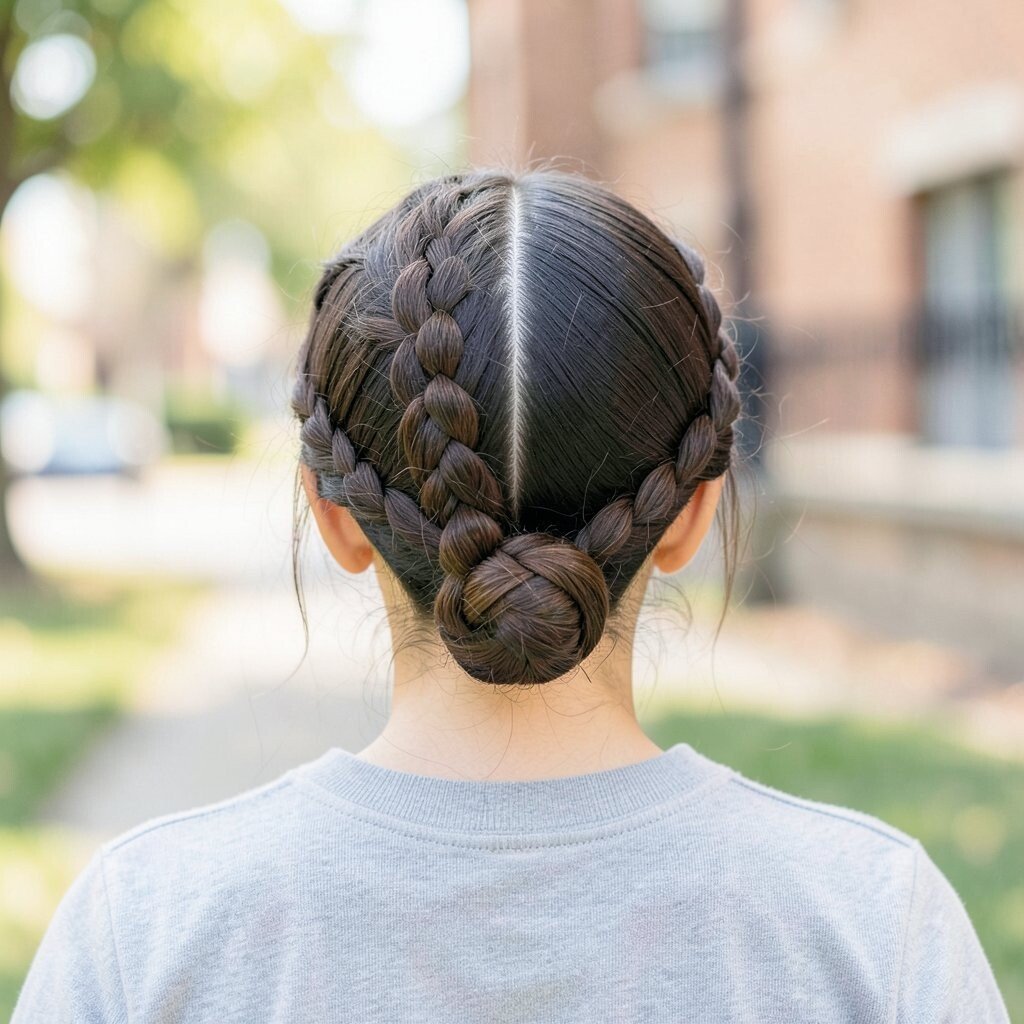
Part your hair in the center, then braid each side into a loose three-strand braid. Bring both braids together at the back and wrap them into a low bun, securing with pins.
This style is elegant and steady, which helps during long school days. It also keeps hair from tangling and makes the back of your hairstyle look just as neat as the front. Use a little hair oil on the outer braid to make it shine without looking greasy. If you want it unique, choose bobby pins with a color you love so the bun looks like it has little details.
8. Half-Up Twisted Clips With Side Polished Ends
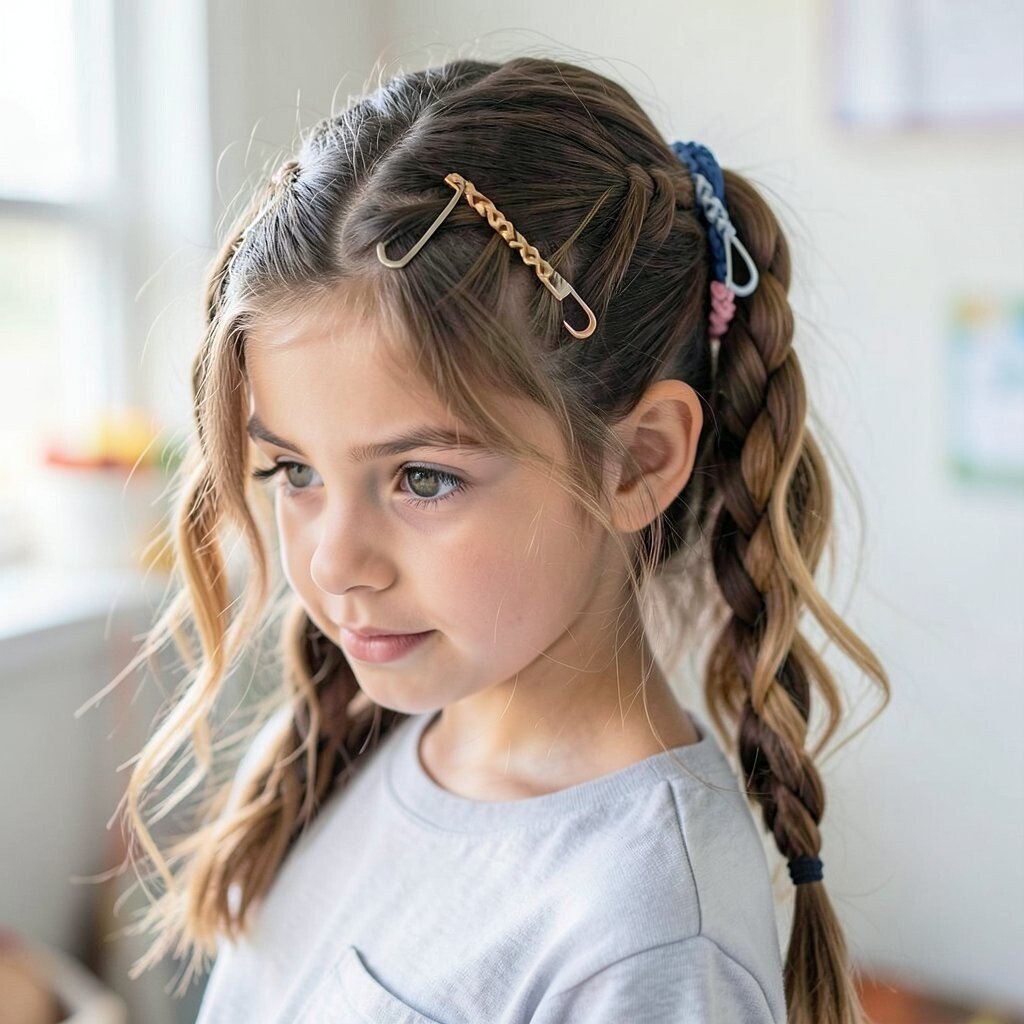
Take two small front sections from either side and twist them toward the back. Clip them together using a decorative claw clip or two bobby pins.
Leave the rest of your hair down and lightly curl or wave the ends for a soft, friendly look. The half-up hold is great because it keeps your face clear while still showing your hair’s length. If you have straight hair, run a flat iron only through the ends so you don’t end up with a very stiff top. For cost considerations, you can get the same effect using inexpensive metal clips if you choose ones with a cute shape.
9. Braided Crown Ponytail For Busy Mornings
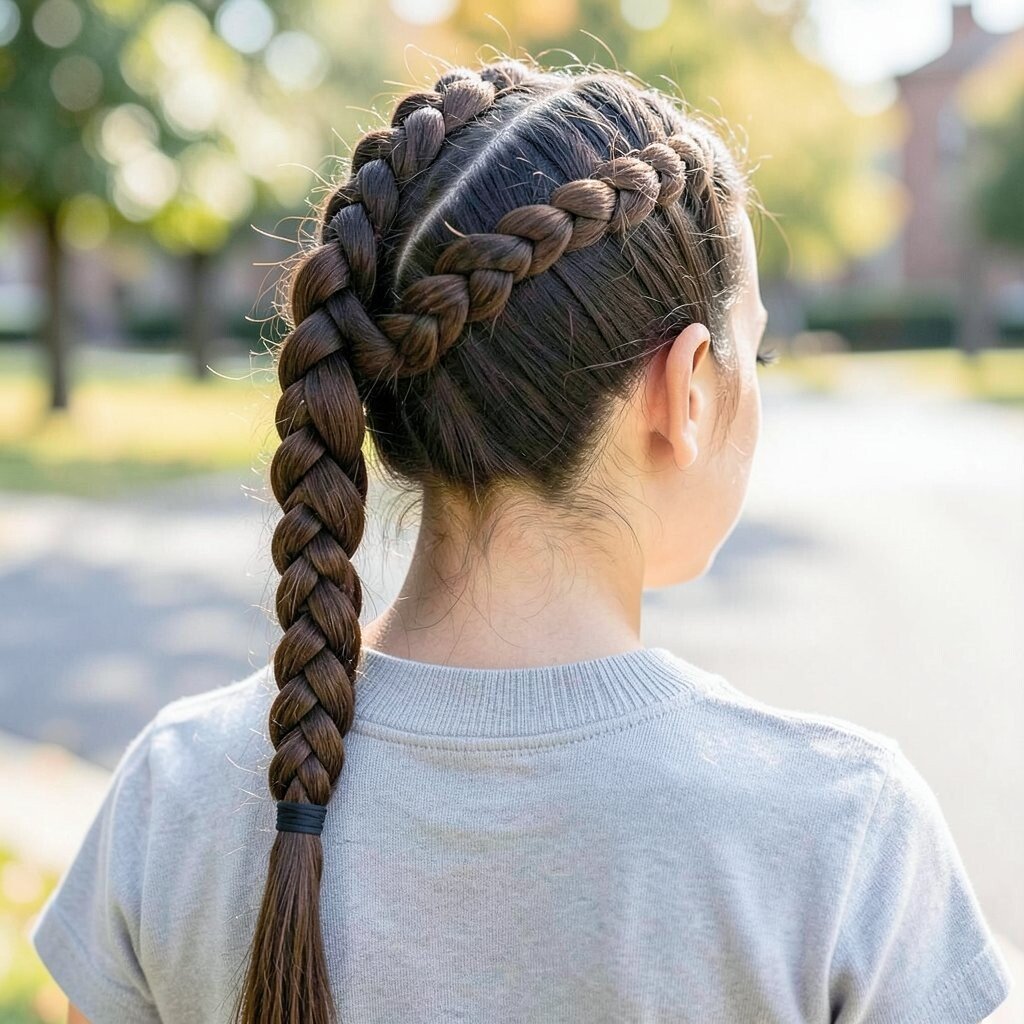
Start by creating a crown braid around the top of your head, working from one side to the other. Secure the braid at the back, then gather the rest of your hair into a ponytail.
This looks like a mini hairstyle “upgrade” without needing tons of products. It also keeps bangs and flyaways controlled because the crown braid holds everything in place. To personalize, use a skinny ribbon tied where the ponytail starts. For thick hair, use slightly tighter sections at the front so the crown sits flatter. If you want it to feel current, keep the ponytail sleek and shiny, since smooth ponytails are trending for first-day looks.
10. Messy Bun With Tiny Braids Around The Face
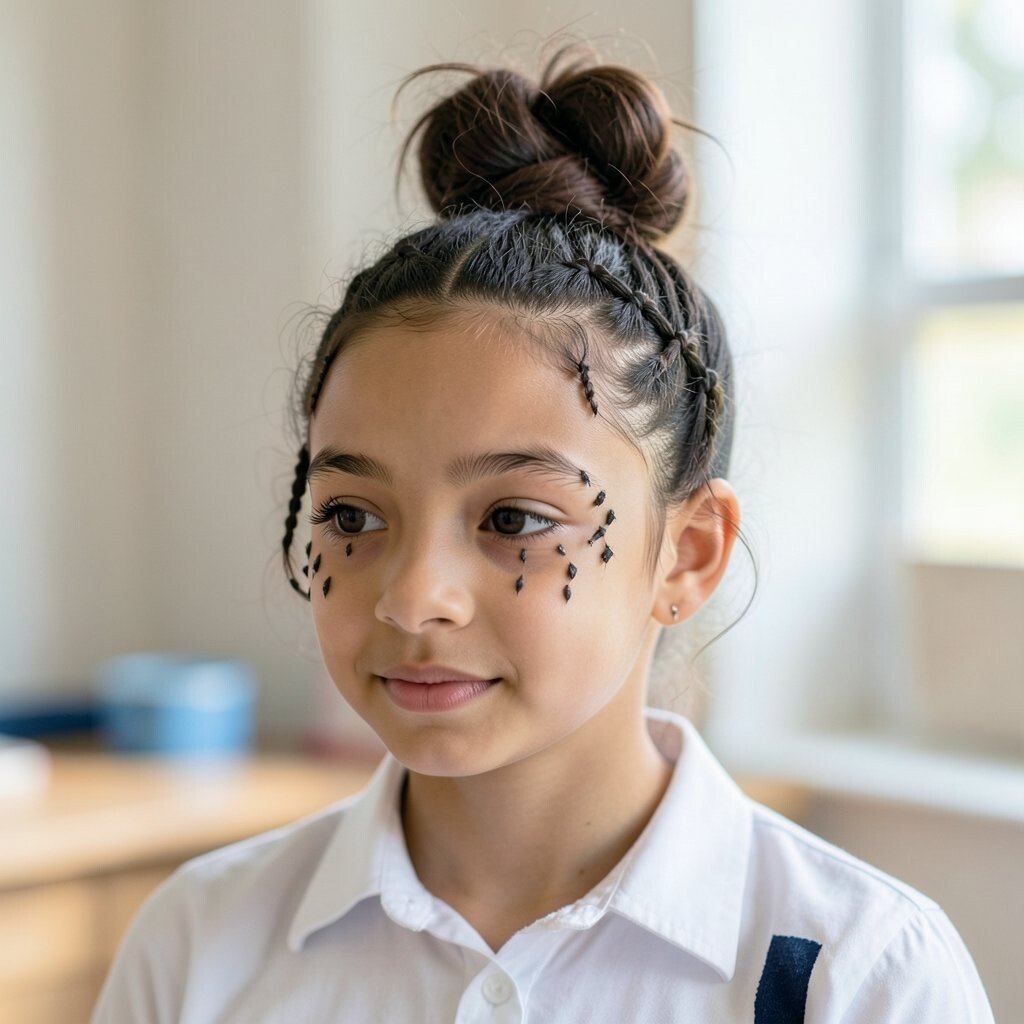
Pull your hair into a loose bun at the back and let a few strands fall naturally. Before you secure the bun, add two tiny braids near your temples and wrap them into the updo.
This style feels trendy and carefree while still looking intentional. It’s perfect if your hair is naturally wavy and you want to show off texture instead of fighting it. Use a light holding spray so the bun stays put without getting crunchy. For personalization, add small beads or a small hair charm to one braid, but keep it secure for comfort in class.
11. Space Buns With Soft Flip Ends
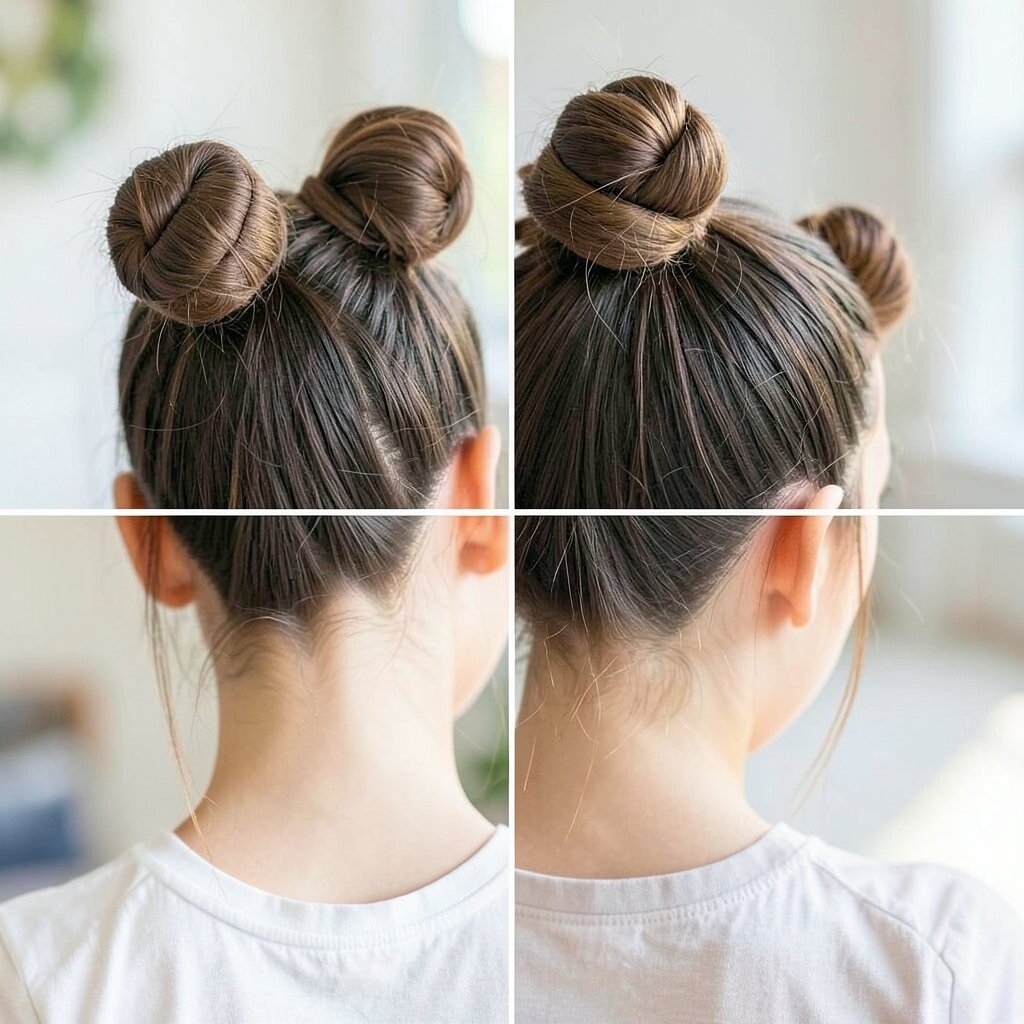
Divide your hair into two sections and create two small buns high on each side. Smooth the edges, then flip the ends outward with a quick twist or gentle curl.
Space buns feel playful and confident, and they’re also great at keeping your hair off your face. If your hair is fine, use a teasing comb at the crown area to give the buns more shape. For a personal touch, choose elastics that match your outfit or add a small sparkle clip to one side. This style fits current trends because it blends fun with structure, especially when the buns are neatly formed.
12. French Braid Shoulder-Sweep
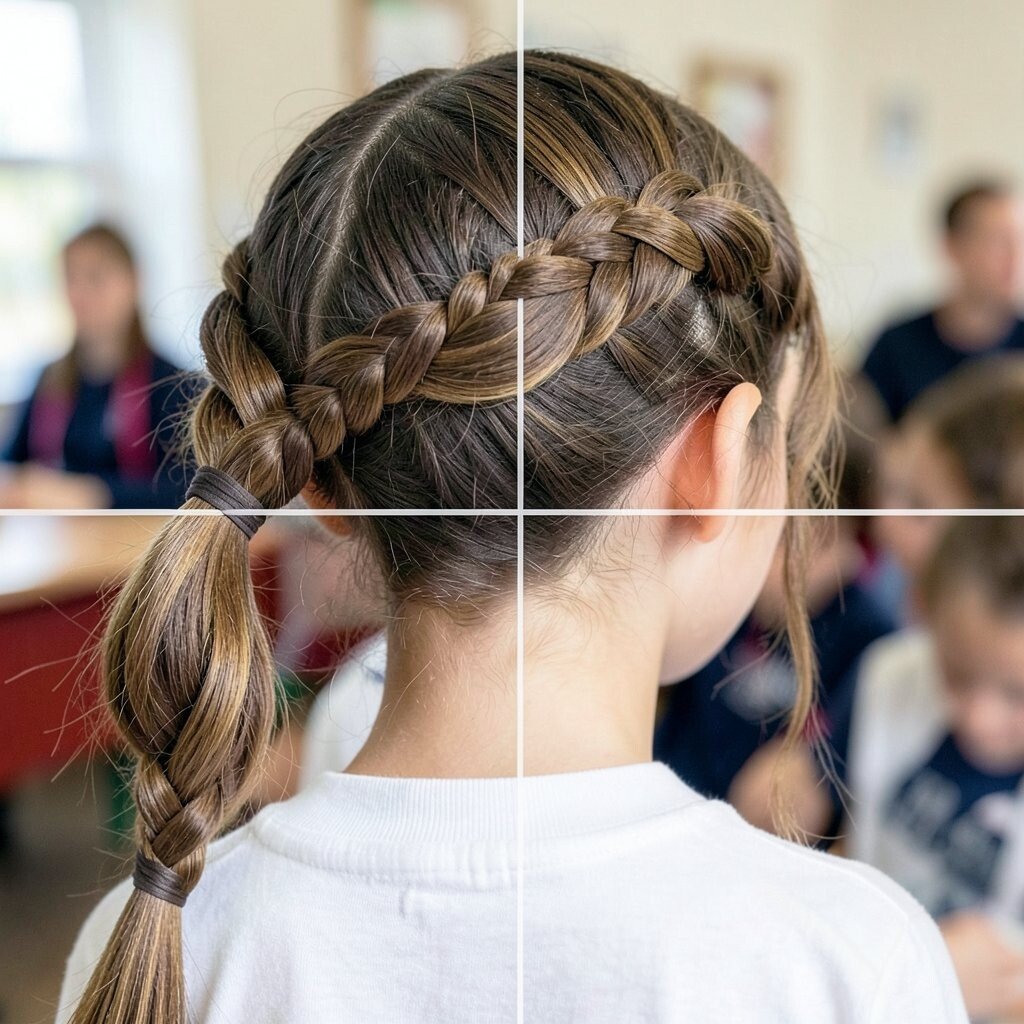
Make a deep side part, then braid close to the scalp like a classic French braid. When you run out of new hair, continue into a regular braid and let it fall over one shoulder.
This gives you a polished look that still feels relaxed. The shoulder-sweep braid also keeps your hair from sticking to your neck, which is helpful during warm days. For personalization, stop the braid a little above the very ends and tuck the last portion under with pins to make it feel more custom. If your hair is slippery, use a small amount of styling cream so the braid looks full and not too flat.
13. Sleek Middle Part With Hidden Bobby Pin Wave
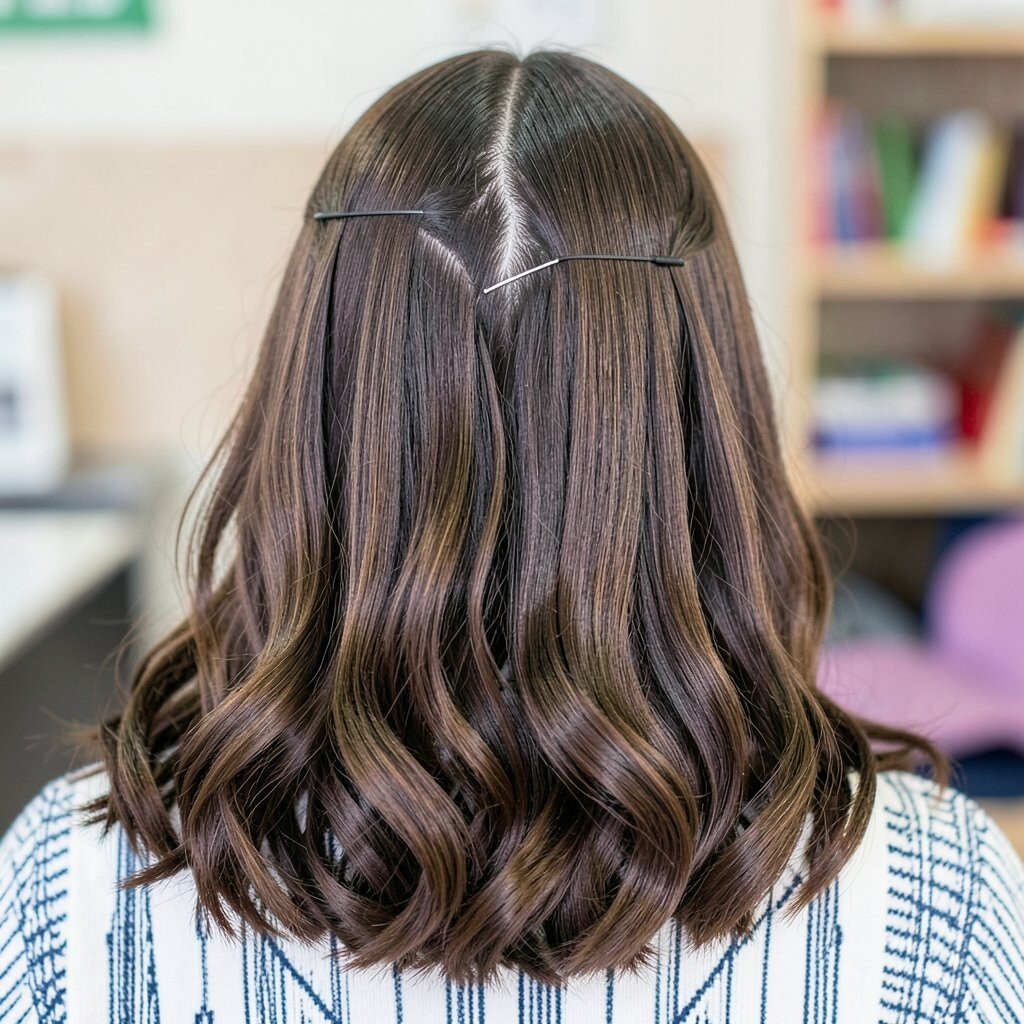
Start with a clean middle part and brush hair straight down. Take a small section near one side and create a gentle wave by pinching and smoothing it in place.
Use bobby pins close to the scalp so the wave looks hidden but noticeable when you move your head. This style is simple, but it makes your hair look styled and intentional. It also keeps flyaways down, which is a big help in windy hallways. If you want personalization, place the wave on your dominant side so it frames your face the way you like.
14. Rope Braid With A Side Clip
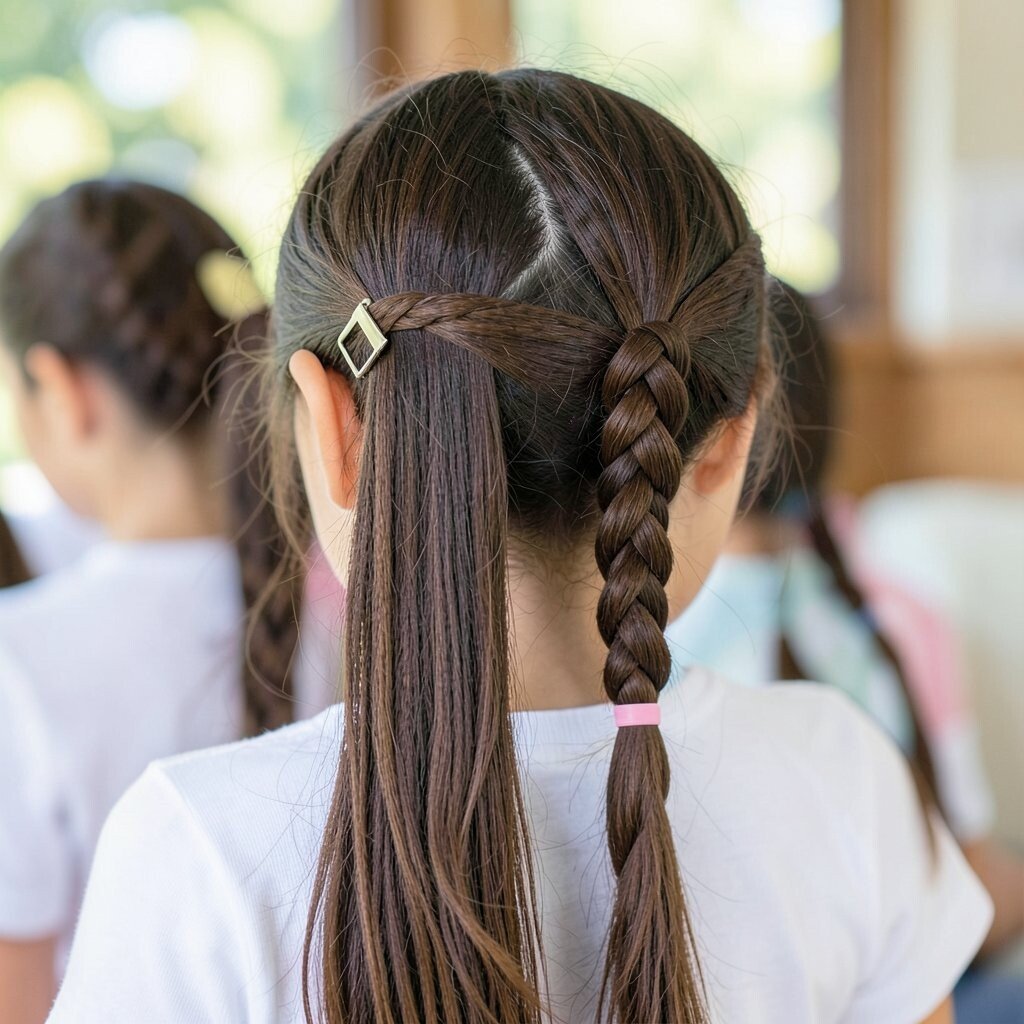
Gather hair into a side ponytail and split it into two equal sections. Twist each section in the same direction, then cross them over each other like a rope and secure the end.
The rope braid looks modern and tidy, and it holds well for school. If you want more volume, loosen the braid slightly after you secure it so it looks wider and softer. For cost considerations, this can be done with just elastics and a clip, no expensive tools required. To personalize, pick a side clip with a simple design, like pearls or a tiny flower, so it feels special without being over the top.
15. Curly Puff With Scarves-Optional Headband
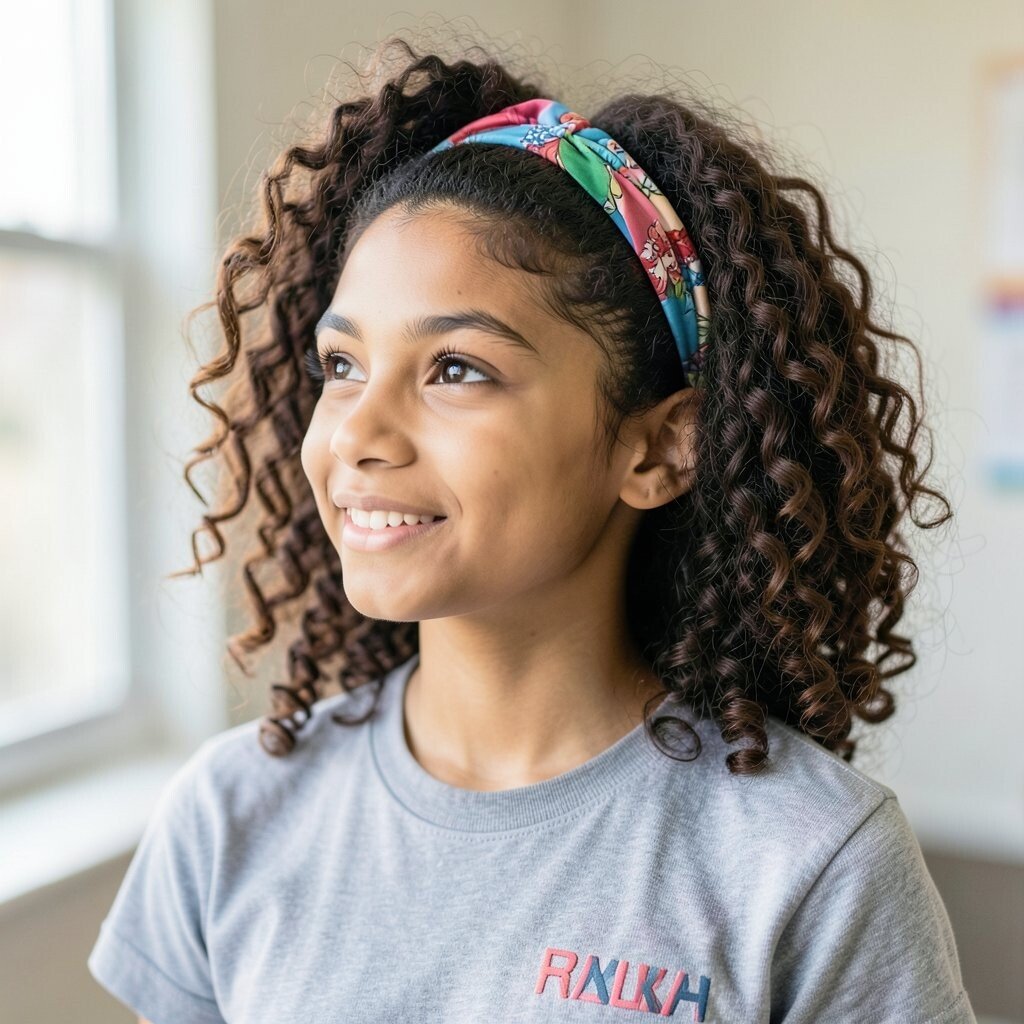
For natural curls or waves, gather hair into a puff near the top or mid-level. Fluff gently at the roots so it looks bouncy, then add a headband to keep shape.
This is a friendly option when you want volume and comfort without worrying about tight braids. The headband also helps prevent curls from falling into your eyes. If your hair is straight, you can add quick curls at the ends or use heatless rollers the night before. For personalization, use a scarf headband in a color that matches your backpack, since small details can make your whole look feel coordinated.
16. Classic Crossover Braids With Back Tuck
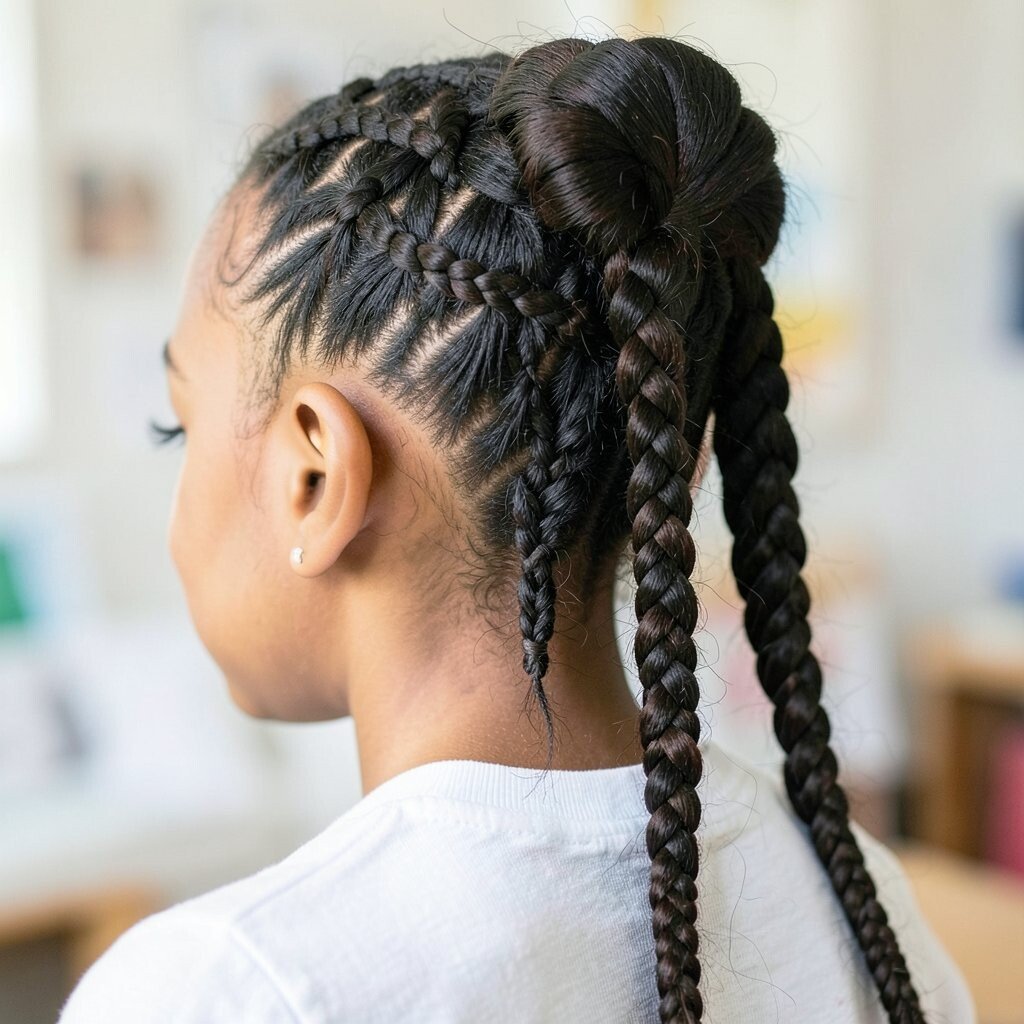
Start with two sections at the front, cross them toward the back, and secure with pins. Add more hair into the crossover as you move, creating a soft braided pattern across the head.
When you reach the back, tuck the ends under and secure again so everything feels neat. This style is great for keeping hair stable during the school day, especially if you like your hair off your face. To personalize, change the angle of your crossover so it tilts slightly and looks custom. For budget, bobby pins are cheap and easy to find, and they make a big difference in staying power. This kind of braided crossover also fits current trends because it looks intricate but doesn’t require a ton of time.
17. Bubble Braided Crown With Micro Elastics
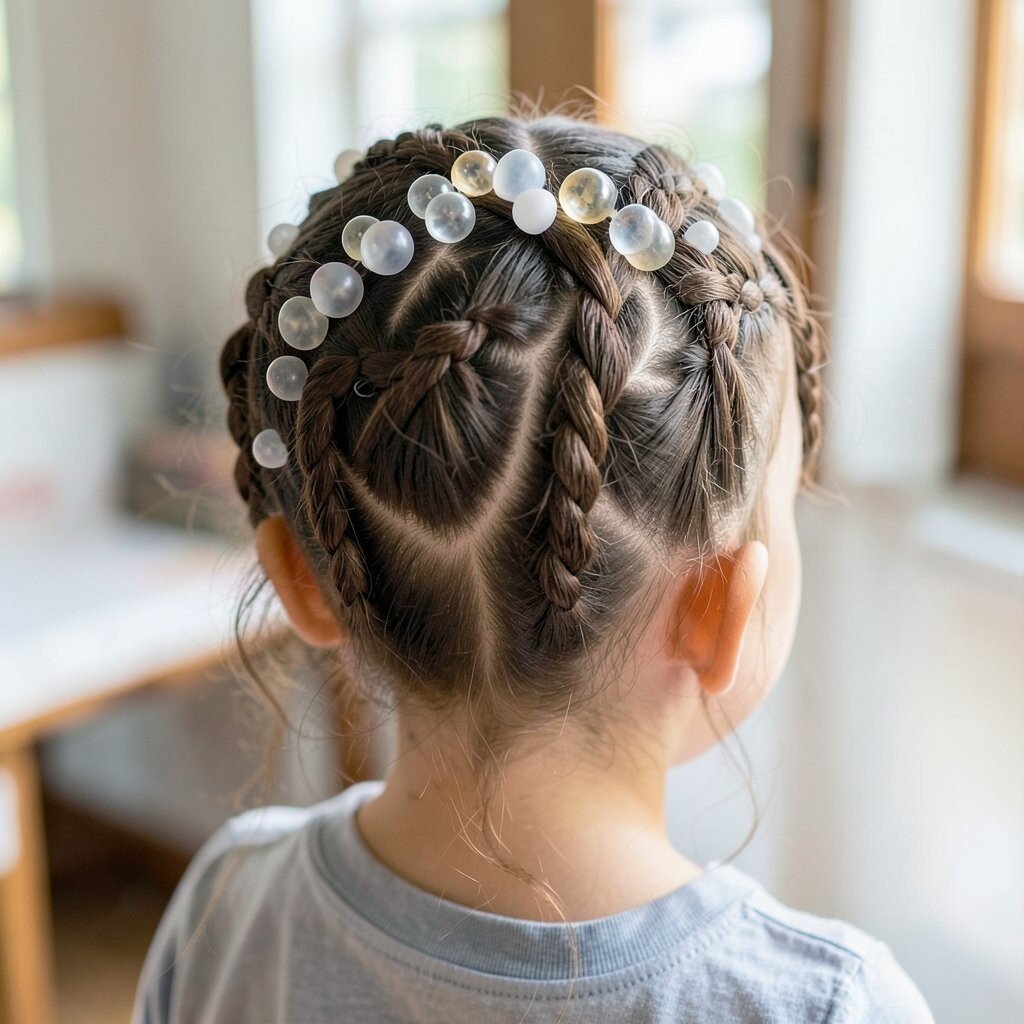
Create a braid crown across the top, then use micro elastics to section the braid into “bubbles.” Gently pull each bubble outward so it looks full and rounded.
The style looks detailed and fun, and it works especially well for hair that wants to puff up. It also gives your hairstyle staying power because the bubbles keep sections from slipping apart. If your hair is thin, braid slightly tighter and use fewer bubbles so each section looks defined. For personalization, choose elastics in a color you like, like soft pink or metallic silver, to make the braid feel special.
18. Straight Hair With Pin-Straight Side Accent
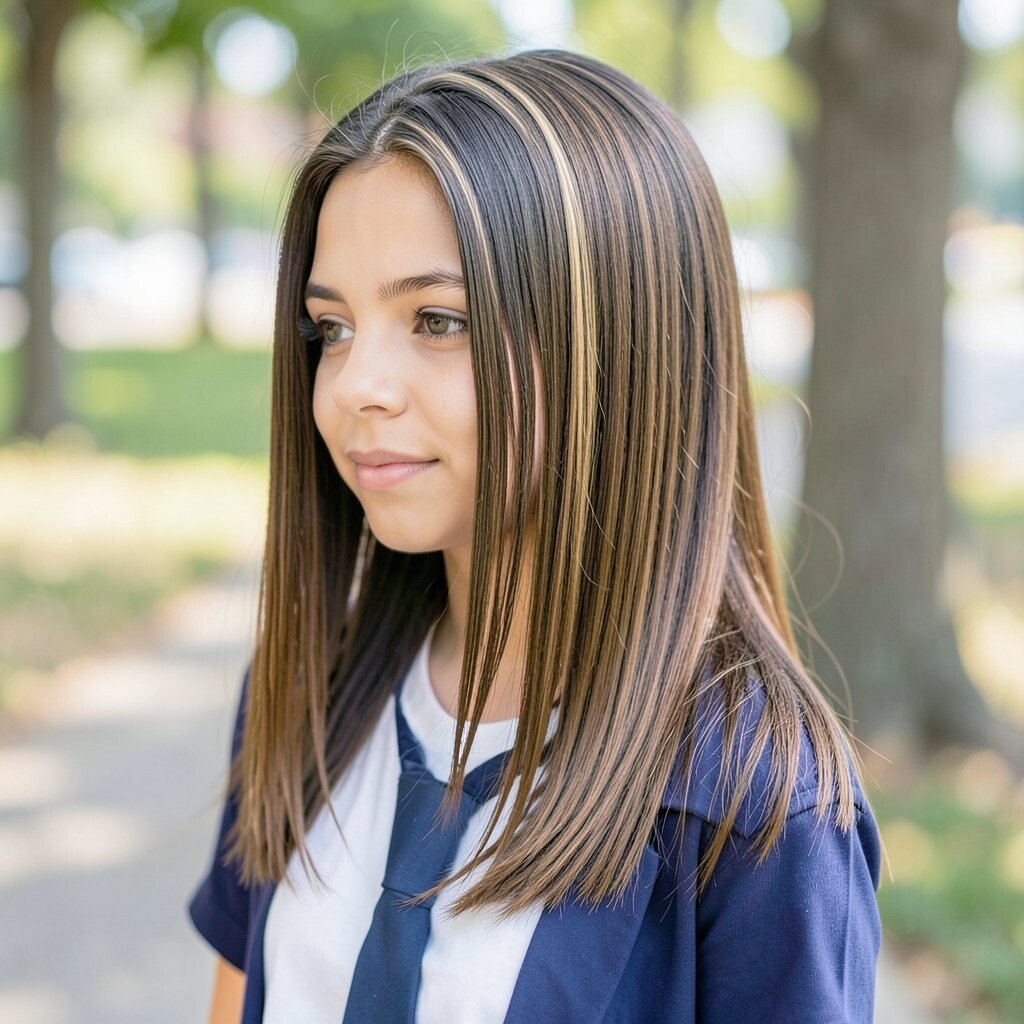
Brush hair smooth, then take a small strip on one side and pin it flat. Repeat with a second strip slightly below, creating a neat accent on the side.
This is a sleek, modern look that highlights your hair shine and keeps hair from covering your ear area. It’s also great if you don’t want to curl or braid your hair every day. For cost considerations, you can use a basic set of bobby pins and focus on placement for the best effect. Personalize by pinning the accent closer to your cheekbone for a softer look, or closer to your ear for a sharper look. If your hair is frizzy, a light anti-frizz cream will help the pins blend in more naturally.
19. Dutch Braids Into A Low Pony Wrap
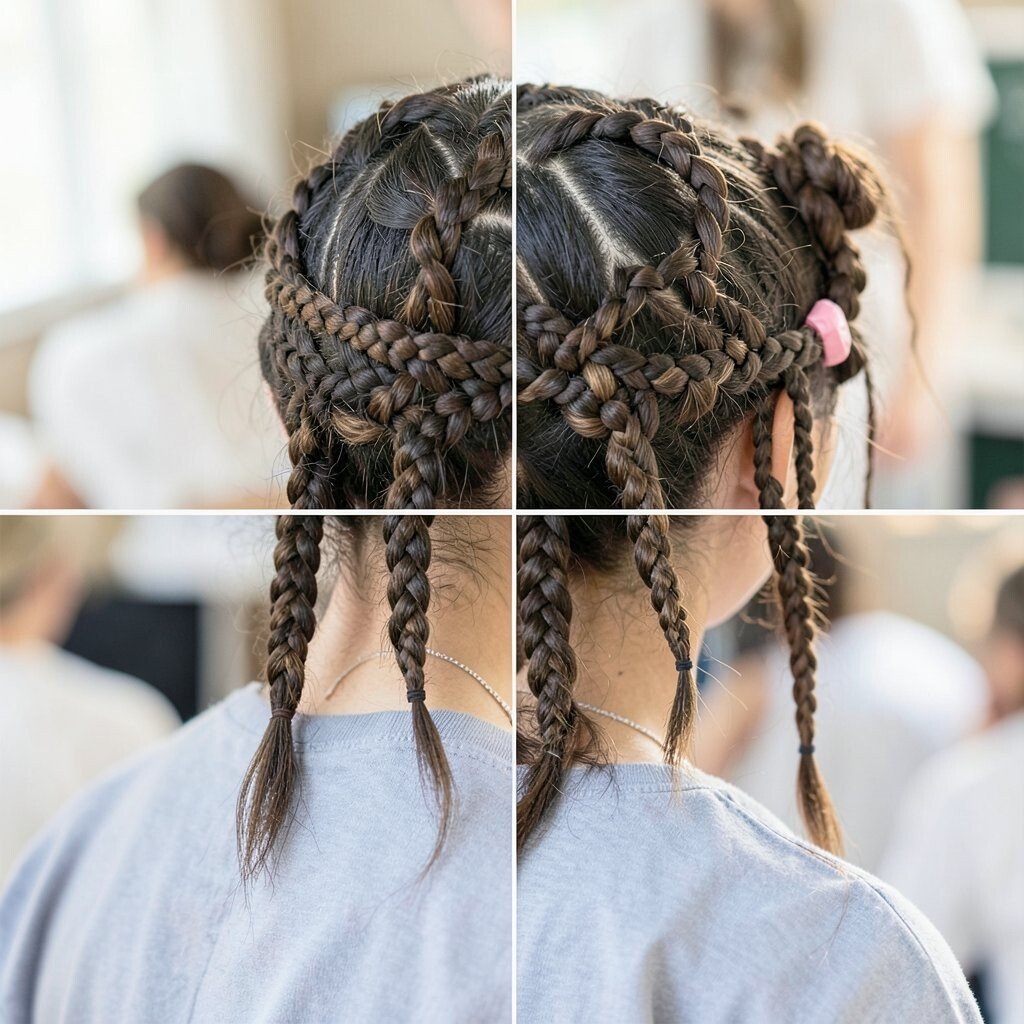
Try two Dutch braids, which are braids done under instead of over, and let them go down toward the back. Secure the braids together into a low ponytail using an elastic.
Wrap a thin strand around the ponytail base to hide the elastic and finish the look. This style is sturdy, stylish, and perfect for gym class or long bus rides. For personalization, add a hair cuff or small ribbon where the ponytail wrap begins. If your hair is thick, braid a little wider near the top so it doesn’t feel tight. This look matches current trends for “athleisure glam,” where braids meet a neat ponytail for a confident first-day vibe.
20. Waterfall Pony With Bow Tie Holder
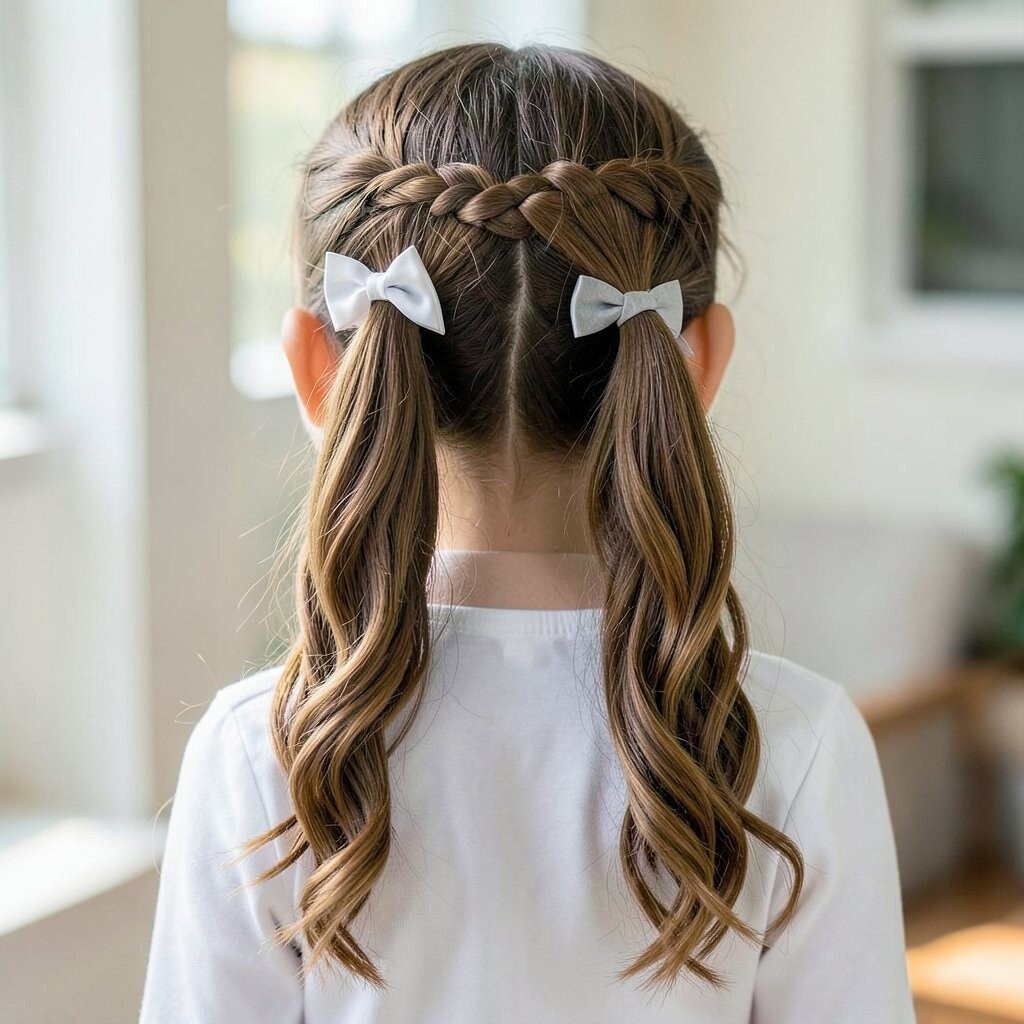
Create a waterfall braid along one side, then gather the remaining hair into a ponytail. Secure the ponytail with an elastic and attach a bow tie hair holder for a cute finish.
The waterfall portion adds movement and softness while the ponytail keeps your day easy. It’s unique because you get the pretty braid pattern without having your hair fully pulled up. If you want personalization, make the waterfall start higher or lower depending on how much face framing you like. For cost, bow tie holders are often affordable and reusable, especially if you choose a sturdy clip. If your hair is fine, use a tiny bit of texturizing spray so the waterfall braid looks full and not too flat.
21. Side Part Soft Waves With A Mini Half Bun
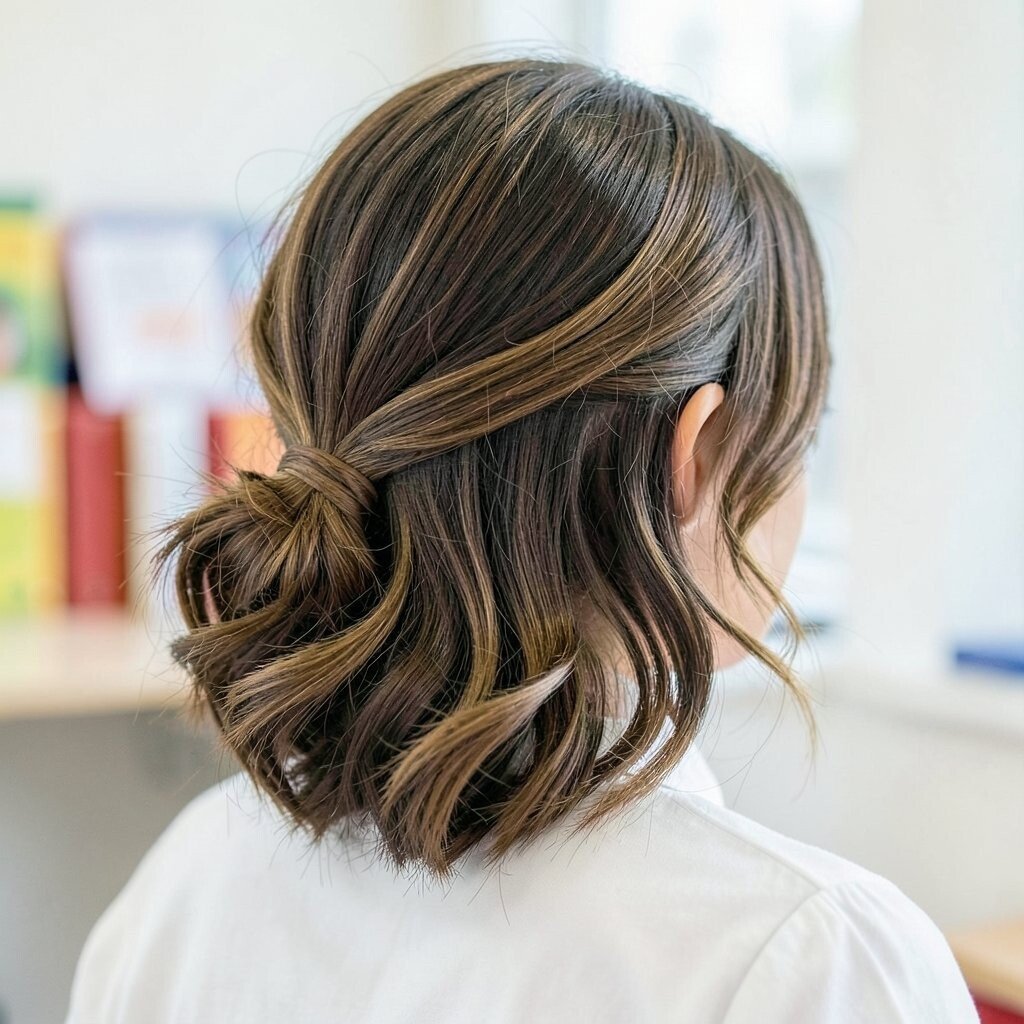
Start with a side part and sweep the hair slightly across your forehead. Then gather a small section from the front and twist it into a mini half bun at the crown.
This style is adorable because it combines flowing waves with a tidy top section. It also helps keep the front hair from falling into your eyes during lunch and recess. For personalization, add a pin that matches your favorite color, or keep it minimal with plain pins if you like a clean look. If your hair is naturally curly, you can keep the mini bun more loose so it looks effortless rather than too tight. Using a heat protectant if you curl helps your hair stay healthy, and it’s a smart investment for daily style routines.
22. Ribbon-Loop Ponytail With Sleek Finish
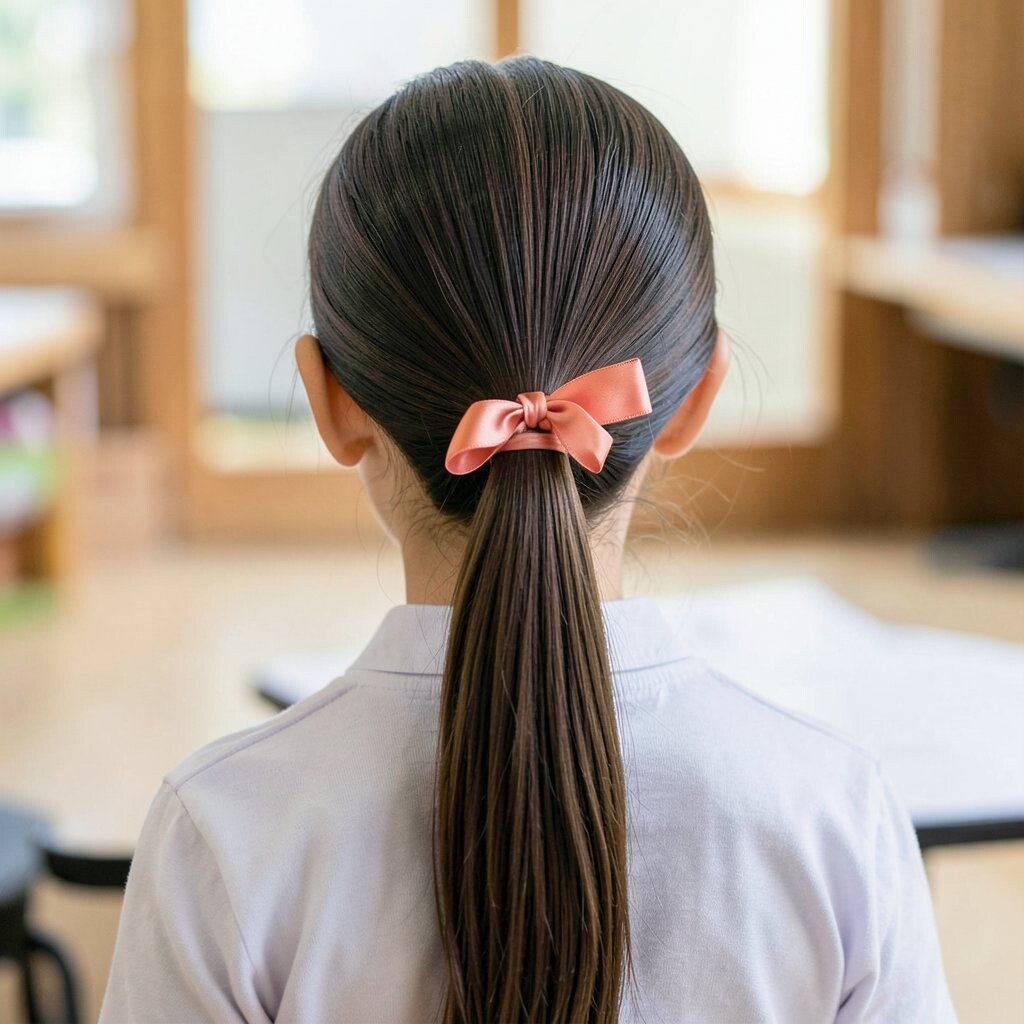
Brush your hair back into a ponytail and secure it firmly at the desired height. Take a ribbon and loop it around the ponytail base, tying it with a small knot or bow.
This hairstyle feels special because the ribbon makes it look instantly styled. It also keeps your hair smooth and controlled, especially if you use a bit of smoothing cream on the top. For personalization, use a ribbon color that matches your scrunchies or locker decor, and choose a ribbon width that feels comfortable. If you want it to last, spray a light mist of hairspray onto a brush and gently smooth the ponytail before tying the ribbon.