
Messy buns have a talent for looking styled without trying too hard. They also fit almost every outfit, from dressed-up to totally casual.
The trick is choosing a messy bun that matches your vibe, your hair type, and the way you want to feel all night.
1. Feathered Loose-Loop Messy Bun
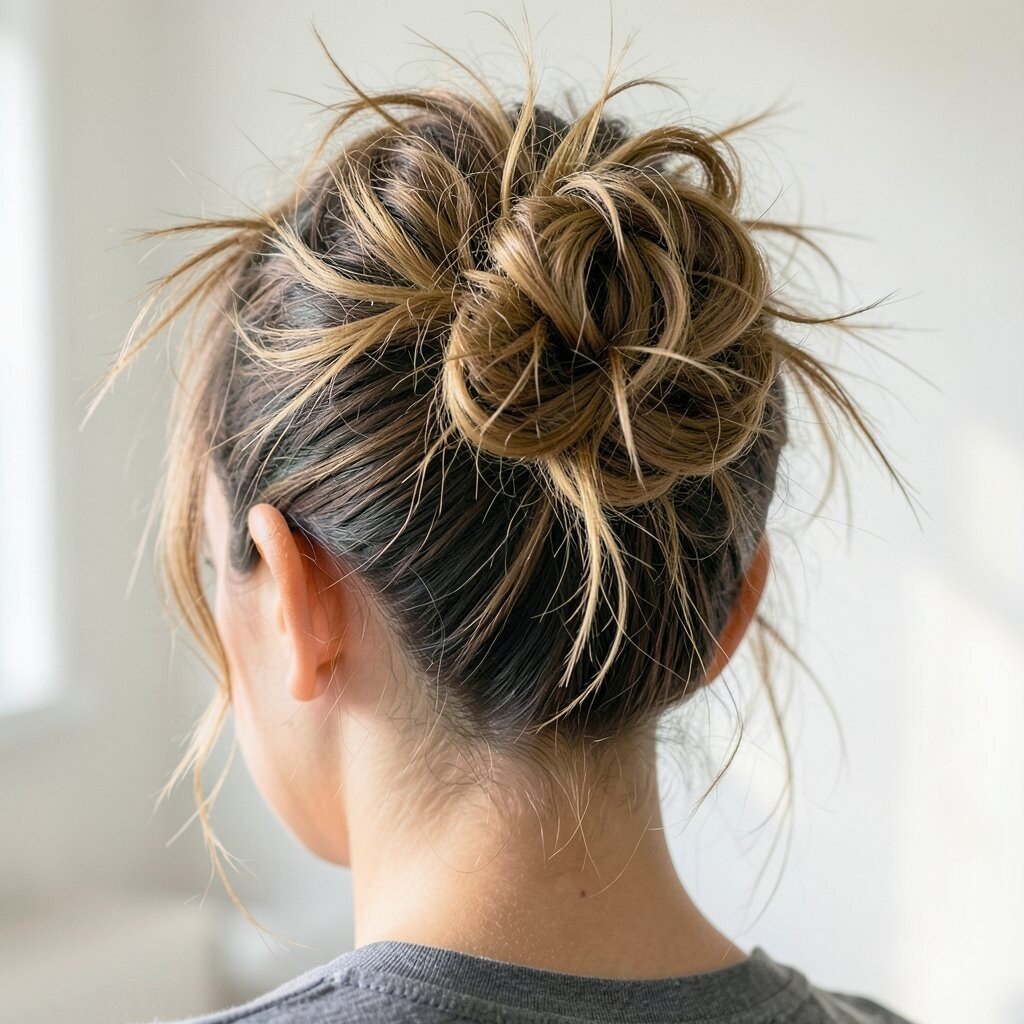
Start with slightly damp hair and pull it into a low ponytail that feels comfortable, not tight. Twist the ponytail loosely into a bun and let a few wispy loops hang around your face.
Use your fingers to fluff the bun until it looks soft and feathered. Finish with a light hold spray so the texture stays bouncy through photos and dancing. For extra movement, tug gently on the crown area and leave one or two strands free near your cheek.
2. Slick-Start Messy Bun With Soft Flyaways
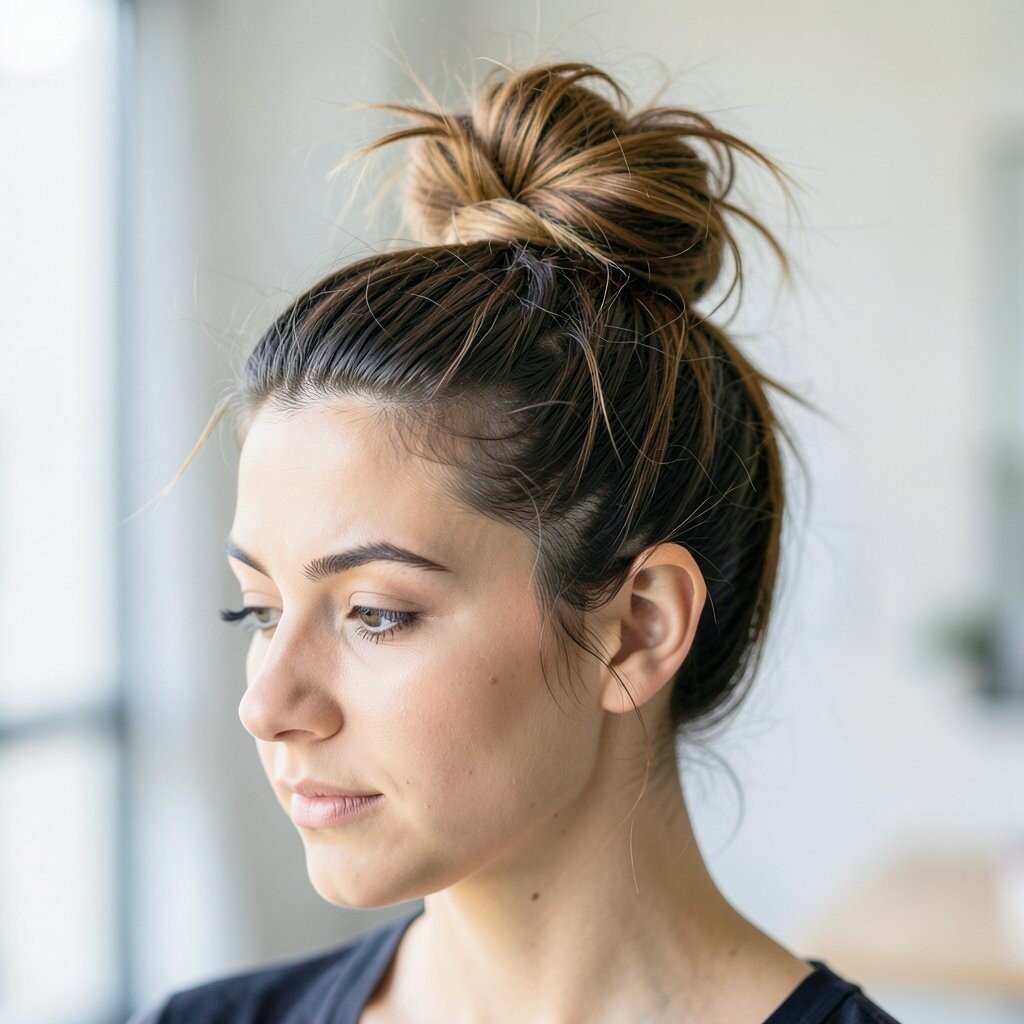
Brush your roots smooth, then intentionally rough up the ends so the contrast looks intentional. Gather hair at the back of your head and create a bun that’s a little messy on purpose.
Pin the bun loosely, then release a few flyaways for a lived-in shine. This style looks polished in the front and playful everywhere else.
Try using a small amount of gel on the hairline, then stop before the rest of your hair gets too controlled. It’s a great way to match current “clean front, messy finish” trends without spending extra time at the mirror.
3. Braided Halo Messy Bun
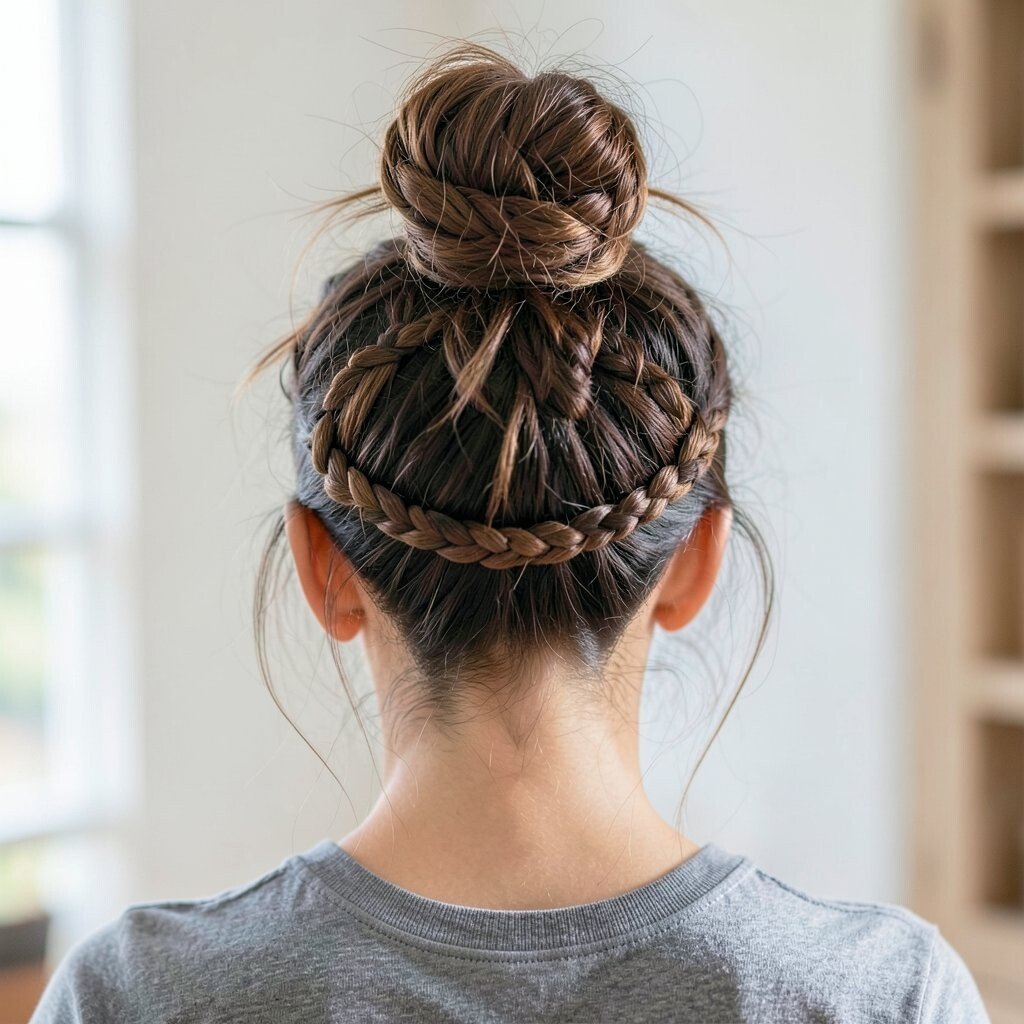
Create a thin braid along the front like a soft headband. Wrap it around your bun area, then tuck the braid ends into the messy coil.
Let the bun stay imperfect and airy, with visible hair texture peeking through. Add two mini bobby pins to hold the halo braid in place so it doesn’t slip during the night.
If your hair is fine, braid with more tension so the halo shows up clearly in pictures. For thicker hair, keep the braid wider and place it a touch higher for a balanced look.
To personalize, choose a braid direction that complements your part, then pull one feathered strand across your forehead. This look feels unique because the braid frames the messy bun instead of hiding it.
4. Twisted Side-Part Messy Bun With Ribbon Ties
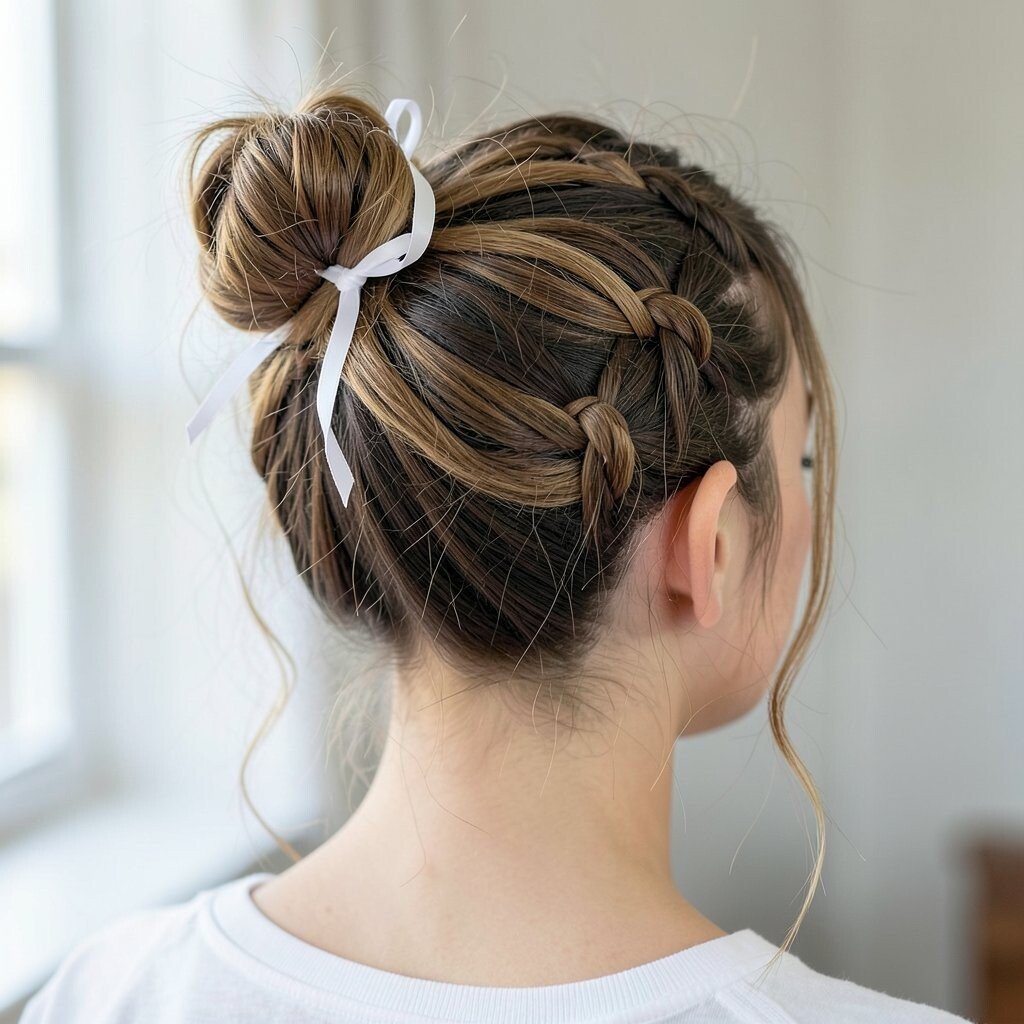
Make a deep side part, then gather your hair into a slightly off-center bun. Twist the hair before looping it into the bun so the messy shape still has direction.
Add a ribbon tie around the base, either matching your dress color or picking a contrasting shade. The ribbon gives you a visible “hoco moment” without needing expensive styling tools.
5. High Messy Bun With Tiny Crown Bumps
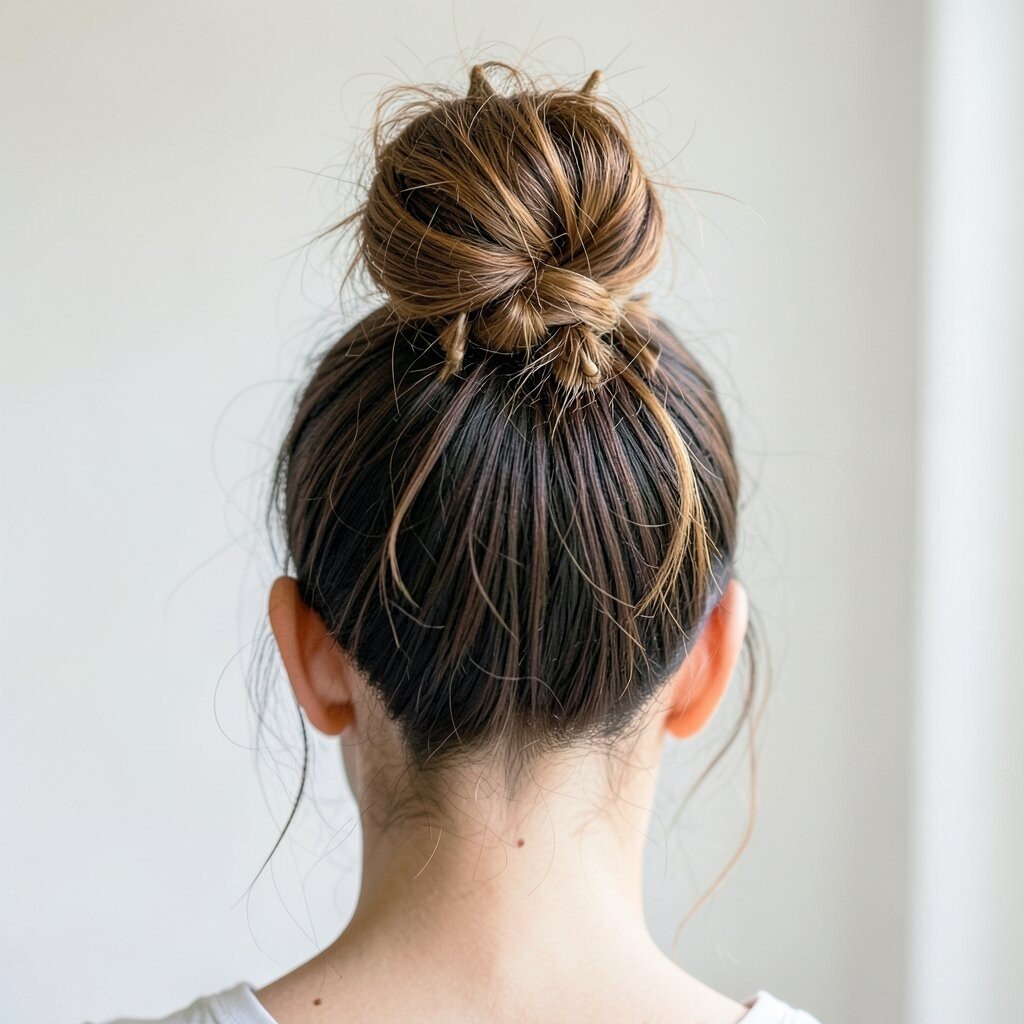
Tease the crown lightly and smooth the top just enough so it looks lifted. Pull your hair into a high ponytail, twist it, and form a bun with a few curls escaping.
Pin strategically, then use your fingertips to pop out little bumps in the front for extra volume. This style pairs beautifully with statement earrings because the bun keeps your face open.
If you have short layers, use a couple of bobby pins to catch them so they don’t fall flat. For personalization, choose a hair clip with sparkle that echoes your makeup or nails.
6. Messy Bun With Curtain Bangs and Loose Ends
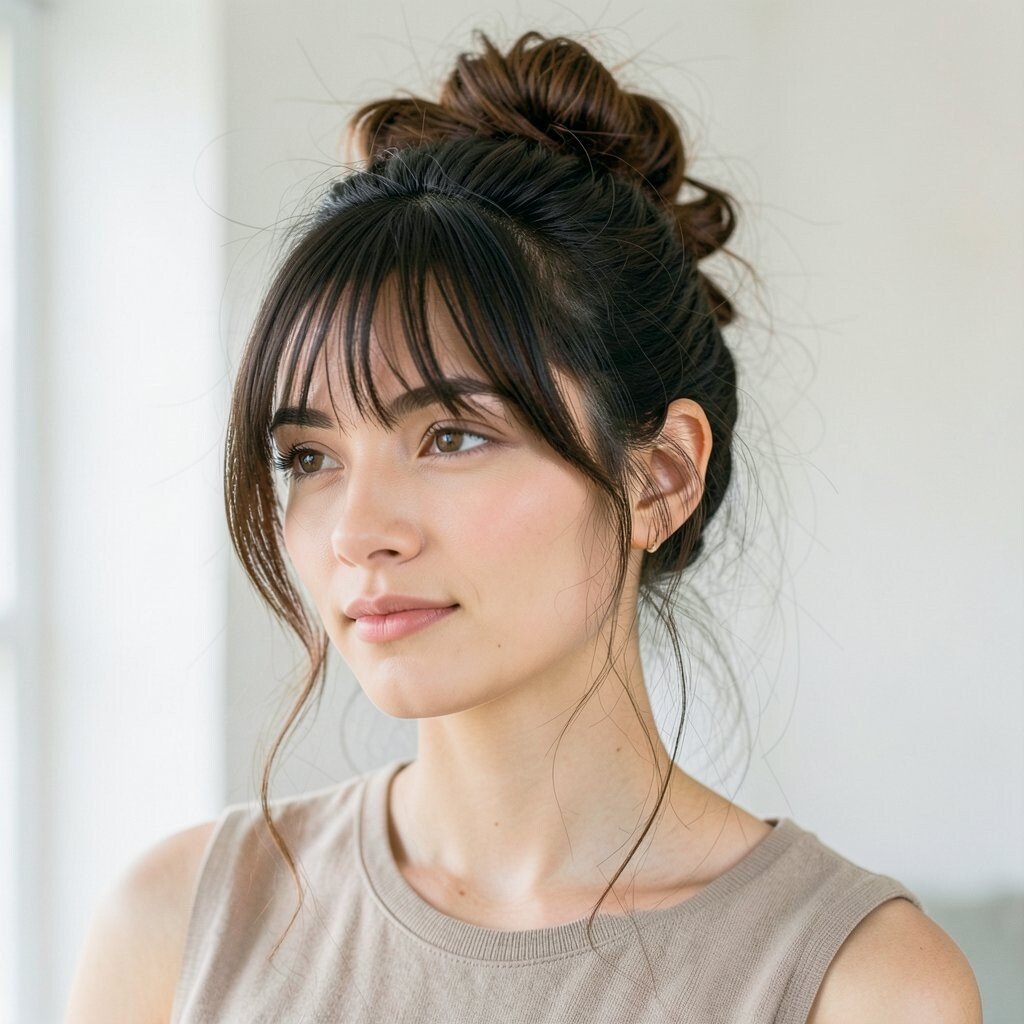
Keep your front strands long and let curtain bangs frame your eyes. Build a messy bun at the back while leaving the ends a little undone around your face.
Use a small elastic to hold the ponytail, then wrap and pin the bun so it looks slightly chaotic but still secure. This works great for hair that won’t hold a neat shape, because messy is the point.
Add a spritz of texture spray to the sides so the strands blend into the bun. The benefit is that your hair looks effortlessly styled even if it falls a bit during the night.
7. Two-Minute Sock Bun Messy Remix
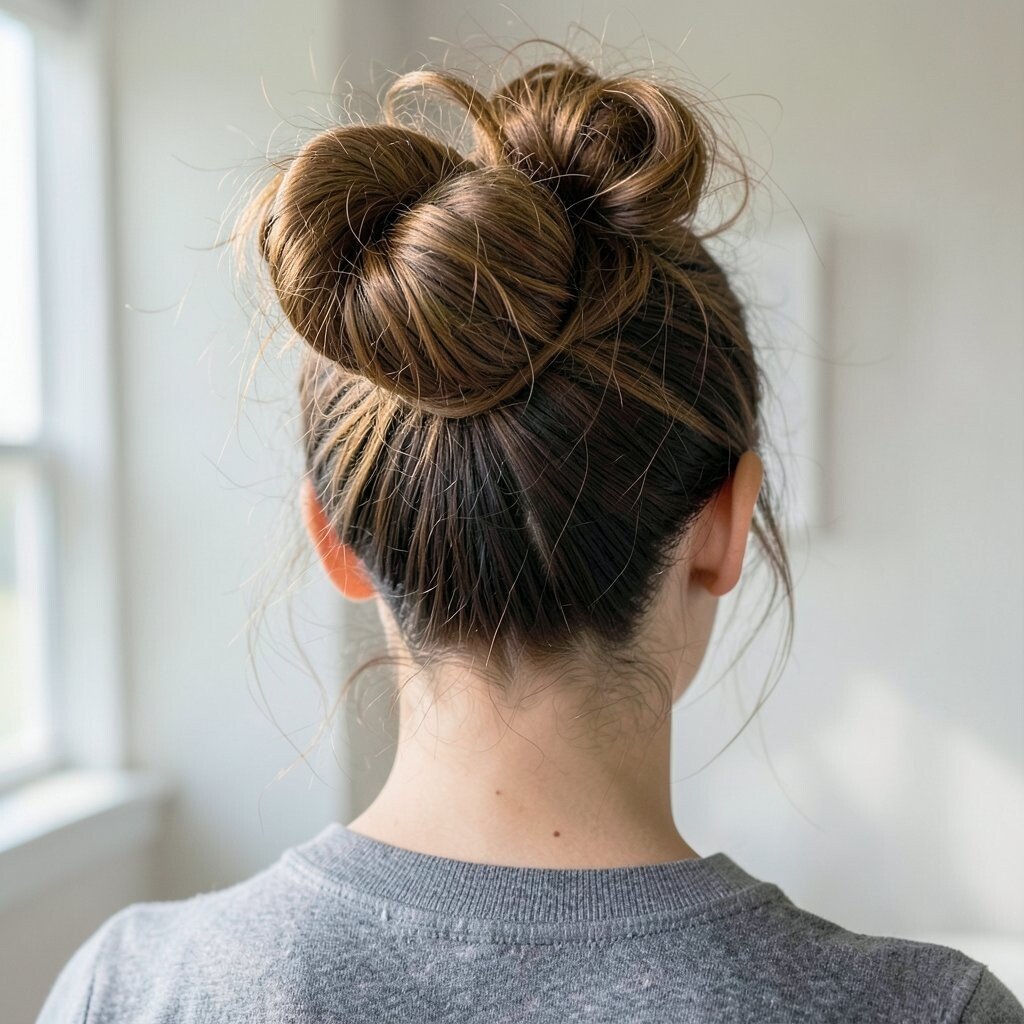
If you want a fuller bun without spending hours, start with a soft sock bun donut. Slide it onto a ponytail, wrap hair around it, and then intentionally pull out a few strands for that messy look.
Pin the loose pieces around the base so the bun stays comfy and high. Then brush only the top lightly so the sides keep texture.
This style is cost-friendly because you can use an old sock tool instead of buying lots of products. It also looks unique because the shape is structured at the base, while the top stays messy and fun.
8. Braided Mohawk-Style Messy Bun
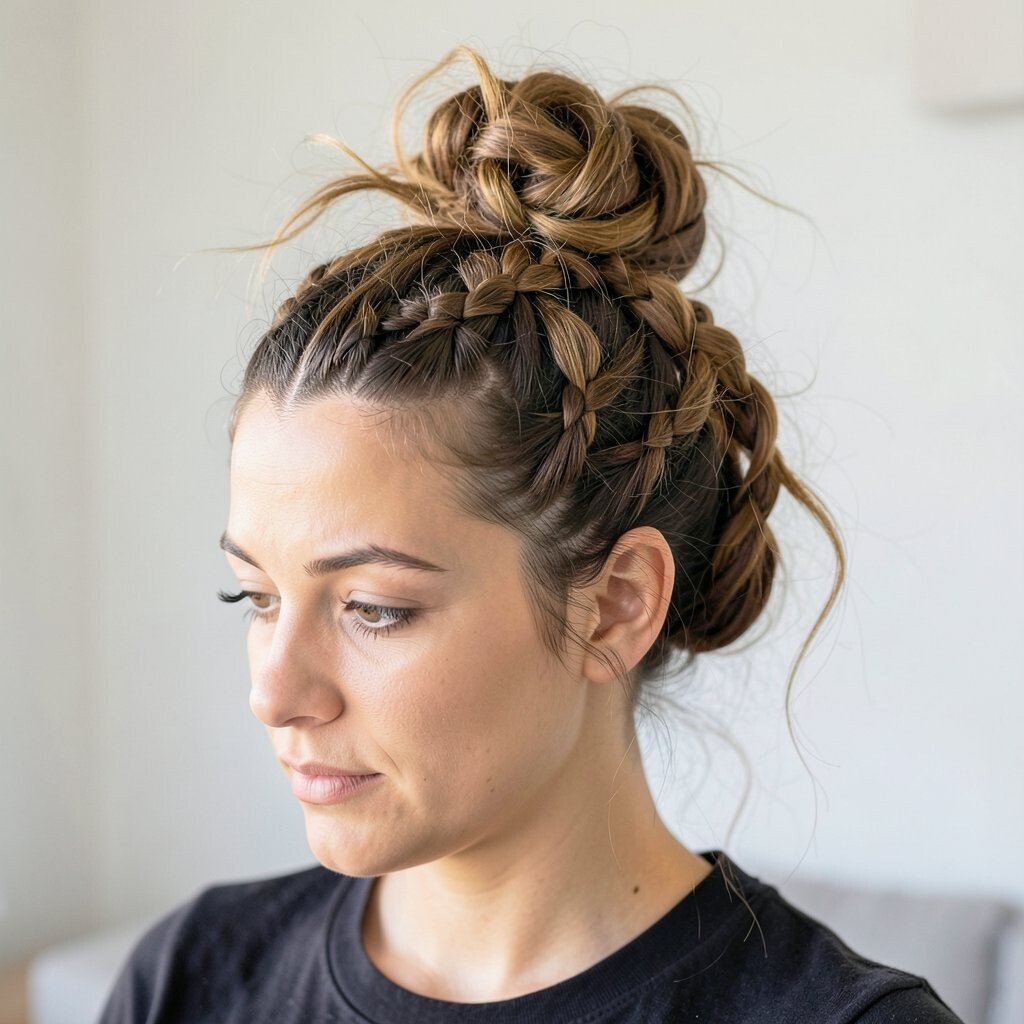
Braid a strip from one side to the other across the top of your head. Instead of a firm braid crown, keep it slightly loose so it feels romantic and relaxed.
Make your bun at the back, then tuck the ends of the braid into the bun. The contrast between the braided “path” and the messy bun makes this one stand out in photos.
9. Half-Up Messy Bun With Face-Framing Layers
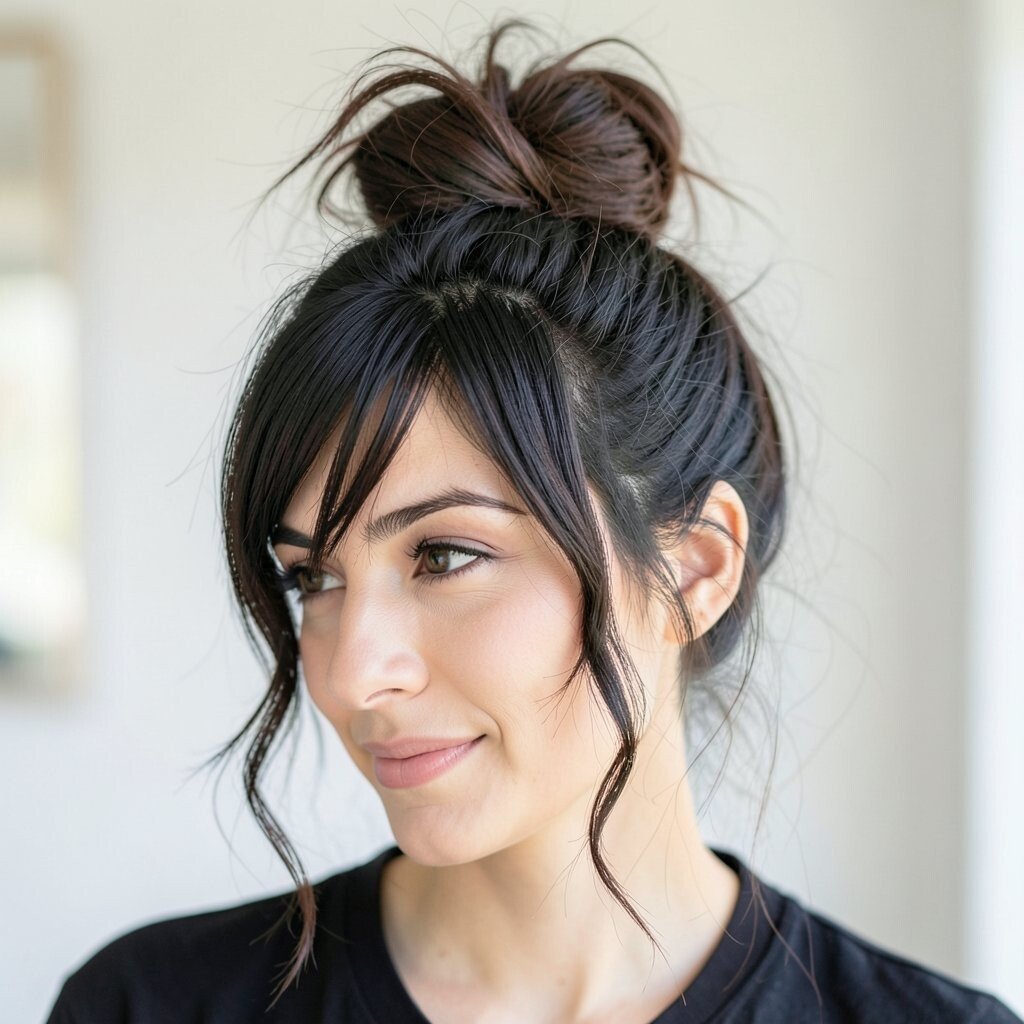
Pull the top half of your hair into a messy bun while leaving the rest down. Keep the bun slightly loose so it doesn’t feel heavy, and let a few strands wrap around the elastic.
Shake out the remaining hair so it falls naturally, then tuck a strand behind your ear to show off your earrings. This style is great for people who want both bun energy and soft hair movement.
To personalize, curl the loose hair ends, or leave them straight for a sleek vibe. Using a tiny claw clip instead of pins at the bun base can save time and still look stylish.
10. Messy Bun With Wrapped Base Scrunchie
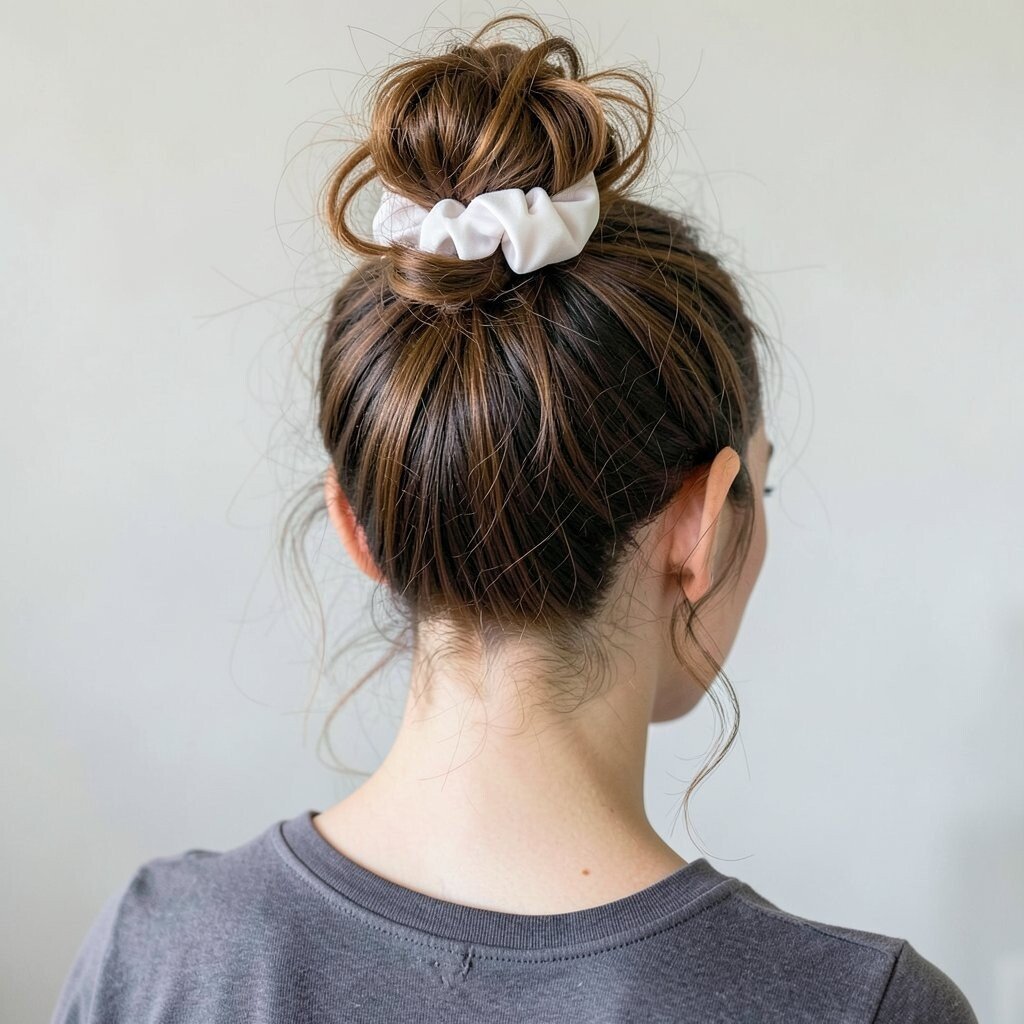
Gather your hair and secure it with a scrunchie, then wrap sections of hair around the base. Pin if needed, but let a few loops show for that carefree look.
This style feels current because scrunchies are back and they look cute in every hair texture. Choose a scrunchie color that matches your outfit or one that pops against it.
11. Loose Crown Messy Bun With Back Volume
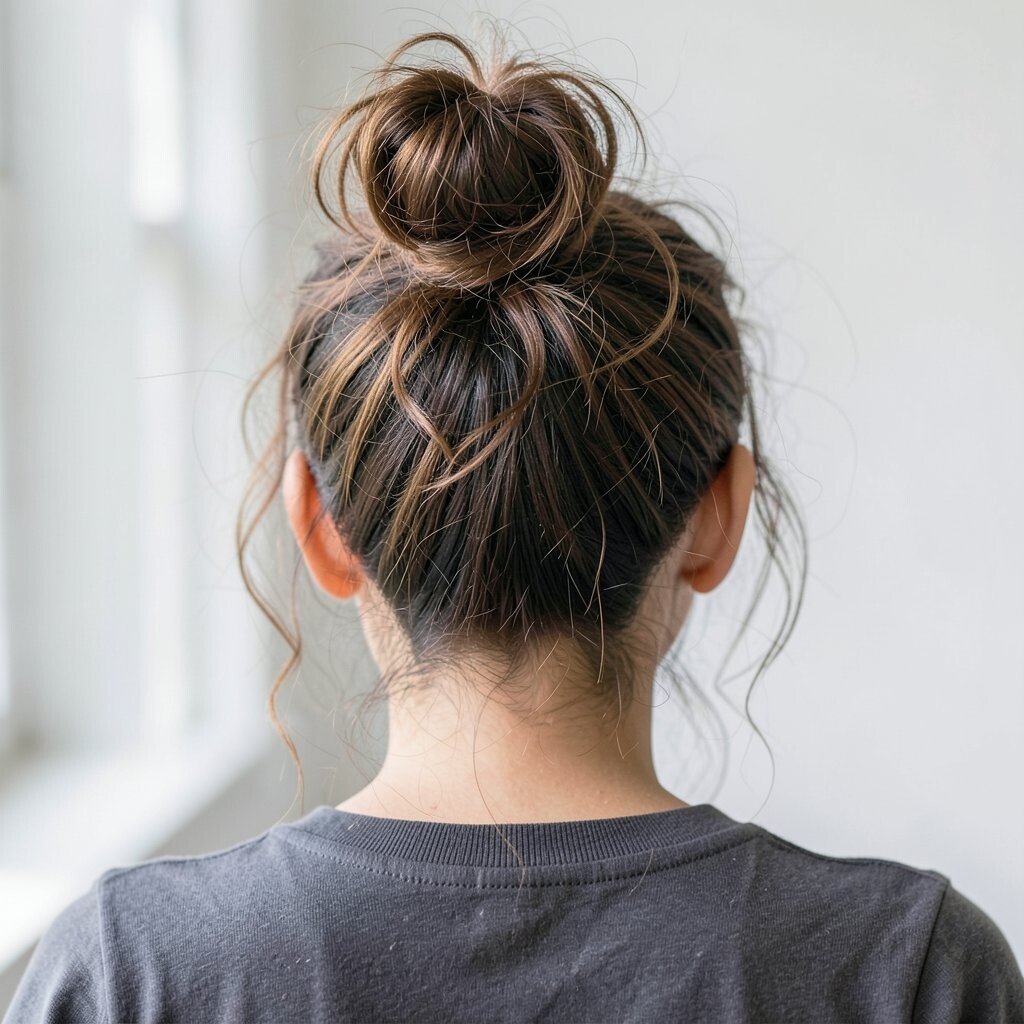
Start by flipping your hair forward, then smoothing it back into a loose ponytail. Create a bun at the mid-to-upper back so it sits like a soft crown.
Painters-tape the look by fluffing the bun from different angles. When you release the pin points, you’ll see volume at the back that makes your whole style look fuller.
If you want a cleaner silhouette, tuck a few strands under the bun. If you want extra mess, pull out two thicker sections to frame your neckline.
12. Messy Bun With Two Texture Clips
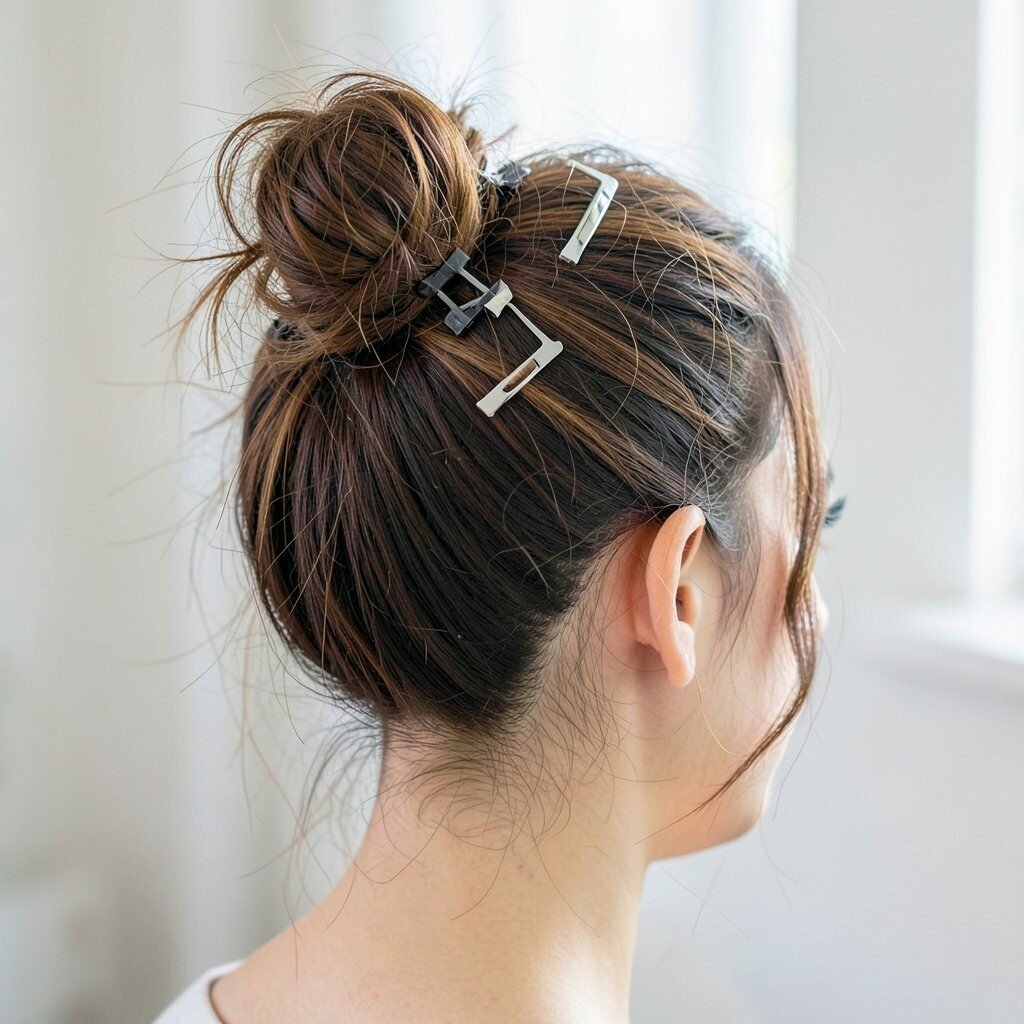
Build your messy bun normally, then add two decorative clips on either side of the base. The clips can be pearls, metal waves, or simple star shapes, depending on your theme.
Place one clip slightly higher so it draws attention upward and balances your face. This gives you a custom finish without needing a big styling routine.
For cost considerations, start with one affordable clip you love, then mirror it with a second similar clip from a different color. It’s a fun way to get the “designer look” feeling on a budget.
13. Side Swept Messy Bun With One Long Strand
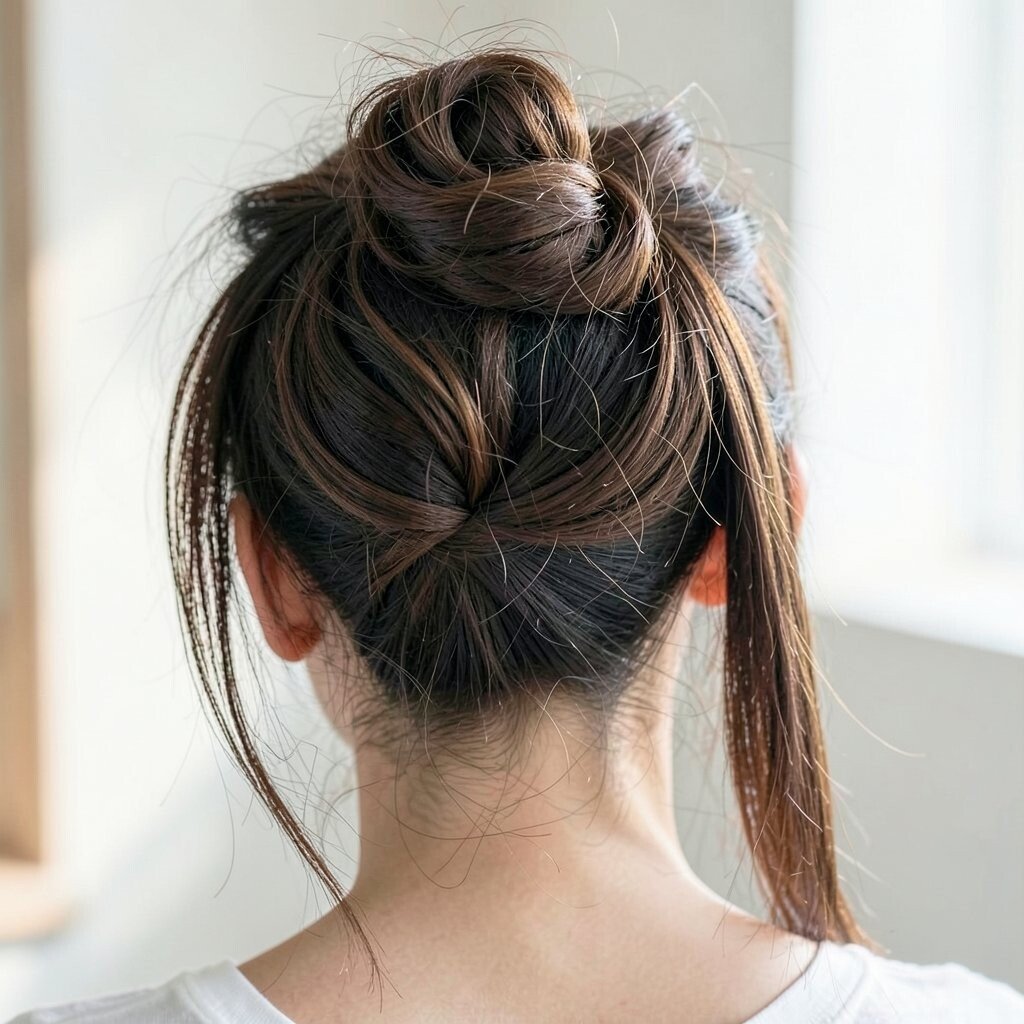
Sweep most of your hair to one side and secure it into a messy bun. Leave one long strand loose so it curls or waves as you move.
The loose strand makes the hairstyle feel personalized and adds motion to your photos. Pin the bun well enough that it doesn’t shift, but don’t over-tighten so it keeps that airy messy texture.
Use a light serum on the strand so it shines and doesn’t puff up. This style is unique because it looks intentional even with its “not done yet” vibe.
14. Messy Bun With Under-Braid Accent
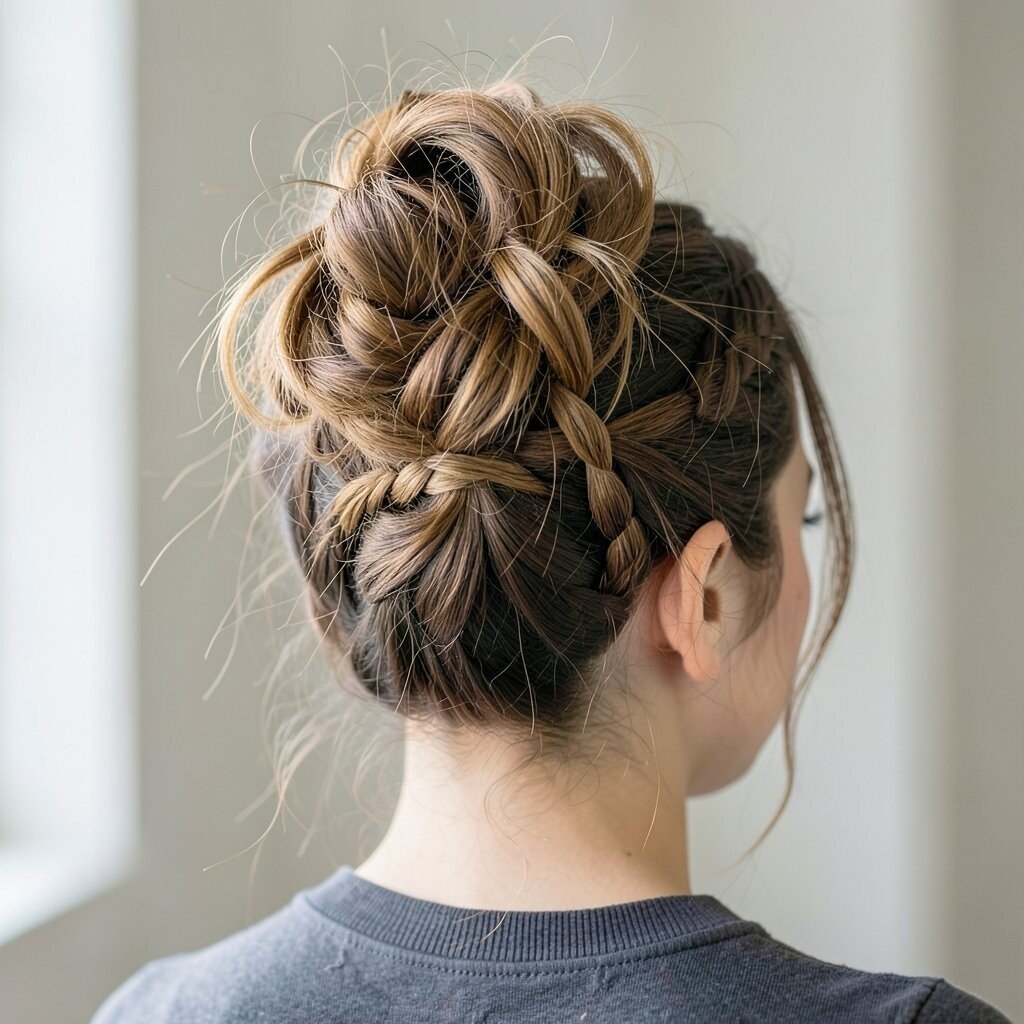
Make a small braid underneath your ponytail before twisting everything into a bun. The braid hides at first, then shows when your hair shifts or when you turn your head.
Pin the bun loosely and fluff the top layers so the braid becomes a subtle detail. It’s a smart option when you want something different but still classy.
For fine hair, use a thinner braid so it doesn’t overpower your bun. For thick hair, keep the braid wider and secure it with two bobby pins to stop it from sliding.
15. Messy Bun With Messy Rope Twist
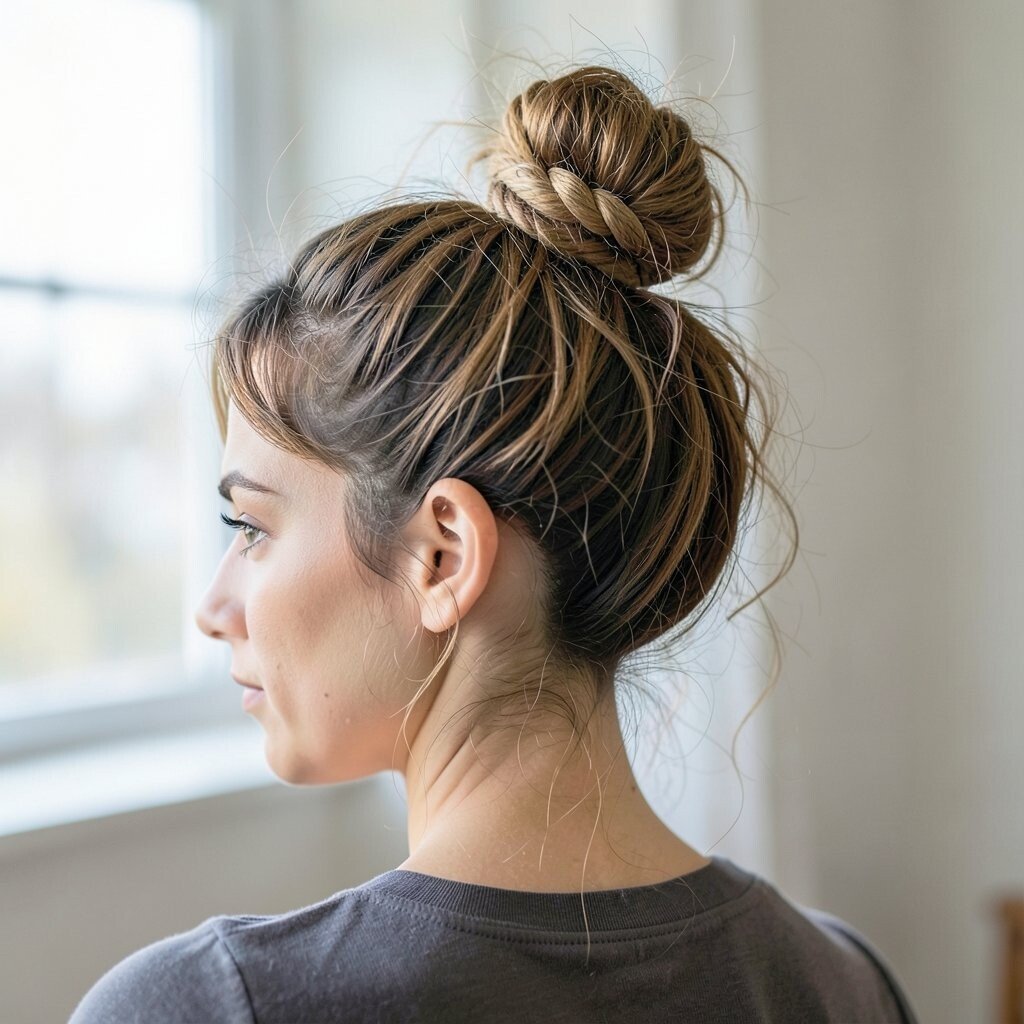
Grab two sections from your ponytail and twist them together like a rope. Once you have the rope twist, loop it into a bun and pin the edges where needed.
The rope twist adds texture, so even if your bun looks messy, it still feels structured. This style looks amazing with satin dresses because the rope detail catches light.
To personalize, leave the rope twist ends sticking out a bit more for a dramatic photo moment. A small amount of curl cream on the twist can help the strands hold shape longer than a basic spray.
16. Low Messy Bun With Braided Sides and Loose Top
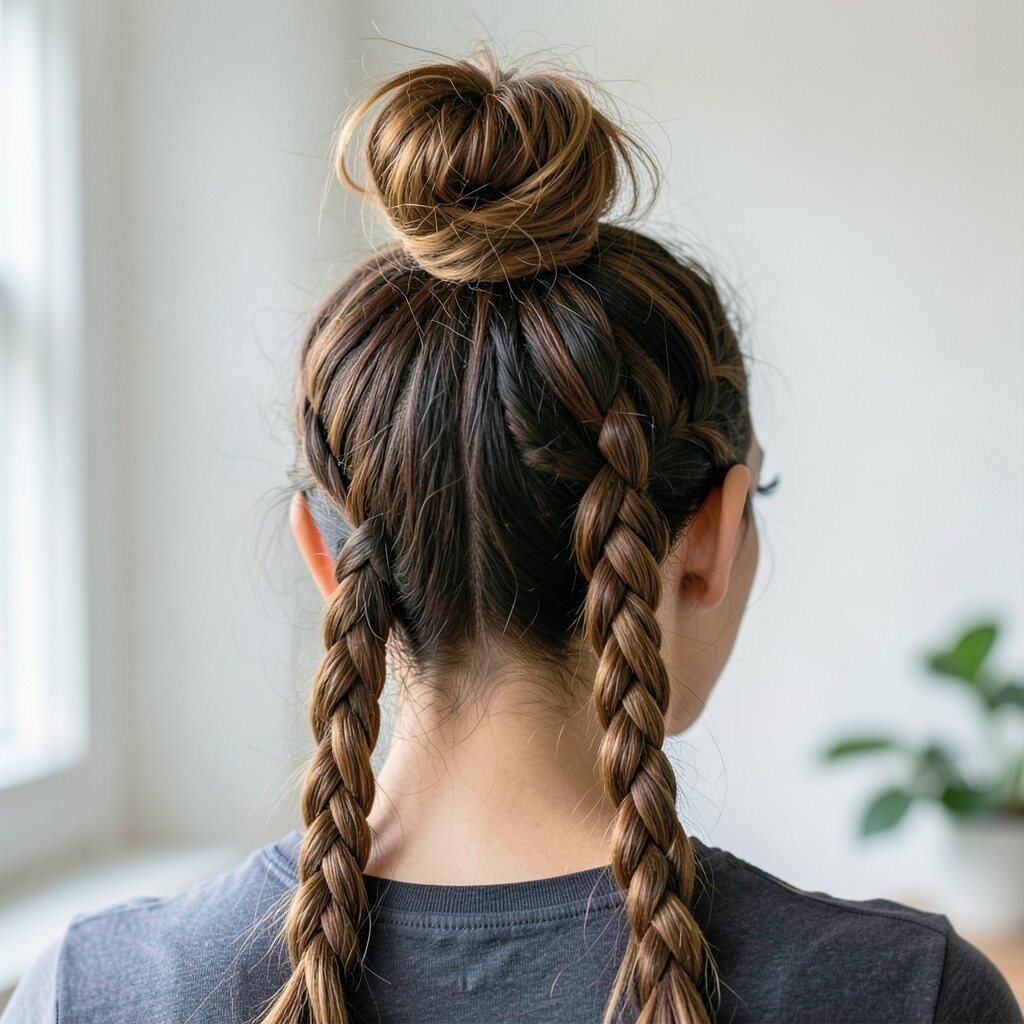
Part your hair and braid small sections along both sides, then gather everything into a low bun. Keep the top of the bun airy so it looks soft rather than flat.
Pin the braided sides so they act like anchors, which helps the bun stay put during busy hoco moments. This is a great choice if you want your hairstyle to survive dancing, pictures, and rushing to meet friends.
17. Messy Bun With Shimmer Hair Spray and Loose Texture
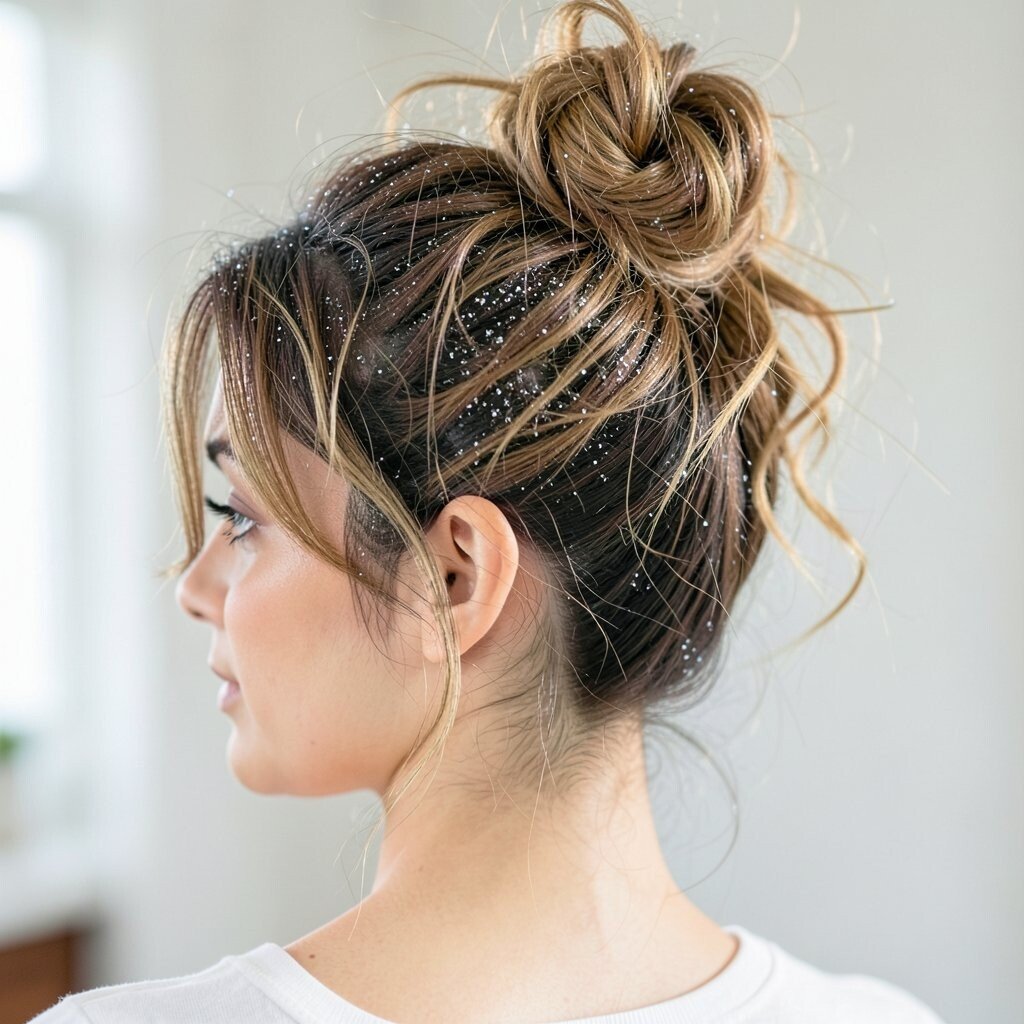
Spray a little shimmer mist onto the mid-lengths and ends before you twist your bun. Then create a messy bun and pull out a few strands so the sparkle looks spread out, not concentrated.
This style gives a current “glow in the flash” effect that looks amazing in group photos. Keep it subtle by using a light hand, especially if your dress already has shine.
For cost considerations, shimmer spray can be reused across different styles like beach waves or half-up looks. If you’re aiming for a safer choice, try a tinted gloss spray that won’t look too heavy.
18. Messy Bun With Pearl Bobby Pin Starbursts
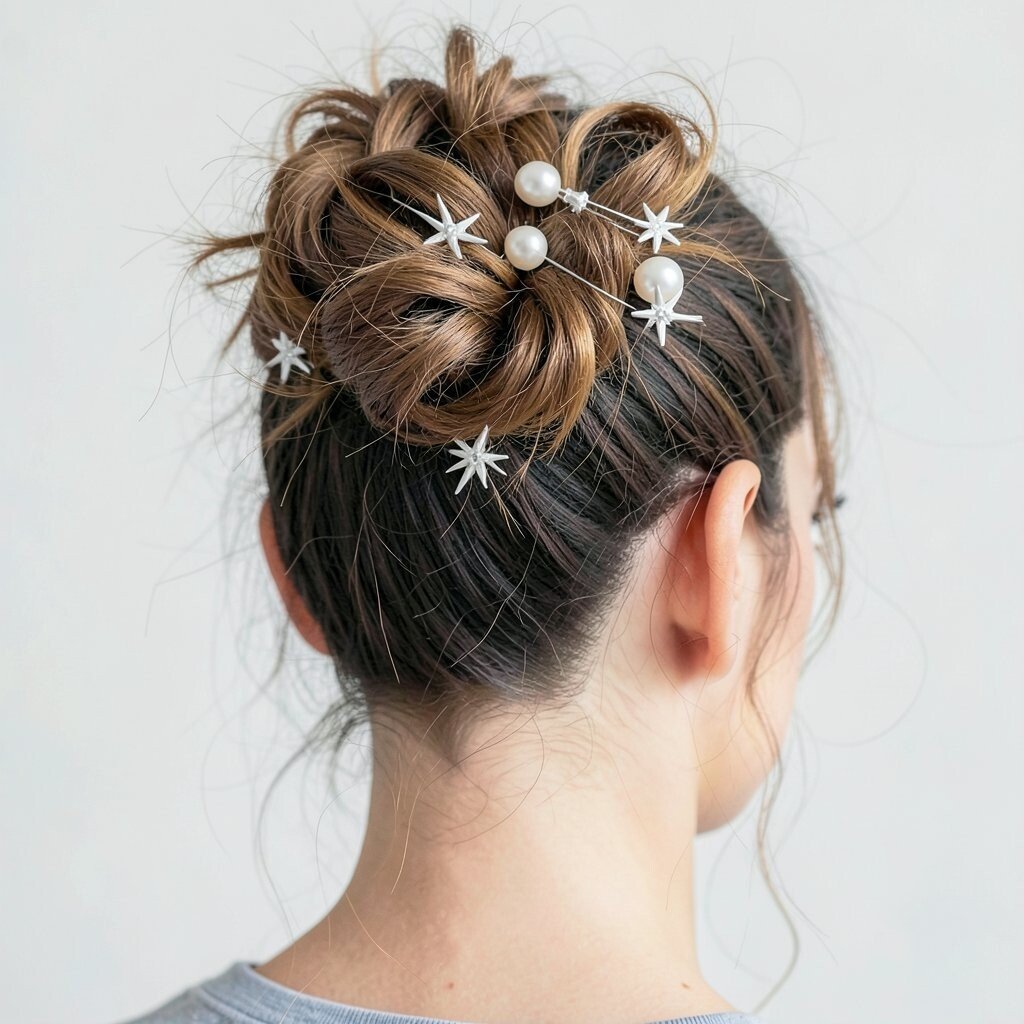
Make a messy bun at the back, then secure it with pearl or gem bobby pins scattered like tiny starbursts. Place pins in small groups instead of all over, so it looks styled rather than cluttered.
This look feels special without needing complicated braids or tools. It also flatters most face shapes because the bun stays open and the pins add a delicate focal point.
To personalize, match pin color to your outfit details like shoe accents or hair accessories. If pins are a budget issue, start with a few statement pins and rotate them through your styles for different events.
Use hairspray lightly after pinning so the gems stay in place, especially if your hair is slippery or naturally straight.
19. Messy Bun With Micro Bun Wraps and Tiny Clips
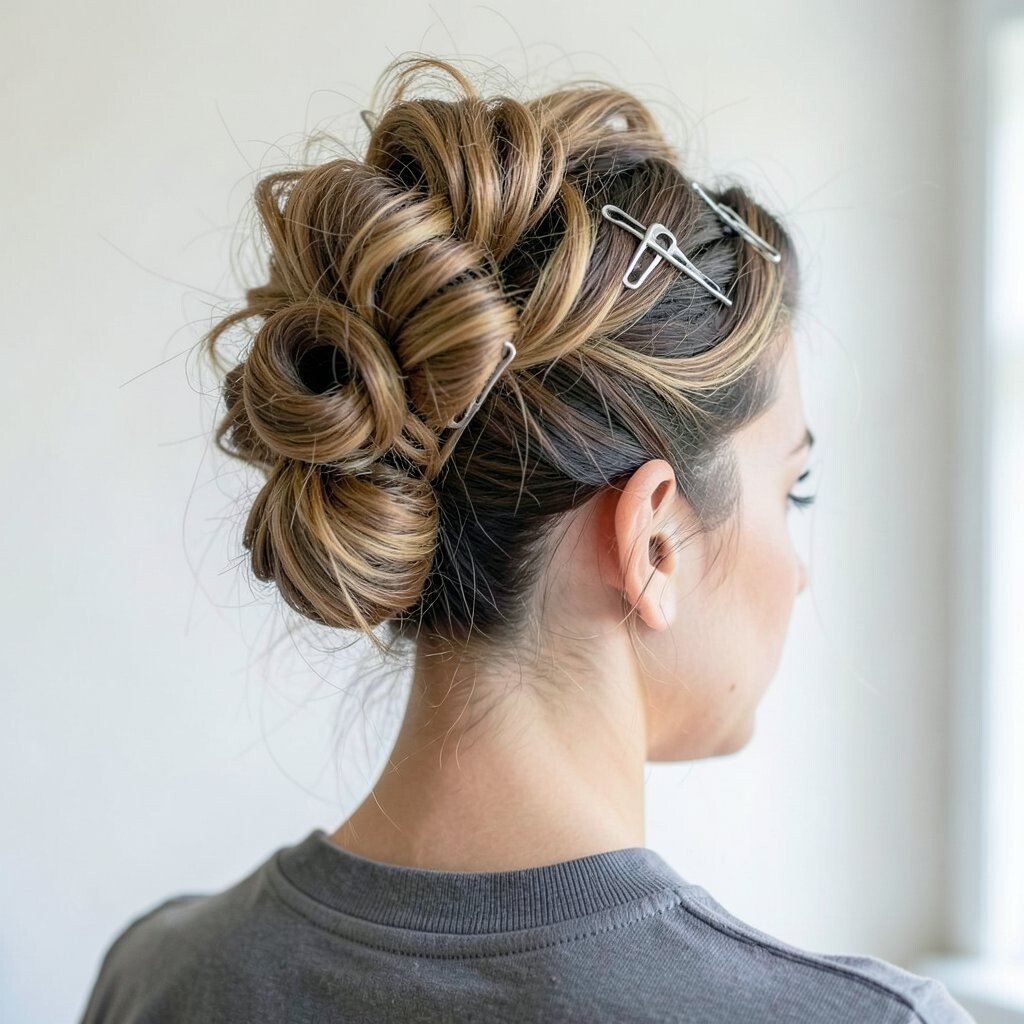
Section the ponytail into two or three small pieces, then wrap each piece around the base like mini buns. Pin each wrap so you get that layered messy texture.
Add tiny clips at the edges, especially where the wraps meet, so the gaps look intentional. This style looks unique because the bun isn’t one shape, it’s several soft moments stitched together.
If you have short hair, use smaller wraps so everything can be pinned securely. For personalization, try clips shaped like bows or hearts that match your hoco theme.
20. Messy Bun With Tucked Crown and Loose Bottom
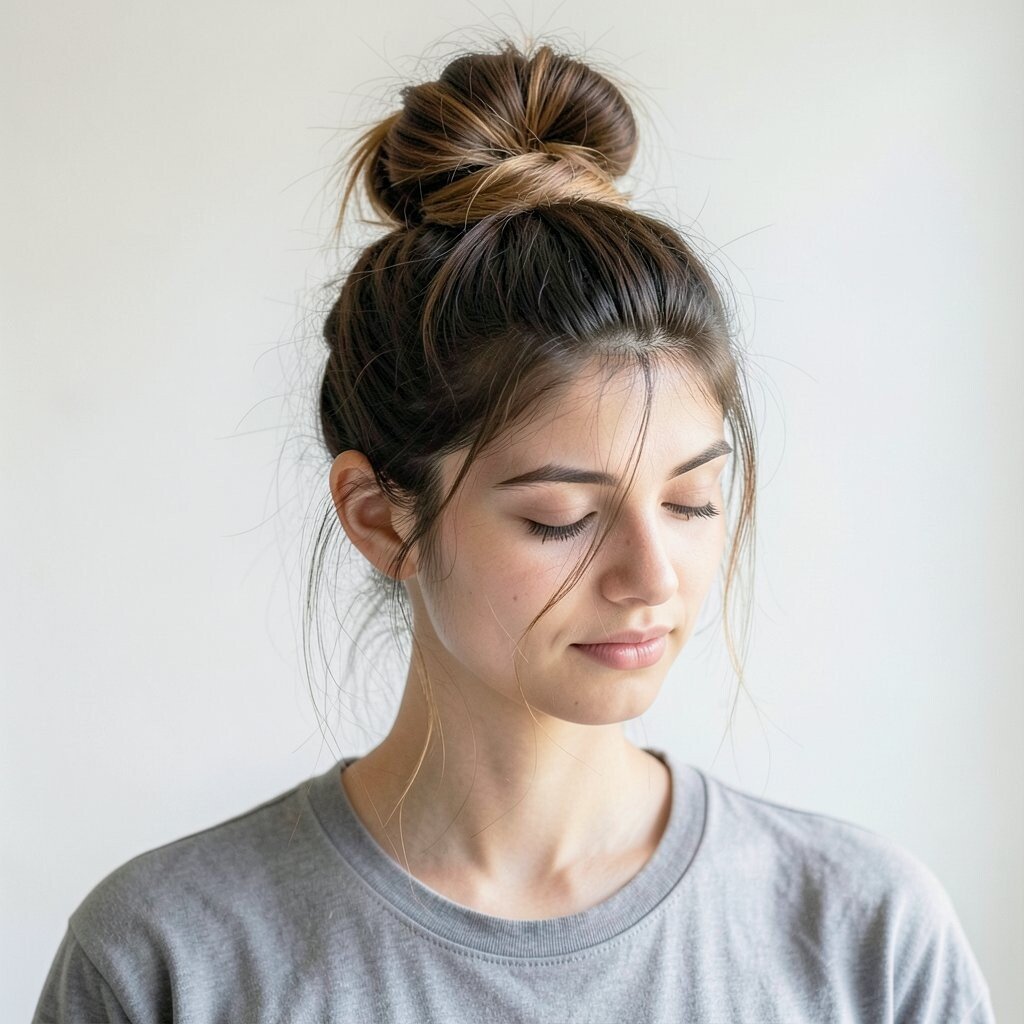
Press the top portion down gently so the crown looks tidy, then let the lower hair be messy and textured. Tie the hair into a bun and keep the bottom slightly looser so strands fan out.
This contrast is very flattering for pictures because it creates a clean frame for your face. You also get a practical benefit since the crown stays flatter and easier to manage all night.
To personalize, add a headband chain or a thin braid across the crown before you tie everything back. Using a stronger elastic helps this style last longer, particularly if your hair is long and heavy.
21. Messy Bun With Side Twist Waterfall Effect
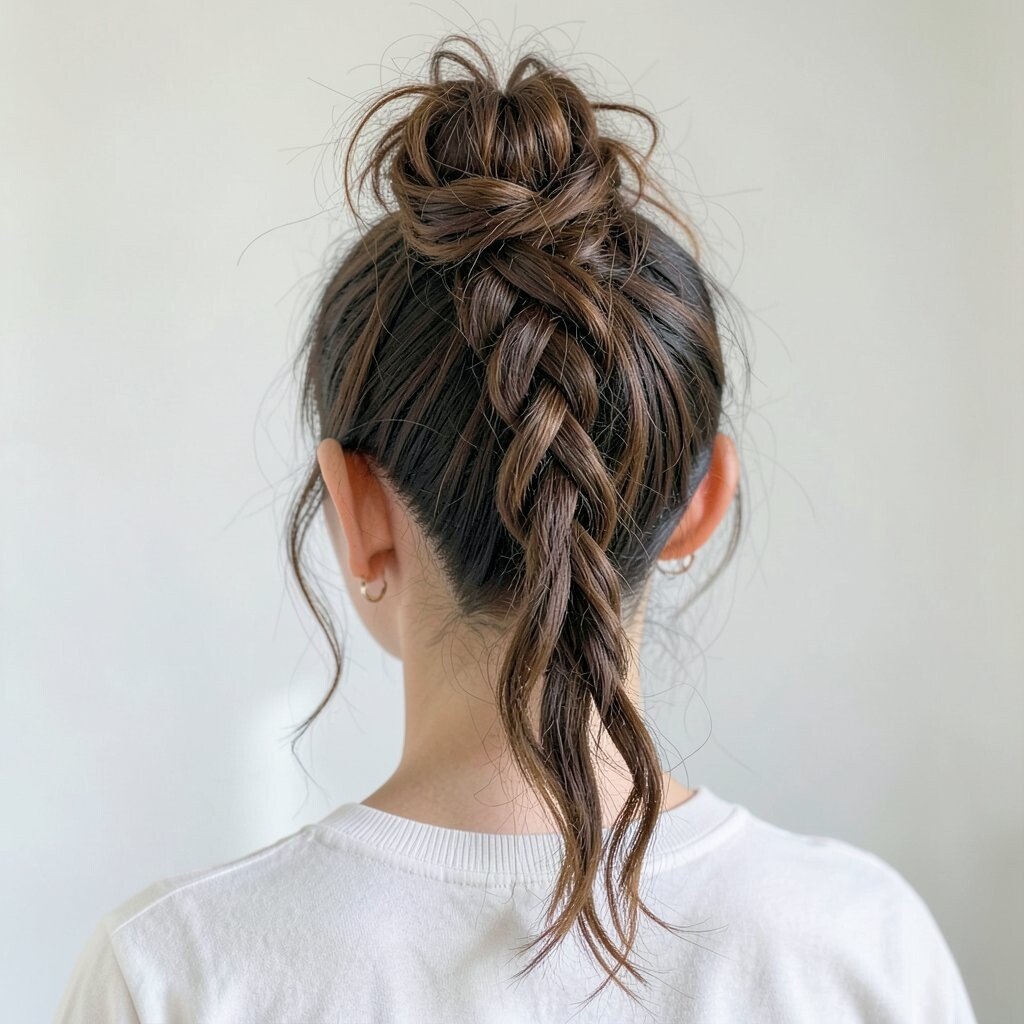
Create a side twist at the front, then let pieces fall like a mini waterfall as you gather hair into a bun. Secure the waterfall twist strands first, then build your messy bun behind them.
This hairstyle looks like you planned every strand, even though it’s mostly airy and loose. It’s a great option for anyone who wants something romantic and slightly dramatic without going full updo.
For personalization, curl the loose waterfall pieces so they blend into your bun and catch light as you turn. Choose a hair spray with flexible hold so the twist stays intact while the rest stays touchable and soft.
If you’re worried about cost, focus your budget on one styling product that adds texture and hold, and use bobby pins for everything else. With the right base, this messy bun can look high-end in every photo.