That moment before pictures always feels like a spotlight. Your hair can do the same thing, even when you keep everything simple.
1. Soft Curtain Bangs With Shiny Blowout
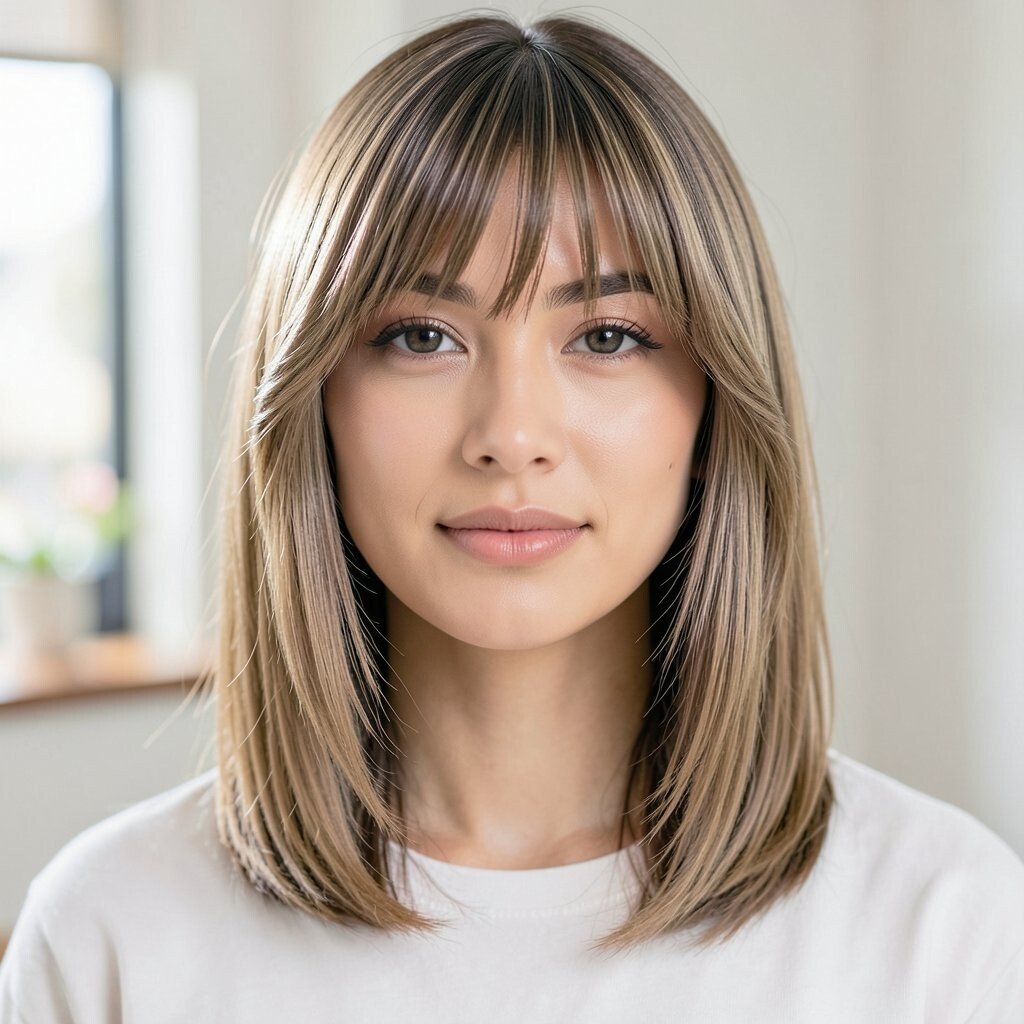
Picture a warm, glossy top that frames your face like a gentle curtain. The bangs start near the middle of your head and fall evenly, so your features look extra clear in every photo.
This style is great for people who want a polished vibe without tons of styling. Use a round brush to smooth the hair while you blow-dry, then add a light serum on the ends. If your hair is straight, a little heat and a quick brush-through keeps it looking fresh. For natural waves, try a diffused blow-dry and then brush the bangs forward for that clean curtain shape.
2. Sleek Half-Up Pony With Micro Braids
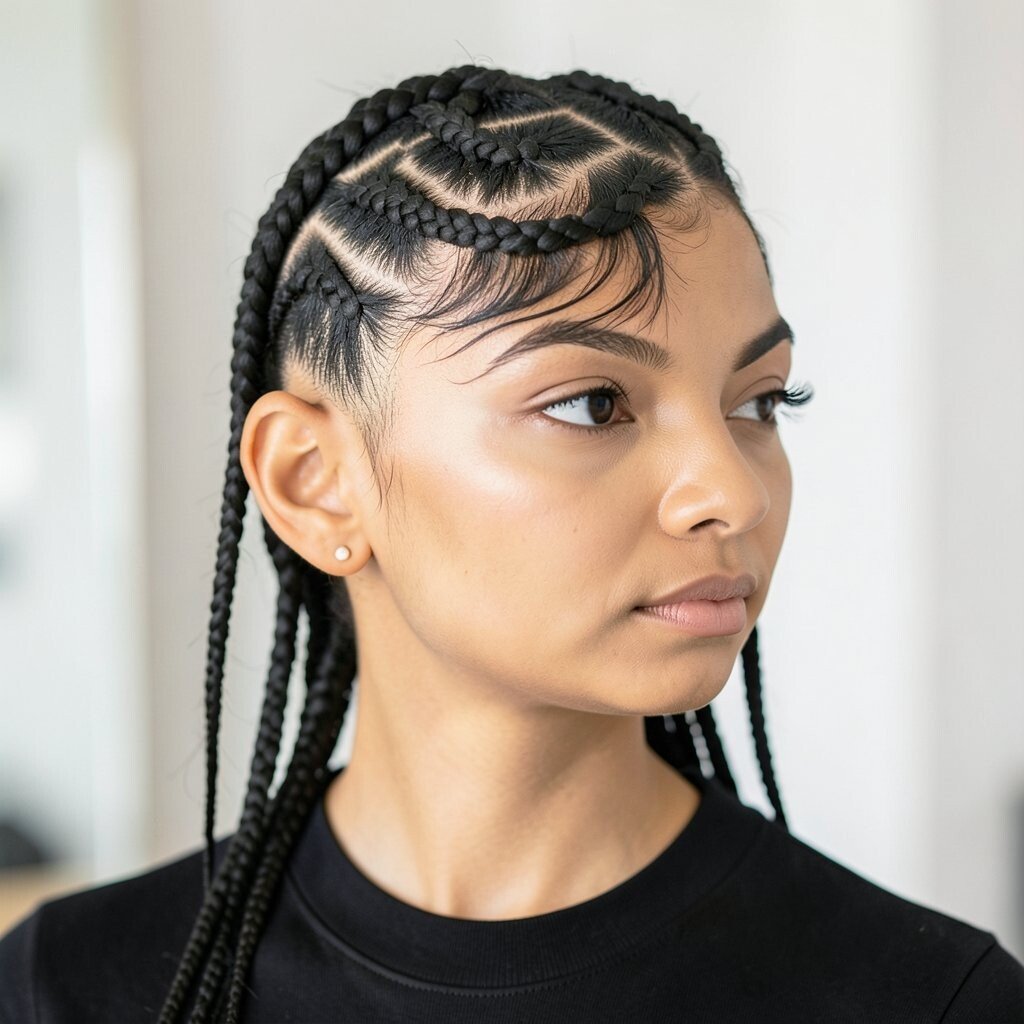
Imagine a glossy half-up pony that looks neat from the front and still fun from the side. Tiny braids weave into the gather, like delicate details you notice only after you stare at the picture for a while.
This look is both trendy and practical for dancing, because the half-up section keeps hair out of your eyes. Start by sectioning the front pieces, then braid them into small strands before combining them at the crown. Finish with a smooth ponytail tie and a light hairspray mist so it stays put through photos.
If you want personalization, choose braid widths to match your hair thickness. Curly hair can handle this too, especially if you pin the top smooth first and leave the rest voluminous. Styling takes a little time, but the tools are basic, so cost usually stays low.
3. Classic Low Bun With Baby Hair Edges
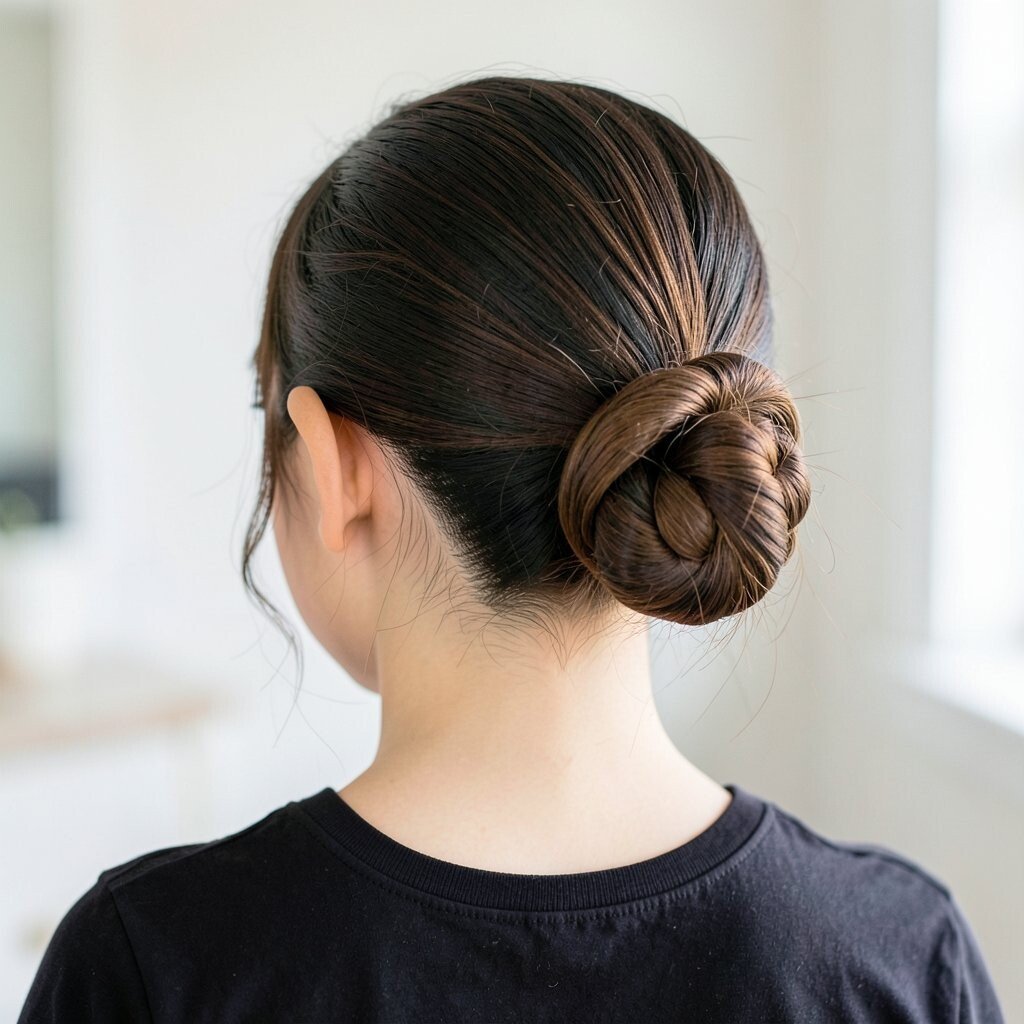
Think of a low bun resting at the nape of your neck, clean and elegant. Baby hair edges add a soft glow around your hairline and make the bun feel extra intentional.
This hairstyle feels timeless, which is why it keeps showing up for big events. Gather your hair into a low ponytail, twist it into a bun, and secure with pins that match your hair color. Use a soft edge gel or a tiny brush to tame flyaways, then wrap a small scarf for ten minutes if you want maximum neatness.
For uniqueness, try a slightly messy center part or leave a thin face-framing strand. It also works well for all hair types, because buns can be adapted for sleek or textured hair. If you’re buying products, look for a gentle hold gel and a good bobby pin set to keep it affordable.
When you add a statement earring, this bun makes your earrings look even brighter. And if your dress is busy, the sleek shape helps your whole look feel balanced. Keep shine optional with a light spray so your hair looks healthy on camera.
4. High Ponytail With Soft Volume At The Crown
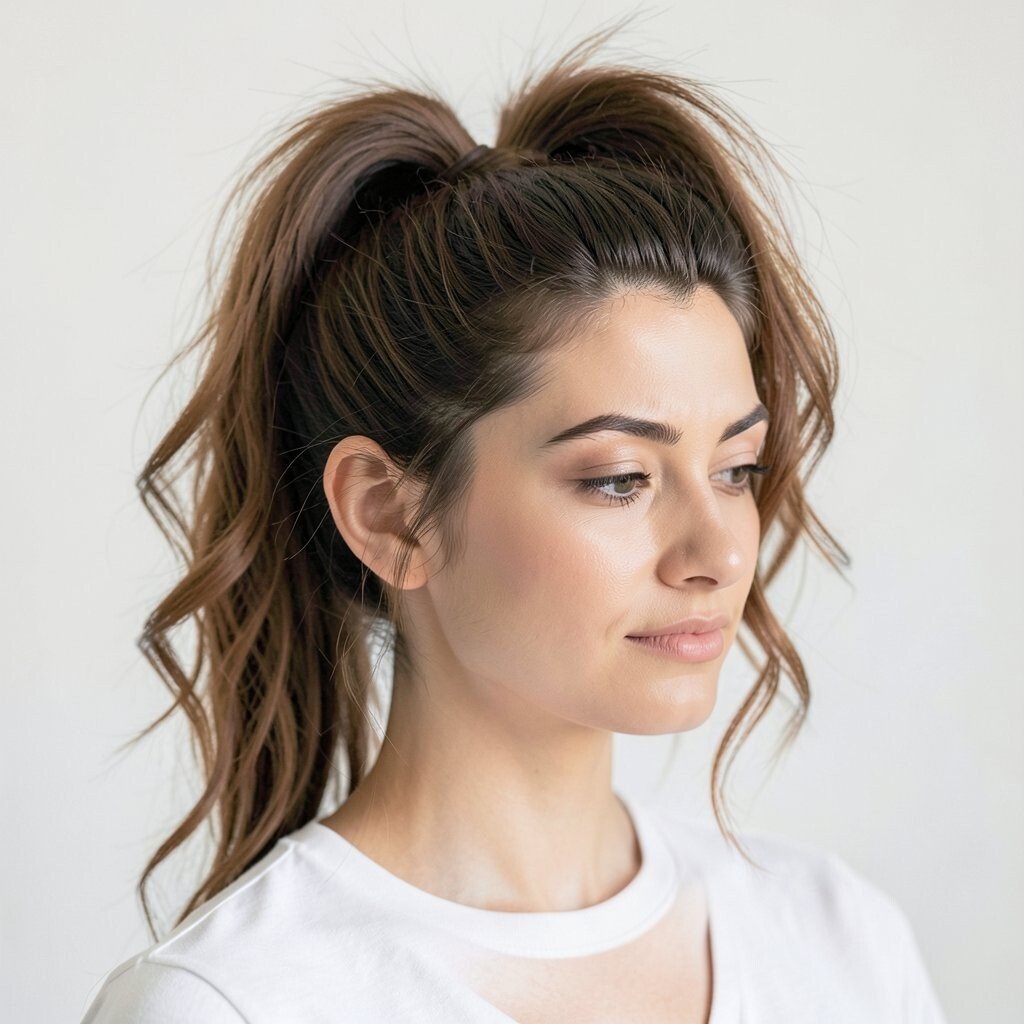
Visualize a bold high ponytail that lifts your look instantly. The crown has gentle volume, making the pony feel bigger and more dramatic without looking heavy.
This style is perfect if you want energy and a confident vibe. Tease the roots lightly at the crown, then smooth the top and tie the pony high. Add a wrapped elastic with a strand of hair for a finished look, and use a small amount of gel along the hairline to avoid bumps.
5. Twisted Rope Crown Braid
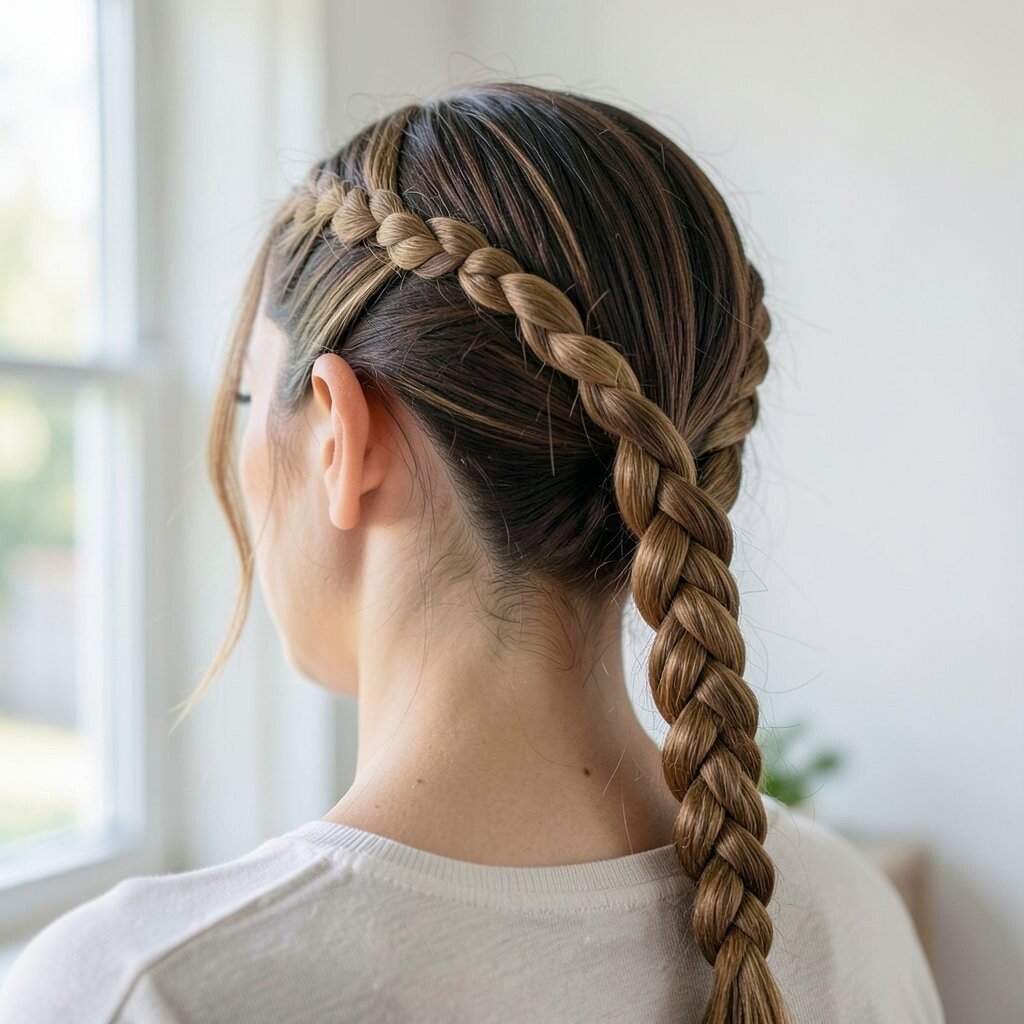
Picture a crown braid made from two twisted sections that look like polished ropes. It sits around your head like a halo, and the texture shows up beautifully in flash photos.
This one feels unique because the twist style looks more detailed than a basic braid. Start with two equal sections near the front, twist them in the same direction, then cross them and repeat as you move around your head. Secure with pins and a discreet elastic underneath so it holds through the night.
To personalize, keep the braid tight for a sleek look or loosen it slightly for a soft, romantic vibe. If you have shorter hair, you can use a few strategic pins and maybe a small clip-in piece. Cost considerations are friendly here since you mostly need elastics, pins, and maybe a braid spray.
6. Waterfall Braid With Loose Waves
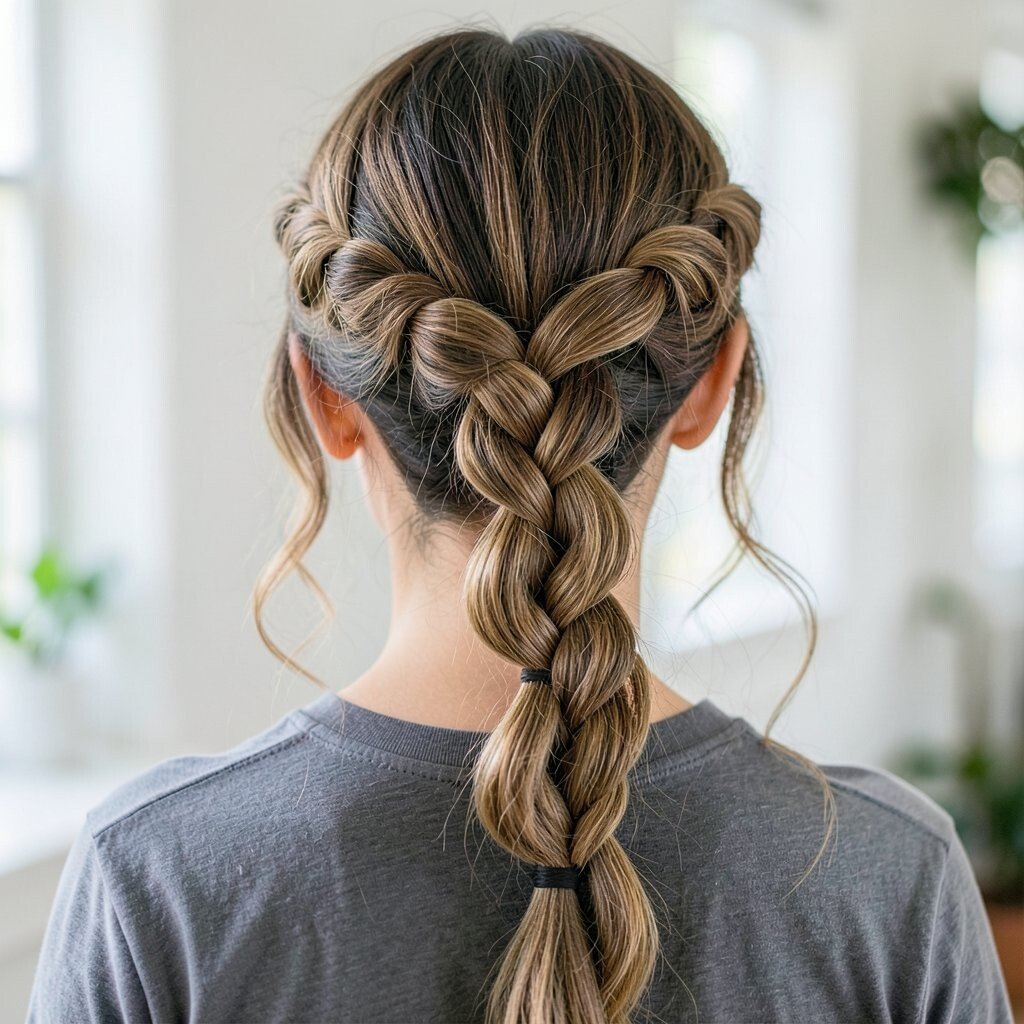
Imagine a braid that releases sections of hair like flowing ribbons down the side of your head. Loose waves add movement, so the waterfall effect looks effortless and pretty.
This style feels elegant while still giving you that natural, soft look. Make a side part, then braid across while letting a strand drop and replace it with fresh hair from above. When you finish, curl the remaining hair lightly so the “waterfall” blends into the waves.
7. Sleek Side Part With Glossy Tucked-Back Waves
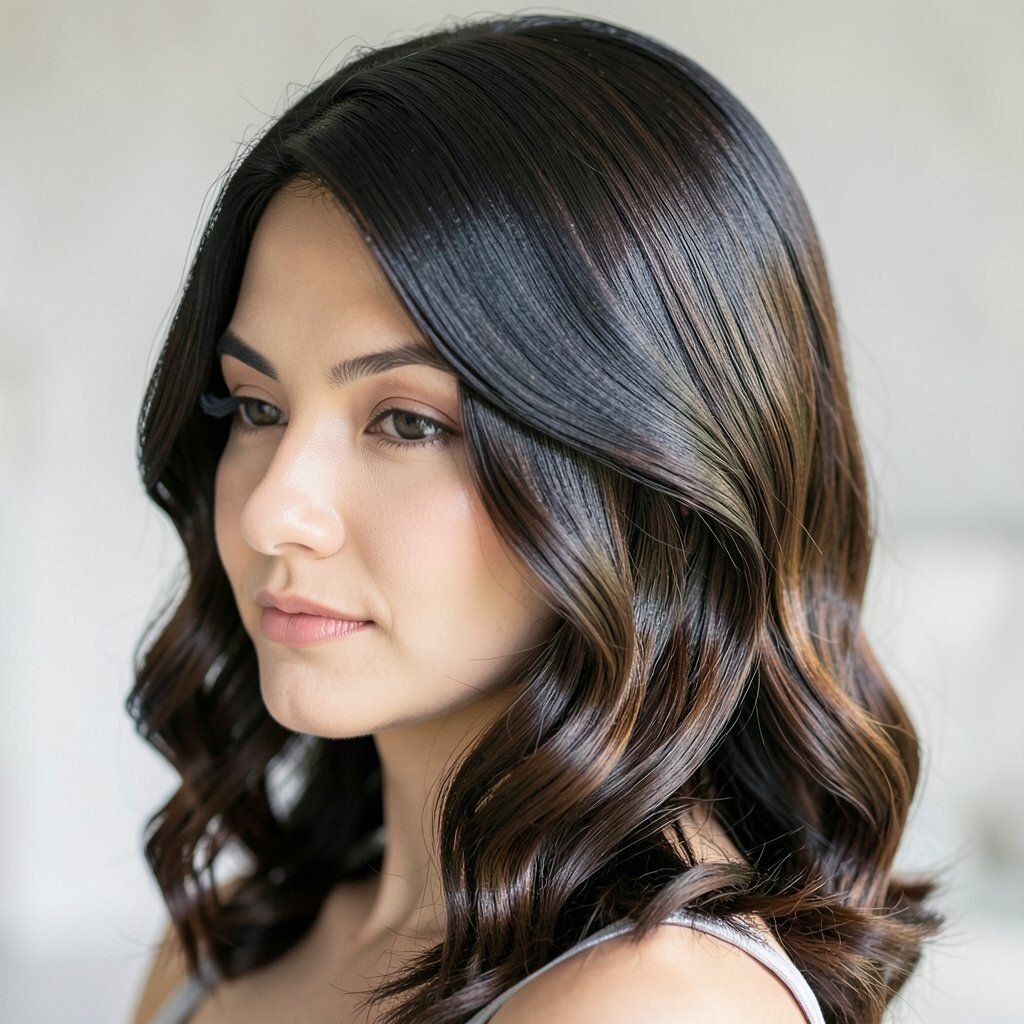
Think of glossy waves that are tucked back at one side, like a classy secret detail. Your hair still moves, but it never falls across your cheek in the middle of a dance.
This look works well for people who want a polished hairstyle that doesn’t require constant adjusting. Use a side part, tuck a section behind one ear, and pin it close to the head. Add shine spray on the lengths and soften the wave shape with your fingers after curling.
For personalization, choose a deeper side part for a sharper look or a softer part for a romantic vibe. If your hair is frizzy, a smoothing cream and heat protectant will help keep it sleek without crunch. It can also fit different budgets since many stores sell travel-size shine products.
When the lighting hits, the glossy finish makes your hair look healthy and rich. Pair it with a simple clip or no accessories at all for a clean, modern feel.
8. Messy Top Knot With Textured Ends
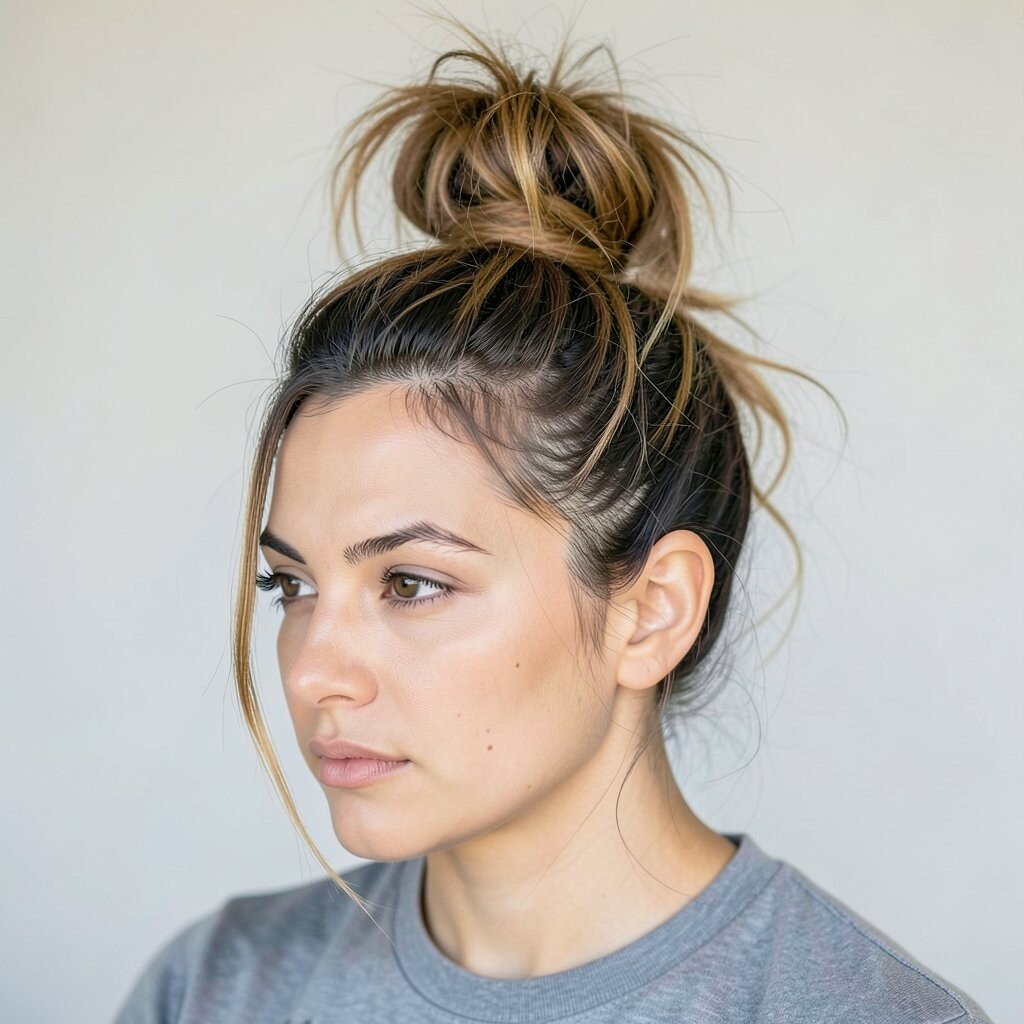
Picture a casual top knot perched on top of your head, with pieces left intentionally tousled. The texture gives it a cool, off-duty vibe that still photographs well.
This style is great if you want something quick that looks styled. Gather hair high, twist it into a knot, and secure with pins. Use a sea salt spray or texture spray first, so your hair holds the mess instead of falling flat.
9. Bubble Ponytail With Three Mini Ties
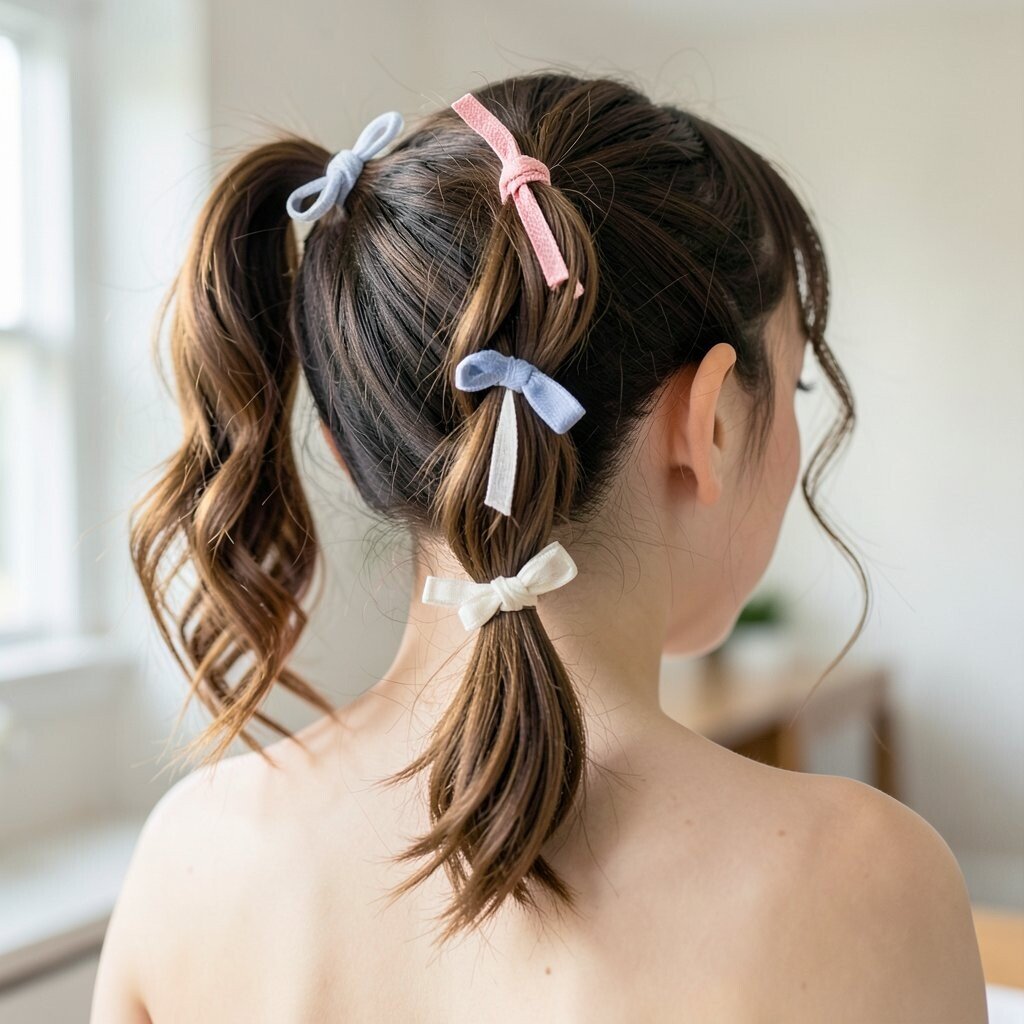
Imagine a ponytail shaped with repeating “bubbles” created by small elastics. Each section catches light, making your hair look fun and structured at the same time.
This hairstyle is playful and perfect for prom energy. Start with a mid or high ponytail, then split it into sections by placing small elastics down the length. Gently pull each bubble outward so it looks round and full.
For personalization, match the elastics to your hair color or try clear elastics for a cleaner look. If your hair is thick, you can create bigger bubbles; if it’s fine, keep them smaller for more lift. Budget-wise, elastics are cheap, and you can reuse the same product setup for other events.
If you want a more elegant version, smooth the top part first and leave the bubbles neat instead of super messy. Add a ribbon for extra charm, especially if your dress has a matching color.
10. Half-Up Braid Crown With Flower Clips
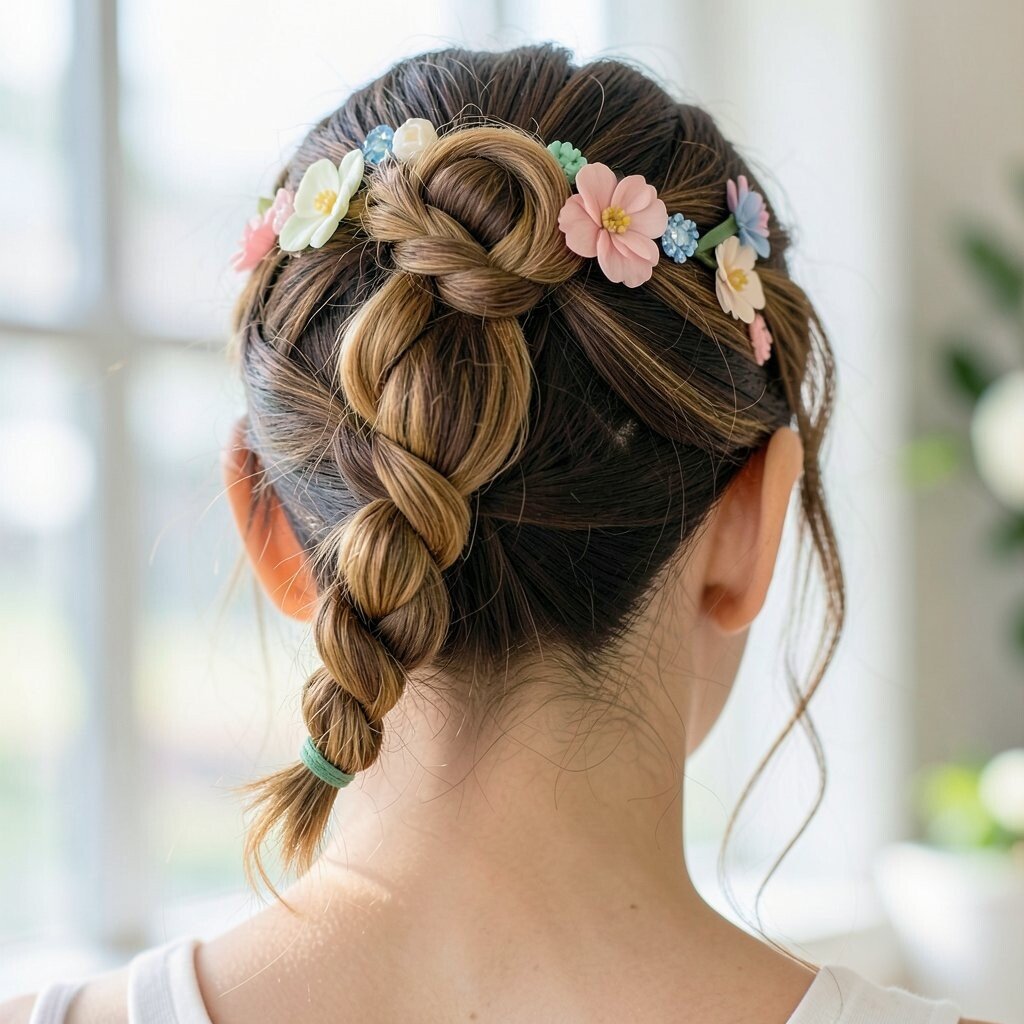
Picture a braid crown that begins at each side and meets in the middle, with soft hair left down the back. Small flower clips tucked into the braid add a sweet touch that feels fresh and youthful.
This style is a win because it keeps your hair neat while still letting your length show. Braid both sides loosely, then pin them at the back using bobby pins for comfort. Let the remaining hair fall in soft waves so the crown looks balanced.
To personalize, use clips that match your outfit theme, like pearls, daisies, or even a metallic accent. If you have curly hair, embrace the texture and braid with damp hair so it stays easier. You can often keep cost low by using hair clips you already own or buying a small pack for reuse.
11. Retro Victory Rolls With Modern Shine
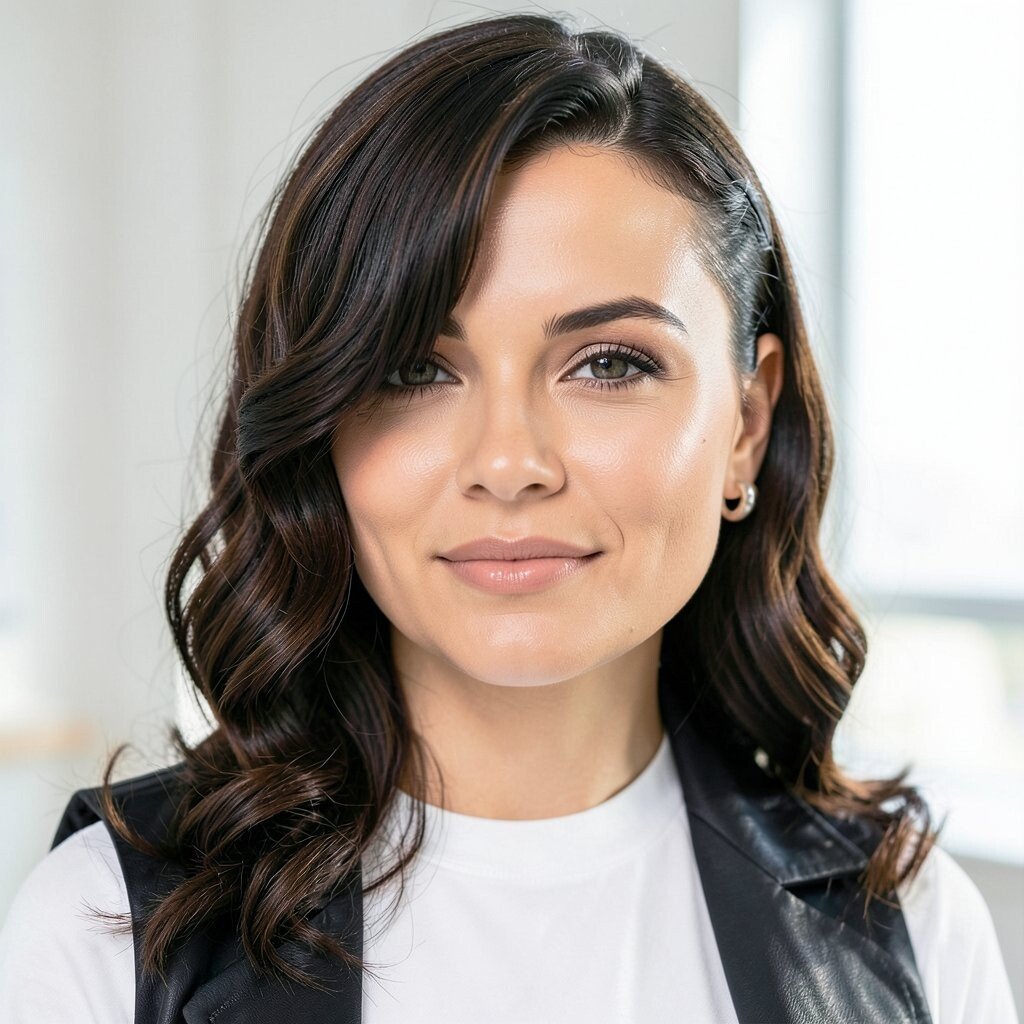
Imagine waves shaped into bold rolls near the forehead, giving a classic old-movie vibe. Modern shine makes it feel current instead of costume-like, especially under bright lights.
This hairstyle stands out because it’s artistic and memorable in photos. Section hair at the front, curl into roll shapes, and pin them as you go. Keep the rest of your hair smooth or lightly wavy to avoid competing textures.
If you want personalization, choose a deeper part and vary the roll size slightly for asymmetry. Practice once at home so you know where to place the pins comfortably. Cost considerations are usually minimal since you need only pins, a curling tool, and some setting spray.
For comfort, pin with care and avoid placing pins where they will rub your forehead. The extra effort pays off when you see your pictures and realize your hair looks like a whole theme by itself.
12. Sleek Braided Chignon At The Nape
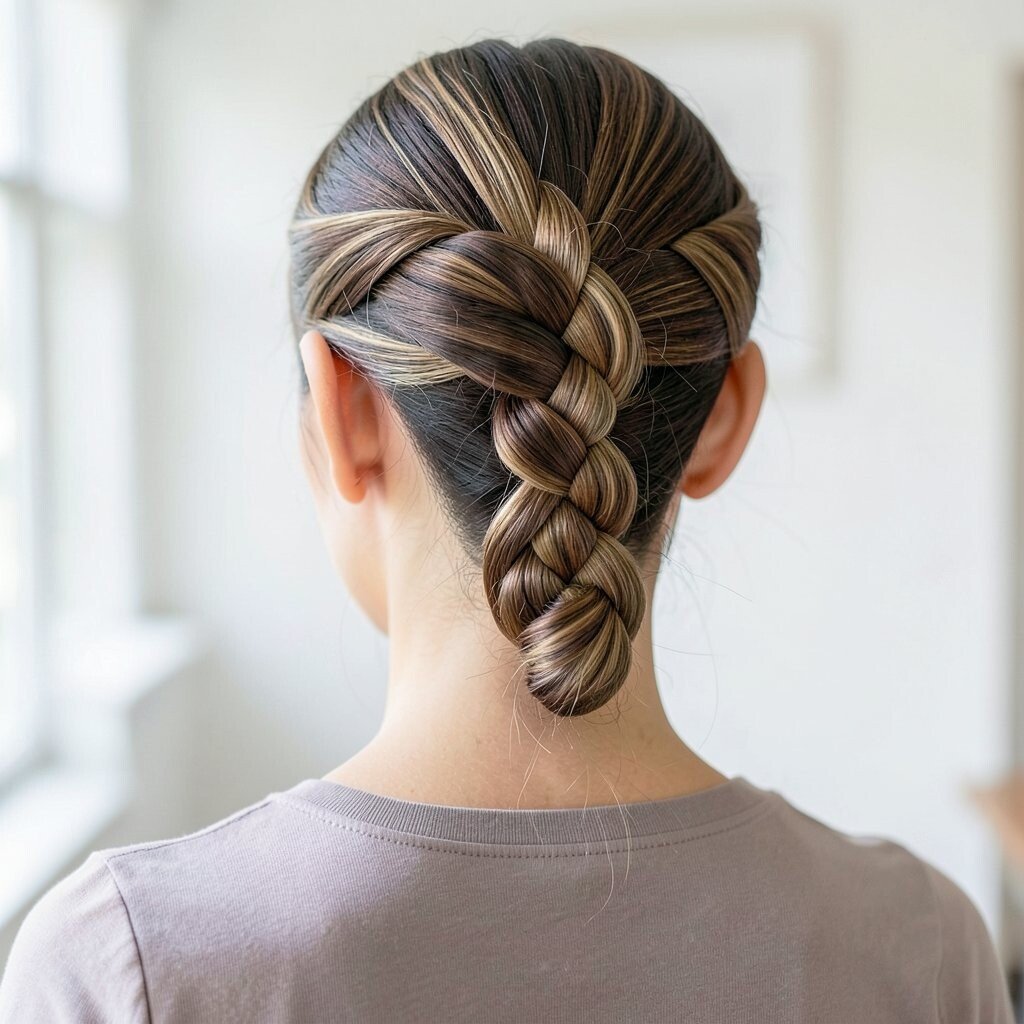
Picture a braided chignon tucked low at the back, like a neat bundle with built-in texture. The braid gives structure, while the bun shape keeps everything elegant.
This style feels formal but still approachable, so it’s great for both classic and modern looks. Create a low ponytail, braid it, then wrap the braid into a bun at the nape. Secure with pins and lightly tug the braid so it looks full and not flat.
13. High Shag-Inspired Layers With Curtain Fringe
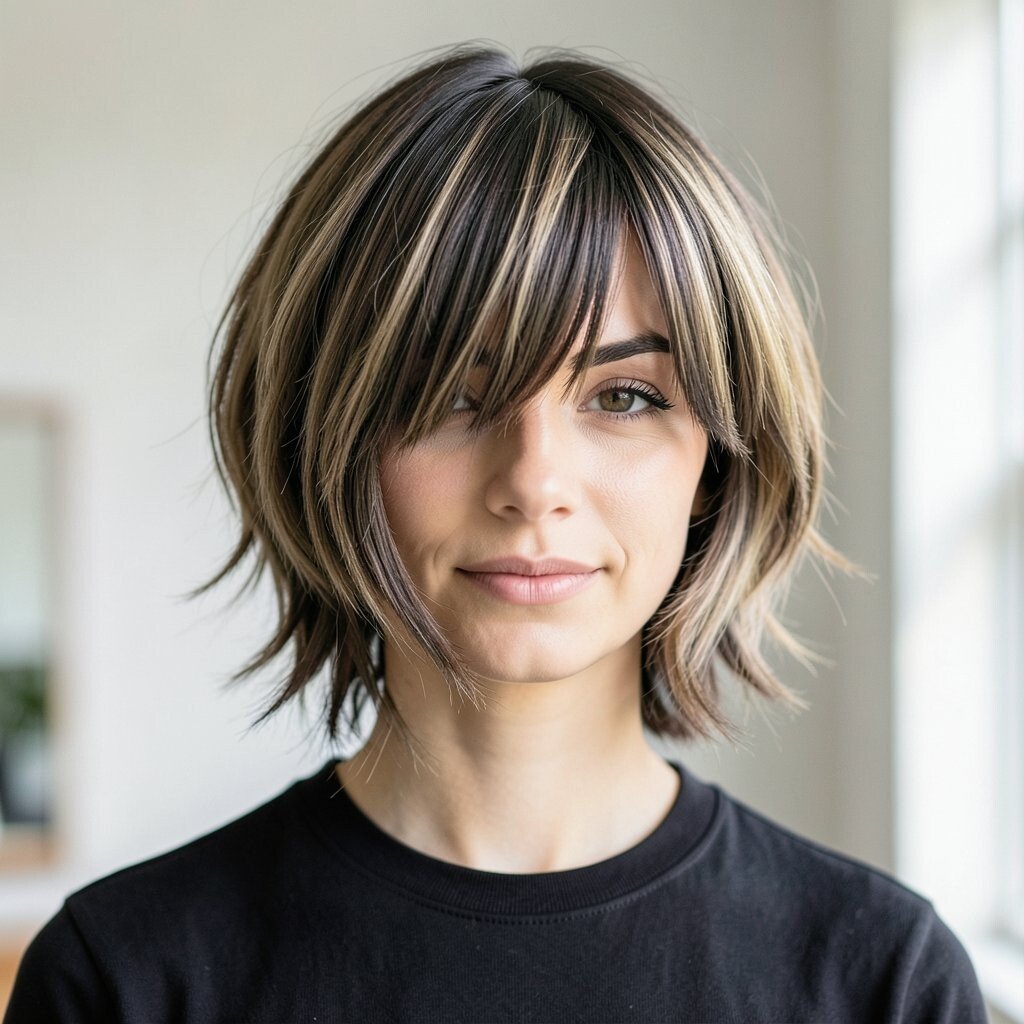
Imagine shoulder-length movement, with layers that bounce as you turn your head. A curtain fringe adds softness and makes the whole style look effortless.
This look matches current trends because it celebrates texture instead of hiding it. If your hair is already layered, you can style with a round brush on the fringe and a light mousse on the lengths. For thicker hair, blow-dry with the nozzle pointing down and keep the layers defined.
Personalization can be as simple as choosing how separated your fringe is from the rest of your hair. If you want more edge, add a slight bend at the ends with a curling iron. Cost considerations are fair since a basic mousse and heat protectant can do most of the work.
14. Glam Wraparound Ponytail With Hair Extension Trick
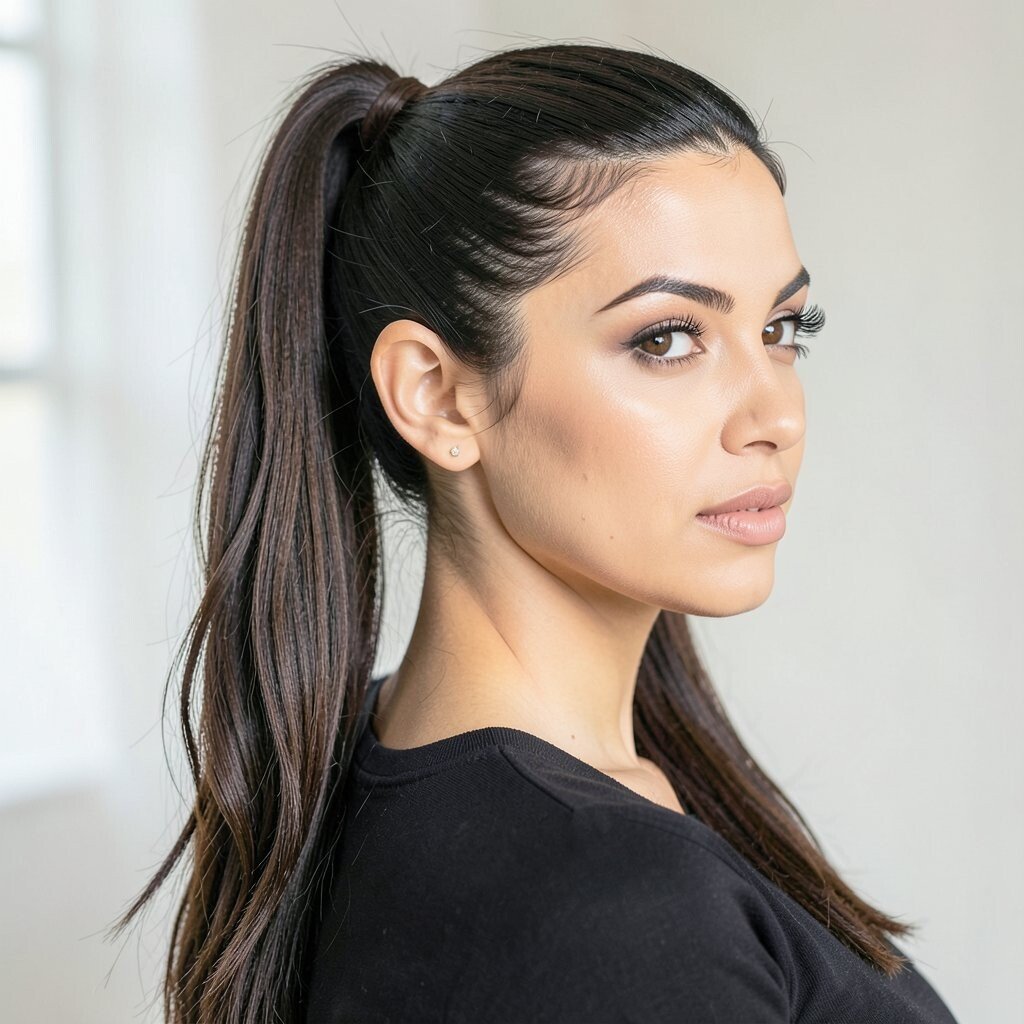
Picture a ponytail that looks extra thick and long, with hair wrapped around the base for a smooth finish. The wraparound section hides the elastic so it looks like a salon result.
This is a great choice if you want maximum drama without a complicated style. You can use a matching extension piece or thickness clip to add volume, then blend it by smoothing the top and brushing the lengths together. Finish with a shine spray and a firm elastic so it holds through photos and dancing.
For personalization, decide how high you want the pony and whether you want curls or a straight finish. Straight hair looks extra sleek, while loose curls add softness and movement. Since extensions vary in price, you can consider borrowing one or renting if that fits your budget.
15. Braided Bangs Into A Sleek Side Swept Style
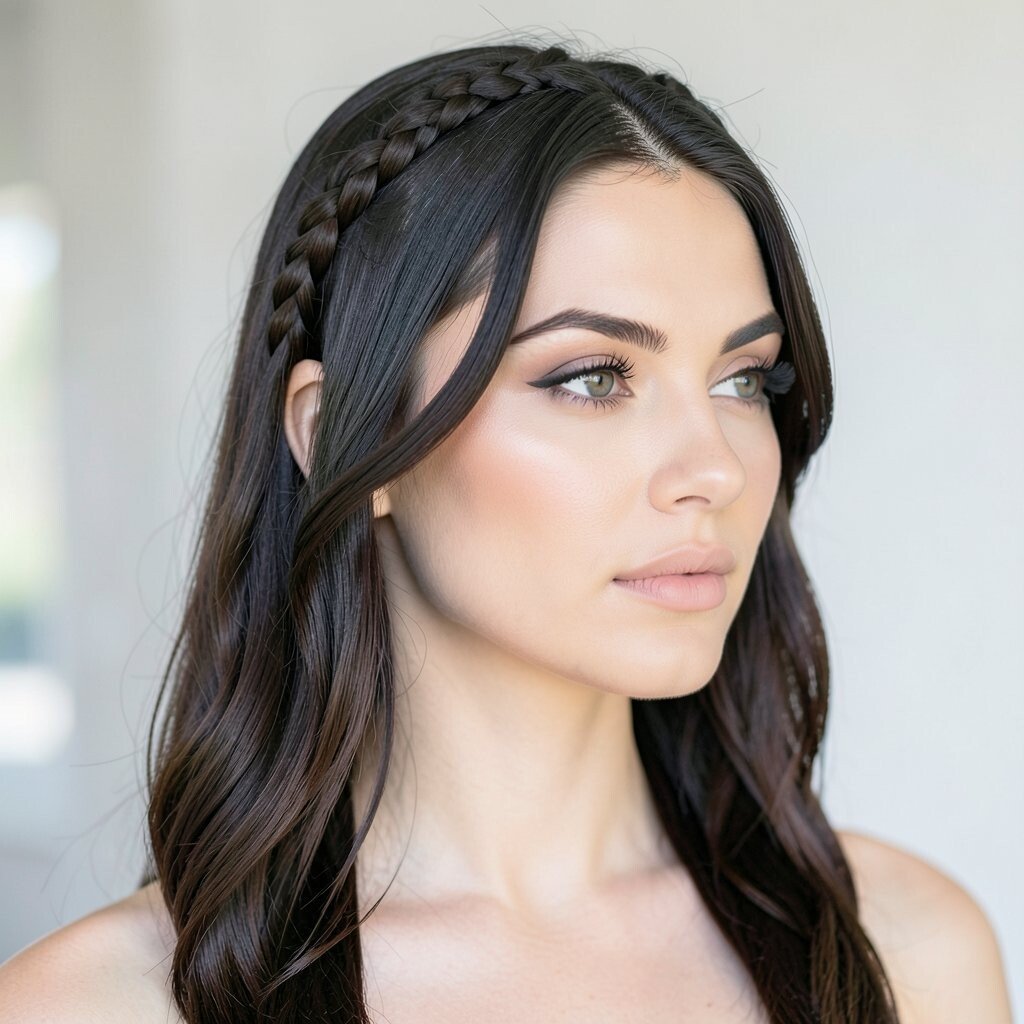
Imagine tiny braids along your bangs that blend into a smooth, side swept hairstyle. The result feels delicate but still strong enough for a busy night.
This style is unique because the braid detail is small, yet it frames your face in a special way. Start by braiding a narrow section from the front, then braid backward and pin it into place. Sweep the rest of your hair to one side, curl lightly, and tuck any loose ends under.
To personalize, keep the braid thin for a subtle effect or thicker for a more visible look. If your hair is fine, use a light volumizing mousse so the side waves don’t fall. Cost is usually manageable because braid tools are basic and reusable.
When you wear this with a strapless or off-shoulder outfit, the side sweep draws attention to your neckline. And if you’re nervous about too much styling, this one gives you a simple structure that you can repeat again later.
16. Low Side Bun With Twisted Under-Side Detail
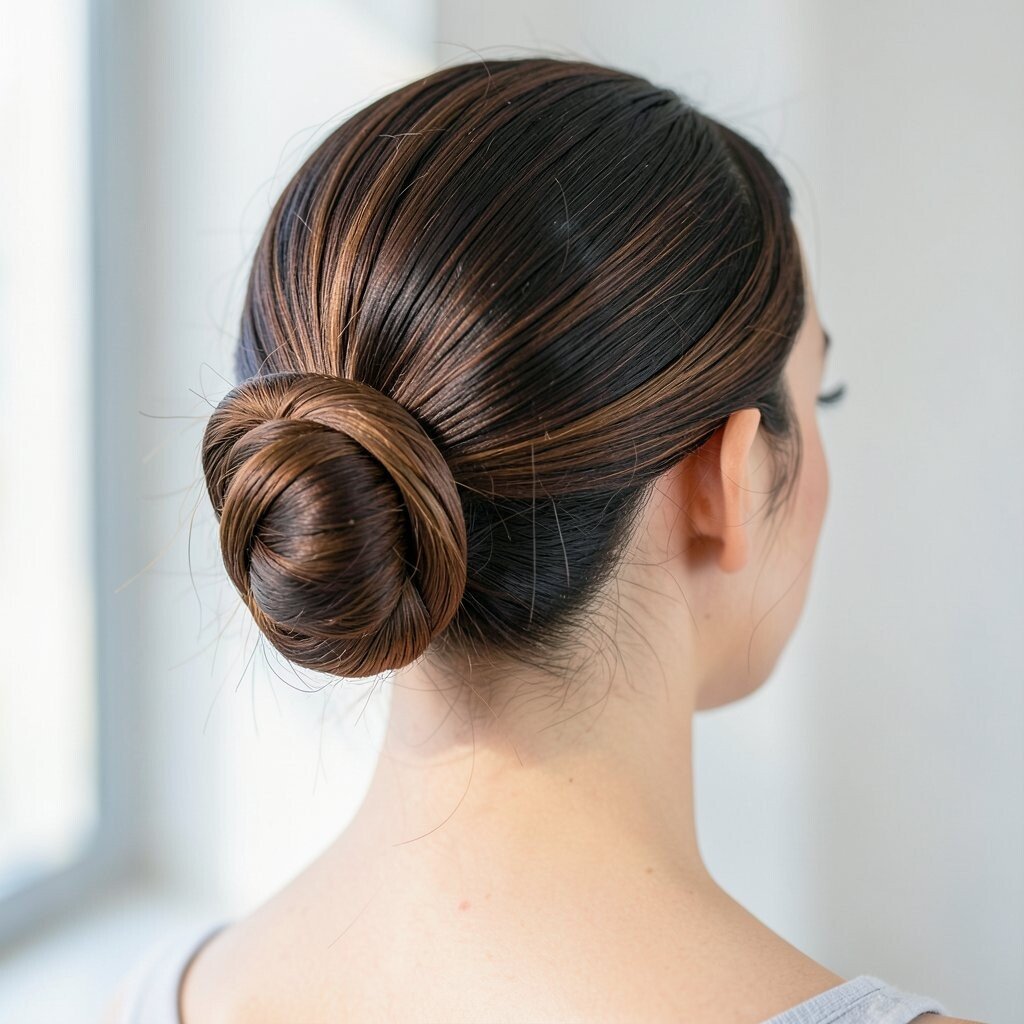
Picture a low side bun tucked near your jawline, with a twisted detail underneath. The twist adds a hidden-looking texture that feels fancy when you see it closely.
This hairstyle is practical because it keeps your hair secure while still looking romantic. Gather your hair to one side, twist a section at the underside, and wrap it into the bun. Use pins generously at the base so it doesn’t shift when you turn your head.
17. Curly Half-Up Puff With Satin Scrunchie
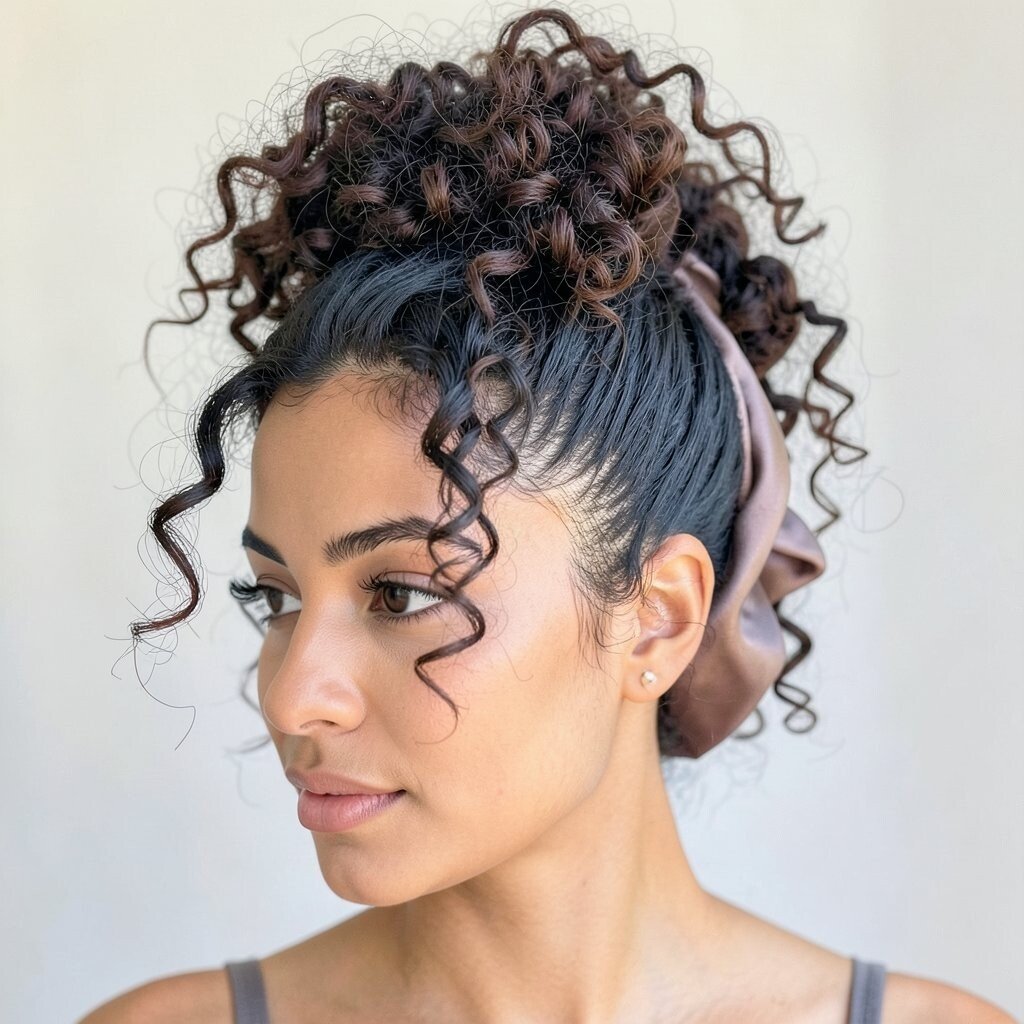
Imagine bouncy curls pulled into a half-up puff at the top, held by a shiny satin scrunchie. The contrast between soft volume and smooth fabric looks cute in every angle.
This option is perfect for curly hair types because it protects your curl pattern and reduces frizz. Gather the top portion only, then secure with a satin scrunchie to minimize breakage. Fluff the puff gently with your fingers for a rounded shape.
For personalization, adjust the puff height or add a small clip near the side. If you want a more glam finish, wrap a thin ribbon around the scrunchie base. Cost considerations are friendly since satin scrunchies are affordable and easy to find.
This style also works for people who want to skip heat and still look polished. Just refresh curls with a little water or curl spray before you style.
18. Sleek French Twist With Minimal Accessories
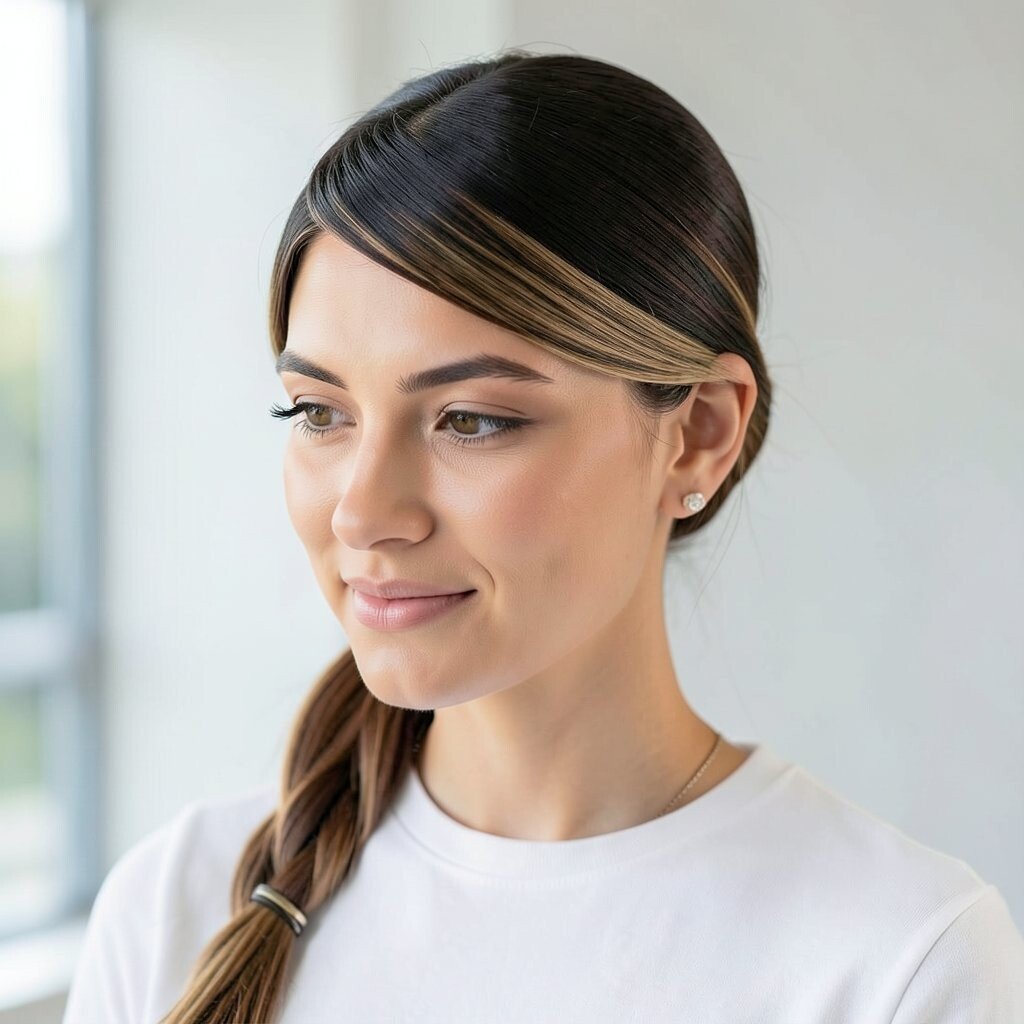
Think of a French twist that sits neatly like a sculpture at the back of your head. A clean twist highlights your face and makes your neckline look extra elegant.
This look is a classic trend for formal events because it’s neat and photo-ready. Section your hair, smooth it, twist it toward the back, and pin it in layers so it feels secure. Add a light hair spray to help it stay smooth instead of slipping.
19. Side Ponytail With Braided Wrap And Loose Ends
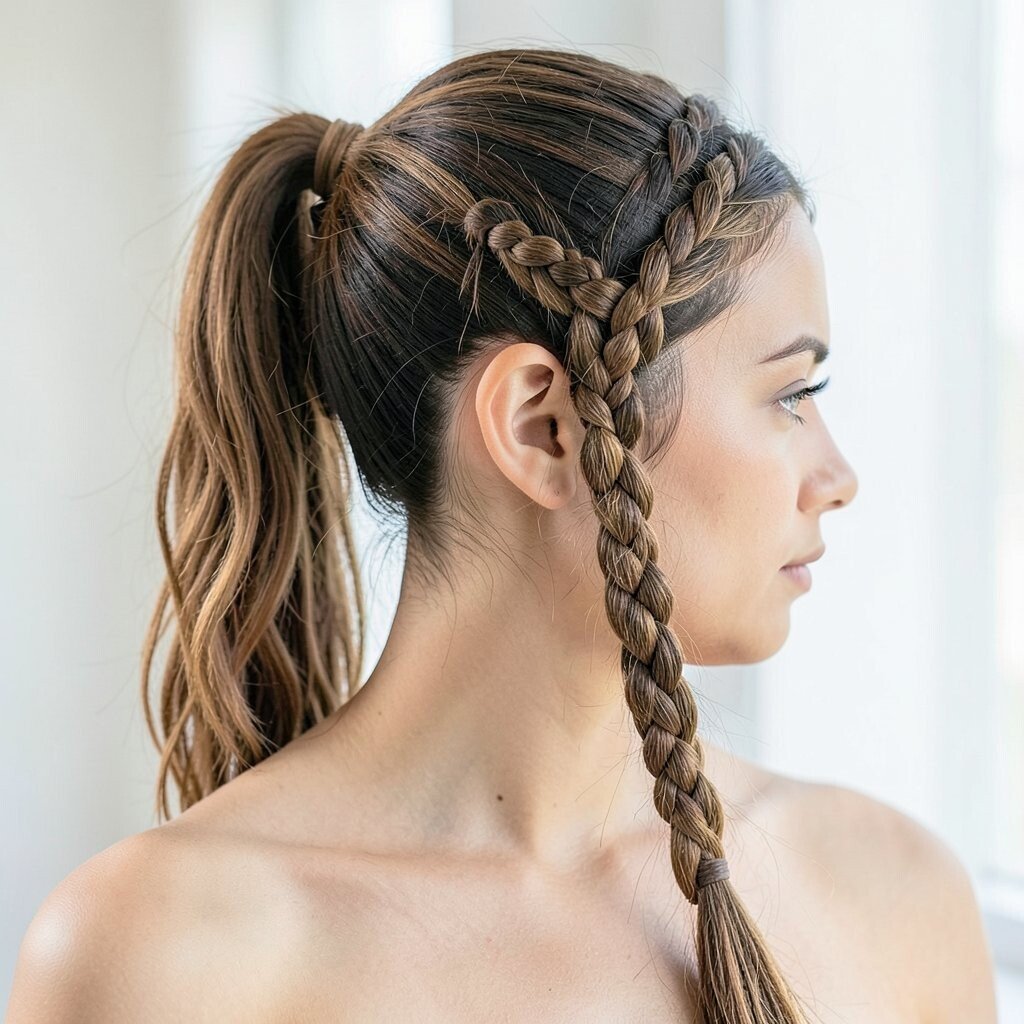
Imagine a side ponytail that flows like a ribbon, then wraps with a braid near the base. The loose ends look soft and carefree, making the whole style feel fun.
This one feels actionable because it’s easy to adjust for your hair length. Tie a side ponytail, braid a small section around the elastic, and secure the end with a pin under the pony. Curl the ends or use a clip-in wave for an instant boost.
For personalization, decide the side location based on where your hair naturally parts. If you want extra volume, tease the roots at the crown first. Cost considerations are simple since you can make this work with elastics, pins, and a curling tool you already have.
20. Statement Hair Clip With Straightened Center Part
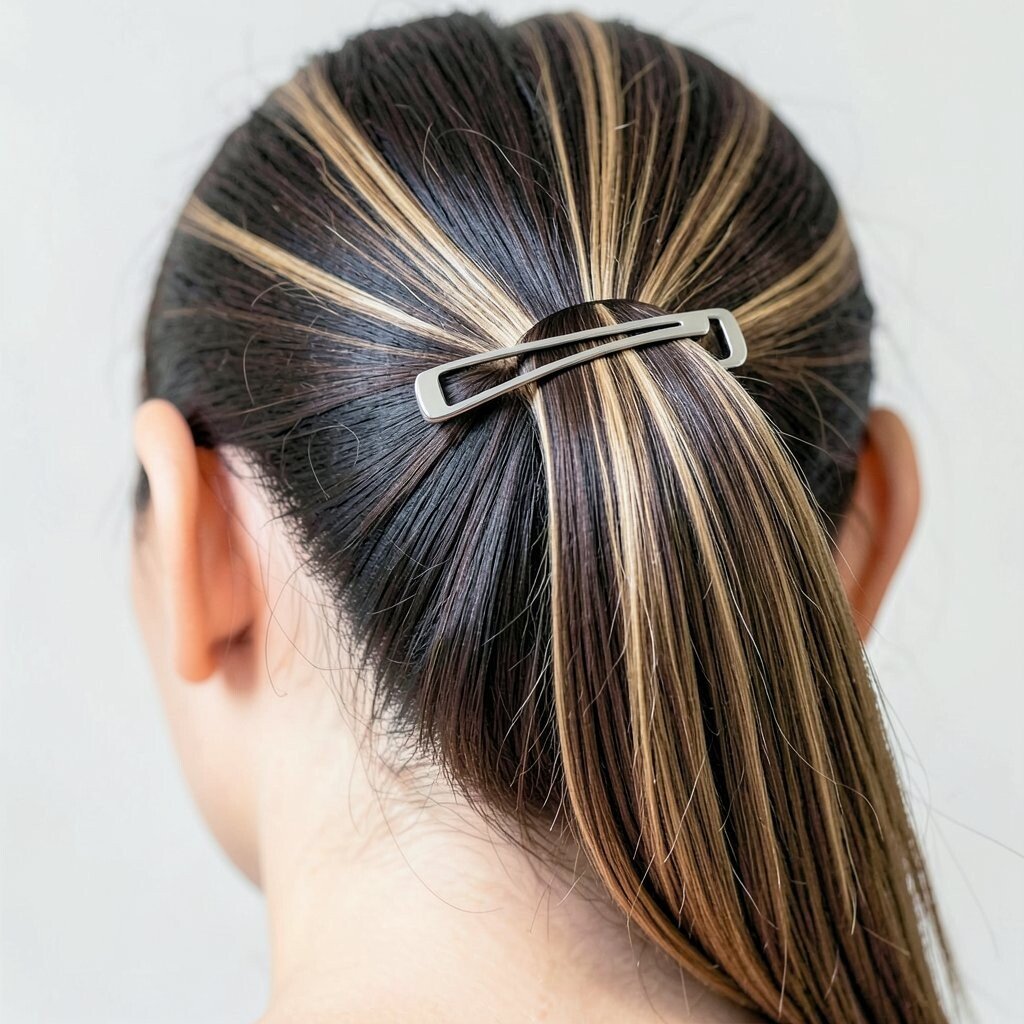
Picture a center part with hair falling smoothly on both sides, plus a bold clip placed near the crown. The clip acts like jewelry, so your hairstyle feels styled even when it’s sleek and simple.
This style is trendy because minimal hair can still look high-fashion with the right accessory. Straighten your hair with heat protectant, then set it with a light spray for shine. Place the clip where it frames your face and makes your look feel intentional.
To personalize, choose a clip color that matches your earrings or your outfit details. If your hair doesn’t hold straight well, try a blow-dry with smoothing technique instead of heavy flat ironing. Cost can stay low since one good clip can be reused for many events.
This also works for busy schedules because you can get ready quickly and still look polished. Pair it with a simple makeup look and let the clip do the talking.
21. Double Dutch Braids With Loose Face-Framing Strands
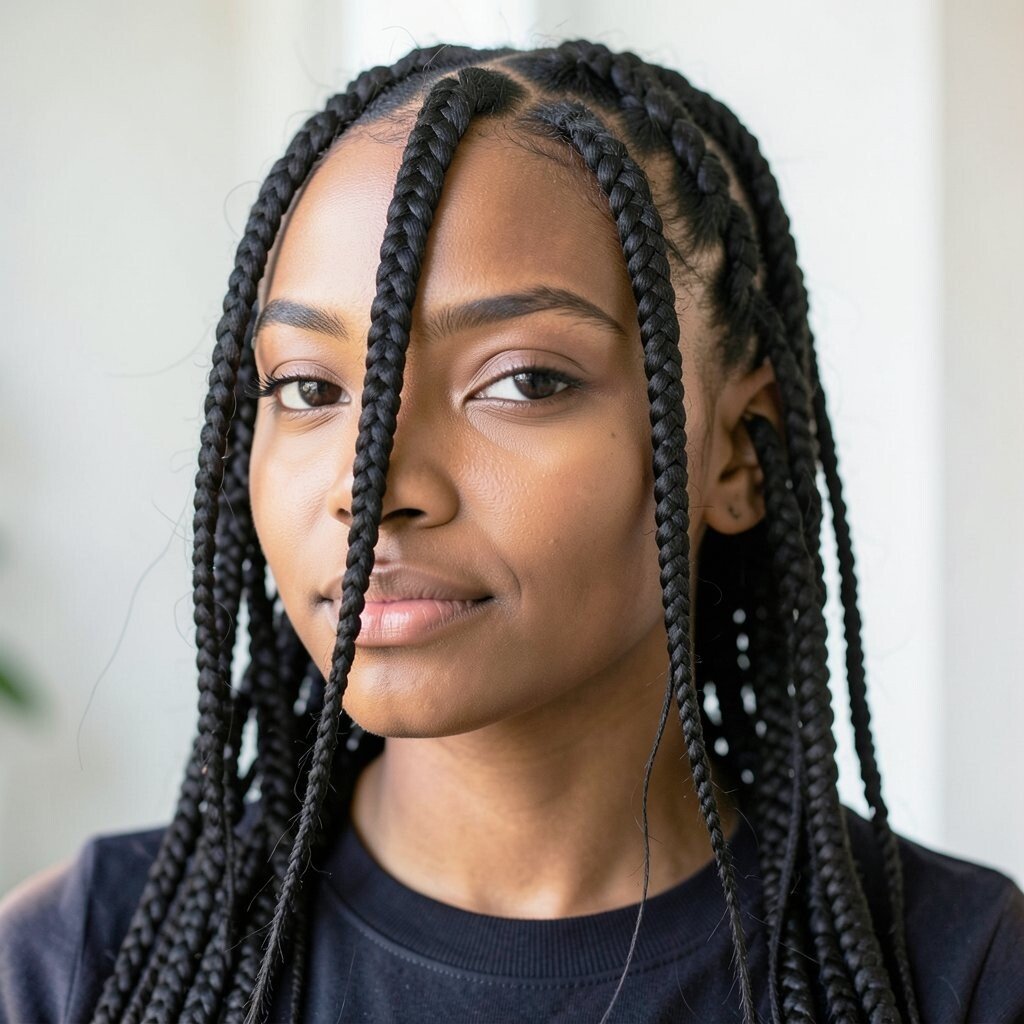
Imagine two bold braids pulled tight along your scalp, with soft strands left out to frame your face. The combination feels sporty, pretty, and confident all at once.
This hairstyle is unique because the double Dutch structure looks strong while the face-framing pieces keep it sweet. Divide hair into two sections, create Dutch braids by crossing strands under, and secure the ends with elastics. Curl or wave the released face strands so they blend into your natural shape.
For personalization, vary the braid tightness and add a small ribbon at the ends if you want extra charm. If your hair is fine, using a light styling spray before braiding can help the braid last. Cost considerations are manageable since you mainly need elastics, pins, and maybe one styling product to hold everything in place.
When you wear this with a fitted outfit, your hair adds texture without stealing the whole look. And if you’re worried about flyaways, a tiny bit of gel around the braid roots keeps everything neat.