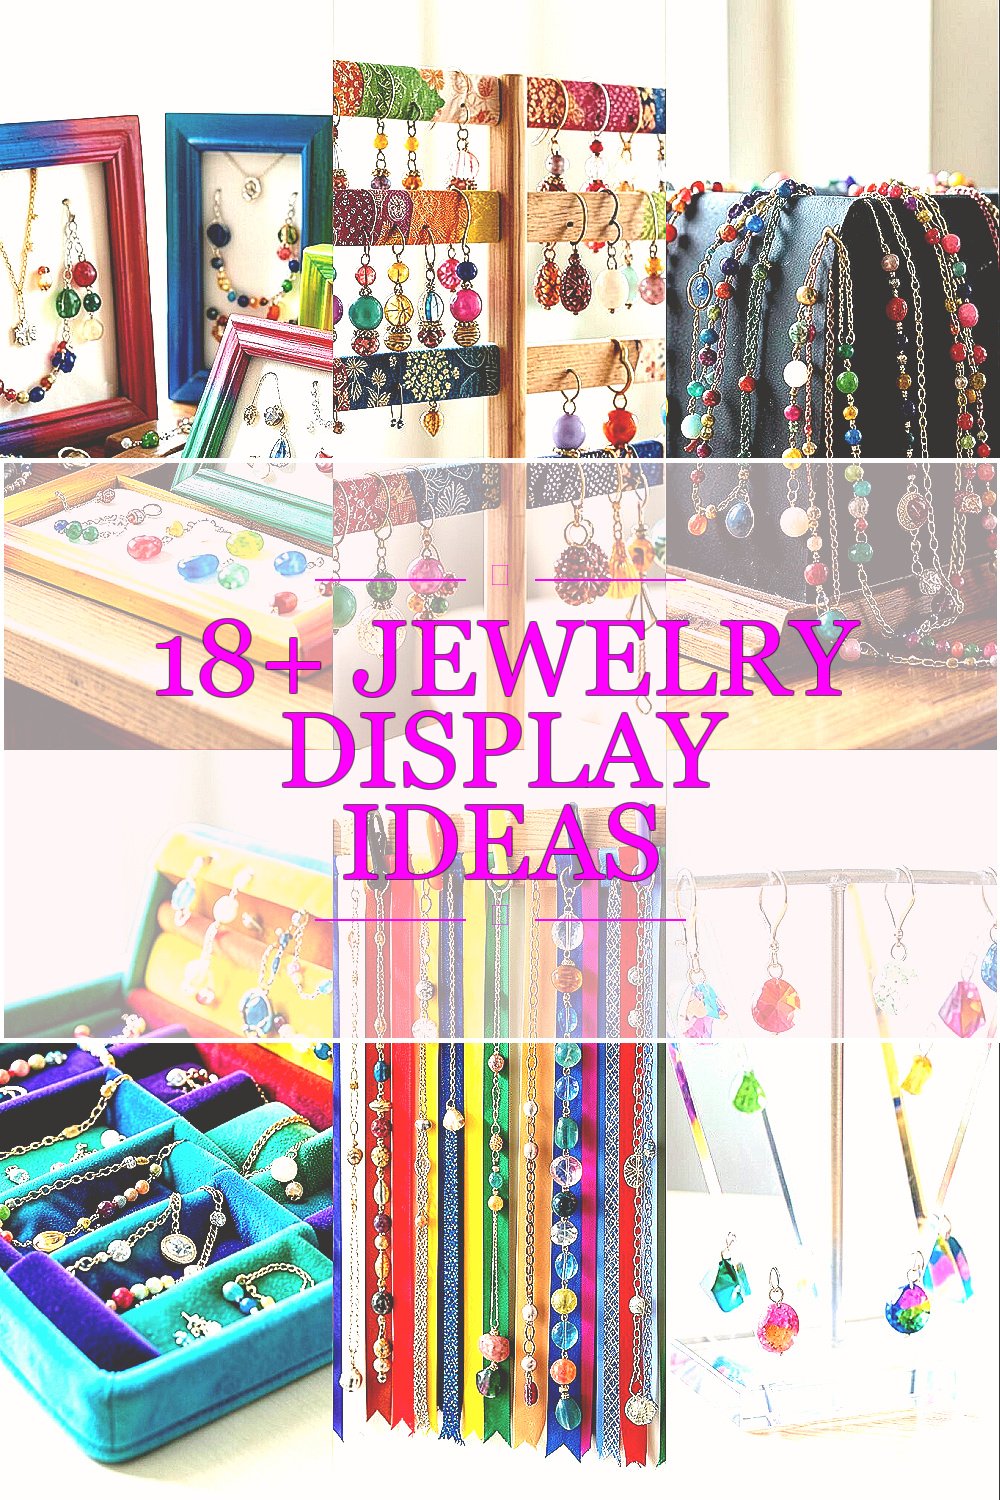
Jewelry deserves to look as good on your wall as it does on your body. When it’s displayed right, your room starts to feel more lively and personal.
With a few colorful touches and smart organizing, you can turn every piece into part of your home style. These ideas help you see what you own, wear it faster, and enjoy it every day.
1. Painted Shadow-Box Jewelry Frames

Choose a few shallow shadow boxes and paint their back panels in bright tones like coral, teal, or sunny yellow. Place necklaces on hooks or wrap them around small ring pegs so the colors pop in a neat layer.
This creates a tidy gallery look that still feels playful, especially when you mix metals with bold background shades. You can rotate pieces by season, and adding a name label behind the jewelry can help you stay organized without clutter. Consider starting with one or two boxes, then matching the rest to your room color palette for a cohesive feel.
2. Color-Blocked Earring Rails With Patterned Washi

Mount a simple wooden or metal rail, then use patterned washi tape to draw color blocks behind each earring section. Hang studs in tidy rows and let tiny hoops and drops sit like little ornaments.
This setup makes everyday earrings easy to find, which helps you actually wear the ones you own. Since washi tape is affordable, you can change colors whenever your style mood shifts, like switching from warm reds in fall to cool blues in summer. Keep heavier pairs closer to sturdy screws and use small clear clips for dangly pieces so they don’t tangle.
If your space is small, you can place the rail near a mirror so you can grab earrings before leaving. Use one dominant color and one accent color to keep the look clean. This idea also works great for gifts, since you can tailor the tape pattern to a person’s favorite colors.
3. Repurposed Chalkboard Mug Display for Necklaces

Grab a chalkboard mug or small chalkboard sign and hang it like a mini jewelry station near your door or dresser. Use chalk to lightly draw curved lines, then hook necklaces over small pegs while the chalk background adds a bold pop of contrast.
The visual effect feels artsy, like your jewelry is part of your daily message board. It’s unique because the chalk surface turns blank space into color and style each day. To personalize it, write a short reminder in bright chalk colors, like “gold first” or “sparkle day.”
For cost, chalkboard pieces can be cheaper than specialty organizers, especially if you repurpose something you already have. Keep it practical by using chalk only for simple shapes, since tiny letters can smear if you touch them often. If you live in a humid area, seal the board gently with chalk-friendly fixative so it stays vivid.
Use a small tray underneath for rings so your daily grab-and-go routine stays smooth. This also helps you keep the chain ends from drifting around when you’re in a rush.
4. Velvet Jewelry Catch-All Tray in a Bright Shade

Pick a velvet tray in a bold color like emerald or cobalt and place it on a dresser top where you can see it daily. Arrange rings, cuffs, and small pendants in little clusters so each item looks intentional.
Velvet gives your jewelry a soft, elegant backdrop that makes colorful stones look richer. It also makes cleanup easy, since everything sits in one protected spot instead of spreading across the surface. For practical personalization, choose tray compartments by adding small dividers with matching ribbon, and then swap your arrangement when you change what you wear most often.
5. Hanging Ribbon Wall Organizer With Color Clips

Stretch a few ribbons across a wall or inside a closet door, then clip jewelry to them using small clothespins or binder clips. Choose ribbon colors that match your room, such as dusty pink, mustard, or ocean blue, so everything looks coordinated but still fun.
This hanging display keeps necklaces visible and prevents the usual chain knots. Since clips are inexpensive, you can build the organizer gradually and adjust spacing as your collection grows. Use different clip sizes for different jewelry types, so heavier pieces have stronger clips and lighter chains hang comfortably.
To personalize, tie tiny charms to the clips or use ribbon ends shaped like little bows. Keep the ribbons smooth by ironing them lightly before hanging. If you want a cleaner look, use a consistent ribbon width and evenly spaced hooks for a neat line effect.
6. Acrylic Pendant Stand With Prism-Like Accents

Set up a clear acrylic stand for pendants and add colorful accents behind it, like small sheets of translucent craft plastic. The acrylic makes the jewelry look crisp, while the colored background adds a glow effect.
This style is great for showcasing gemstones, since light catches the facets and makes colors feel brighter. It’s also unique because you can swap the colored backing in seconds to match your outfits. For practical use, keep your daily necklace on the most visible side and rotate other pendants when you finish the look.
Consider cost by using inexpensive acrylic shelves or repurposed clear containers, then add the colorful backing yourself. If you want a current trend feel, lean into the “light and airy” look that clear organizers create. Add a small microfiber cloth nearby so the acrylic stays smudge-free and shiny.
7. Woven Basket Drawer Inserts for Beaded Jewelry

Use shallow woven baskets or wicker drawer inserts to hold beaded bracelets and bangles, then add bright scarves or fabric liners on top. The texture makes the jewelry feel warm and handcrafted, and you can see colors easily through the woven patterns.
This method is practical because it prevents tangles while still letting you grab pieces quickly. It also feels unique compared to straight metal organizers, since the basket texture adds depth and character. Choose liners in lively patterns like polka dots or small florals to make the display feel cheerful.
Personalize by sorting by color families, like grouping all turquoise beads together. For cost considerations, thrift stores often have baskets in great shape, and fabric liners are usually cheap. Keep bracelets from slipping by placing a thin ribbon strip across the top as a gentle barrier.
8. Colorful Pegboard With Mini Painted Hooks

Cover a section of wall with pegboard and paint the pegboard background in a bold shade before mounting mini hooks in coordinating colors. Hang earrings and small necklaces by color so you can scan your collection in seconds.
Pegboard displays are especially useful for practical daily use because hooks hold shapes well and keep items from tangling. This can feel truly unique since the pattern of hooks becomes its own artwork. To personalize, draw a simple theme like a sunrise gradient, where one row moves from warm to cool tones.
Keep cost in mind by using a small pegboard panel first, then expanding one section at a time. A current trend is turning functional storage into wall art, and pegboard does that well. Try adding a tiny tray along the bottom for rings so your most worn pieces stay at eye level.
If you have sensitive finishes, avoid heavy pressure when hanging and use hooks that fit securely without bending the board.
9. Bathroom Towel Bar Necklace Display in Bright Bands
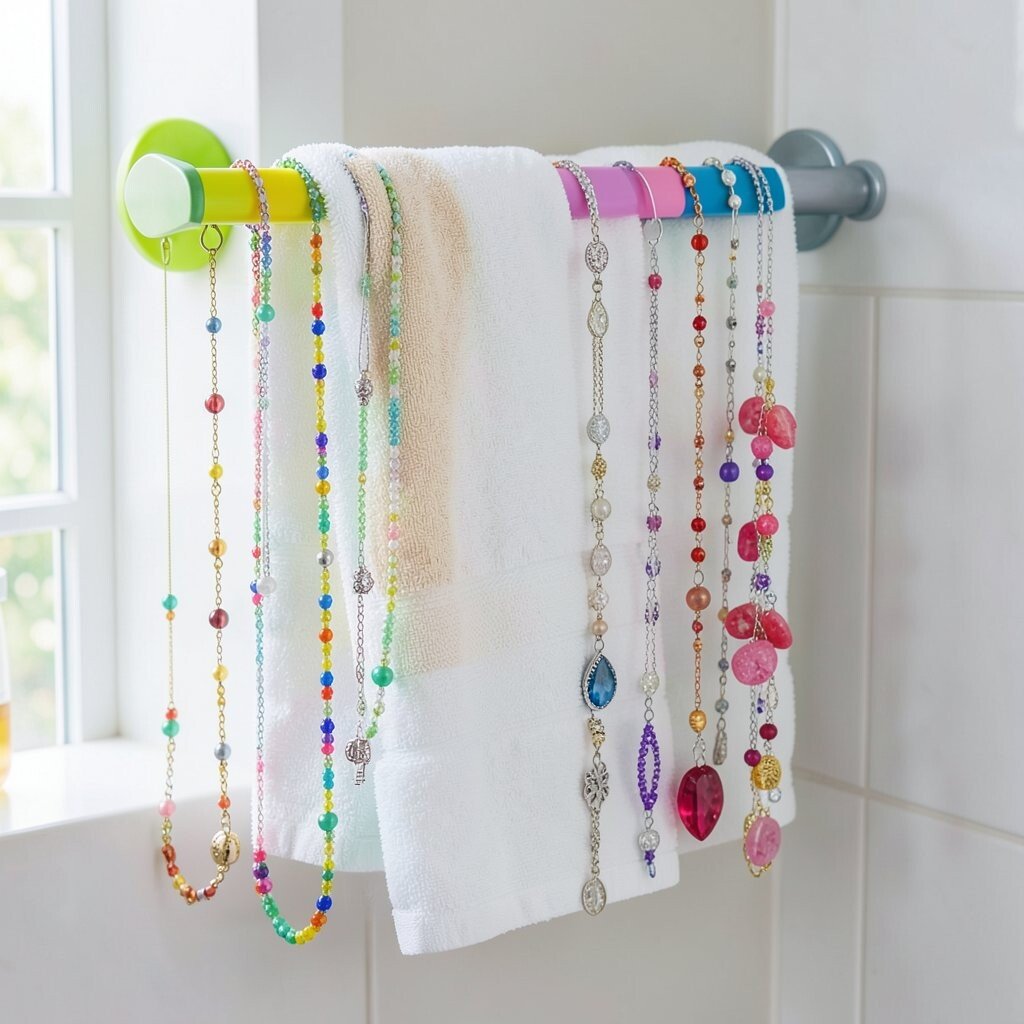
Install a small towel bar and use bright rubber bands or fabric ties to create spaced “zones” for necklaces. Hang each necklace over the bar so it sits flat, then tighten the ties slightly to keep chains from sliding.
This setup works surprisingly well because towel bars hold long pieces with less twisting than many hanging methods. It’s a practical upgrade for people who want a visible display near the mirror. For personalization, paint the bar ends, or wrap the bar with colorful grip tape that matches your room decor.
Cost-wise, towel bars can be affordable, and you can mount them with basic hardware. A current trend in home styling is using rails and bars in unexpected places, and this makes your jewelry look intentional rather than messy. Keep delicate chains away from rough knots by using small soft clips or clear curtain rings as gentle spacers.
10. Painted Branch Necklace Rack With Colorful Thread

Find a smooth, small branch and mount it in a planter or weighted base, then paint it in a rich color or leave it natural with a bright accent twist. Tie colorful thread or embroidery floss to the branch points, and hang necklaces from those knots.
The visual look feels organic, like a mini jewelry tree, and it adds a warm statement to your space. This is unique because thread creates a soft, flexible hold that can hold many chain styles. To personalize, tie each thread color to a category, such as “work,” “weekend,” and “special” so your morning routine stays quick.
For cost, branches are often free or low-cost from craft stores, and paint supplies are usually inexpensive. Keep practical balance by using a weighted base so the display doesn’t wobble when you swap pieces. If you live in a dry area, consider sealing the branch lightly to prevent paint from chipping over time.
11. Hanging Glass Jar Earring Garden
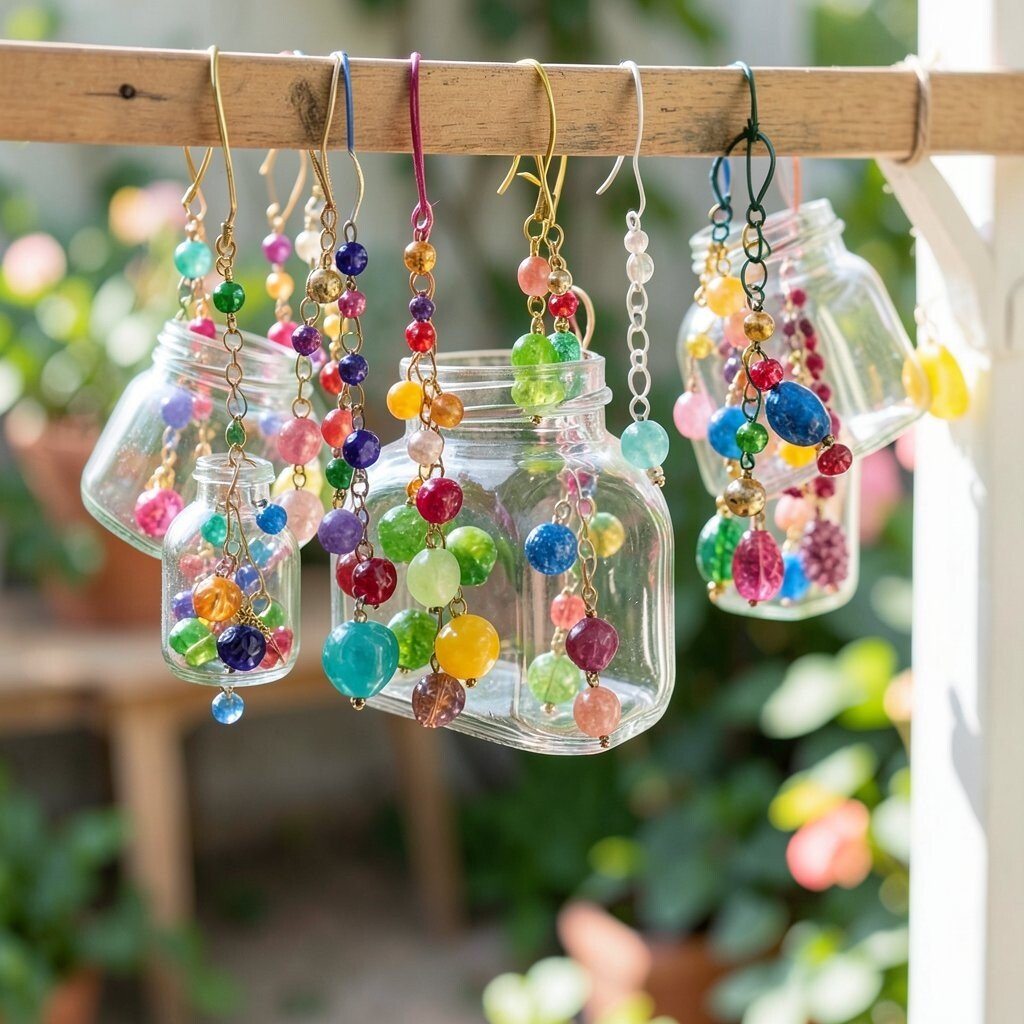
Use small glass jars or mini apothecary jars and hang them from a wooden board or from hooks on a decorative rack. Fill each jar with colorful earring backs, then hang earrings inside or attach them on small rings mounted to the jar lids.
This gives your jewelry a playful “garden” feel, and the glass makes bright stones look sparkling. It’s unique because it blends storage and display in one unit, so your accessories feel like curated decor. A practical trick is to group jars by style, like studs in one jar and hoops in another, so sorting takes seconds.
Personalize by tying ribbon around each jar lid in matching shades, or add tiny chalk dots for quick identification. Cost can be friendly if you use thrifted jars or repurpose spice containers, then upgrade the hanging board later. Keep jars stable by using strong craft wire and testing the weight before mounting.
12. Color-Splashed Ceramic Tile Jewelry Wall Grid

Mount a small grid of ceramic tiles on a wall and add hooks or adhesive pads between tiles. Paint tile sections in bold colors or use glossy tile stickers so each area looks like a mini art panel.
The benefit is that tiles are easy to clean and keep your jewelry display looking fresh, even in a busy room. It’s unique because the tile grid gives structure while the colors bring energy. For personalization, arrange tiles in a gradient pattern, like from lemon yellow to deep purple, and hang necklaces and bracelets across the grid lines.
Cost considerations depend on size, but you can start small using a few tiles and build outward as you expand. A practical tip is to plan hook locations before you place the tiles so the jewelry weight is supported well. If you want a trendy look, focus on glossy finishes and simple geometric layouts that look modern.
Keep your most worn pieces on the center tiles so you can reach them quickly without searching.
13. Accordion Fold Photo Display for Watches and Bangles

Use an accordion-style photo display frame and place it on a shelf, then clip watches and bangles along the pockets or attached bands. Choose bright pocket liners or add colored backing sheets so each row of jewelry feels vivid.
This method is practical because it keeps smaller accessories from wandering while still showing them clearly. It’s unique since it borrows a photo organizer shape and turns it into accessory storage. Personalize by using different colors for different watch straps, like blue for casual and black for dressy.
For cost, accordion displays are often cheaper than individual stands, and they can fit on narrow shelves. A current trend is using vertical “see-through but tidy” storage, and accordion frames fit that vibe. Keep the display clean by wiping gently with a dry cloth, especially around sticky liners.
14. Stained Glass Look Earring Holder With Layered Foam

Create a stained-glass inspired earring holder by cutting colorful craft foam into panel shapes and layering translucent sheets behind small hook points. Hang the finished piece on a wall so colorful earring drops look like little jewels on display.
The benefit is that the layered look creates depth even with lightweight materials, so your jewelry feels brighter without needing fancy equipment. It’s unique because you’re making a custom art piece that matches your exact colors. To personalize, choose a palette that mirrors your favorite outfit shades, and place studs at the top for an even visual balance.
Cost can stay low since foam and translucent sheets are usually affordable, especially if you buy craft packs. A practical tip is to seal the foam edges with a thin layer of clear adhesive to prevent rough spots that snag earring wires. If you want a modern twist, use a dark frame color like black or deep navy around the edges.
15. Magnetic Spice Rack With Mini Labels for Metal Necklaces

Mount a magnetic spice rack and use it for metal necklaces, since magnets help keep flat pieces from sliding. Paint the rack backing in a bright color so the whole display looks cheerful, and add small magnetic strips to hold pendants.
This is practical for daily use because you can quickly see and grab necklaces without rummaging. It’s unique because spice racks are designed for tiny jars, and repurposing them makes jewelry feel playful rather than precious. For personalization, match the colors of your backing to your room, or alternate warm and cool magnets to create a visual rhythm.
Cost considerations are usually favorable because spice racks are widely available and don’t require fancy hardware. A current trend is using magnets for modular storage, so this fits right in with the smart organizer movement. Be gentle with delicate chains by using soft cloth pads between metal and jewelry when needed.
Keep heavier pieces toward the center of the rack so the magnets hold well and stay secure.
16. Rainbow Beaded Curtain Rod for Hanging Bracelets

Hang a curtain rod and thread colorful beads along it, then use small hooks or elastic loops to attach bracelets around the rod. When the light hits the beads, the whole setup shines and makes your jewelry look like a rainbow accessory.
The benefit is that bracelets stay visible and separated, which helps prevent stretching and tangling. It’s unique because the rod becomes a decorative feature, not just a storage tool. For practical tips, use beads that aren’t sharp so clasps slide smoothly, and group bracelets by size so thicker ones don’t crowd out thinner ones.
Personalize the rainbow with your own order, like placing your favorite color in the middle for a “center star” effect. Cost can be manageable if you buy bead strands in bulk and keep the rod simple. This idea also feels on-trend because playful color gradients are popular in home styling right now.
17. Folded Fabric Garland With Knotted Necklace Loops
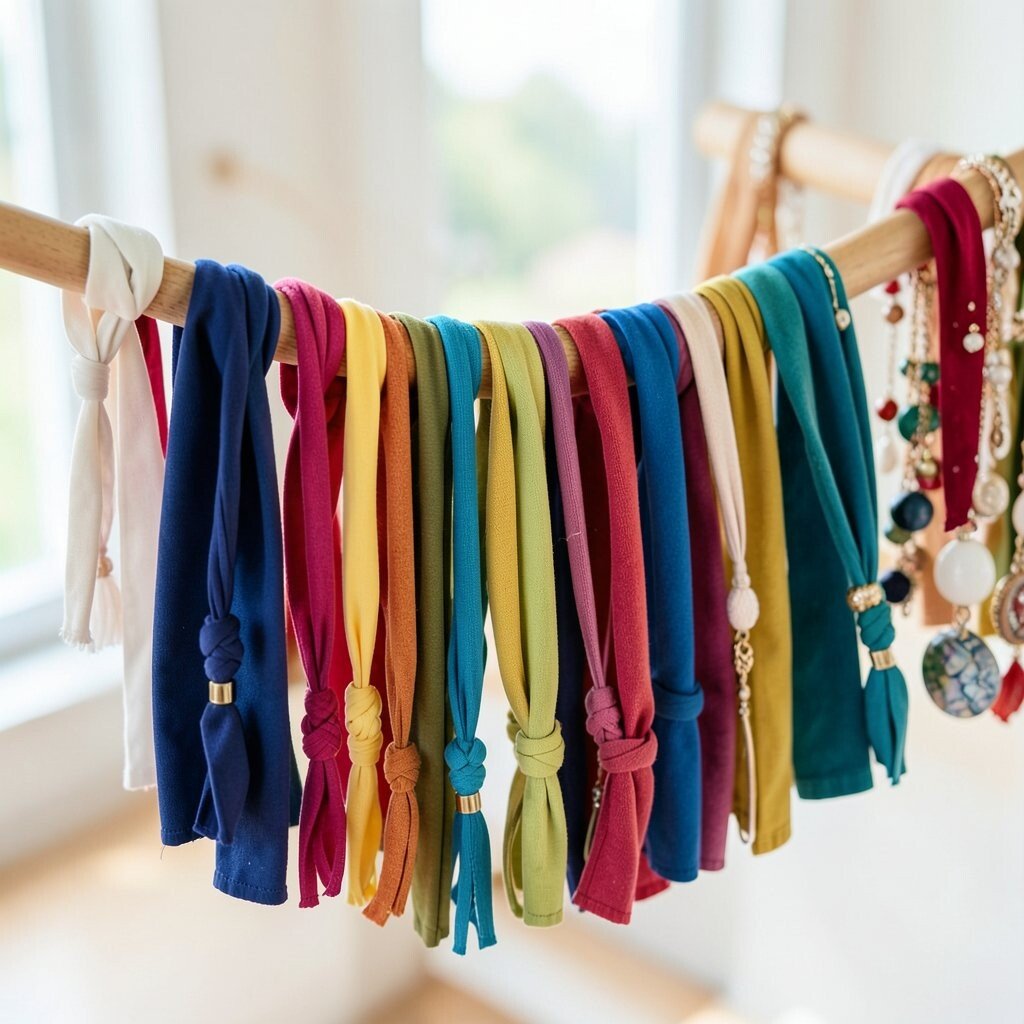
Make a fabric garland by tying strips of colorful cloth along a string, then add small loops or knots where necklaces can rest. The fabric holds chains gently and adds a cozy, artsy vibe to your wall or closet area.
This method is practical because fabric reduces slipping and helps prevent scuff marks on delicate finishes. It’s unique because it looks like a decoration first, then a jewelry organizer second. Personalize by choosing cloth colors that match your bedding or seasonal decor, and vary the knot sizes for different necklace lengths.
For cost considerations, thrift fabric scraps work great, and you can cut strips from old scarves. Keep it easy by using a simple string hanger system so you can remove it for cleaning. If you want a modern feel, use a tight color palette with two or three main shades rather than many scattered colors.
Hang it at eye level near where you get dressed so putting jewelry on in the morning feels effortless.
18. Mini Vanity Mirror With Backlit Jewelry Tray

Place a small vanity mirror on your dresser and add a glowing tray beneath it using battery lights or a simple LED strip. Set rings and small earrings in a colorful foam liner so the light makes gemstones look extra bright.
The benefit is that you get better visibility when choosing jewelry, which makes matching faster and more fun. It’s unique because the backlight turns your accessories into a mini spotlight display. Personalize by switching the foam liner color, like pink for charm bracelets or green for gemstone styles, to match your weekly outfit plan.
Cost can be moderate depending on the mirror, but the glow effect is often affordable with basic LED strips. A current trend is “warm light” styling, and it makes metals look softer and more flattering. Keep practical by securing the LED strip well so it doesn’t shift when you open drawers near the setup.
19. Color-Changing Nightstand Lamp Display With Clip Hooks

Use a clip-on jewelry hook set mounted near a nightstand or reading nook, then place a colorful lamp nearby so the display looks different throughout the day. When you turn on warm light, your jewelry shadows deepen and bright stones glow in a new way.
This is practical because the display sits exactly where you wind down, so you can set jewelry out for tomorrow without rushing. It’s unique because lighting changes the feel of the display, making even simple pieces look special. Personalize by matching your hook area with the lamp shade color, and use small clip hooks for rings, then tiny hooks for earrings.
Consider cost by choosing budget-friendly clip hooks and adding a lamp shade tint that complements your palette. A practical tip is to keep hooks slightly above reachable height so jewelry stays secure and doesn’t get bumped during the night. If you want a trendy touch, use a warm-toned lamp bulb and let the stones do the “color show” for you.
When you set up this spot, keep a small cloth nearby to wipe jewelry quickly before bedtime, so everything stays shiny and ready.