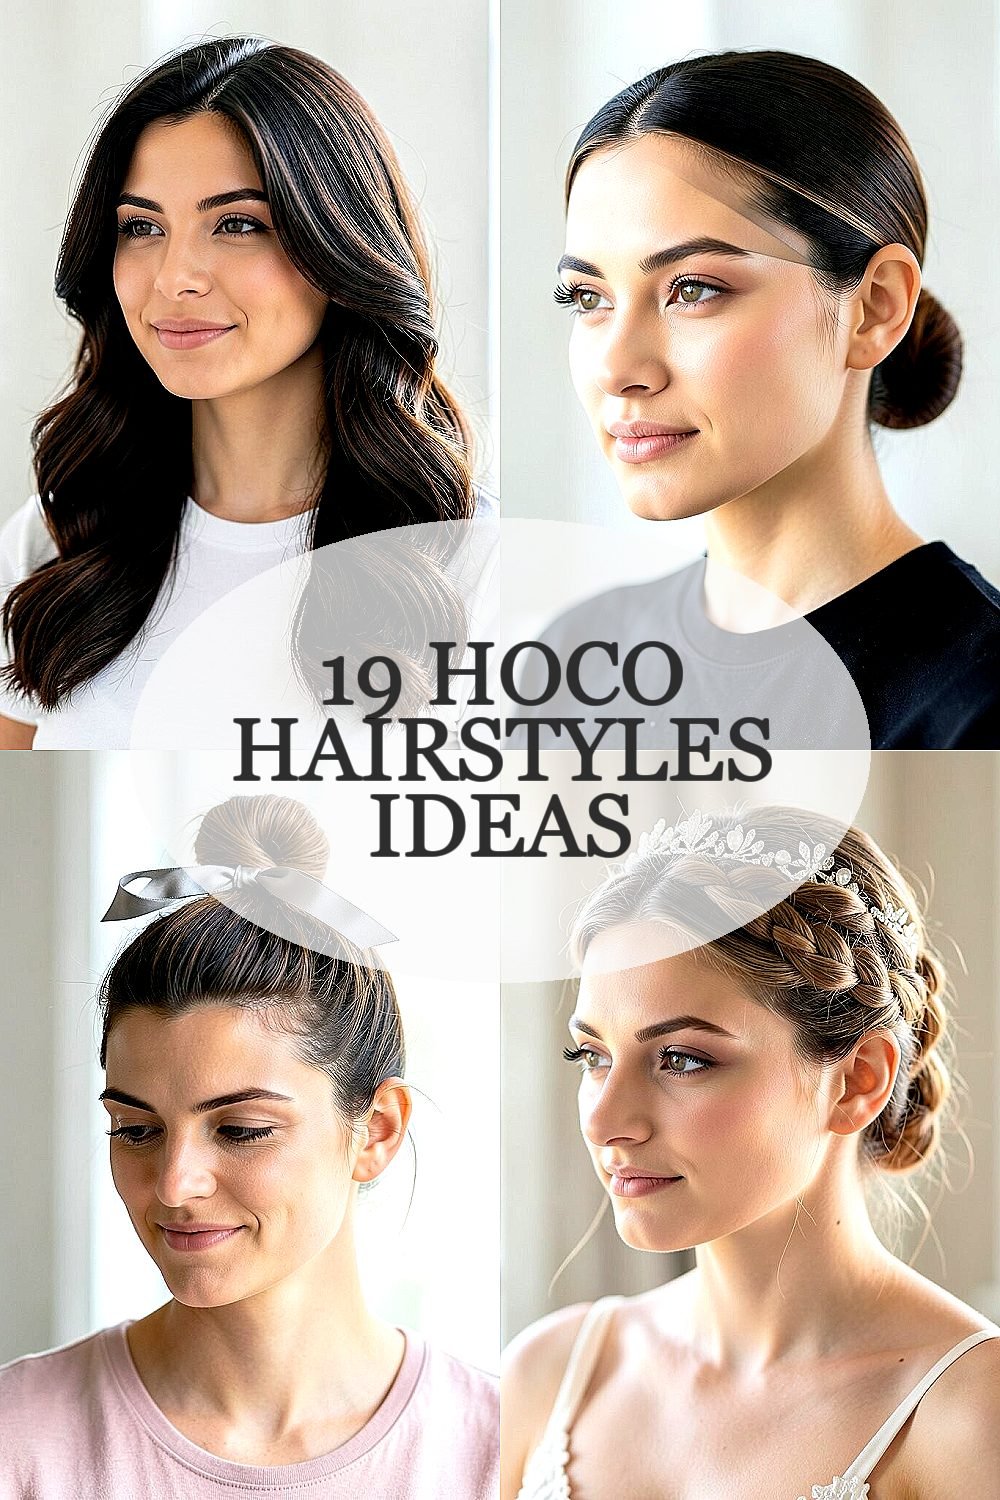
The right hairstyle can make your outfit feel like it fits perfectly. With the right choice, you’ll feel confident the moment you step out.
From romantic to bold, these styles are made for photographs, dancing, and real life.
1. Soft Hollywood Waves With a Side Part

Soft Hollywood waves look like classic glam without trying too hard. They fall in shiny, touchable S-shapes that frame your face beautifully.
A side part makes the whole look feel intentional and can flatter cheekbones and jawlines. To keep the waves smooth for the night, use a light heat protectant, then finish with a flexible hold hairspray so your hair stays moveable while you dance. If your hair is thick, divide it into bigger sections for faster styling; if it’s fine, use a small amount of mousse at the roots so you get lift.
2. Sleek Low Bun With Face-Framing Pieces
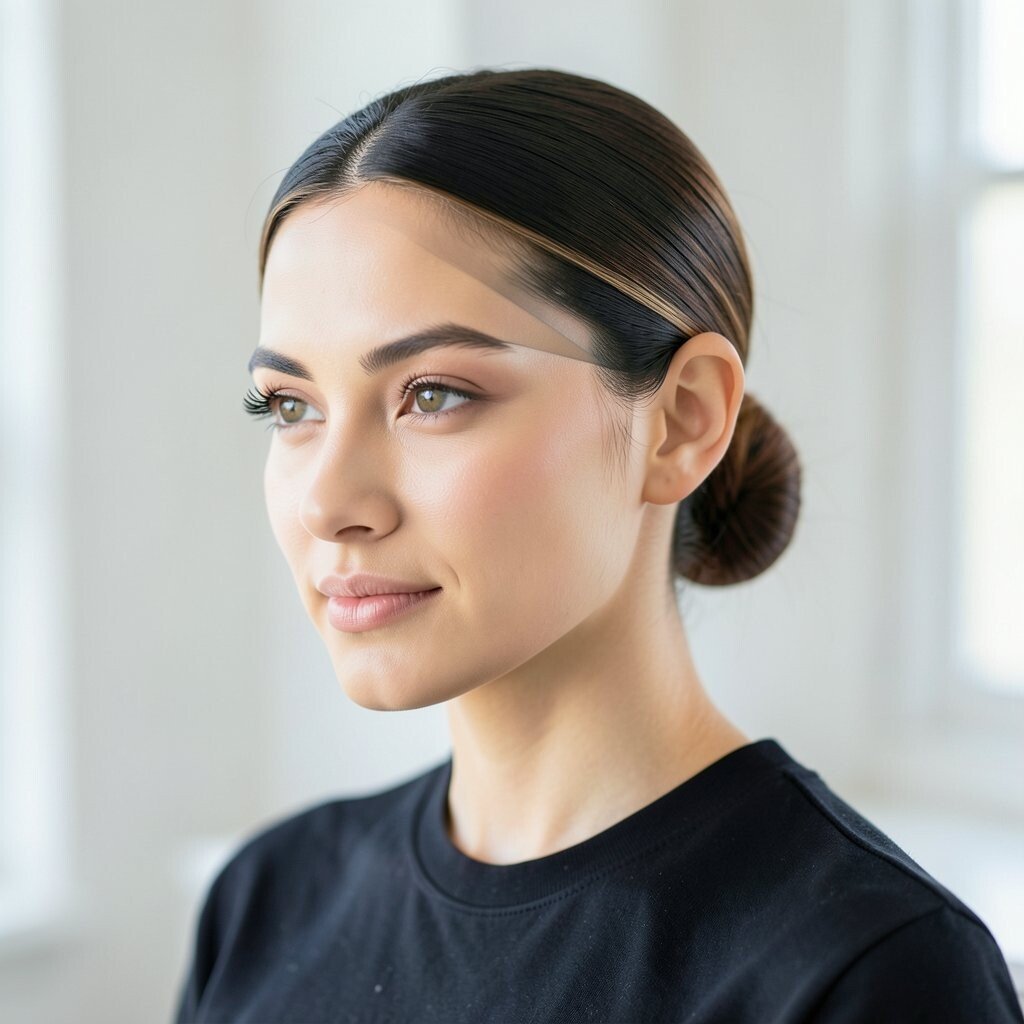
A sleek low bun is tidy, elegant, and great for keeping hair off your neck. The polished shape makes your neckline and earrings look extra sharp.
This style works for both straight and slightly wavy hair, and it photographs really well. For practical staying power, pin the bun at multiple points and secure any loose strands with bobby pins that match your hair color. Add a few face-framing pieces by pulling out thin strands near your temples, then lightly curl them so they blend into the look.
You can personalize it with a ribbon, a tiny clip, or a few decorative pins placed where the light hits. If you’re worried about cost, this look is mostly hair ties and pins, so you can use what you already own and spend only on a good smoothing product.
3. Half-Up Top Knot With a Ribbon Tie

A half-up top knot gives you the best of both worlds: style up top, comfort down below. It looks playful and modern, like you planned your look but still feel effortless.
When you pull the top section back, you show off your forehead and can highlight your eye makeup. Use a ribbon tie or a scrunchie that matches your dress color to make it feel special and personalized. For extra bounce, tease the crown gently before twisting the hair into a knot, then smooth the outer layer so it stays neat.
This hairstyle is unique because it balances cuteness with structure, and it’s easy to adjust if you want it tighter or looser. If your hair is long, you can wrap the knot with a small elastic first to prevent slipping, which is a smart practical step for long events. Styling takes less time than you might think, and most people can create it with basic tools.
4. Braided Crown for a Princess-Elegant Look
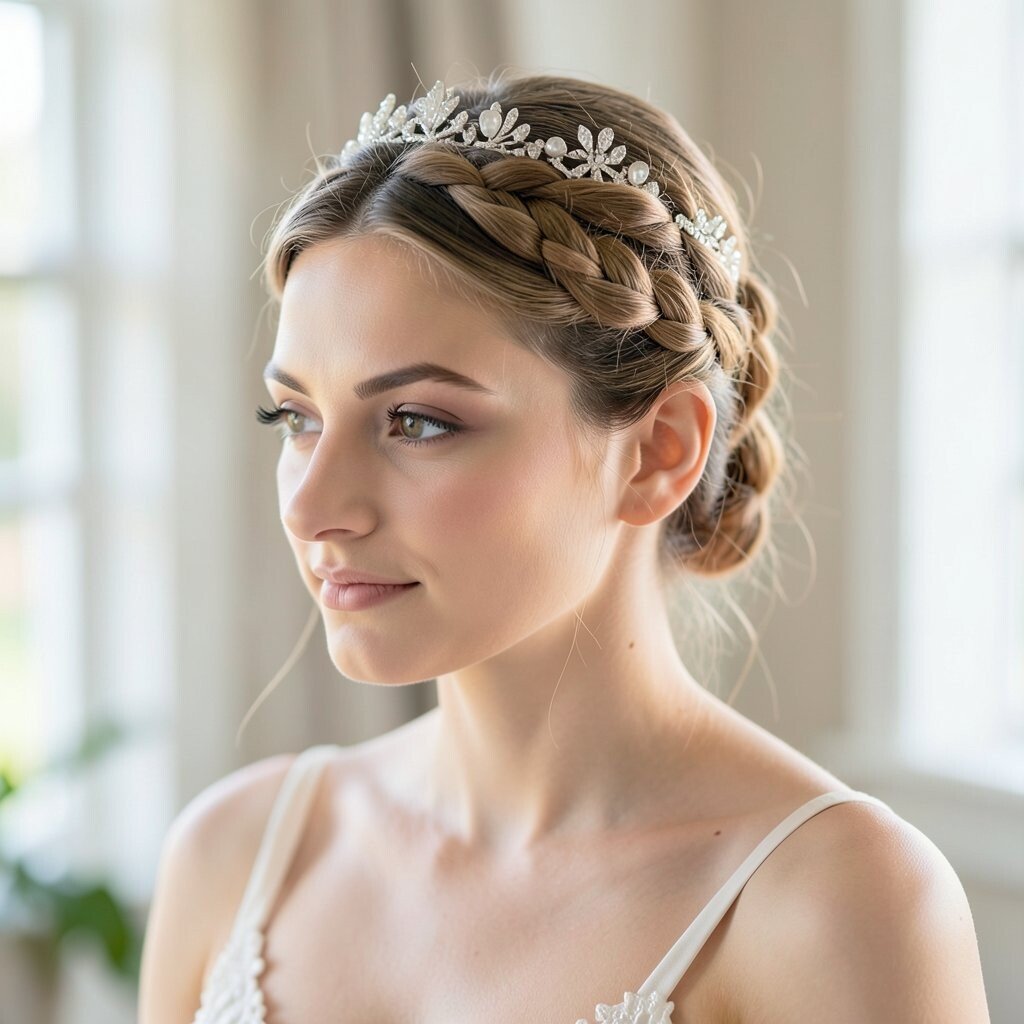
A braided crown makes you feel instantly dressed up, like a soft, wearable crown. The braid sits along your head and wraps around in a way that looks romantic from every angle.
It’s also practical because the braid helps hold your hair in place while you take pictures and move around. For best results, start with slightly damp hair and blow-dry it, then braid with even tension so it looks polished. If you want it to feel more modern, leave the crown braid a little looser at the back so it looks airy instead of too tight.
5. Curly Ponytail With a Glossy Finish

A curly ponytail turns your hair into a big, bouncy statement. The height at the crown gives a fun silhouette, and the curls add movement when you walk.
This look is perfect if you want volume without a complicated updo. Use a curl cream or gel for hold, then gather your hair high with an elastic that won’t snag. Wrap a small strand around the elastic and pin it underneath so the ponytail base looks neat.
If you have straight hair, you can curl it and then brush lightly so the curls look natural. For practical staying power, mist the ponytail area with a flexible spray after styling so humidity and dance time won’t flatten it. To personalize, add a thin headband, a charm clip, or a glittery tie that matches your theme.
6. Classic French Twist With Shimmer Pins
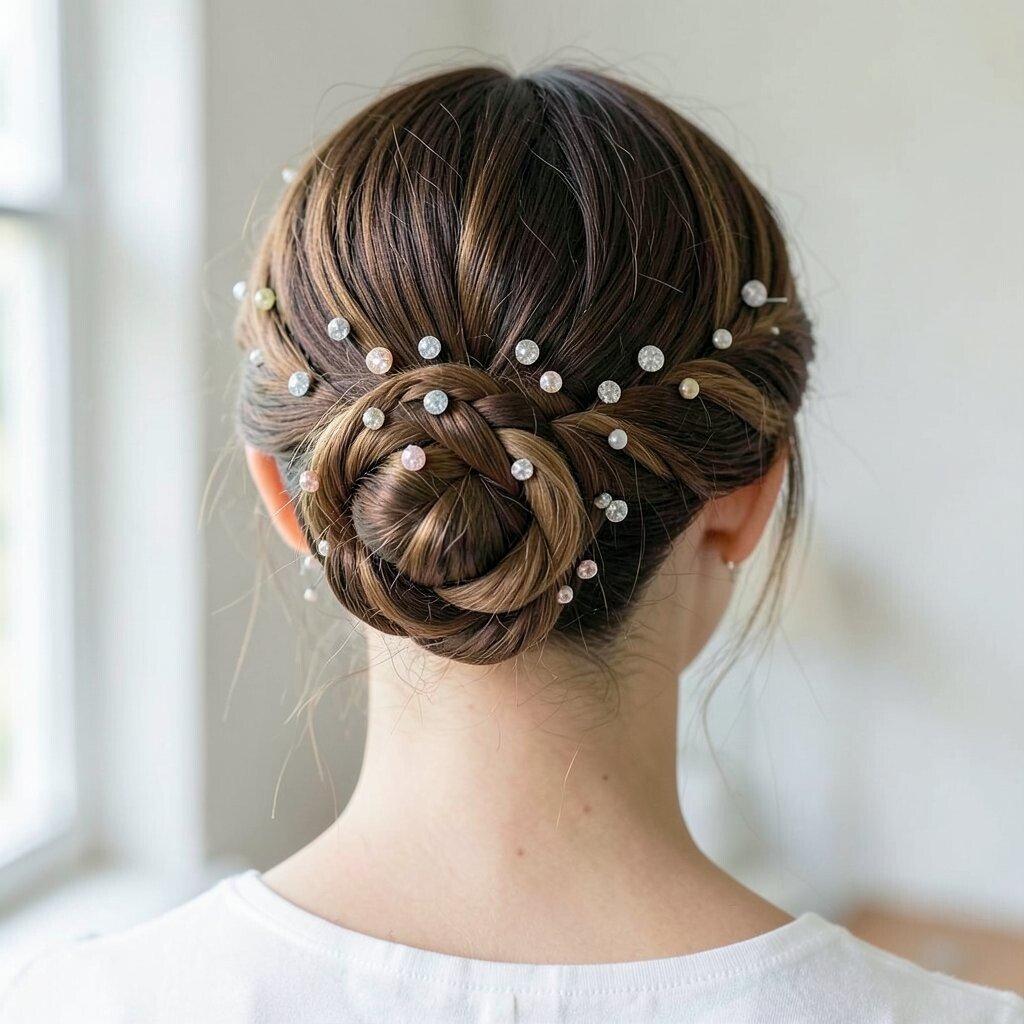
The French twist is timeless, and it makes your hair look sleek and styled even when you’re in motion. It sits neatly at the back of your head, which helps keep everything comfortable during the whole event.
When you add shimmer pins, the twist looks like high-end glam without needing a complicated hairstyle. Create the twist with slightly textured hair, then pin firmly at the base so it holds. For a practical trick, use a comb to smooth the top section first, then build the twist from the sides inward.
7. Top Bun With Loose Curtain Bangs
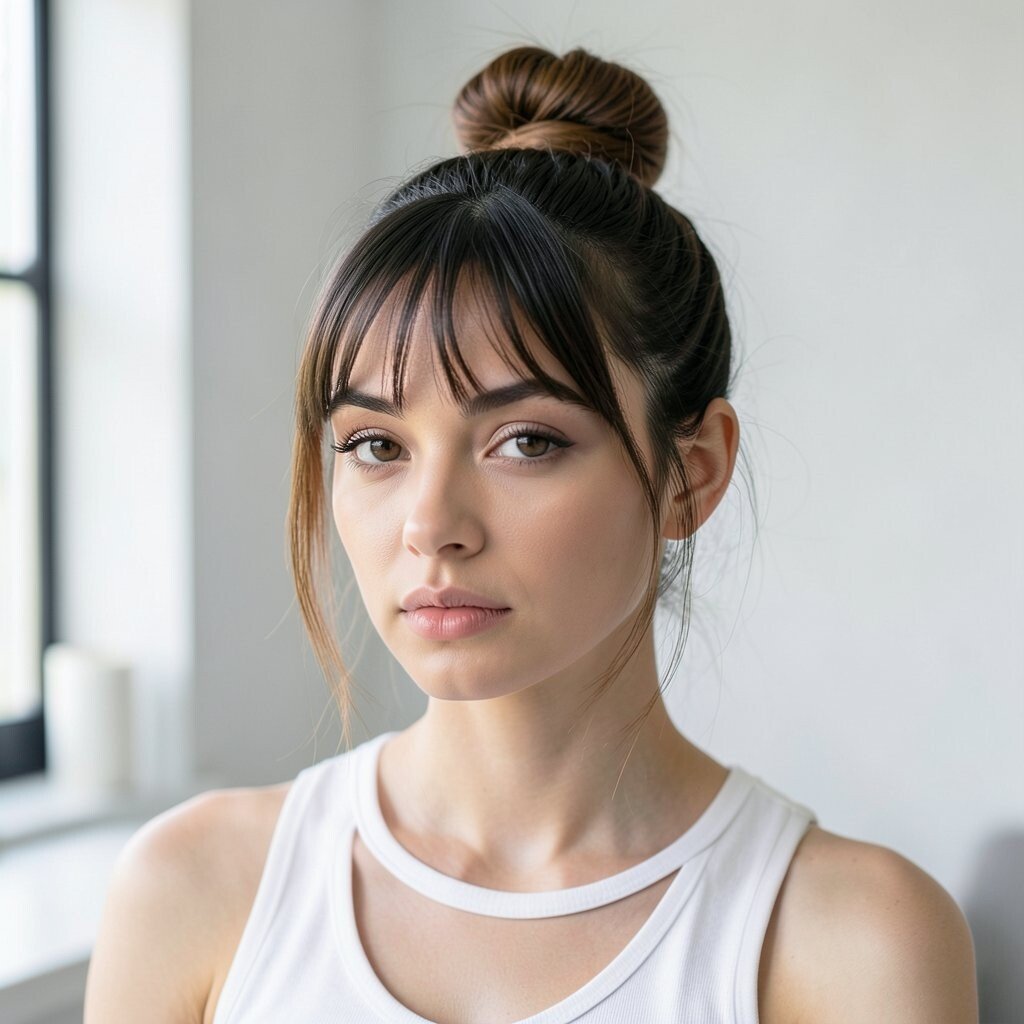
A top bun feels bold, and adding curtain bangs makes it feel soft too. The bangs part in the middle and frame your eyes, giving you a flattering, dreamy look.
This hairstyle stands out because the bun is at the top, so it shows off your height and makes your face look extra bright. If you have bangs already, blend them naturally; if not, use a curling iron to create a curved fringe effect on the front pieces. Add a little styling cream to define the bang shape and keep flyaways under control.
It’s also a great choice for different hair types, from straight to wavy. A simple elastic and a few pins are usually enough, so the cost stays low unless you choose to buy special pins or a shine spray.
8. Braided Side Pony With Soft Waves

A braided side ponytail looks playful and polished at the same time. The braid adds texture, and the waves make it feel extra romantic.
Choose a low or mid side placement based on your dress neckline, because it can balance the look nicely. Start by curling your hair lightly, then braid a portion and fold it into a side pony, securing it with an elastic. Finish with a light mist so the waves stay bouncy, and pull a few strands loose around your face for a soft, natural frame.
9. Half-Up Knotless Braids
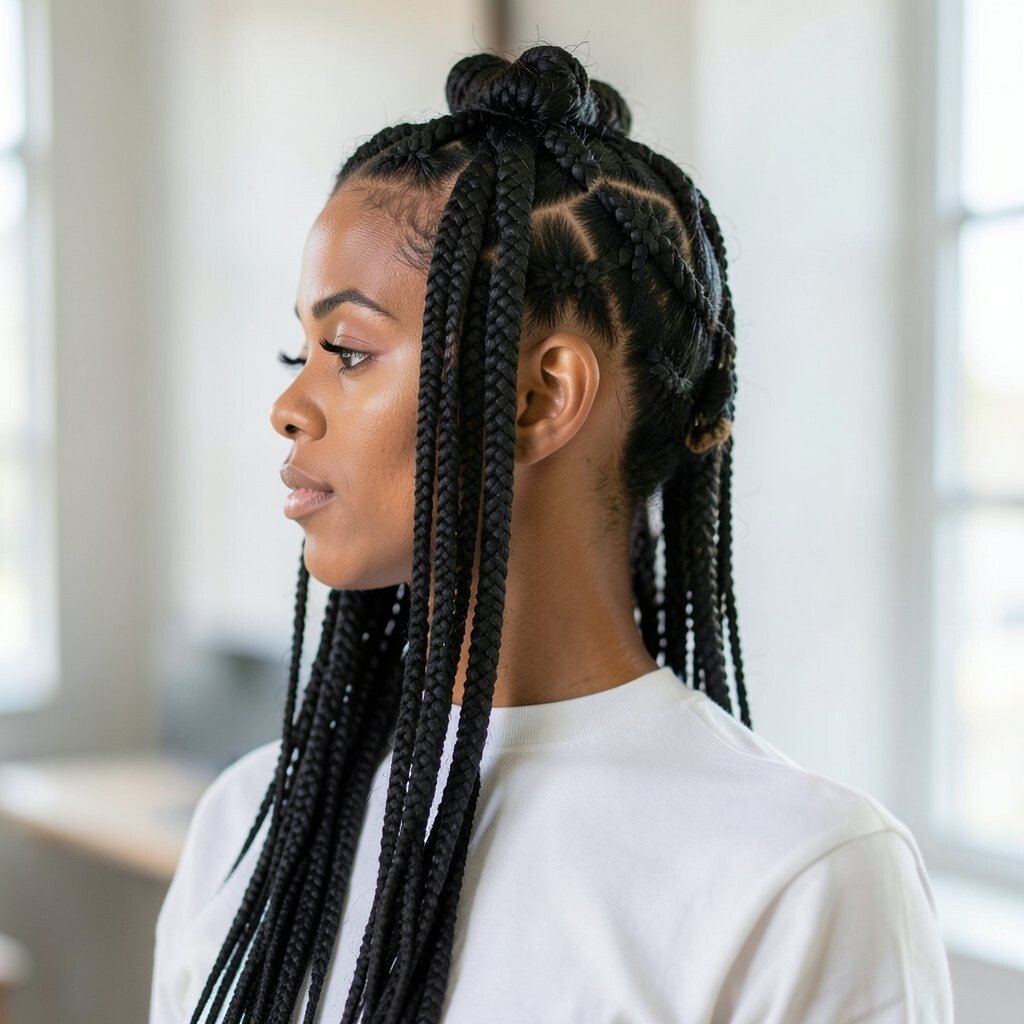
Knotless braids look neat, and they’re also kind to your scalp. The half-up style keeps your hair secure while still letting some length swing around.
Because the braids are spaced and formed in a way that sits close to the head, they look clean in photos. To personalize, add small accessories like tiny beads or a metallic clip near the knot area, but keep the shine balanced so it doesn’t compete with your outfit. For practical comfort, avoid making braids too tight, and if your hair is fine, use a bit of styling mousse before braiding for better grip.
10. Sleek Middle-Part Shoulder-Length Style

A sleek middle-part hairstyle looks sharp, modern, and super flattering for many face shapes. The clean line down the center draws attention to your eyes and gives a smooth, expensive vibe.
If your hair is shoulder length, this style can look effortless while still feeling dressed up. Use a flat iron with heat protectant, then smooth from roots to ends so it looks glossy. Add a tiny drop of serum to the ends only, because too much at the top can weigh hair down.
To personalize, tuck one side behind your ear or add a minimal barrette for a subtle sparkle. This is also a budget-friendly option if you already own basic styling tools, since you mainly need protectant and a finishing product.
11. Waterfall Braid for Flowing Movement

A waterfall braid is made for hair that moves, because it creates a repeating “cascade” effect. As you turn your head, the braid pattern shows off and looks soft instead of bulky.
This style feels unique because you’re blending braiding with loose hair, so it doesn’t trap everything like a full updo. Start with a side section, braid across, and let each section fall into the hair below for the true waterfall look. If your hair is slippery, use a light styling spray so the braid holds its shape.
For practical tips, keep strands the same size, and make sure the braid isn’t too tight so it stays comfortable. Personalize by curling the loose ends after braiding, or by adding a small clip where the braid begins.
12. Twisted Side Bun With an Elegant Clip
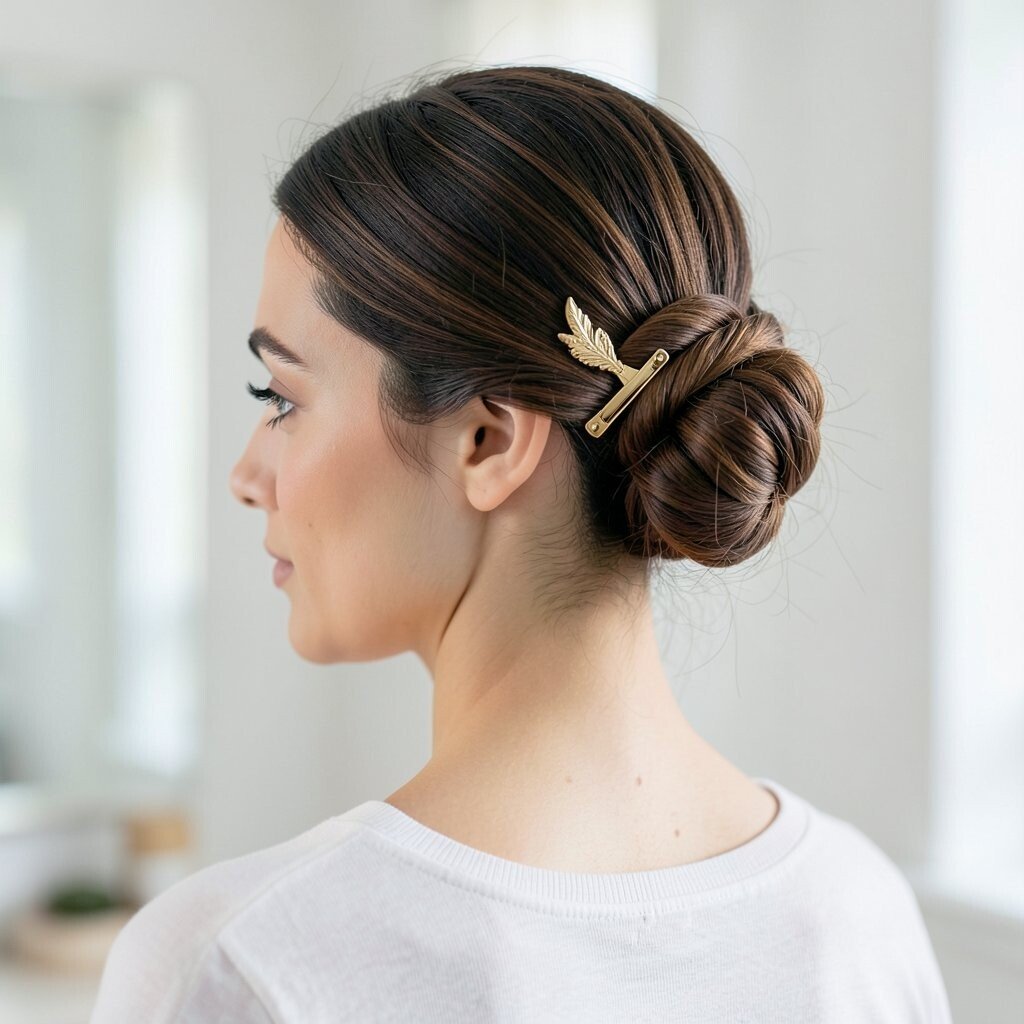
A twisted side bun looks refined, like you spent extra time on every detail. The twist gives texture while keeping the shape neat and secure.
This hairstyle is great if you want something off to one side, because it can balance asymmetrical earrings or a one-shoulder dress. To make it practical for a long night, pin the twist to the head at multiple points and test it by gently lifting your hair near the end. Add an elegant clip, like a pearl or crystal shape, so the bun catches light in photos.
13. High Ponytail With Wrapped Base and Texture
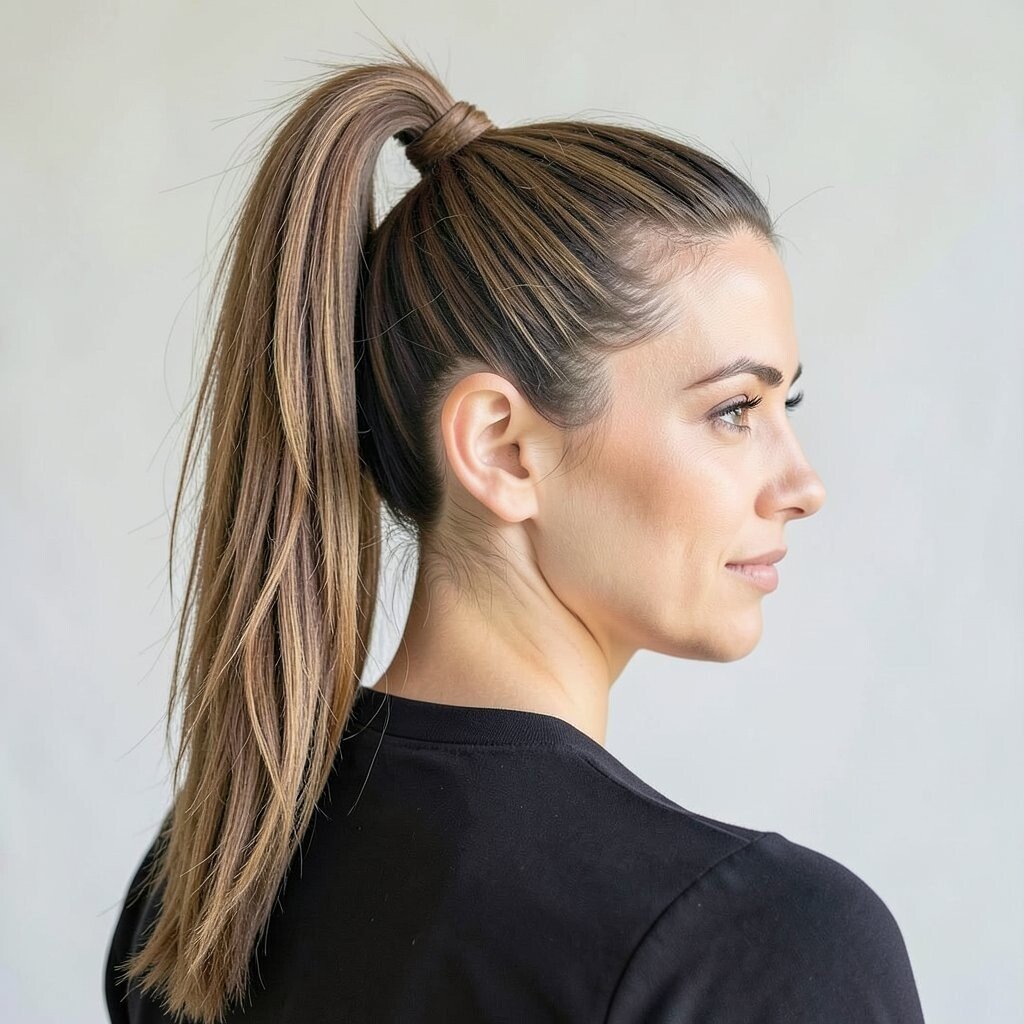
A high ponytail is bold and energetic, and it looks amazing in motion. Wrapping the base makes it look styled, not rushed.
To get extra texture, use a small amount of mousse or volumizing powder at the roots before brushing up. Wrap a thin strand around the elastic and pin it underneath, then lightly smooth the outer layer so it looks polished. If you have thick hair, consider a stronger elastic and split the ponytail into two sections before curling so everything blends.
This hairstyle can feel truly personalized with different textures, like sleek and straight or soft and wavy. Cost stays reasonable because you can use an elastic and pins, and only add a styling product if you need it.
14. Messy Bun With Braided Underlayer
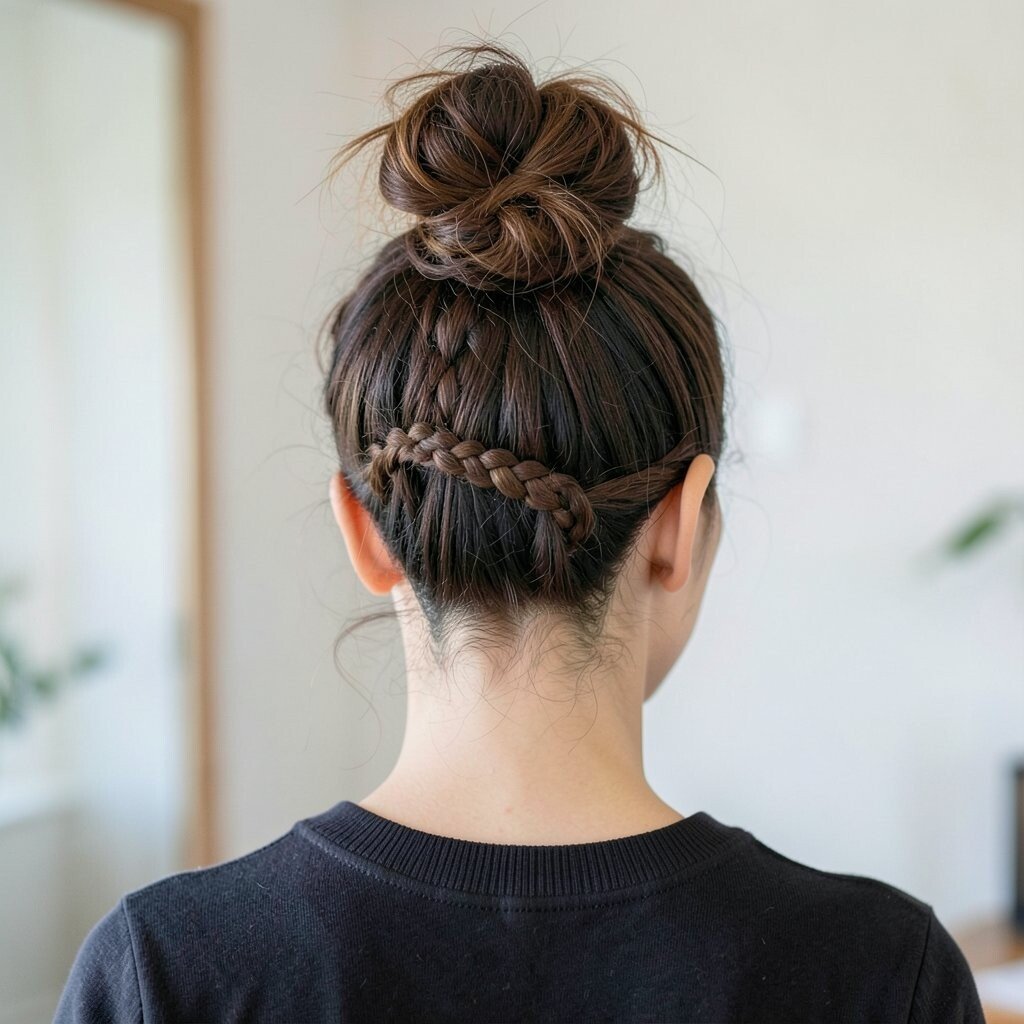
A messy bun is fun, but a braided underlayer makes it look intentional. The contrast of “messy” on top and neat texture underneath creates a cool, trendy vibe.
It’s perfect for busy hair days because it hides small flyaways and uneven parts. Start by braiding a small section at the crown or under the hairline, then gather all hair into a loose bun and pin it so the braid peeks through. Use hairspray around the hairline so it stays secure, and pull out a couple of strands to frame your face.
15. Half-Up Crown Braid With a Soft Twist
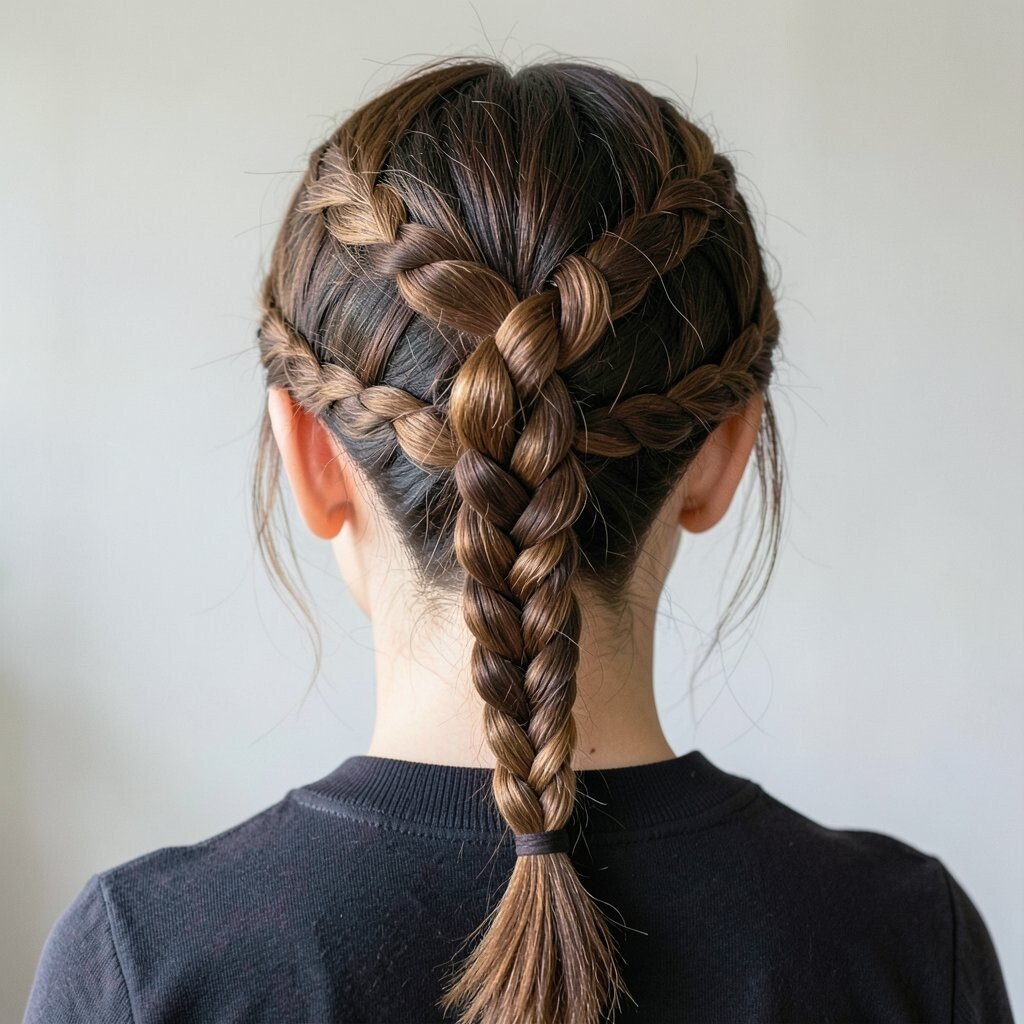
This half-up crown braid feels romantic and polished, like a gentle bridal vibe. The soft twist at the ends makes it look more unique than a basic braid.
It’s a great choice if you want your hair out of your face but still want the length visible. Keep the crown braid slightly looser so your scalp doesn’t feel tight, and use pins to secure it without flattening the whole style. For practical comfort, use lightweight pins and avoid adding too many accessories that tug on the hair.
Personalize it with a small charm clip or a ribbon near the back, and match the color to your dress. If you’re thinking about cost, you can create the look with hair ties, pins, and a flexible hold spray you already have.
16. Glam Updo With a Twisted Rope Strand

A glam updo with a twisted rope strand looks like a salon style, even if you do it yourself. The twist adds dimension and makes the hairstyle feel artsy and modern.
To build it, create an updo base using a bun or gathered knot, then twist a small rope-like strand from the side and wrap it around for a decorative accent. This helps the style look unique, because the twist acts like a signature detail. Use a finishing spray to keep the twist defined and smooth, especially around the front where photos focus.
17. Bubble Braid Ponytail for Playful Volume
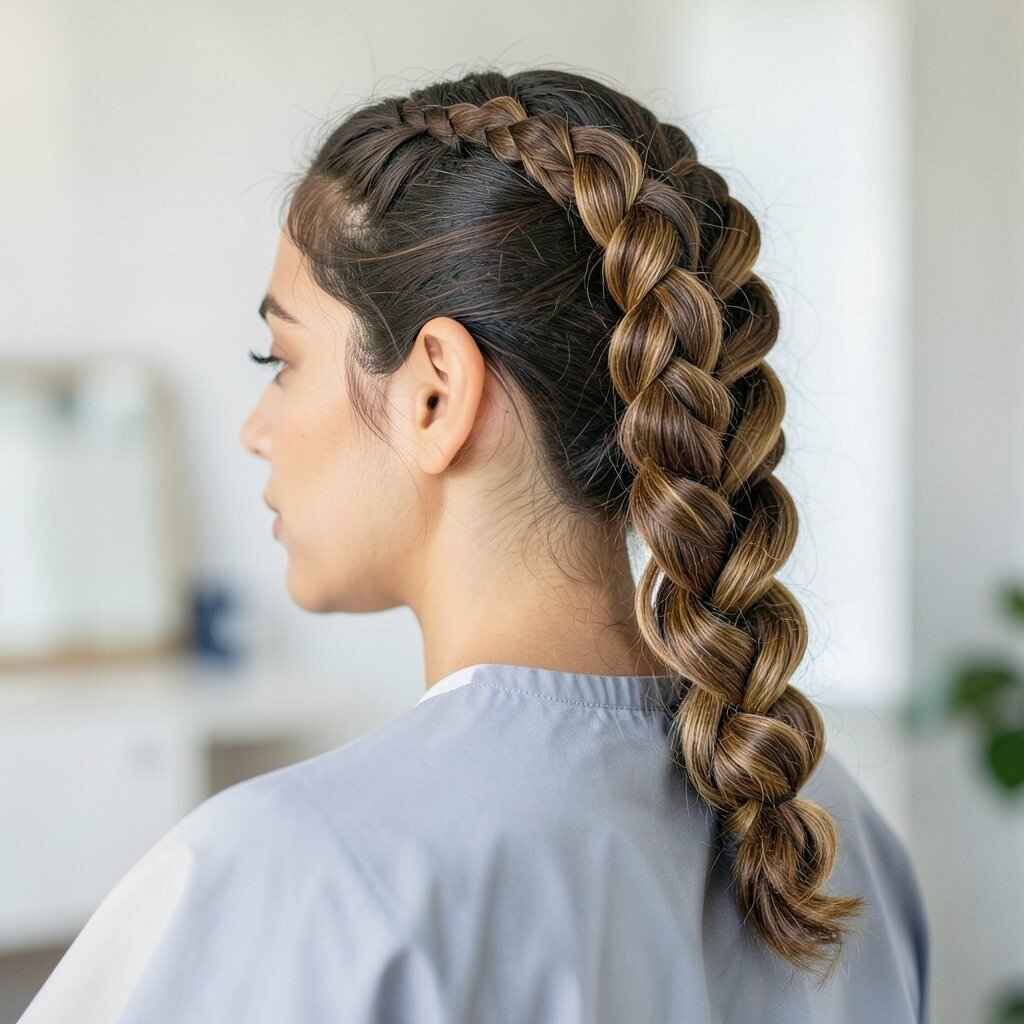
A bubble braid ponytail is playful, bouncy, and photo-ready. You section the ponytail into small “bubbles” and secure each one with elastics, creating a fun geometric look.
This style works best when your hair has at least medium length, and it gives volume even if your hair is fine. Start with a ponytail, then stretch each section gently to form bubbles, and keep the elastics evenly spaced for a clean finish. For personalization, use clear elastics for a sleek look or colored elastics if your outfit has a pop of color.
It can be a little more time-consuming than simple styles, but it’s worth it because the results look special. Cost is usually low since you just need elastics and maybe a light styling spray to keep everything smooth.
18. Feathered Shag With Slick Back Crown

A feathered shag with a slick back crown gives a bold contrast that feels very current. The top looks smooth and controlled, while the ends look light and bouncy.
For a practical approach, create volume at the sides and back using a round brush, then slick only the crown area with a small amount of gel. This helps the style look intentional, not messy, and it keeps your hair from getting flat. To personalize, add a side part for extra drama or keep it centered for a cleaner silhouette.
This hairstyle feels unique because it mixes textures, and it also works with different hair lengths and thickness. If you want it to last, use a medium-hold product on the crown and a light mist on the feathered ends so they stay soft and touchable.
19. Classic Braided Bun With a Ribboned Edge
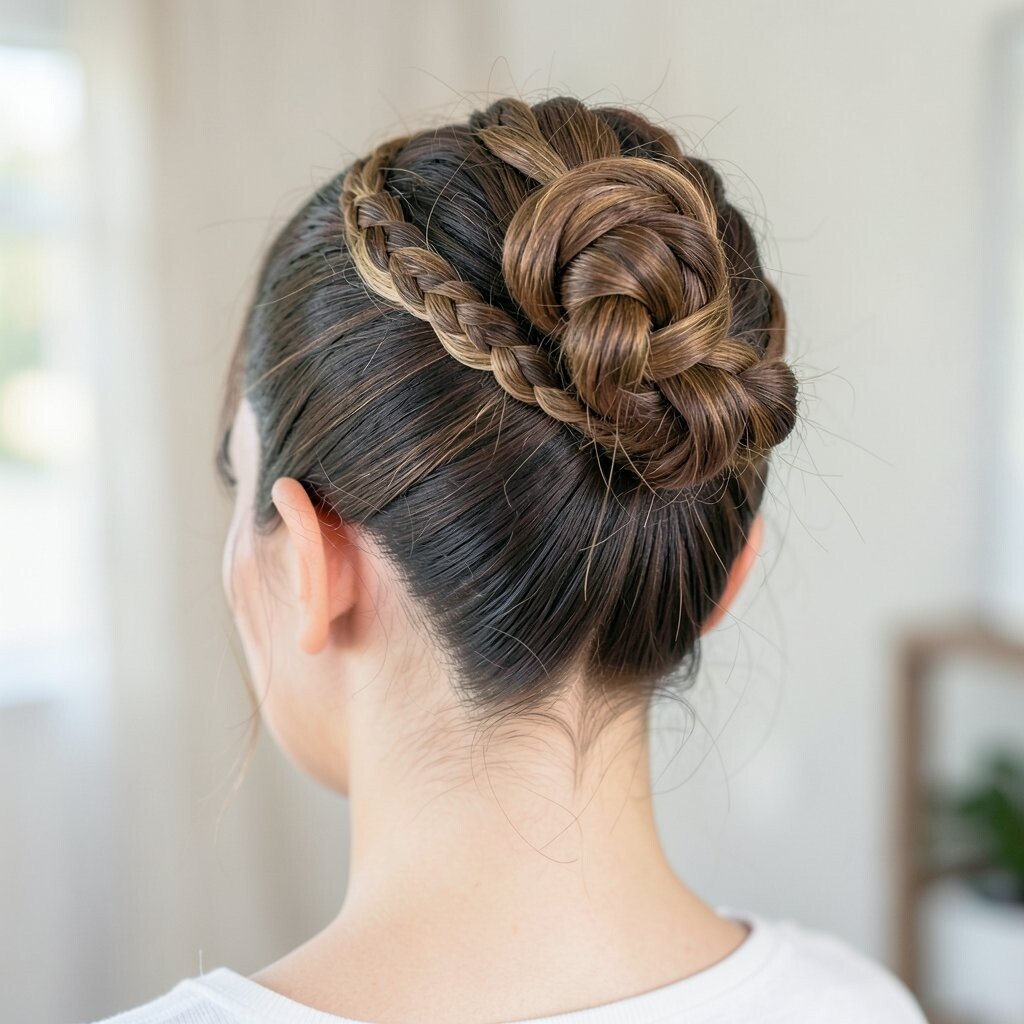
A classic braided bun looks elegant and timeless, and adding a ribboned edge makes it feel sweet and special. The braid creates structure, while the ribbon adds a pop of color that photographs beautifully.
To get the braided bun look, braid sections of hair and wrap them into a bun shape, then pin securely. The ribbon edge can be woven into the braid or tied around the bun base, depending on your comfort and hair length. This is a practical choice because braids hold well and usually stay neat through dancing.
For personalization, choose ribbon colors that match your dress, shoes, or even your makeup theme. Cost considerations are friendly because you can use a ribbon you like from a craft store, and you’ll mostly rely on pins and elastics that are already part of your routine.