Shimmering strands can make your whole look feel new in minutes. The best highlights feel like you, just more luminous.
You can keep things soft and subtle or go bold and sun-kissed. Either way, the right shade placement brings out your features without needing a total hair makeover.
1. Face-Framing Honey Highlights
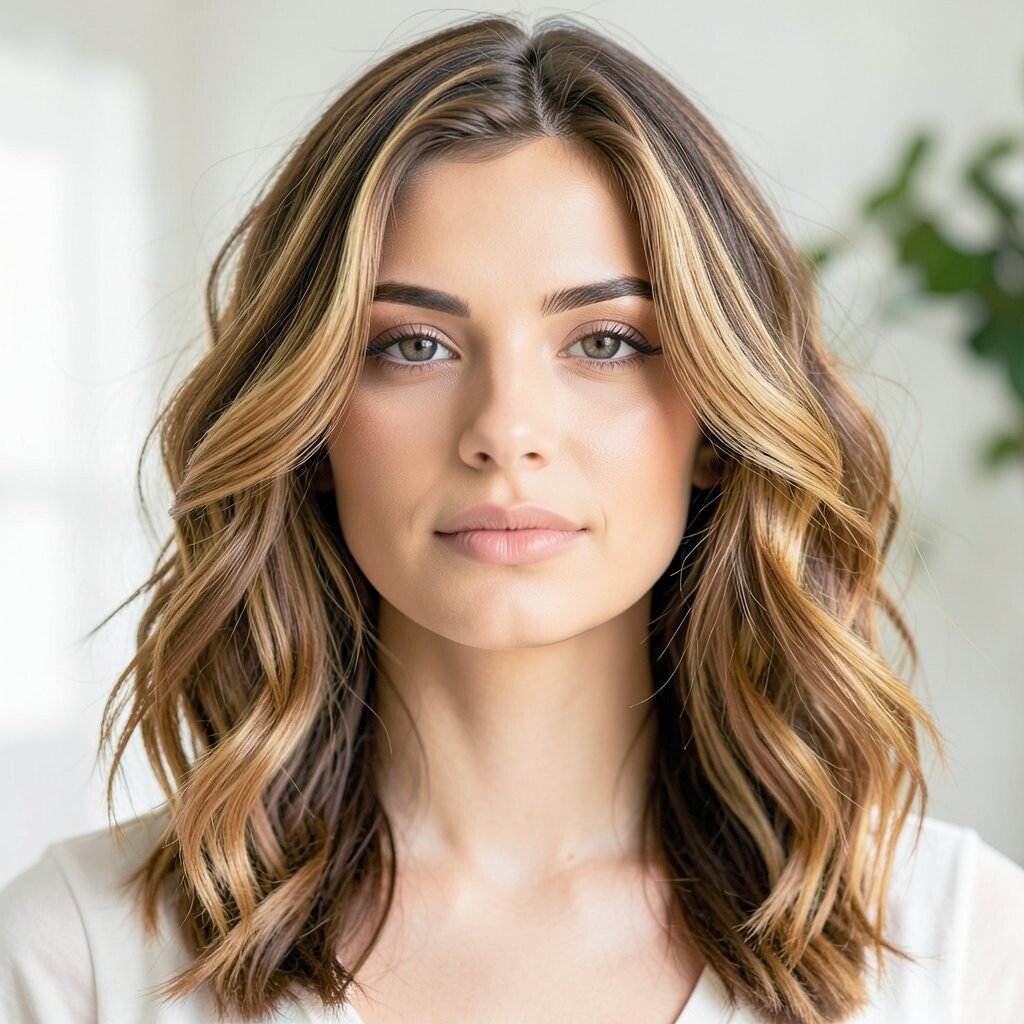
Picture warm honey ribbons starting near your cheekbones and fading outward. They catch light as you move, giving your face a gentle glow.
This style works especially well for people who want bright impact without heavy contrast. Ask for highlights that begin slightly higher in the front and soften as they reach the mid-lengths. For practical results, use a gloss or conditioner with a light warm tone so your highlights keep looking smooth. If your hair is naturally dark, consider a caramel shade rather than something too golden, so it blends naturally.
2. Icy Blonde Money Piece With Soft Blending
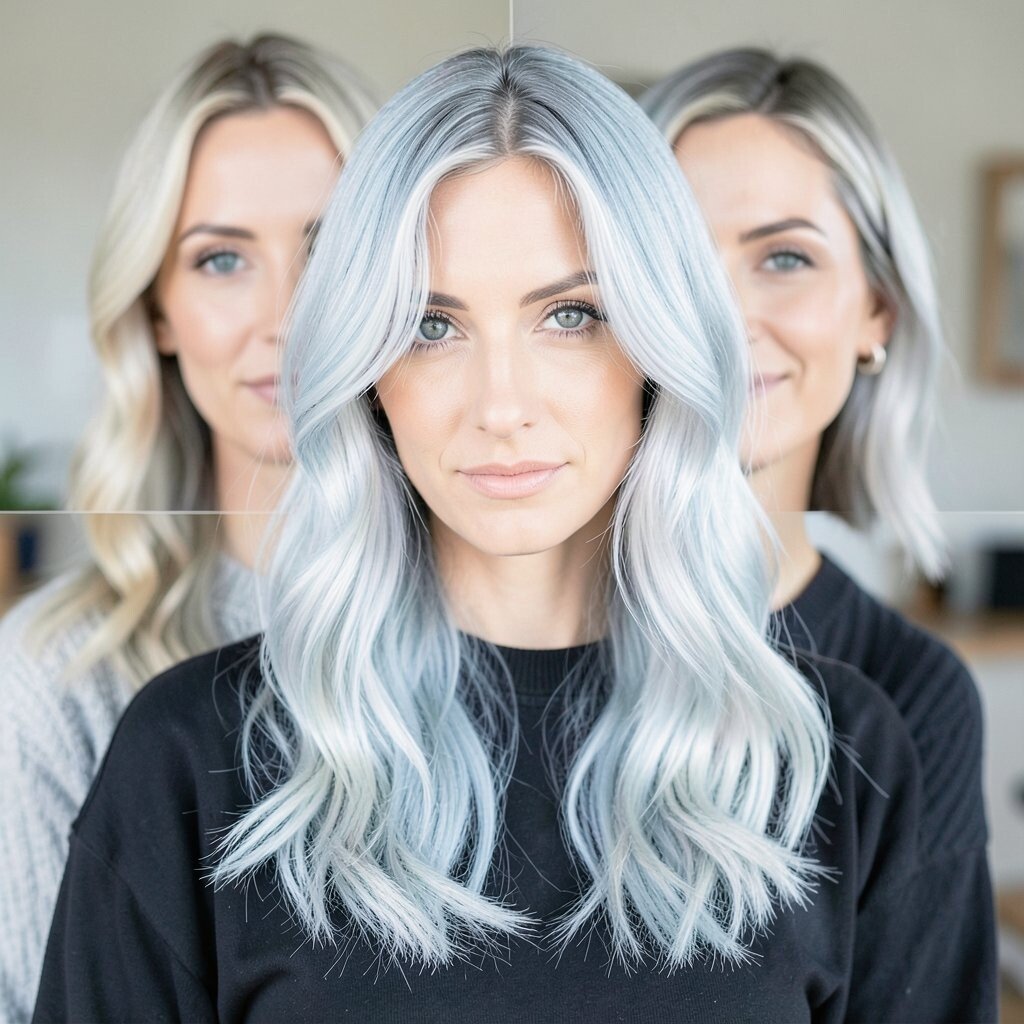
Imagine a crisp, bright streak right around the front pieces, like sunlight on polished glass. The rest of the hair stays slightly darker, so the highlight looks extra sharp.
This “money piece” effect is popular because it draws attention to your eyes and makes roots look intentional. For best results, request soft blending behind the bright front section, not harsh blocks. If you’re worried about damage, choose a lower lift and rely on toning to get the icy vibe. At home, use a purple shampoo once or twice a week and follow with a hydrating mask to keep hair glossy.
It can be more costly than traditional all-over highlights because it needs careful sectioning and precise placement. To lower the cost, start with the front sections only and add more later if you love the look. Personalize it by matching the cool tone to your undertone, like silver for cool skin and platinum-leaning beige for neutral skin. Styling wise, try a sleek blowout or a smooth part so the bright ribbon stays visible.
3. Chocolate Mocha Highlights With Caramel Melt
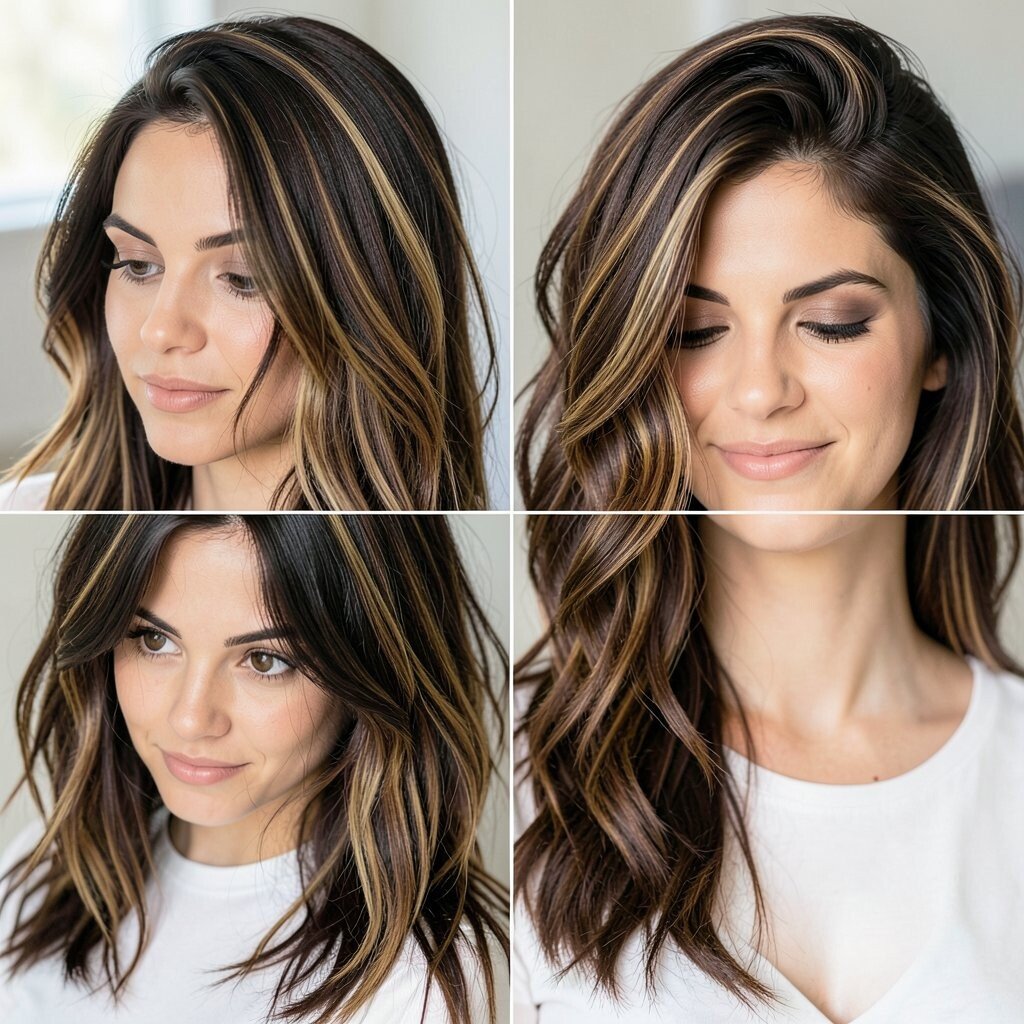
Think rich cocoa strands with caramel highlights that melt into the dark base. The color looks dimensional, like a latte with golden swirls.
These highlights are a great choice if you want warmth without going too blonde. Ask your stylist to paint highlights in thin, natural-looking slices rather than thick chunks for a smoother blend. For practical upkeep, choose color-safe shampoo and keep heat styling moderate. If your hair tends to look flat, a few strategically placed highlights can add lift and movement right away.
Cost-wise, a blend-focused service can run higher because of the time spent hand-painting. Still, the payoff is that your grow-out often looks graceful instead of obvious. Personalize the caramel intensity by selecting a tone that matches your current hair goals, like subtle to medium warmth. When your highlights start to fade, a caramel gloss can bring back that “fresh-from-the-salon” shine.
Try parting your hair slightly off-center so the caramel pieces catch light across the crown and around the cheeks.
4. Rose Brown Highlights For Soft Glam
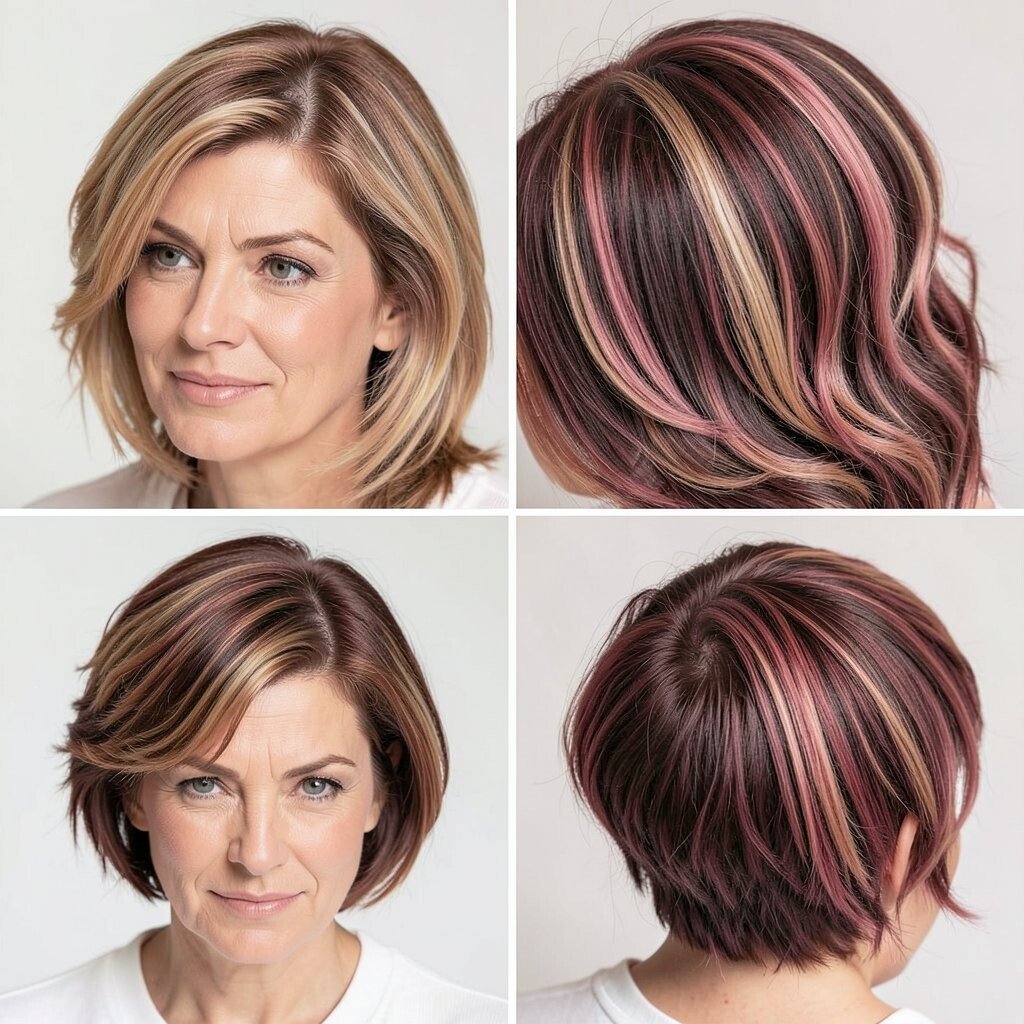
Picture muted rose highlights that look like a warm blush across your hair. They feel romantic, modern, and flattering in everyday lighting.
Rose brown is trending because it sits between cool and warm, making it easy to wear. Ask for micro highlights or balayage streaks so the rose tone looks like it’s been sun-kissed, not painted on. If your hair is dark, you may need more than one session for the rose shade to show clearly, so plan ahead. To keep the color looking fresh, use a sulfate-free shampoo and limit hot tools.
5. Subtle Brunette Balayage With Natural Root Shadow
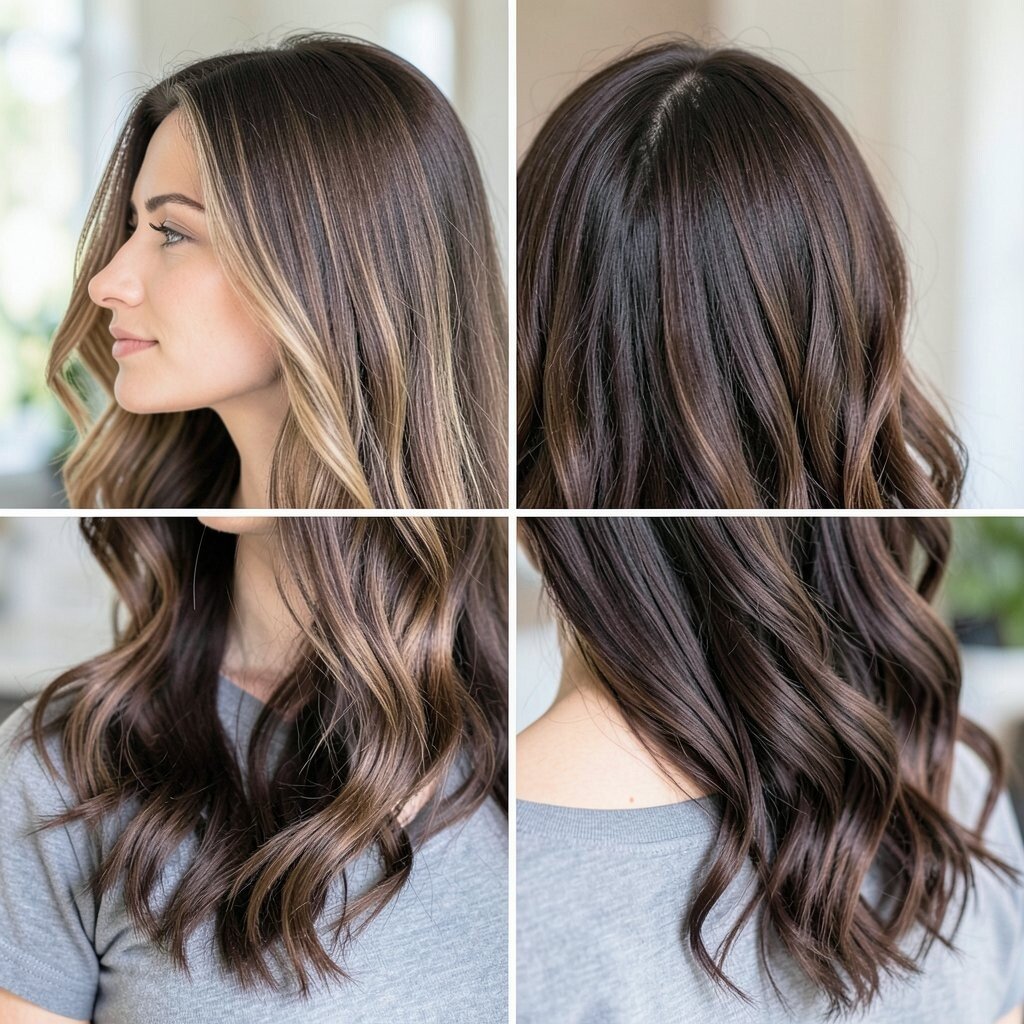
Imagine soft, blended color that barely shows the exact line where it starts. Your hair looks kissed by the sun, with darker roots that make everything feel effortless.
This look is beloved because it grows out beautifully. Request a natural root shadow so your base stays rich and your highlights blend seamlessly into it. If you want it to feel more personal, add slightly brighter pieces near the ends for extra dimension when hair swishes. Keep styling easy by using a light mousse and letting waves fall naturally.
Costs can be moderate to high depending on how many sections are painted and how long your hair is. The good news is you can often stretch appointments longer because the grow-out looks natural. For a practical at-home boost, use a leave-in conditioner with shine and detangle gently to reduce breakage. Choose a tone close to your natural color if you prefer low-maintenance glam.
6. Sculpted Caramel Highlights On Layered Cuts
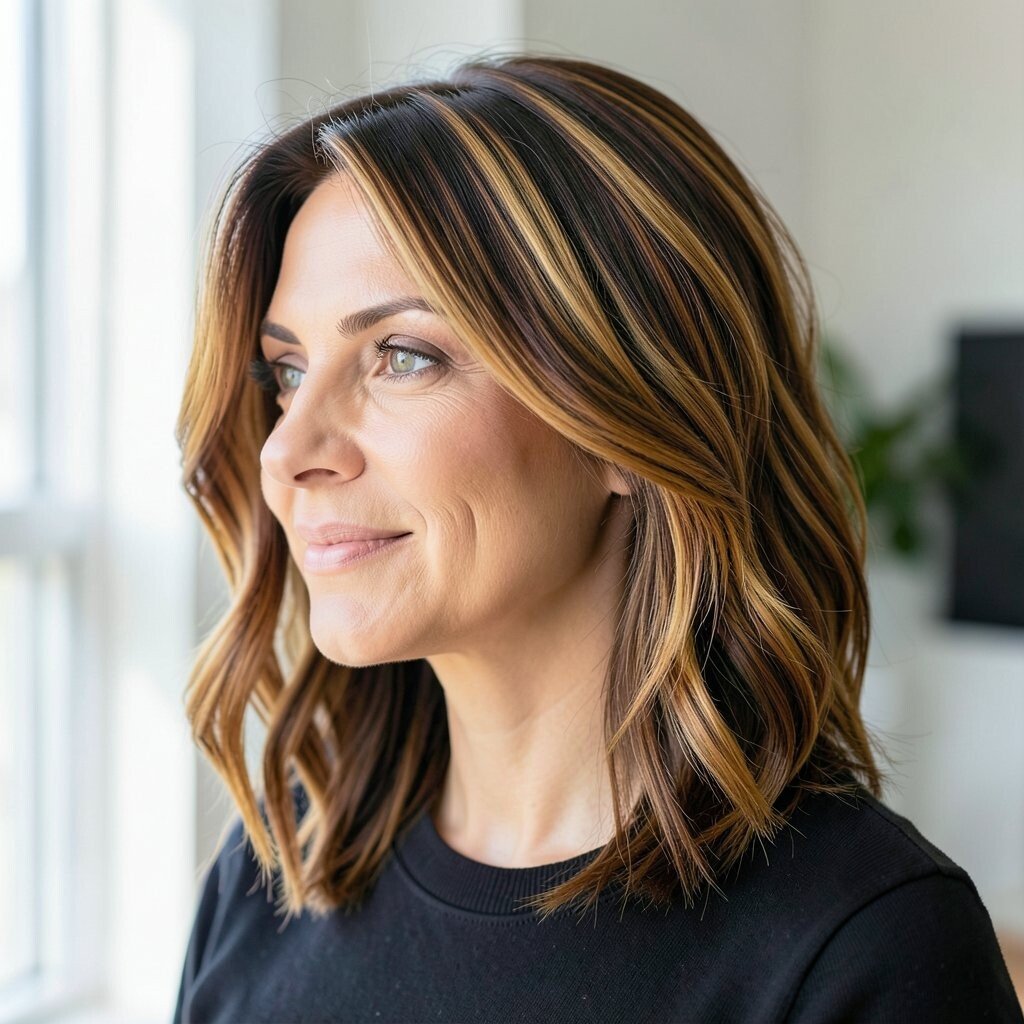
Picture caramel highlights that follow the shape of your layers like a light-catching frame. Every time you move, the color highlights the cut and adds bounce.
This idea is perfect for layered hairstyles because the highlights can emphasize movement and texture. Ask your stylist to place brighter caramel pieces on the top layer and slightly deeper tones underneath for depth. If your layers are short, you’ll see more contrast, so keep tones balanced. For daily practicality, use a volumizing spray at the roots and a smoothing serum on the ends to keep highlights looking sleek.
In many cases, this service takes longer than a basic highlight because placement must match your cut. That can make it a bit pricier, but it also makes the results look custom. Personalize the caramel shade by choosing a lighter blonde-butter tone for a brighter look or a darker toffee tone for a richer vibe. If your hair is fine, request narrower highlights so your hair doesn’t look washed out.
When you style, flip layers in alternating directions so each highlight catches the light.
7. Vertical Chunky Highlights For A Retro Edge

Think bold, vertical highlighted strands that bring a playful retro feel. The look stands out in the best way, especially with a blunt or bob haircut.
Chunky highlights are unique because they create visible color blocks, not just soft blending. If you want an edgy vibe, ask for a few thicker pieces around the top and sides while keeping the rest mostly natural. For practical care, use a rich conditioner often since bolder contrast can feel drier over time. Choose a gloss between appointments to keep the highlighted parts shiny and even.
This can cost more depending on the number of chunky strands and how light you want them to go. To make it more budget-friendly, start with highlights only on the top crown or face area and expand later. Personalize by choosing colors that match your personality, like warm copper-brown pieces for a vintage glow. For styling, try side-parting or adding slight waves so the vertical streaks show off.
If you dye frequently, mention it before your appointment so your stylist can plan safe lift levels.
8. Smoky Ash Highlights For Cool-Toned Definition
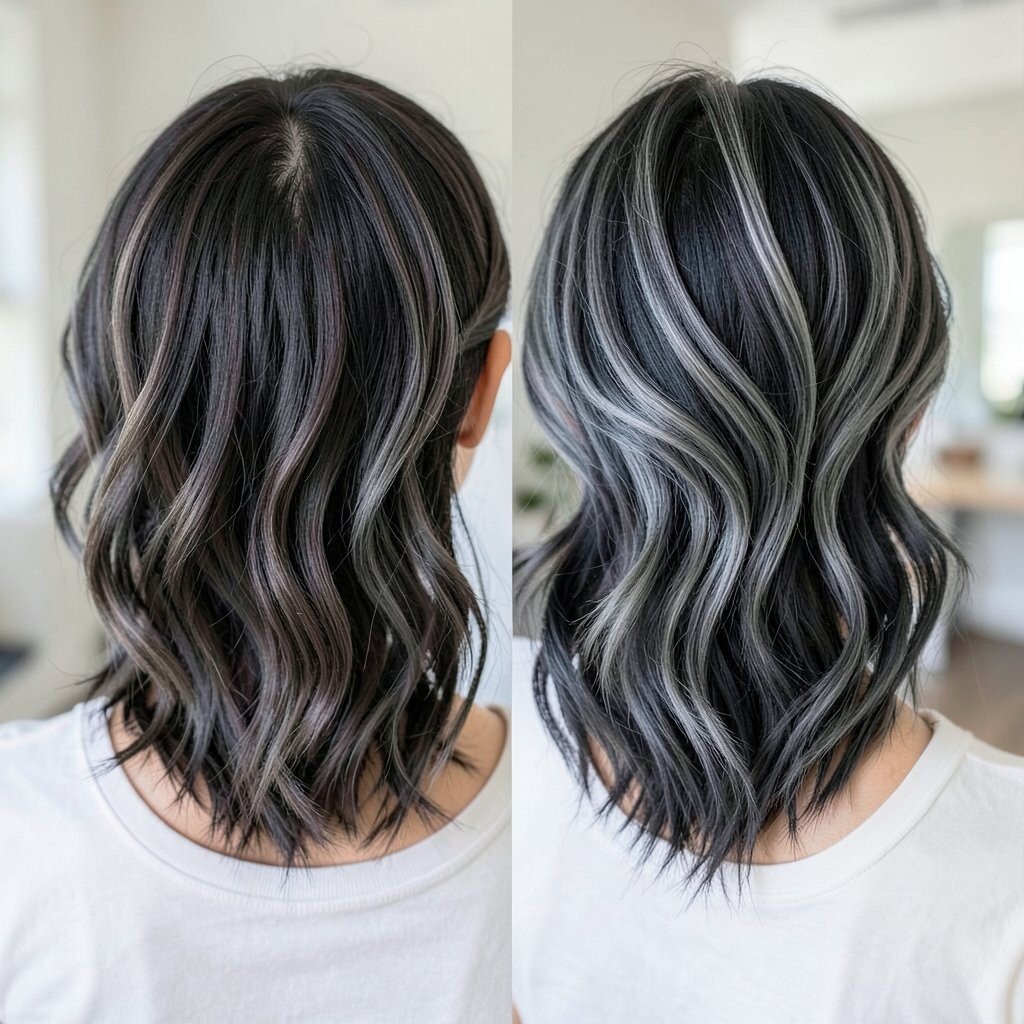
Imagine ash highlights that look smoky and muted, like a foggy morning glow. They add definition without turning your hair into a bright blonde.
This style is great when you want a modern, cool finish that still looks wearable. Ask for ashy balayage with a root shadow to avoid harshness. A toner is key for this look, so plan for a follow-up tone if needed. At home, use color-depositing conditioner to maintain that smoky look between salon visits.
9. Copper-Glazed Highlights Over Dark Hair
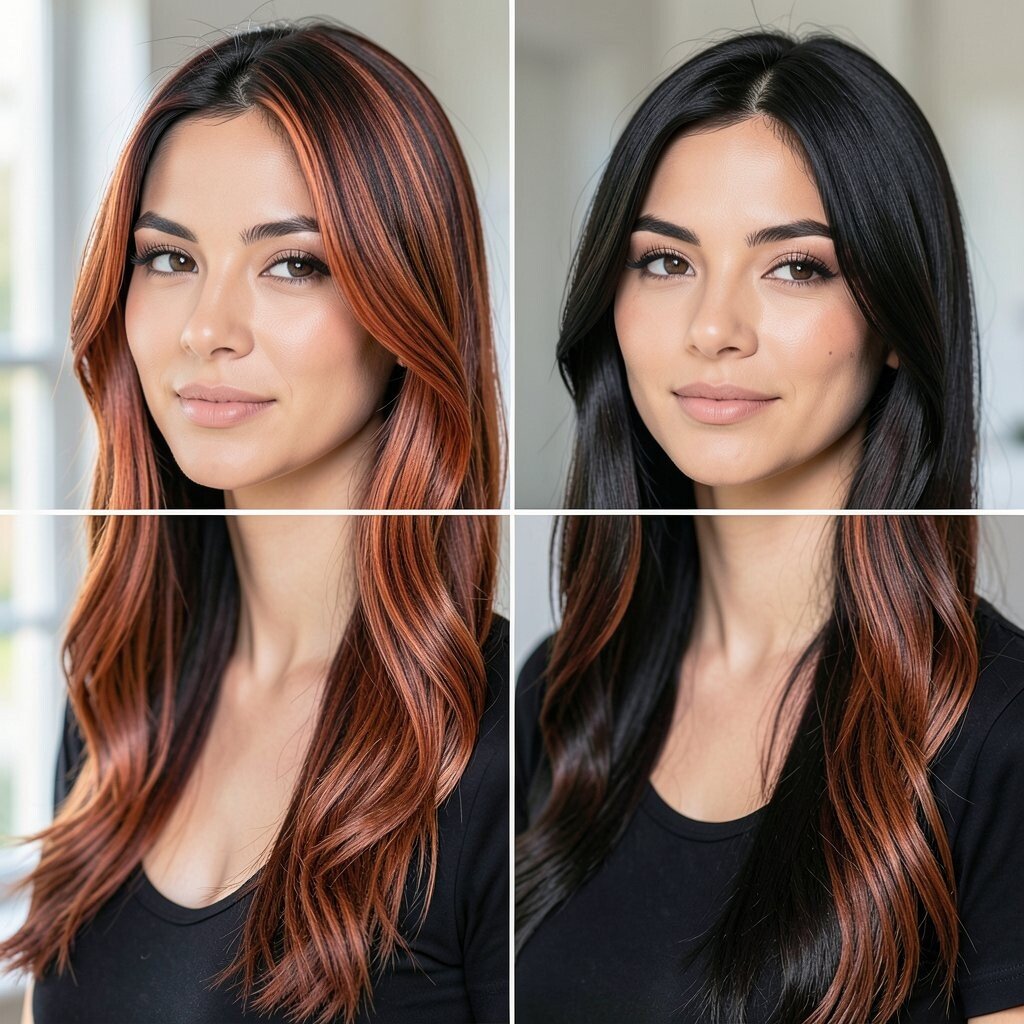
Picture a dark base with copper highlights that look like a warm glaze on top. In sunlight, it shines like a penny, but indoors it stays rich and deep.
Copper highlights are a standout because they bring warmth to your face and make skin look healthier. Request a copper shade that isn’t too orange, especially if you want a polished result. For practical tips, avoid very high heat and use a heat protectant every time you style. If your hair is already warm, your copper may show more easily, which can affect how many sessions you need.
Cost varies based on how much lift is required and how many layers are targeted. If you’re on a budget, focus on the top and front sections where the copper will be seen most. Personalize it by choosing rose copper for a softer vibe or deeper auburn for drama. When your copper begins to fade, a copper gloss can revive it quickly.
Try a smooth blowout or sleek ponytail so the glaze effect looks intentional.
10. Curtain Highlights For An Instant Hair Makeover
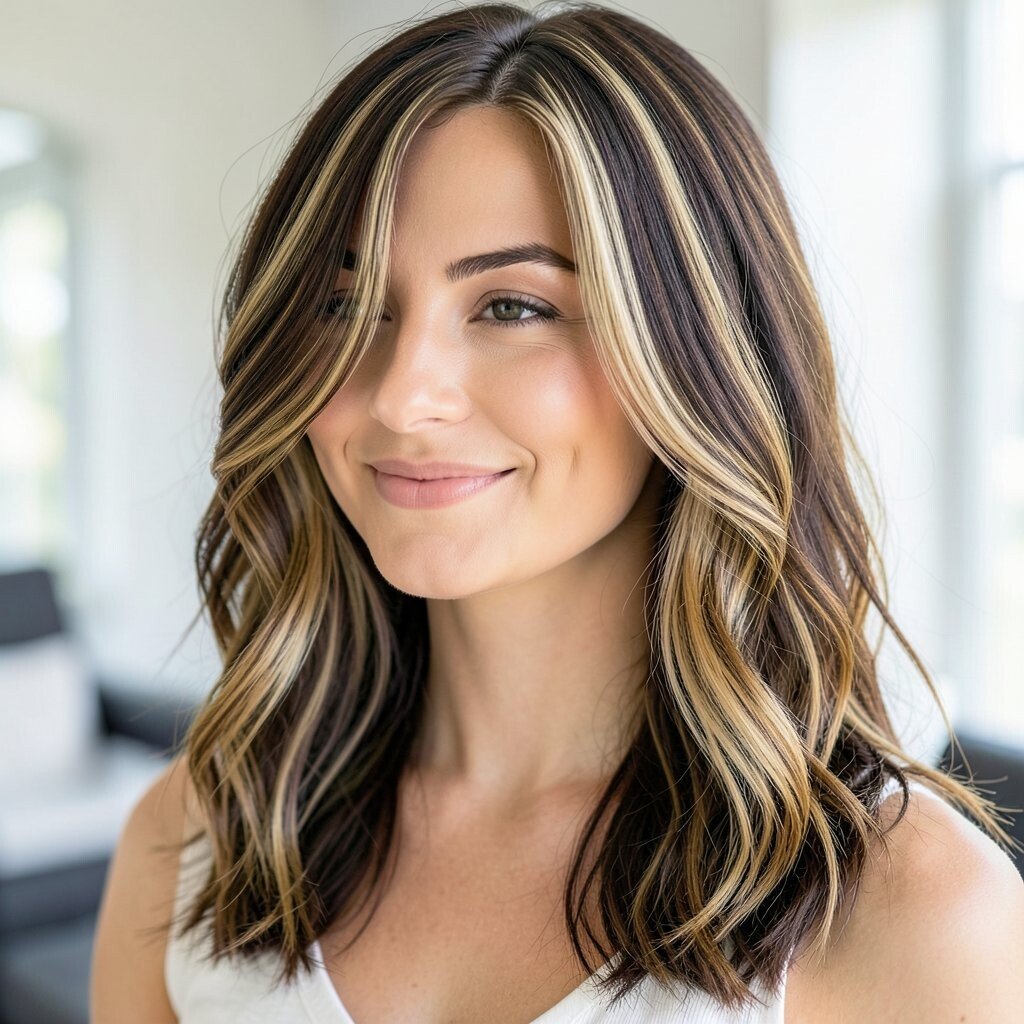
Imagine highlights that part from the center like two flowing curtains framing your face. The effect looks lively, balanced, and flattering in almost any hairstyle.
Curtain highlights are popular because they make hair look styled even when it’s natural. Ask for color that starts near the roots on both sides, then fades softly toward the lengths. For practical upkeep, use a gentle shampoo and keep your scalp moisturized to prevent dryness. If your hair is curly, your highlights will look even more dimensional, so consider keeping pieces slightly thicker for clarity.
This can be moderate to higher in cost since symmetrical placement matters. To save money, you can begin with partial curtain highlights and add more depth later. Personalize the look by selecting a shade close to your natural color for subtle impact or go lighter for a bold frame. When you style, try a middle part to show the curtain effect at its best.
Keep a hydrating mask on standby because longer color can make curls feel drier.
11. Shadow Root With Light Ends For Effortless Dimension
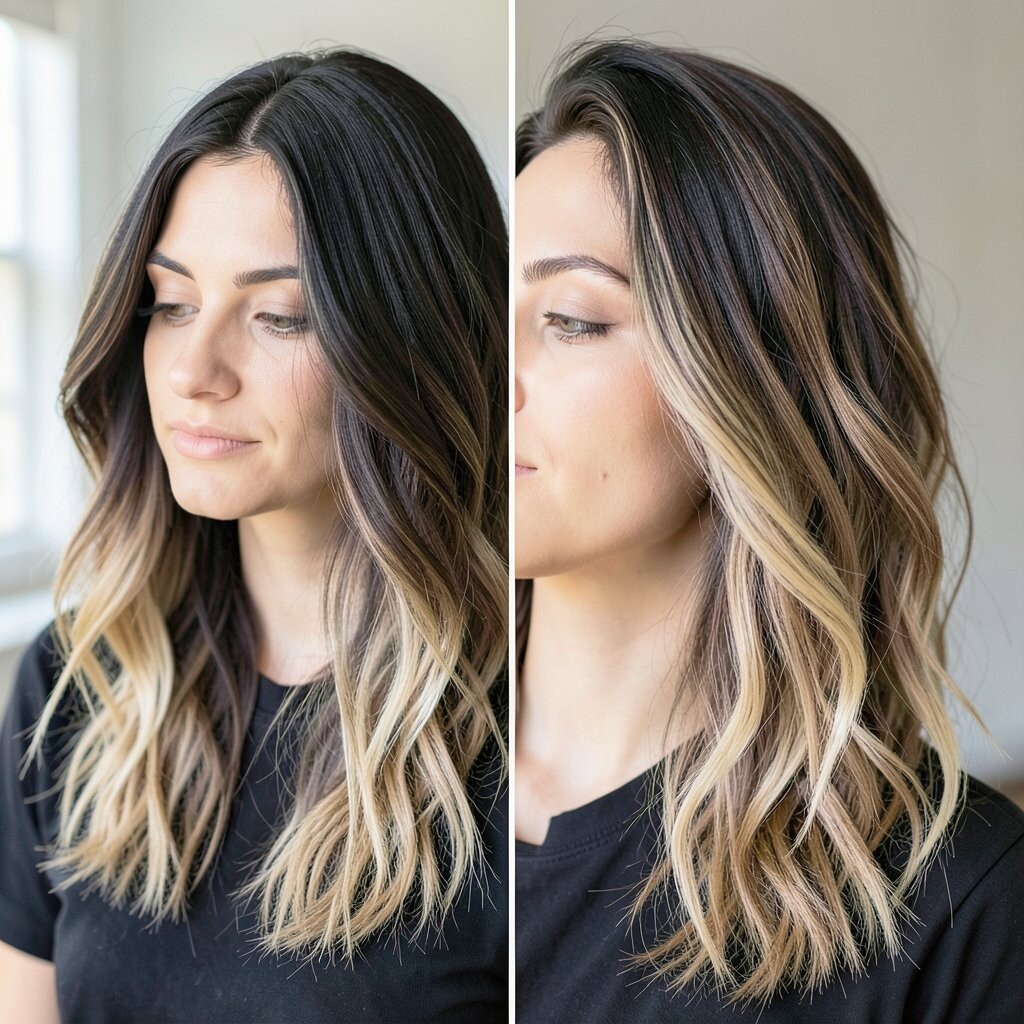
Picture darker roots that gradually lighten toward the ends, creating a gentle gradient. The whole look feels airy at the bottom while staying grounded at the top.
This highlight idea is unique because it mimics natural sun fading but with added style control. Ask for a shadow root and a soft highlight placement that doesn’t jump too quickly. A major benefit is the grow-out, since the darker root makes regrowth less noticeable. For practical tips, keep your ends conditioned and consider a regular trim so the highlight area stays even.
Cost considerations depend on the number of color melts and how light the ends become. If you want a budget win, ask for a lighter only on the lower sections so less lift is needed. Personalize by choosing how dramatic the fade is, from mild to more pronounced. With the right tone, this look works for both straight hair and waves because the gradient is easy to see as texture moves.
12. Glazed Strawberry Blonde Highlights
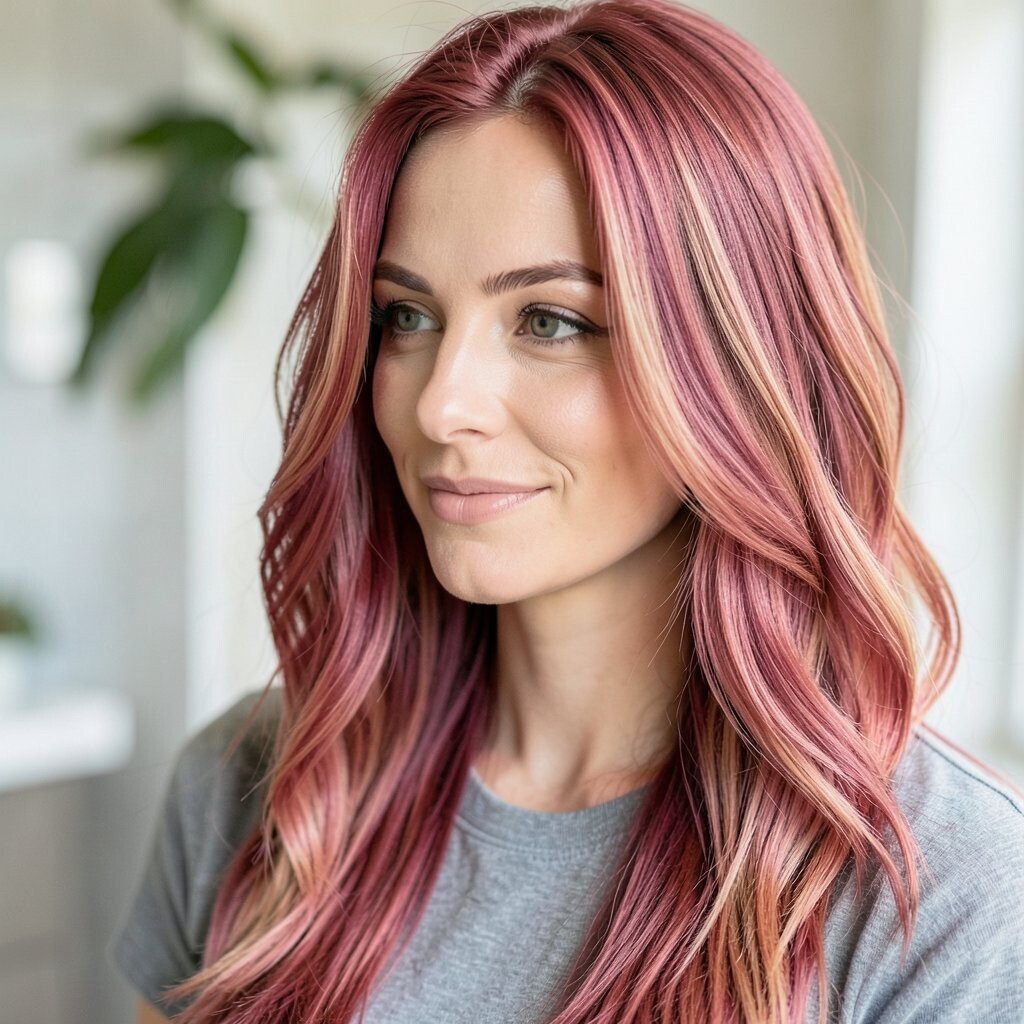
Imagine strawberry blonde highlights that look glossy and smooth, like a fresh glaze on top of warm hair. They blend sweet warmth with just enough brightness to stand out.
This look feels trendy because it’s playful without being harsh. Ask for strawberry-toned highlights paired with a soft gloss so the shine looks healthy and not chalky. If your hair is darker, you’ll likely need careful lift planning so the strawberry tone stays flattering instead of brassy. For practical care, use a moisturizing mask and reduce washing frequency when possible.
Cost can be higher when lift is needed to reach the right shade level. To keep it manageable, start with softer highlights around the crown and front pieces. Personalize by choosing more golden strawberry for a sunny look or a cooler rose-leaning strawberry for a softer vibe. Styling wise, a loose wave makes the glossy highlights feel extra dimensional.
13. Two-Tone Highlights With Darker Underpieces
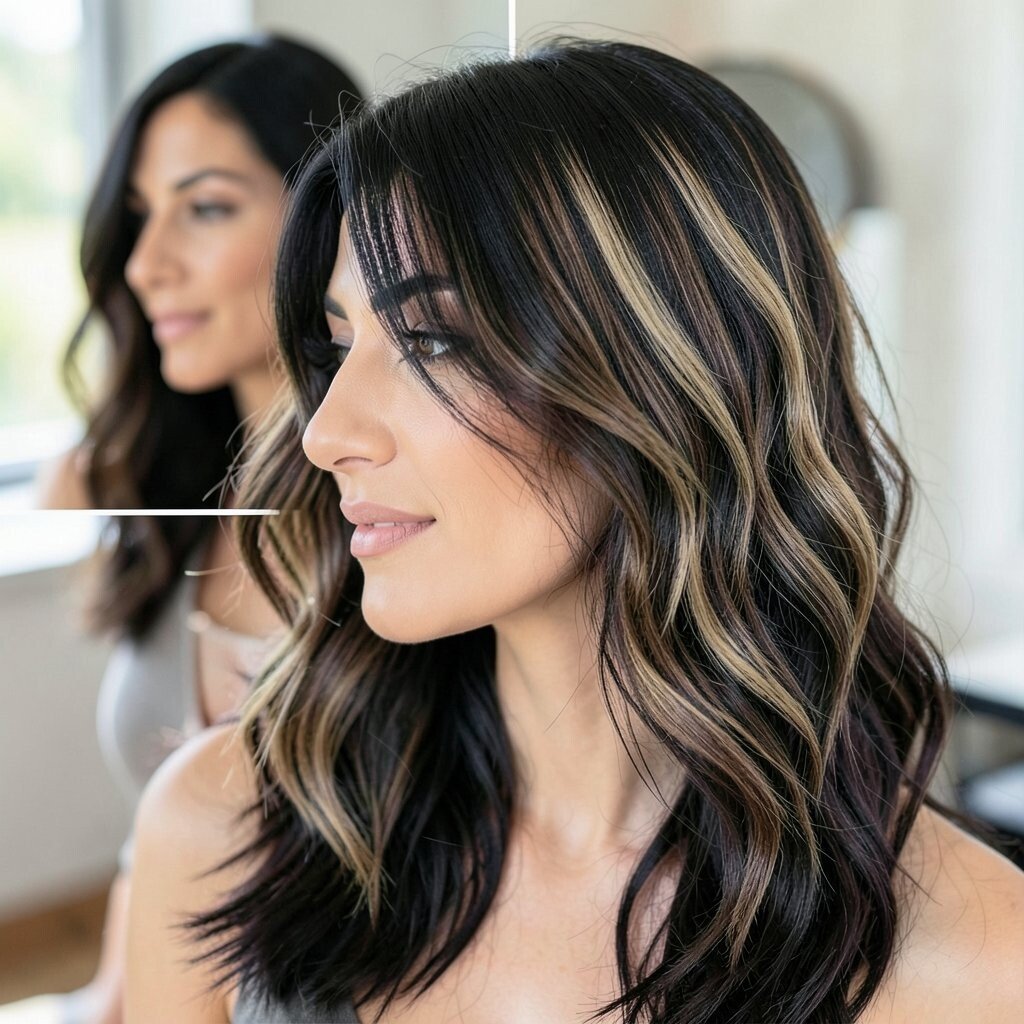
Picture bright highlights on top with darker underpieces that peek out when you move your hair. The result feels bold, modern, and full of depth.
This idea is unique because it gives your hair an inside secret, like color hidden in plain sight. Ask your stylist to place lighter highlights on the outer layer and keep the underlayer slightly deeper for contrast. The benefit is that you get more dimension without needing your whole head to be light. For practical tips, part your hair often in different spots so the underpieces show when you want them to.
Because it involves strategic placement across layers, cost may be more than a basic highlight service. You can personalize the contrast level by choosing how dark the underpieces should stay and how bright the top pieces go. If you want something wearable for work, keep the top highlights subtle and reserve stronger contrast for the ends. To maintain the look, use a color-safe routine and protect hair from sun since underlayers can fade unevenly.
When you style with a blowout or waves, let sections separate naturally so the two-tone effect stays visible.