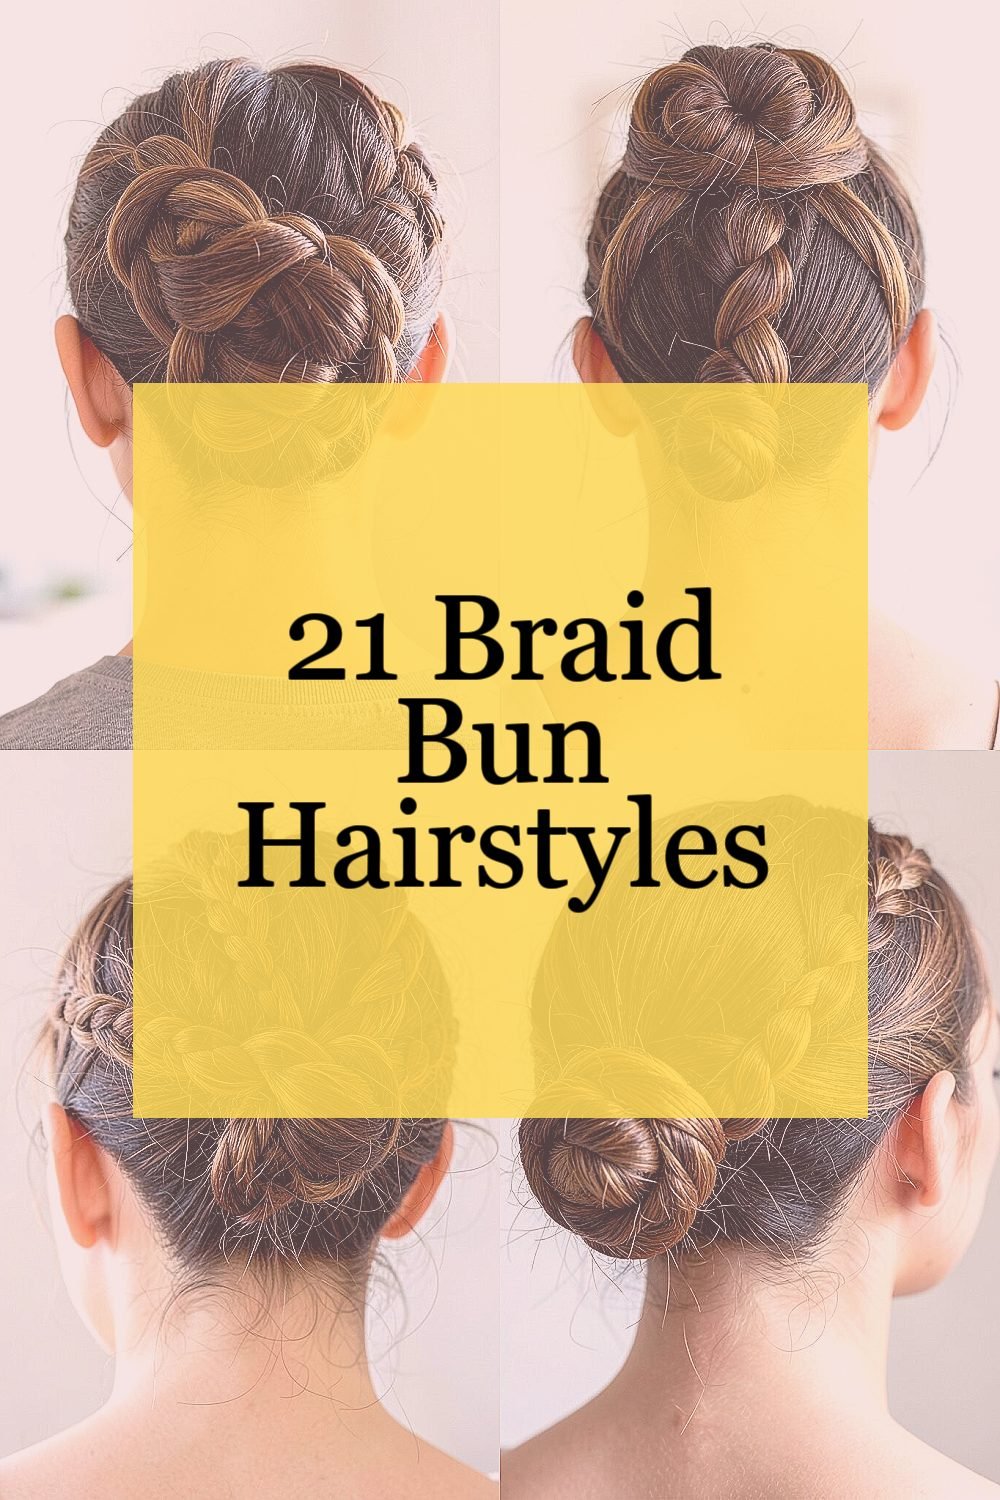
Your hair can look sweet, polished, and a little bit magical with braids tucked into a bun. Pick a style, grab a few tools, and enjoy how quickly your look upgrades.
Braid buns work for busy mornings, dressy nights, and everything in between. They also help your hair stay neat, even when your day gets hectic.
1. Classic Three-Strand Braid Bun
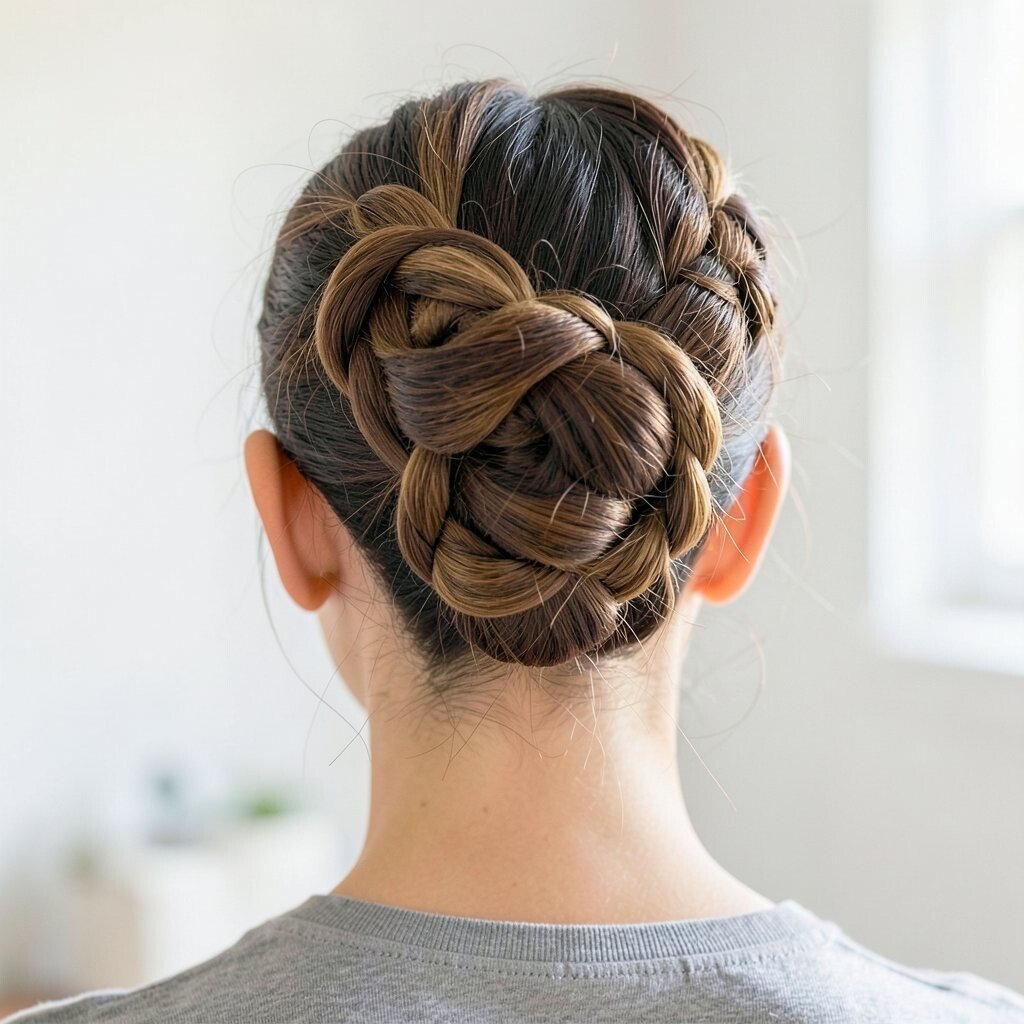
A classic three-strand braid inside a bun looks tidy and timeless. It frames your face softly while keeping hair in place all day.
Start with clean, slightly damp hair and add a light smoothing cream so flyaways behave. Braid three sections, wrap the braid into a low bun, and secure it with bobby pins. For extra hold, mist with a flexible hairspray and tuck the ends neatly under the bun.
2. High Halo Braid Bun
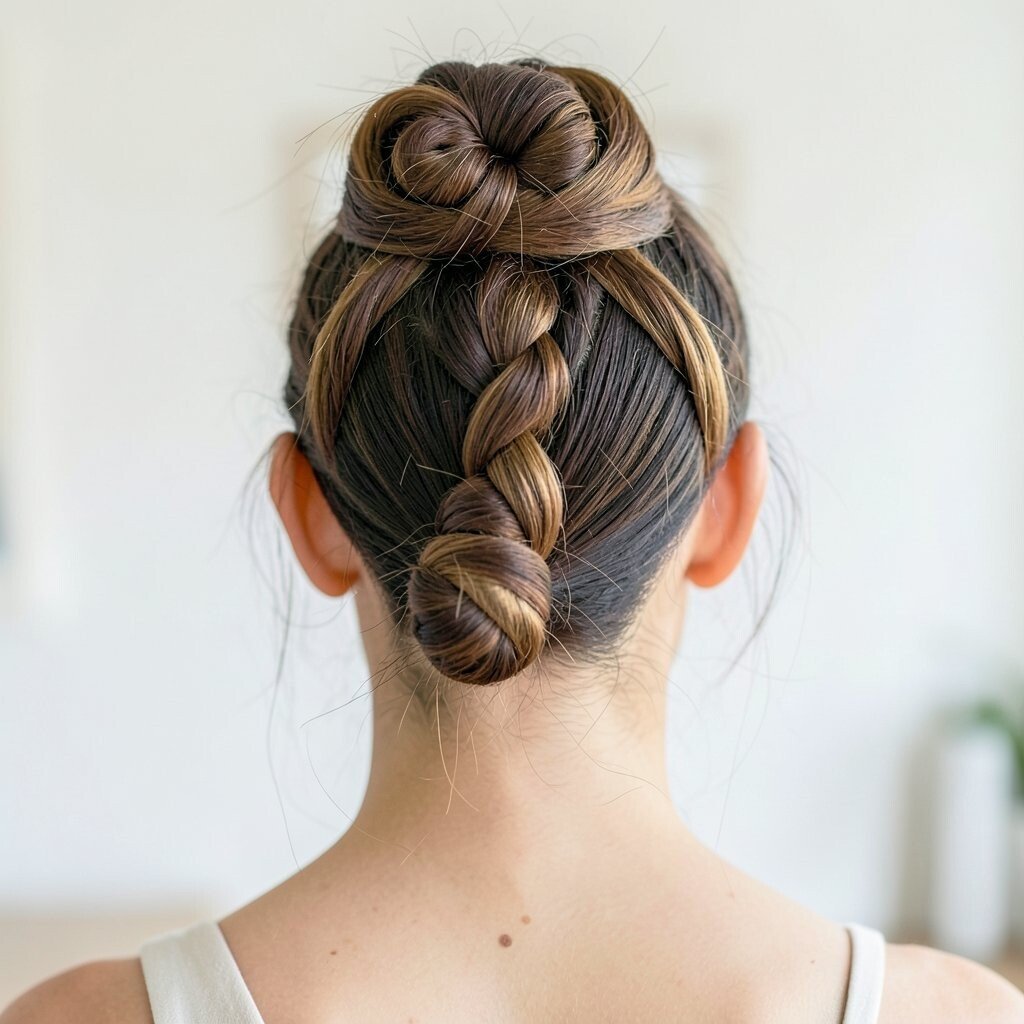
This style gives off a crown-like vibe without needing a tiara. A high halo braid bun sits around the head and makes you look instantly dressed up.
Begin by parting your hair neatly and braiding two sections along the sides. Bring the braids around the top and pin them together at the center, then tuck the remaining hair into a bun. Keep the braid tension medium, so it looks full and not too tight.
It is a great pick for weddings, holiday events, or any day you want your hair to feel special. Add a small gold clip near the pin point to make the bun look intentional and trendy.
3. Dutch Braid Into Messy Bun
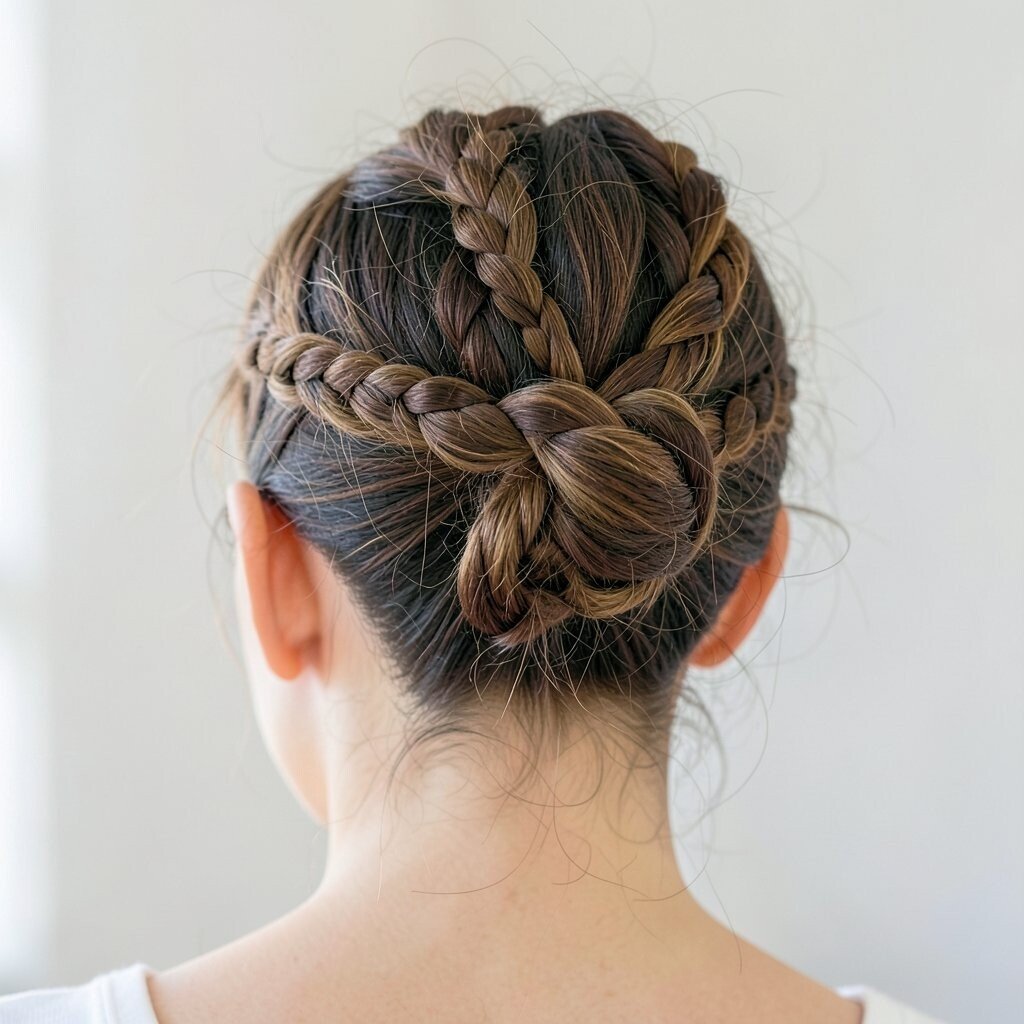
A Dutch braid flips under, creating a bold, bumpy texture before it melts into a messy bun. The mix feels artsy and relaxed, like you planned it that way.
Pull your hair into a side pony first, then Dutch braid from the roots to the ends. Twist the braid into a loose bun and let a few strands fall around your hairline. Use pins in a crisscross pattern so the bun holds while still looking effortless.
This works especially well if you want volume without using heavy rollers. Finish with a texturizing spray so the messy parts look soft and controlled.
For personalization, vary the braid size by feeding in bigger chunks at the top. If you have fine hair, tease the crown lightly before braiding to boost thickness.
4. Fishtail Braid Bun with Side Sweep
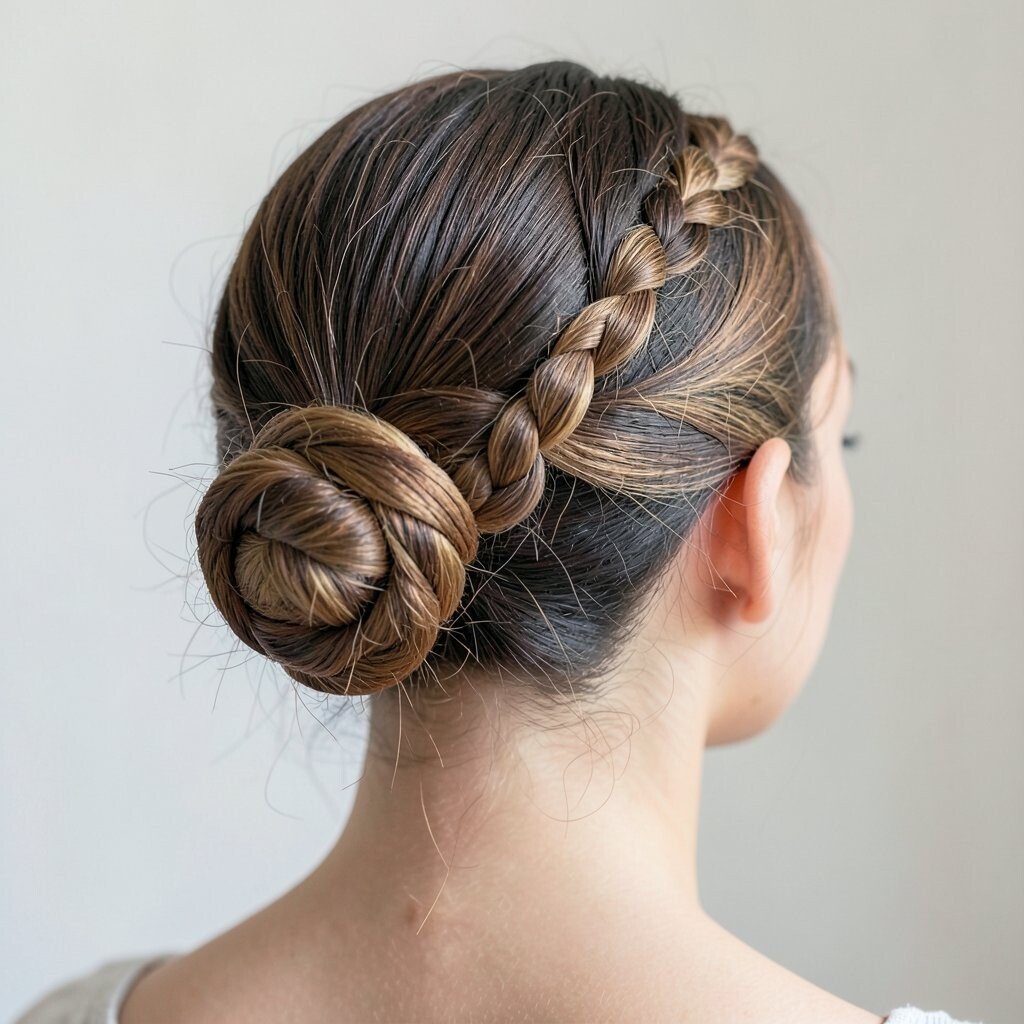
A fishtail braid looks delicate and intricate, and it instantly upgrades a simple bun. When you sweep it to one side, it also gives your face a flattering angle.
Create a deep side part and start a fishtail braid by alternating small sections. Wrap the finished braid into a low side bun, then secure it with pins that match your hair color. Add a few face-framing pieces and gently tug at the braid links for a fuller look.
It is perfect for dates, dinners, and photos because the braid catches light like tiny waves. If your hair is slippery, use a braid gel or a dab of styling mousse before you start.
5. Rope Braid Bun with Center Part
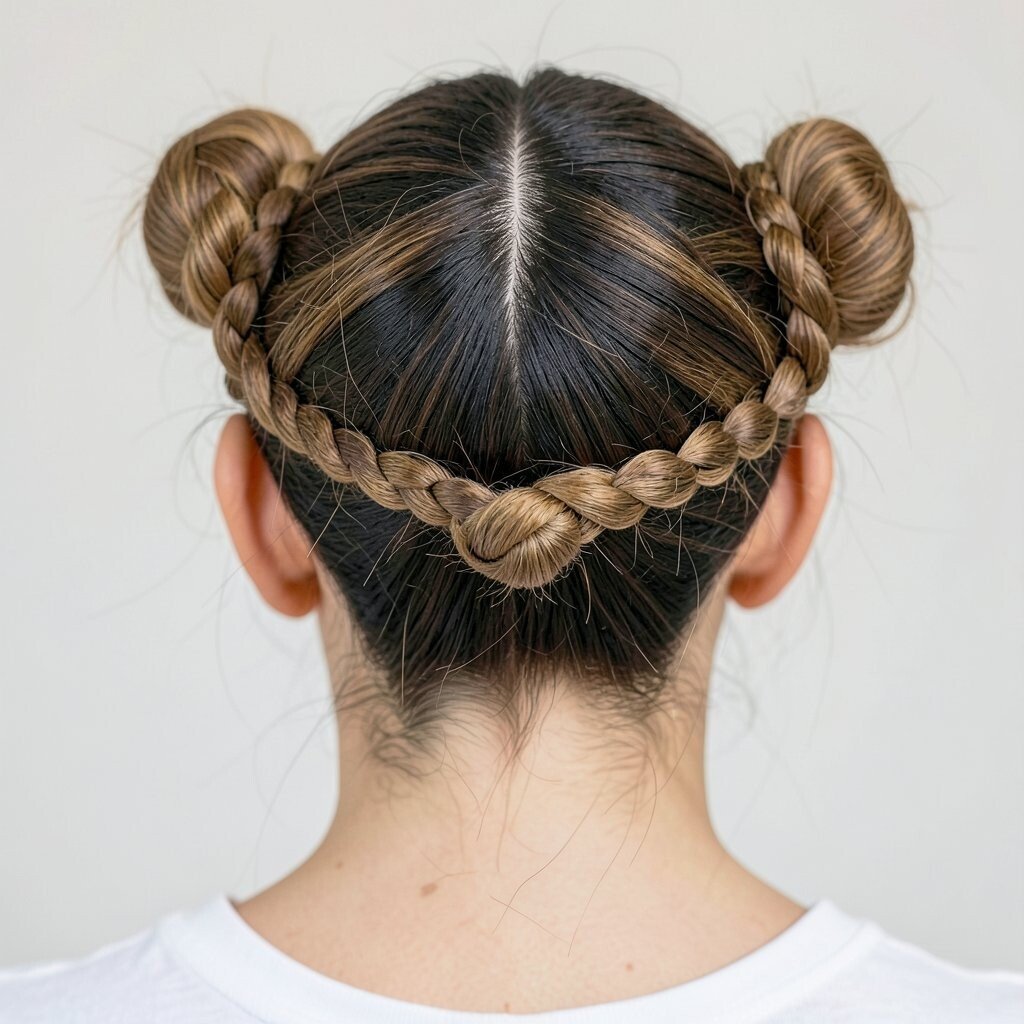
A rope braid twists like a smooth cord, so it looks sleek and modern. Pair it with a center part and you get a balanced, stylish finish.
Divide your hair into two even sections and twist each section away from your face. Wrap the two twisted pieces around each other like a rope, then roll into a bun at the back of your head. Hold everything with bobby pins and add one pin near the twist so it doesn’t unravel.
To keep it comfortable, avoid twisting too hard, especially at the scalp. A light hair oil on the braid ends can make the whole bun look extra shiny and put-together.
6. Waterfall Braid Bun Hybrid
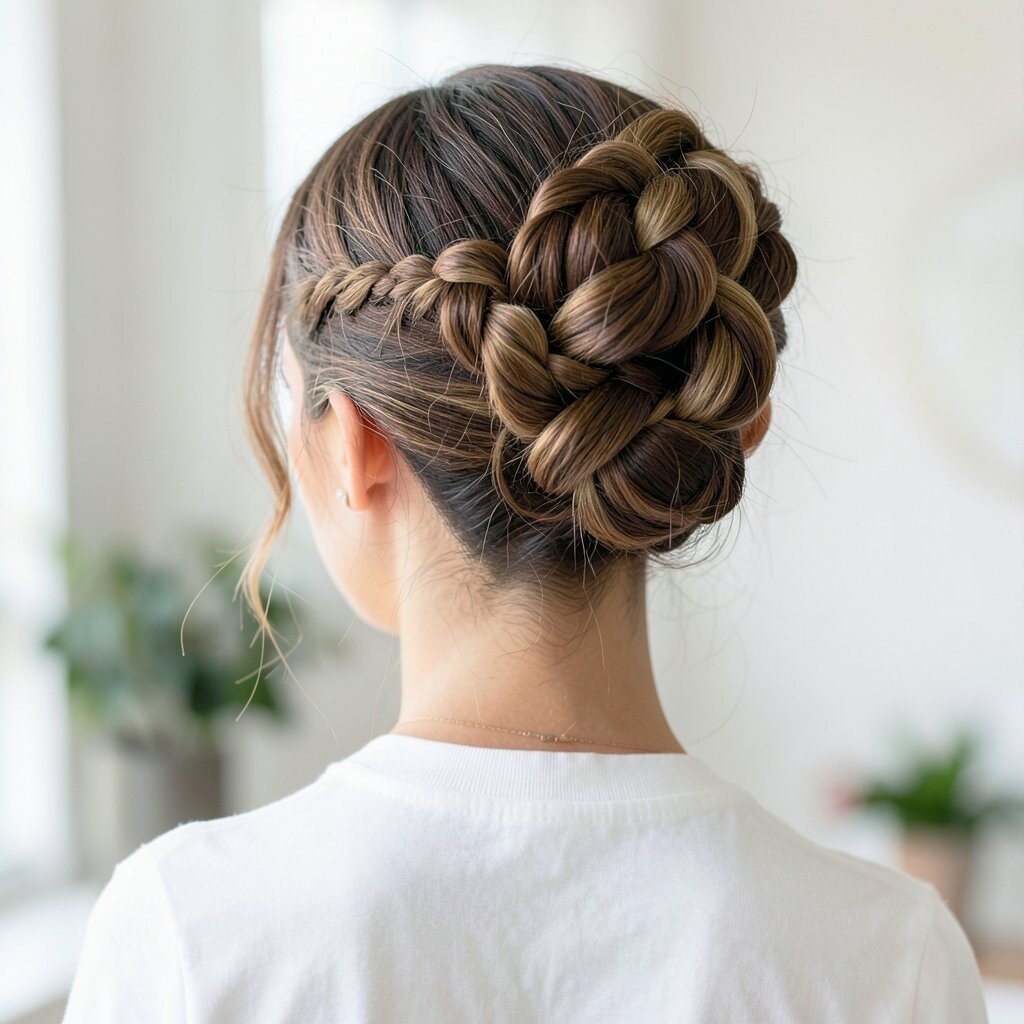
A waterfall braid adds a flowing, soft pattern, then the bun gathers it into one neat shape. This hybrid style feels fancy but still wearable for everyday life.
Work a few sections of waterfall braiding along the side, dropping strands like little loops. Once you reach the back, continue braiding and wrap into a bun. Secure the bun with pins and smooth the top with a brush so the waterfall pattern stands out.
7. Crown Braid Bun for Curly Hair
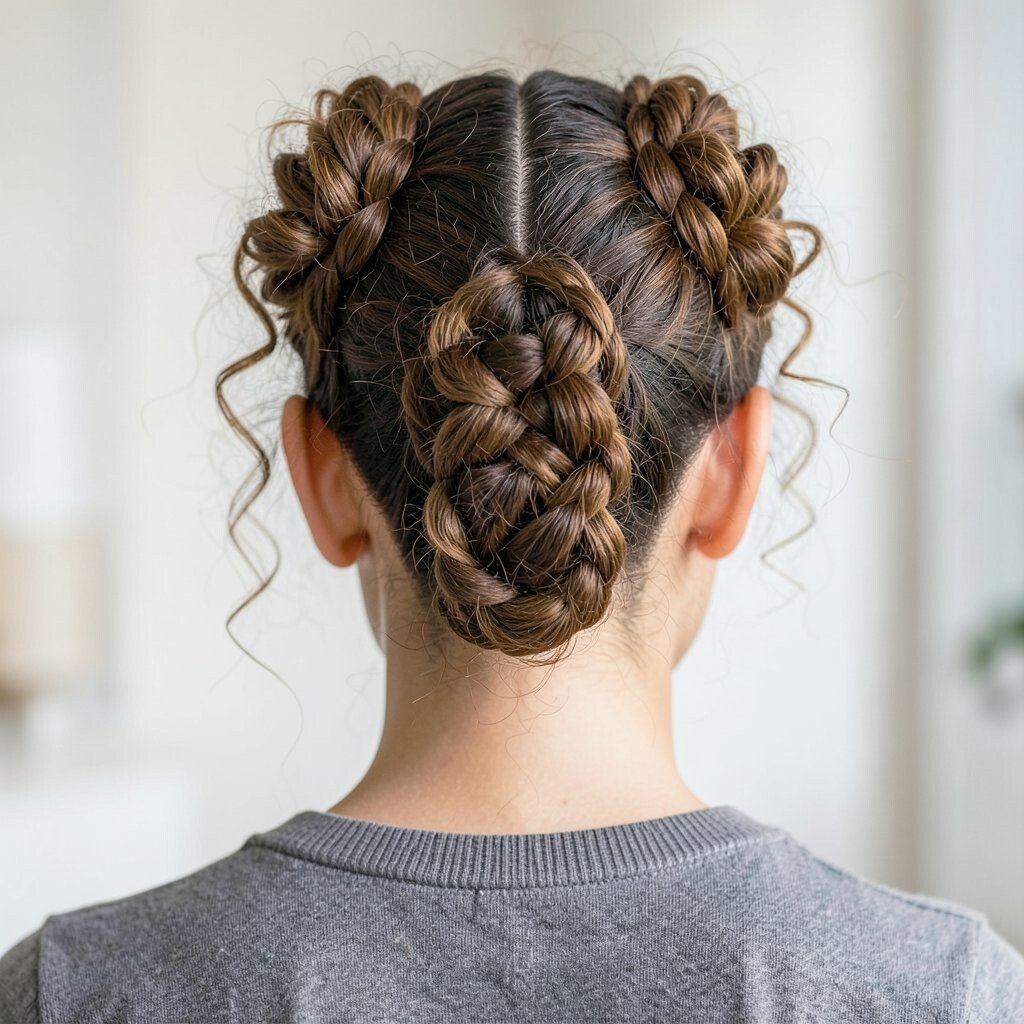
Crown braids look stunning on curls because the braid texture blends with natural bounce. This style keeps your curls from getting frizzy and messy while still showing off your shape.
Separate your curly hair into sections and start a crown braid from one side of the forehead. As you braid, gently pull in small curl portions so the braid sits close to the scalp. After you connect to the other side, tuck the rest into a medium bun and secure with pins.
Use a curl cream for definition and a humidity spray if your weather is changeable. For a personalized look, leave a few curly ringlets loose near the bun so it feels romantic.
Try this style when you want a protective option that still feels fun and fresh. It is also great for work days because the bun keeps everything tidy without losing volume.
8. Micro Braid Bun with Jeweled Pins
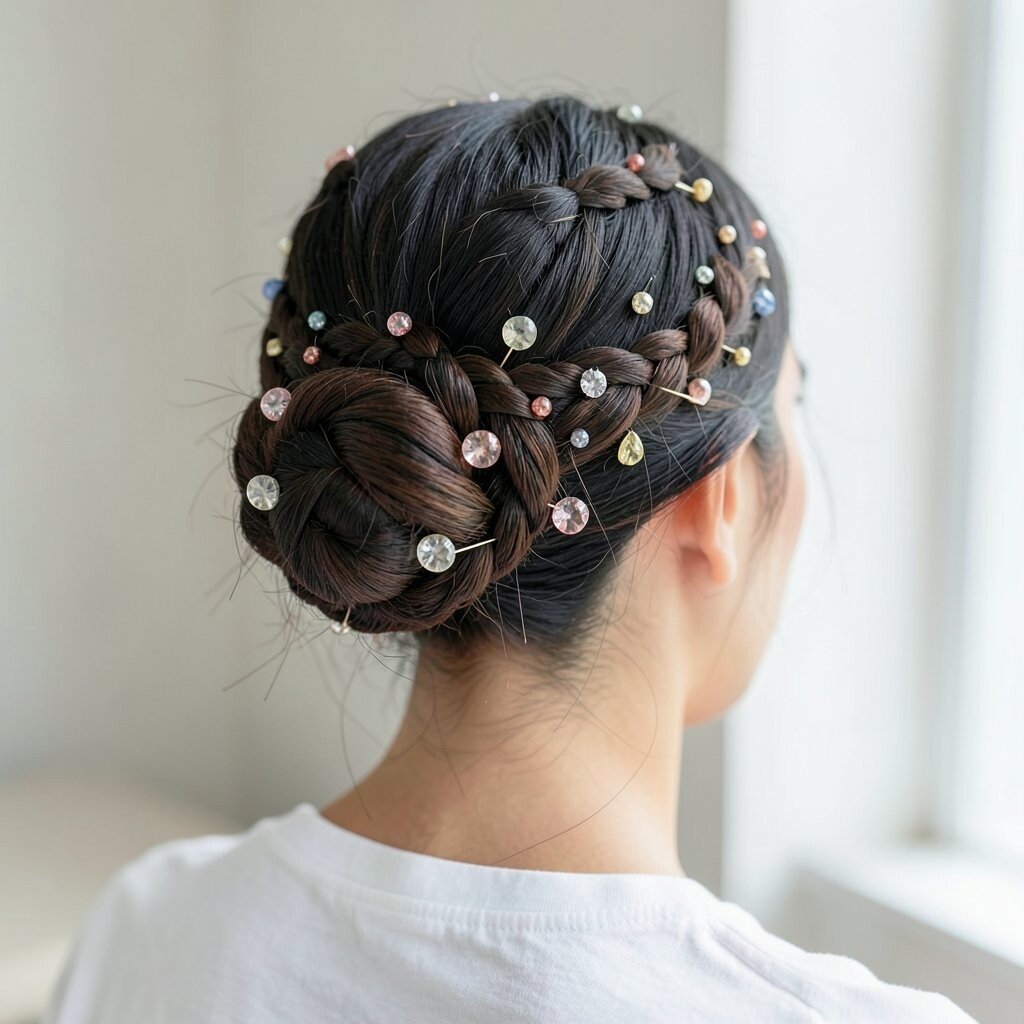
Micro braids bring a detailed, beaded-like look even when your hair is simple. When you tuck them into a bun, the style feels high-end and playful.
Part your hair into small sections, braid each one tightly, and gather the braids into a bun. Use elastics to hold mini braids if you need extra control, then secure the bun with bobby pins. Add jeweled pins around the edge where the braids meet the bun for a sparkling finish.
This look stands out at parties, concerts, and even everyday outings when you want extra confidence. If you are worried about time, braid only the top layer and keep the rest in a regular bun.
Cost-wise, you can keep it budget-friendly by using clip-on accessories instead of pricey hair jewelry. A single set of elegant pins can make many hairstyles feel new.
9. Side Braided Bun with Bangs
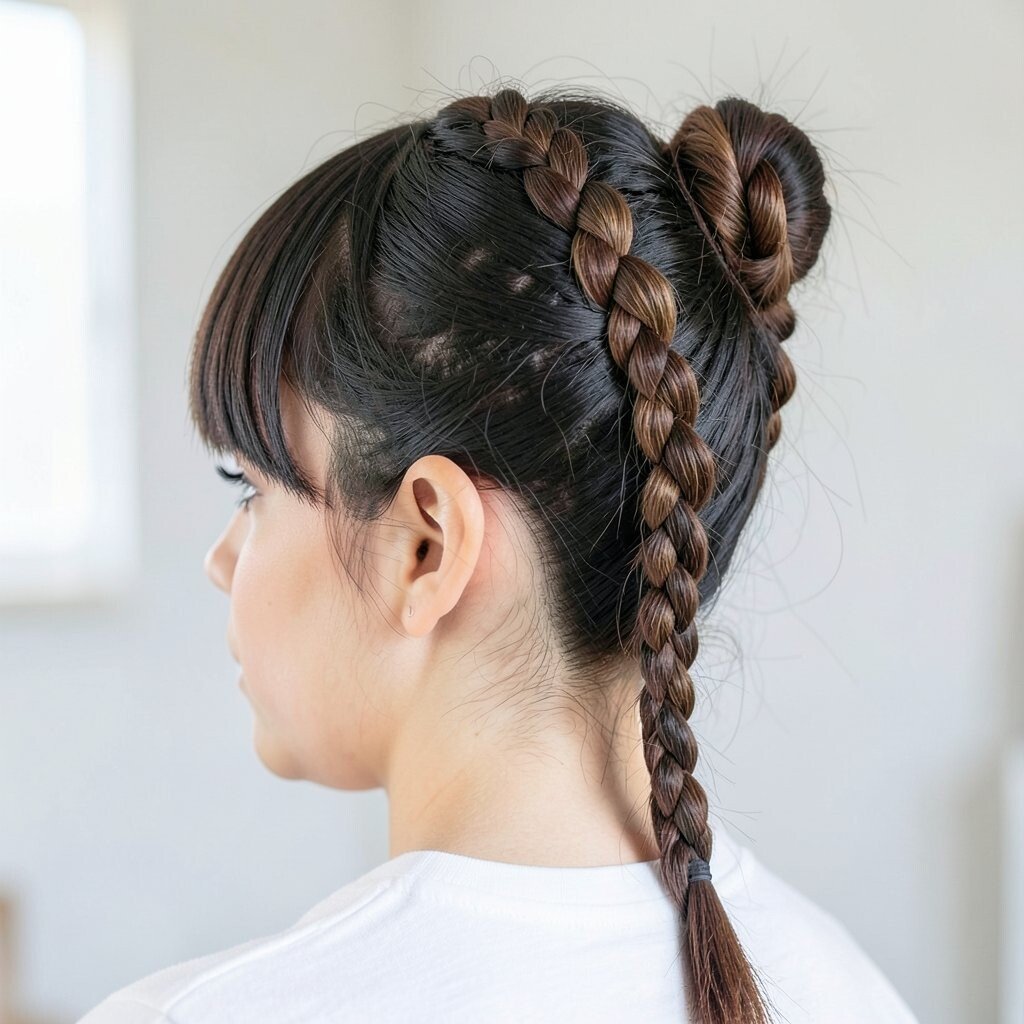
Side braided buns flatter many face shapes, and they look especially good with bangs. The braid acts like a soft frame that pulls attention to your eyes.
Start by braiding a chunky section on one side of your head, beginning near the temple. Continue the braid toward the back and then wrap it into a bun at the side or slightly behind the ear. Pin it down so the braid stays visible even when your hair shifts.
When you have bangs, keep them lightly misted and tidy so they blend smoothly with the bun. For a more modern vibe, braid closer to the hairline rather than starting too far back.
Use a few small pins to secure the braid tail, then tug the bun gently for a fuller silhouette. This style is easy to personalize without needing special tools.
10. Box Braid Bun with Sleek Finish
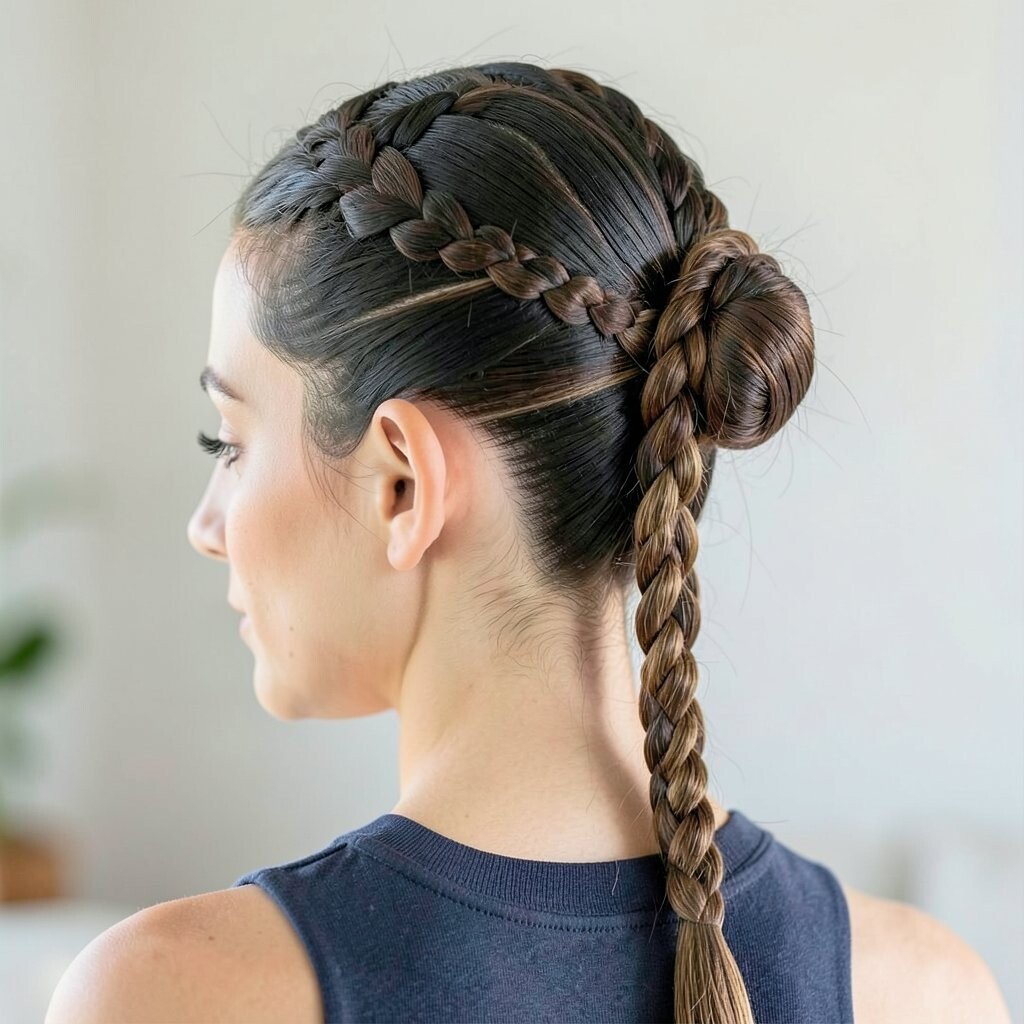
Box braids already have shape, and turning them into a bun makes them look even more polished. This hairstyle is protective, neat, and perfect when you want low daily fuss.
Gather your box braids into a high or low bun using a strong hair tie. Smooth the braid edges with a brush and a tiny bit of gel so everything looks clean. Wrap any loose braid ends around the bun and pin them securely.
The uniqueness here is the way the braid pattern stays visible from every angle. It looks incredible in photos and holds up well through long days.
For cost considerations, many people keep this style for weeks, which can reduce frequent salon visits. If you are doing it at home, invest in quality hair ties and lots of bobby pins so it stays firm.
11. Bubble Braid Bun
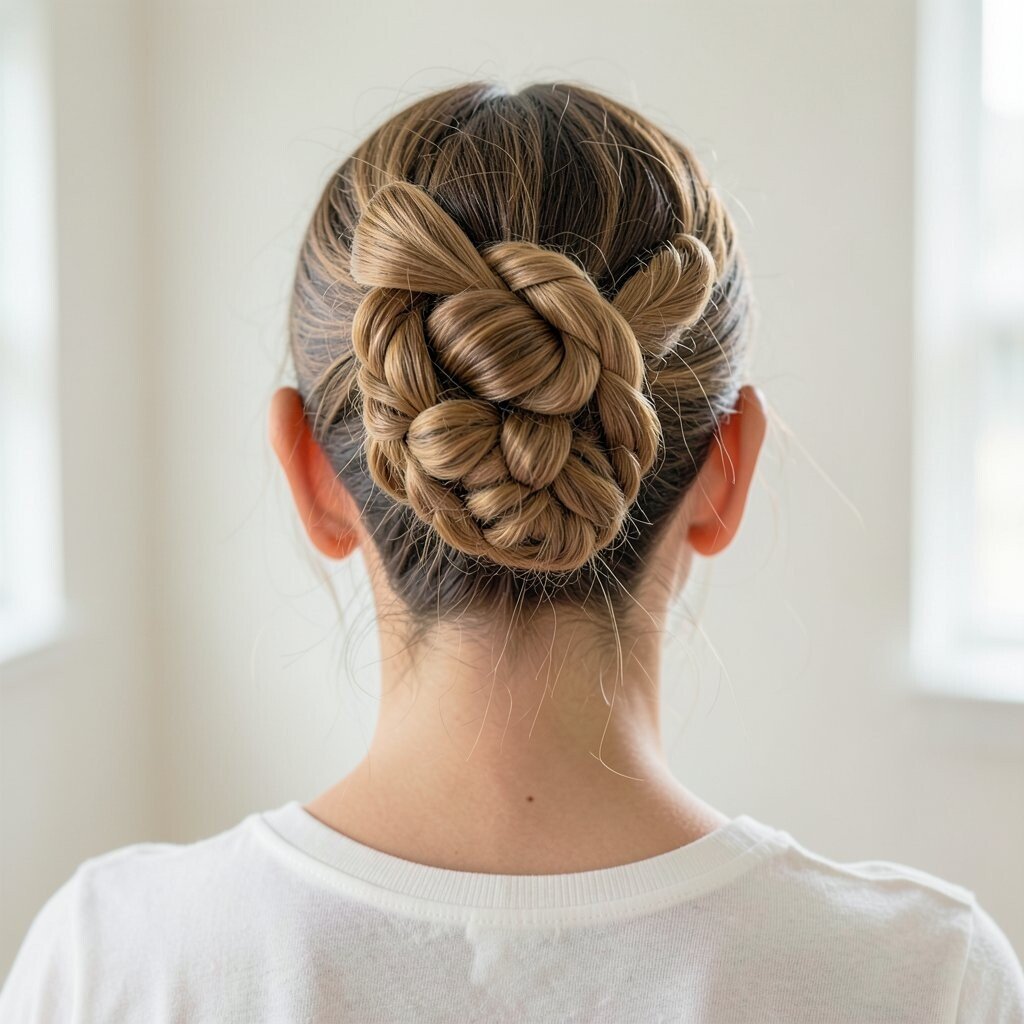
Bubble braids create eye-catching “popped” loops that look fun and different. When you roll the bubble braid into a bun, the texture becomes the star.
Make a regular braid, then secure tiny sections with small elastics along the length. As you place elastics, gently pull the hair between them to form bubbles. Wrap the braided, bubbled section into a bun and pin it in place, keeping the bubbles facing outward.
This is a great trend-friendly choice for casual outings, summer events, and playful photos. For a personalization boost, choose elastics in a color that matches your accessories.
12. Cornrow Braid Bun with Part Lines
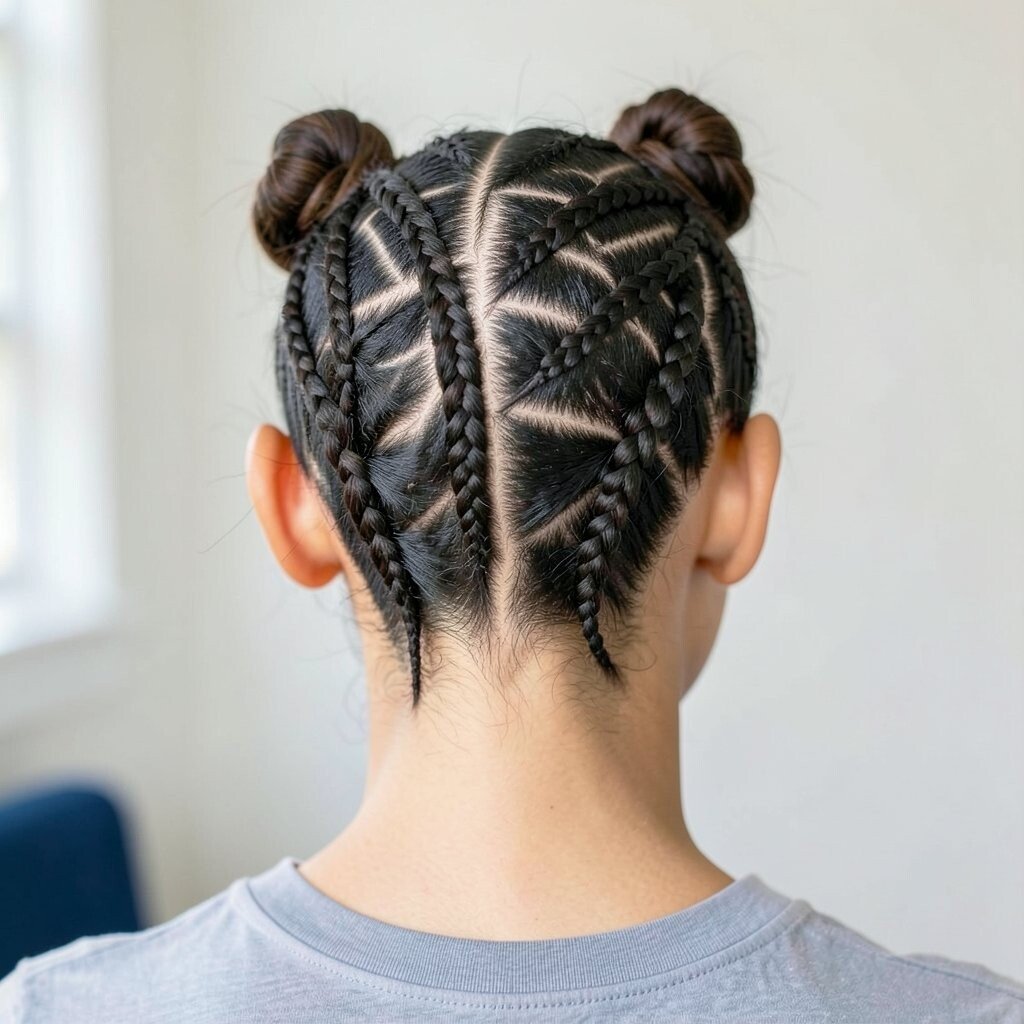
Cornrows look sharp, and the part lines add graphic style. A cornrow braid bun turns that sharp look into a chic updo that feels very current.
Create defined cornrows from the front toward the back, following a neat pattern. Gather the remaining hair into a bun, then pin the ends so they sit smoothly. Keep the bun slightly off-center for a softer, modern look.
This style is great for hot weather because it keeps hair off your neck. Use a light edge gel for extra control, but avoid heavy buildup so your scalp stays comfortable.
13. Twist and Braid Bun with Two Textures
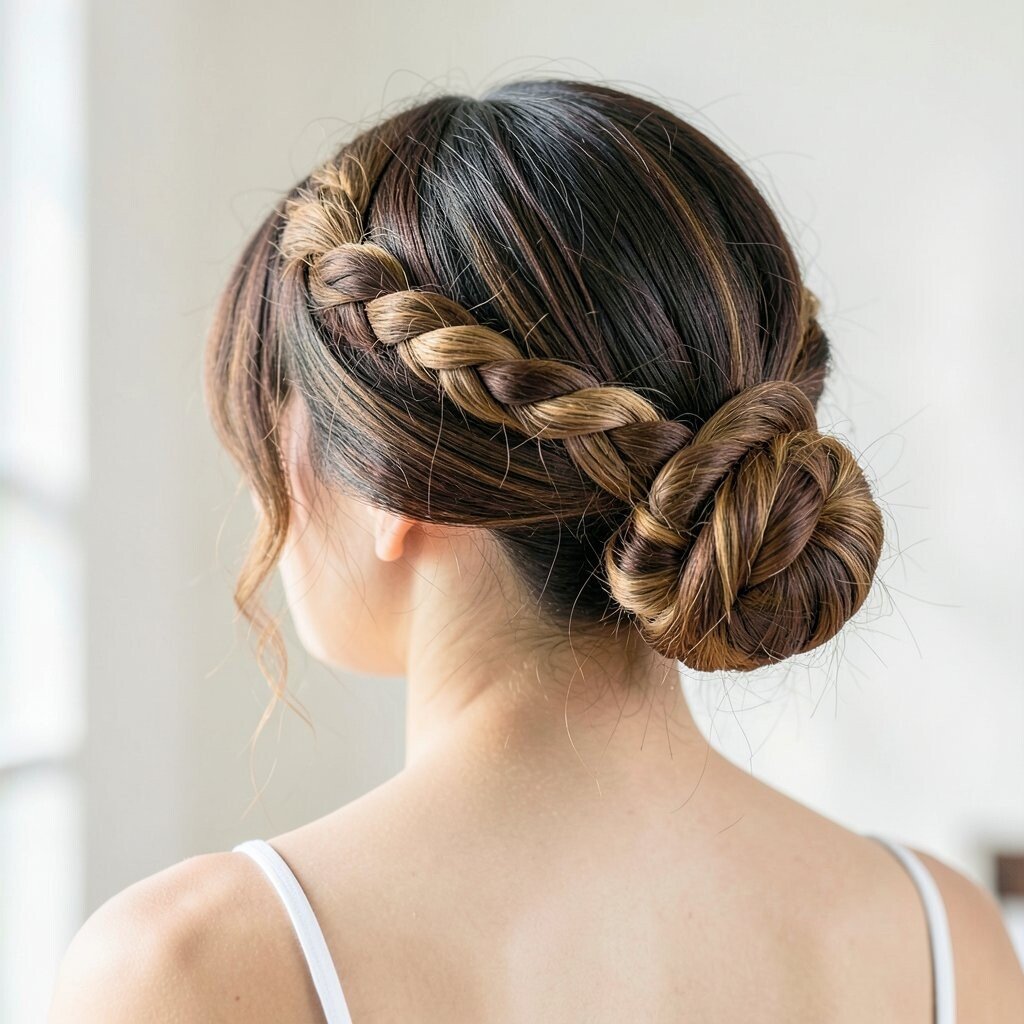
When you mix twists and braids, your bun gets two different textures that look like layers. It is a creative style that still feels easy once you get the hang of it.
Start with a twist at the top, then switch into a braid for the length. Roll the mixed sections into a bun and pin them so both textures show. If you want a fuller look, gently tease the bun area before securing the pins.
This hairstyle feels unique because it does not look like one single technique. It also helps you use different parts of your hair in a way that flatters natural waves.
For personalization, keep the twists thicker and the braid thinner so the contrast looks intentional. A small hair scarf tie near the base can make it feel extra stylish without much effort.
14. Braid Crown Bun with Glitter Root Spray
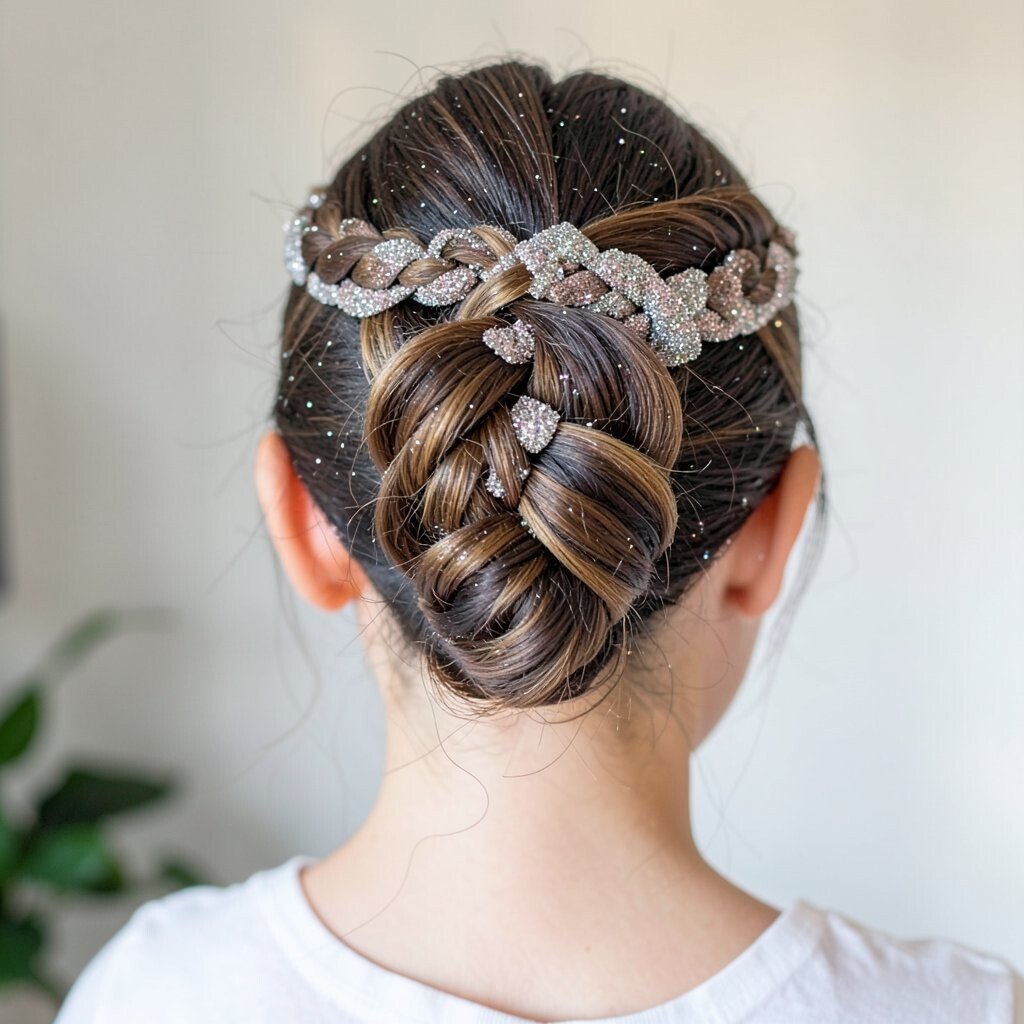
A braid crown bun can look elegant, and it shines even more when you add a subtle sparkle. The glitter is most noticeable under light, so it feels festive without being over the top.
Build a crown braid around the top of your head, then gather the rest into a bun at the back. Use a fine glitter root spray lightly before you pin everything so the shimmer looks delicate. Brush the crown area smooth so the braid pattern stays crisp.
This is perfect for birthdays, concerts, or any moment when you want your hair to look like it belongs to a highlight reel. Choose a glitter that is safe for hair and scalp, and keep it minimal for a clean finish.
15. Double Braid Wrapped Bun
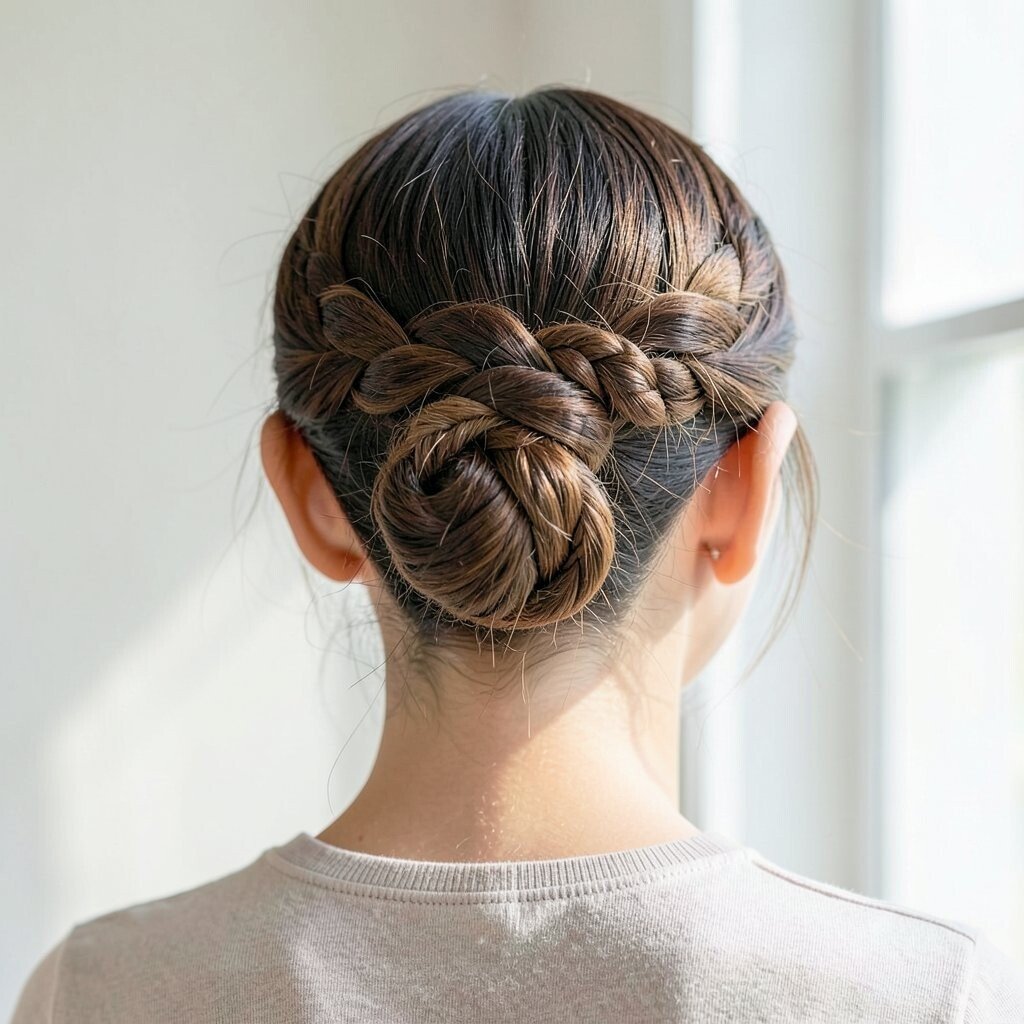
Double braids add symmetry, and wrapping them into one bun looks neat and strong. This style gives a “slick and secure” feel that works for work or events.
Split hair into two sections and braid each side from root to ends. Wrap both braids around the bun so they meet in the center, then pin them firmly. Smooth the outer edges with a little cream so the bun looks polished and not frizzy.
For uniqueness, try slightly widening the braid links for a fuller look. If you have thick hair, this bun will feel extra satisfying because the braids create natural volume.
16. Loose Side Braid Bun with Soft Layers
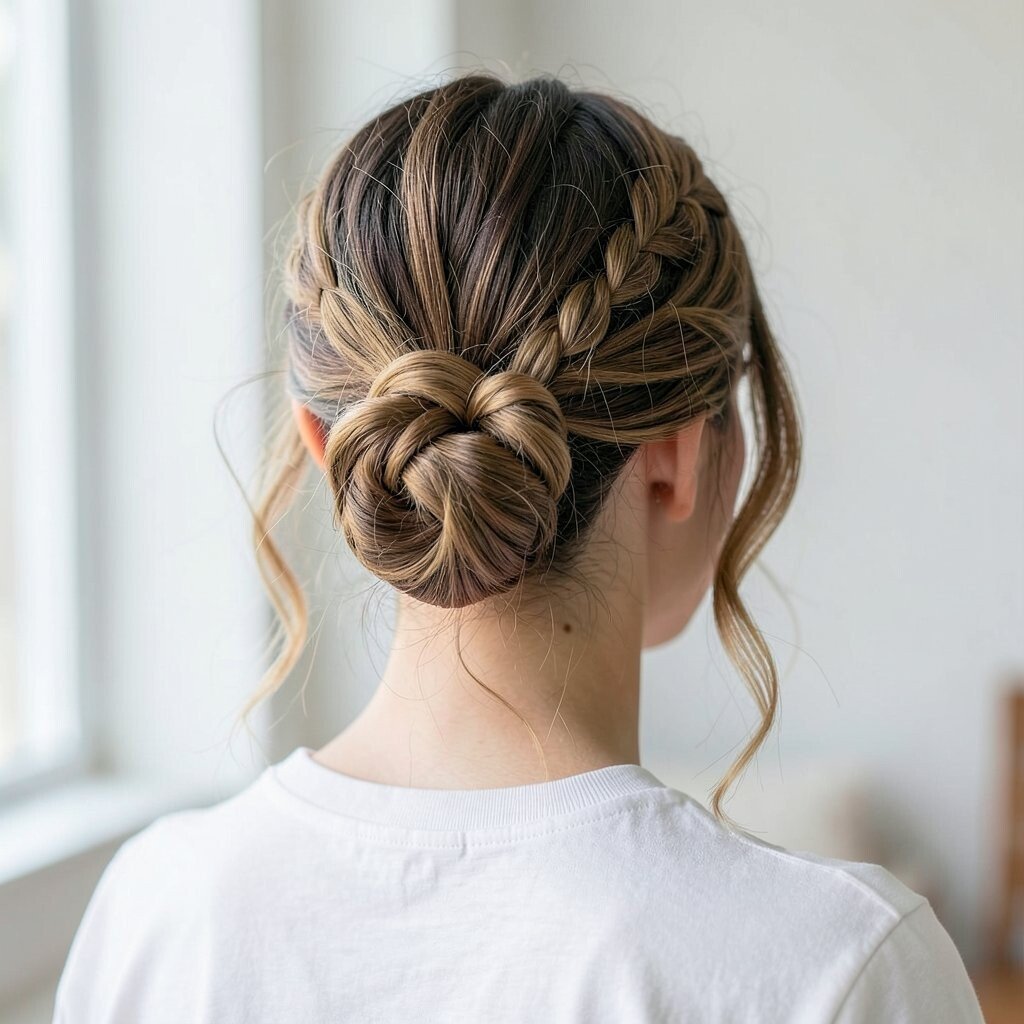
If you like airy hairstyles, a loose side braid bun is a dreamy option. It shows your natural movement, especially if you have layered hair.
Start a side braid from mid-length and keep it relaxed, not tight. Wrap the braid into a bun, leaving a few layers to fall around the front and back. Pin strategically so the bun holds while the loose pieces keep the style soft.
This style is budget-friendly because it uses what most people already have: pins, a tie, and a spray. Add a light mist of shine for a healthy look, and avoid heavy gels that can weigh hair down.
Personalize it by choosing where the bun sits, like higher for a playful vibe or lower for a calmer feel. It is also easy to adjust if you add clip-in bangs or volume extensions.
17. Pull-Through Braid Bun
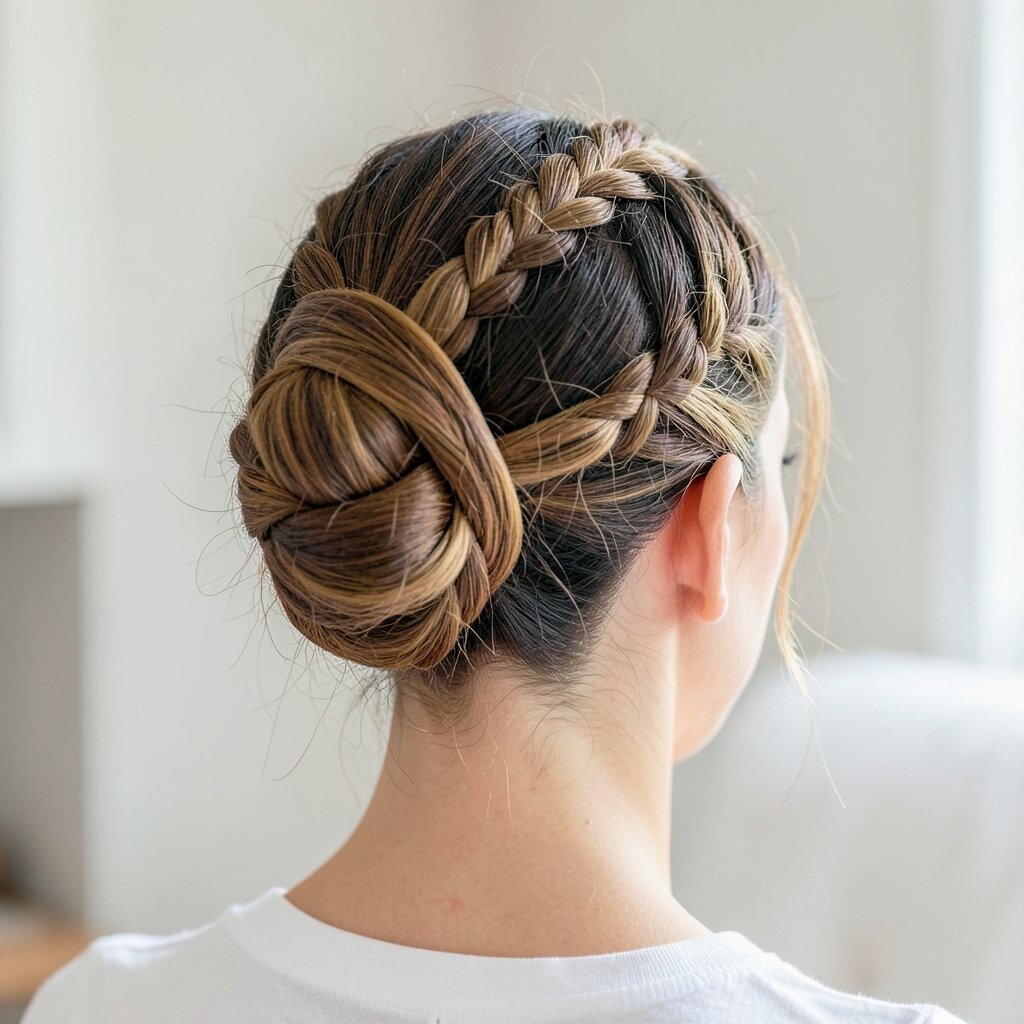
Pull-through braids look modern and a little like braided ribbons. When you tuck them into a bun, they create a clean, structured look that still feels light.
Take a small section of hair, split it into two, and pull a small strand through, then repeat down the length. Keep the pattern consistent so the bun has a tidy design. Wrap the finished pull-through braid around itself and pin it in place.
This style fits current hair trends that favor geometric details and soft volume. If your hair is fine, use a volumizing mousse so the pattern shows up clearly.
18. Crown Dutch Braid Bun with Braided Bang Detail

For a bold, fashion-forward look, try a crown Dutch braid paired with a braided bang detail. It feels like you styled your hair from a magazine, even if it takes less time than you expect.
Make a Dutch braid across the crown area, feeding in hair so it sits close and strong. Create a small braid or braid-like twist near the front for a bang detail, then secure it into the bun. Finish by rolling the rest into a bun and placing pins where the braid meets the bun so everything stays secure.
The benefit of this style is that it gives structure while still looking soft. It also helps keep shorter layers from poking out, which is a huge win for many hair types.
19. African-Inspired Braid Bun with Headband Look
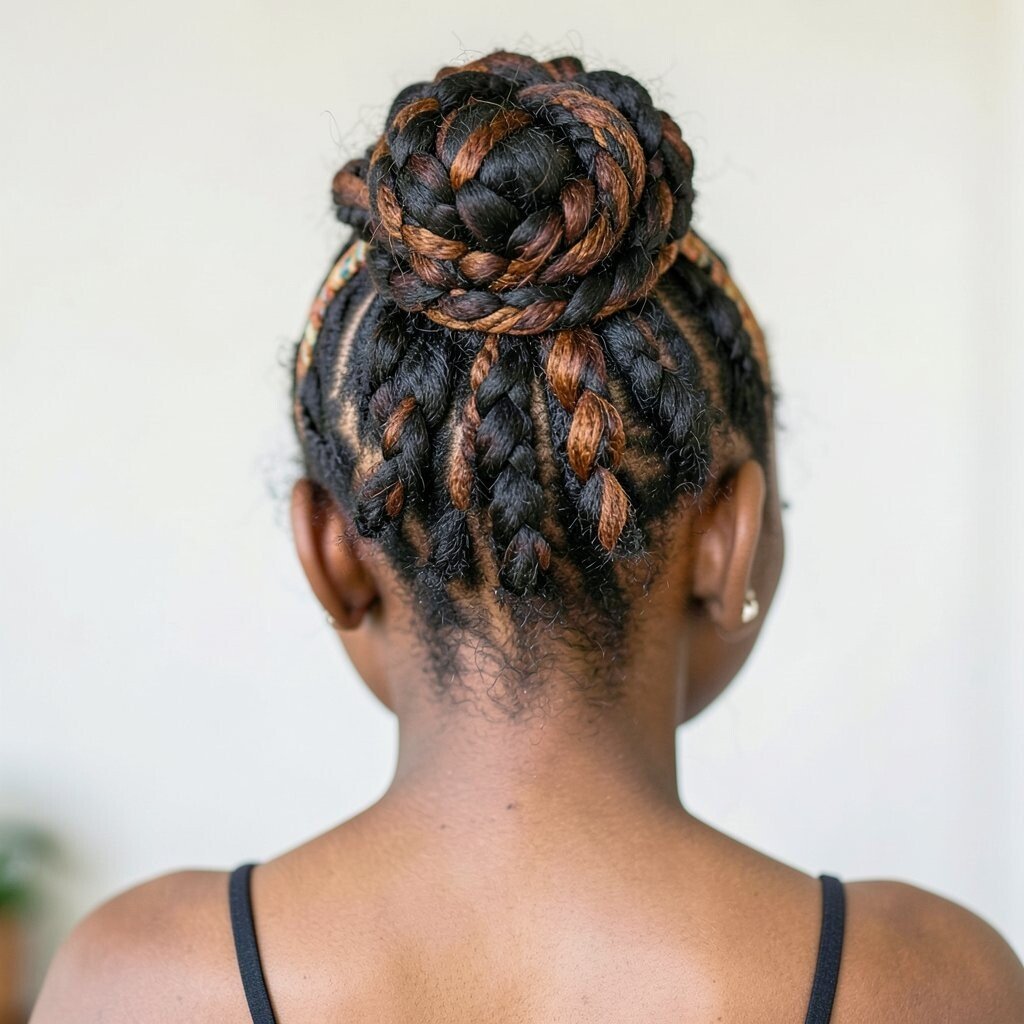
Africa-inspired braids often have bold, graphic energy, and a braid bun can channel that vibe beautifully. It looks great with a headband-style effect even if you do not wear one.
Braid sections across the front like a band, then gather the rest into a bun behind. Pin the braid band so it looks smooth and even, then wrap the remaining braids into your chosen bun height. Add a small woven accessory if you want a festival-ready touch.
This is a standout choice because the pattern is visible and expressive. If you want it more subtle, braid the front band thinner and keep the bun simple.
Cost-wise, you can reuse hair extensions if you already own them, which makes future styling easier. A little braid spray can also help reduce frizz and keep the pattern looking neat longer.
20. Braided Ponytail-to-Bun with Volume Lift
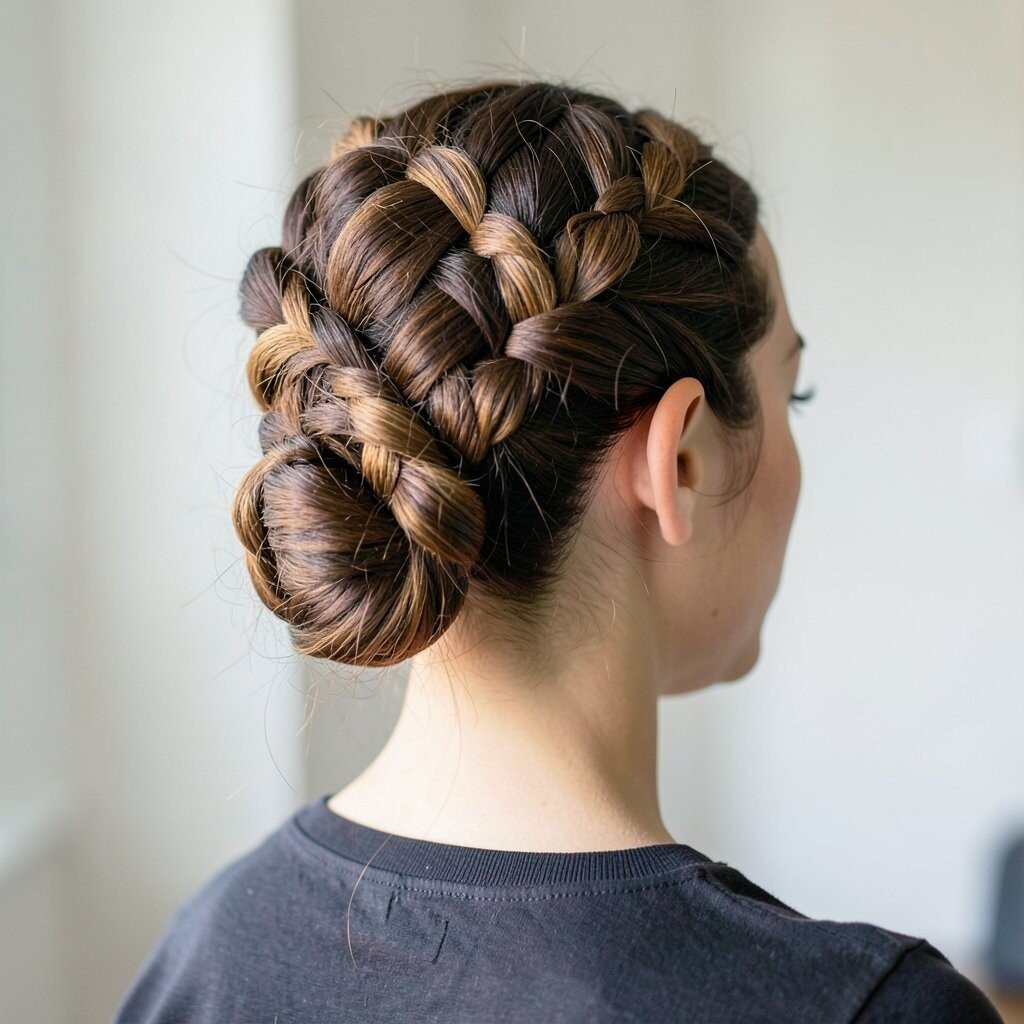
This style starts like a ponytail and ends like a bun, giving you a natural volume lift. The braid adds texture, while the bun keeps everything comfy and secure.
Create a high ponytail, braid it, and then wrap the braid into a bun. To boost volume, gently tug at the ponytail section before braiding so the base looks thicker. Pin the bun tightly at the bottom and lightly at the sides so it holds without flattening.
It is ideal for days when you want a dramatic silhouette but still need practicality. For personalization, try a middle part or add a small twist at the base for extra detail.
If your hair is very fine, use a thicker elastic and a bit of dry shampoo at the roots so the bun doesn’t slip. You’ll be surprised how much fuller it feels with that quick prep.
21. Crown Braided Bun with Side Flower Clip
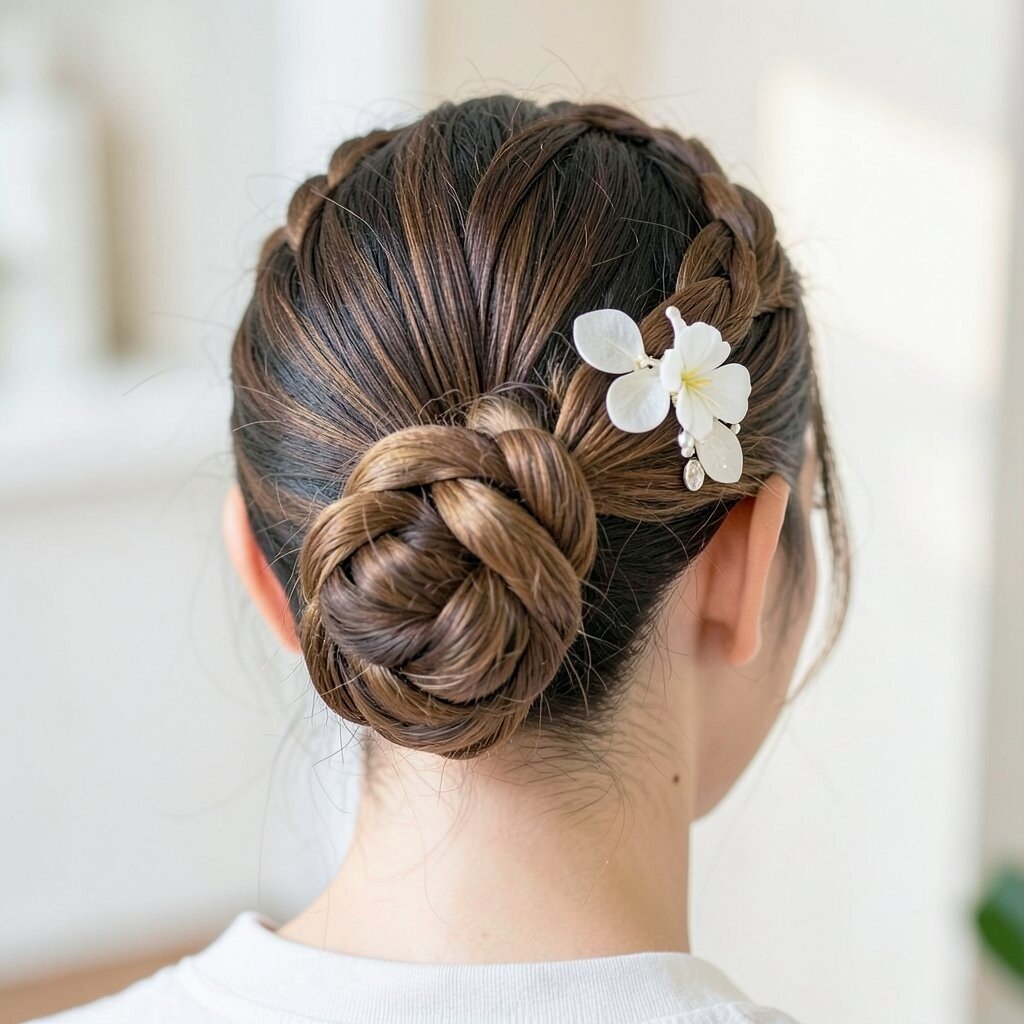
A crown braided bun with a side flower clip feels sweet, playful, and ready for compliments. The braid gives structure, and the flower adds a fun focal point.
Braid along the top of your head like a crown, then gather everything into a bun at the back or slightly to the side. Pin the bun firmly and smooth the hairline so the crown braid looks clean. Clip a small flower accessory near the side of the bun to match your outfit colors.
This is unique because you can change the mood just by swapping the clip. Go minimal with a single white bloom, or choose bright colors for a summer look.
For cost, flower clips are easy to find and usually reusable, so they are a smart styling accessory. Personalize by choosing a clip size that fits your hair length and keeps the braid pattern visible.