The first day of school is basically a style audition. A great hair day can make your morning feel lighter and brighter.
You do not need a full glam routine to look polished. With the right look, you can feel ready to walk in and own the day.
1. Messy High Pony With Face-Framing Pieces
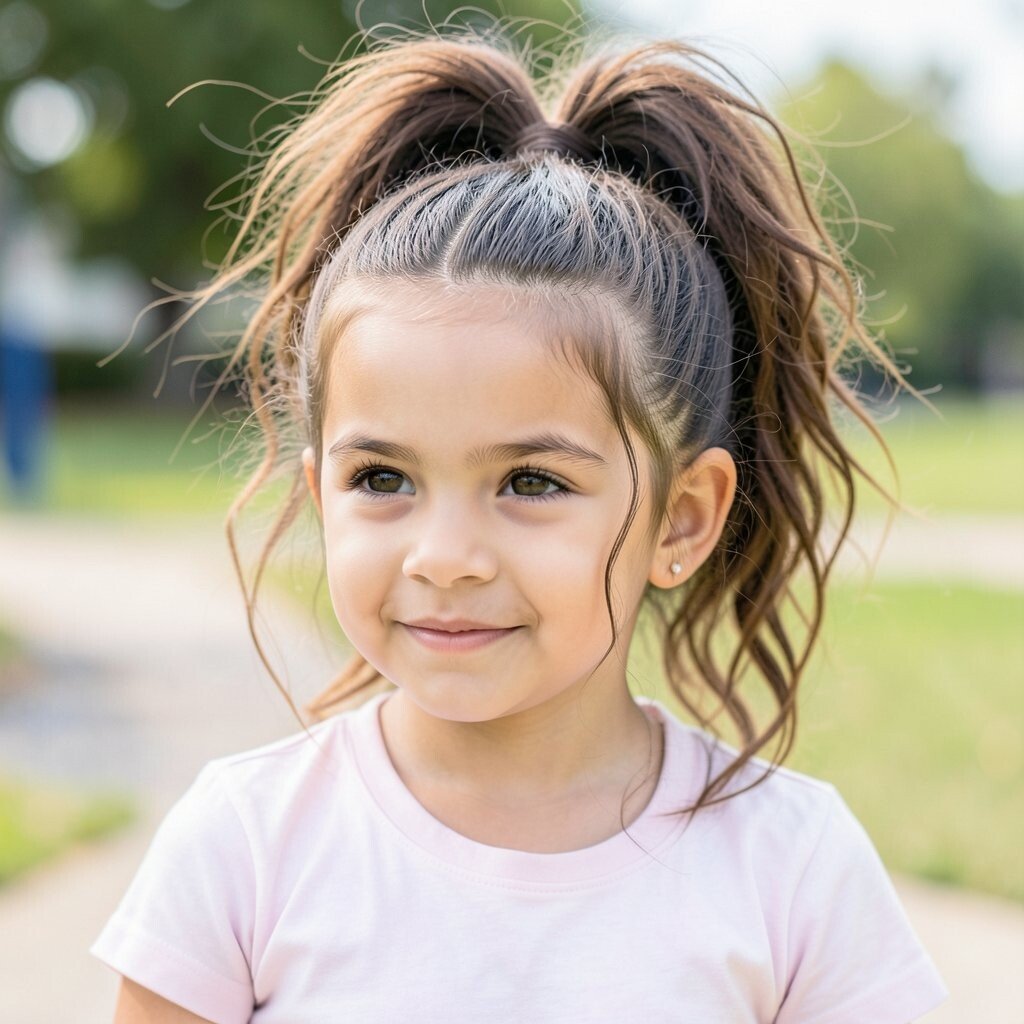
Pull your hair into a high ponytail and leave a few strands loose around your cheeks. The shape will look bold at the top while still feeling carefree at the bottom.
Use a soft brush to smooth the crown, then gently tug the pony for that relaxed volume. A little hair gel on the edges helps prevent flyaways, especially if it is windy on the way to school.
2. Half-Up Twist With a Tiny Clip

Take the top section of hair and twist it back like a mini rope braid. Secure it with a small clip near the part for a cute, tidy finish.
This style keeps hair off your face while still letting your length show. It is also easy to customize by using a clip that matches your backpack or today’s outfit.
If your hair is slippery, use a light styling spray on the twist before you pin it. For budget-friendly styling, a pack of mix-and-match clips can last you all year.
3. Bubble Braids Using Small Elastics

Create a braid along the top or center of your head, then add tiny elastics at intervals. Each elastic forms a “bubble” that looks fun and modern.
These braids are great for keeping hair in place during classes and recess. They also photograph well, which is a nice bonus for those first-day pictures.
To make them look fuller, gently loosen each bubble with your fingers after you finish. Choose elastics that match your hair color to keep the pattern clean and natural.
If you want a twist on the trend, try one thick bubble braid instead of two. You can usually do it with hair ties you already have, plus a few extra elastics if you want more uniform sections.
4. Side Part Sleek Bun With a Ribbon Tie

Make a deep side part, then sweep your hair to one side and shape it into a low bun. Tie it with a ribbon that sits around the base for an instant polished look.
Sleek buns feel grown-up and neat, which can be comforting on mornings when you want quick confidence. The ribbon also adds personality without needing complicated tools.
Use a smoothing cream along the sides so the bun looks crisp, not puffy. If your hair is thick, you may need two bobby pins to keep everything snug.
This look works especially well for shorter hair too by using a mini bun form. Cost stays low since a ribbon from a craft store can be reused for many days.
5. Ribbon-Threaded Braided Crown

Part your hair in the middle and braid two sections near your face. As you braid, thread a ribbon through for a crown effect that looks magical.
The ribbon adds a pop of color while the braids keep hair secure. Your scalp will feel cooler too when the hair is lifted and organized.
Choose a satin ribbon for a soft shine, or pick a matte one for a more casual vibe. After braiding, tuck the ends under so nothing slips loose on the bus.
To personalize it, match ribbon colors to your school colors or your favorite hoodie. Many ribbons are inexpensive, and a single roll can last the whole semester.
6. Crown Braid With Loose Ends

Start a braid across the top of your head, then let the rest of your hair fall naturally. The crown portion looks like you planned your style ahead of time.
Looser ends make the look less stiff and more wearable for everyday school life. It is also a great choice if you hate tight styles that pull at your scalp.
For extra neatness, use a small comb to separate sections before you braid. If you have bangs, keep them out or blend them into the front braid for a more balanced look.
7. Two-Strand Twist Space-Buns

Split your hair into two high sections and do two-strand twists in each. Twist them up into small buns for a playful, athletic feel.
This style keeps your hair off your neck while still showing off your texture. It also looks unique compared to the usual ponytail, which feels fun for a first day.
Use a little leave-in conditioner to make the twists smooth and easy. If you want more hold, finish with a light mist of hairspray at the roots of the twists.
8. Low Ponytail With Twisted Wrap Around the Tie
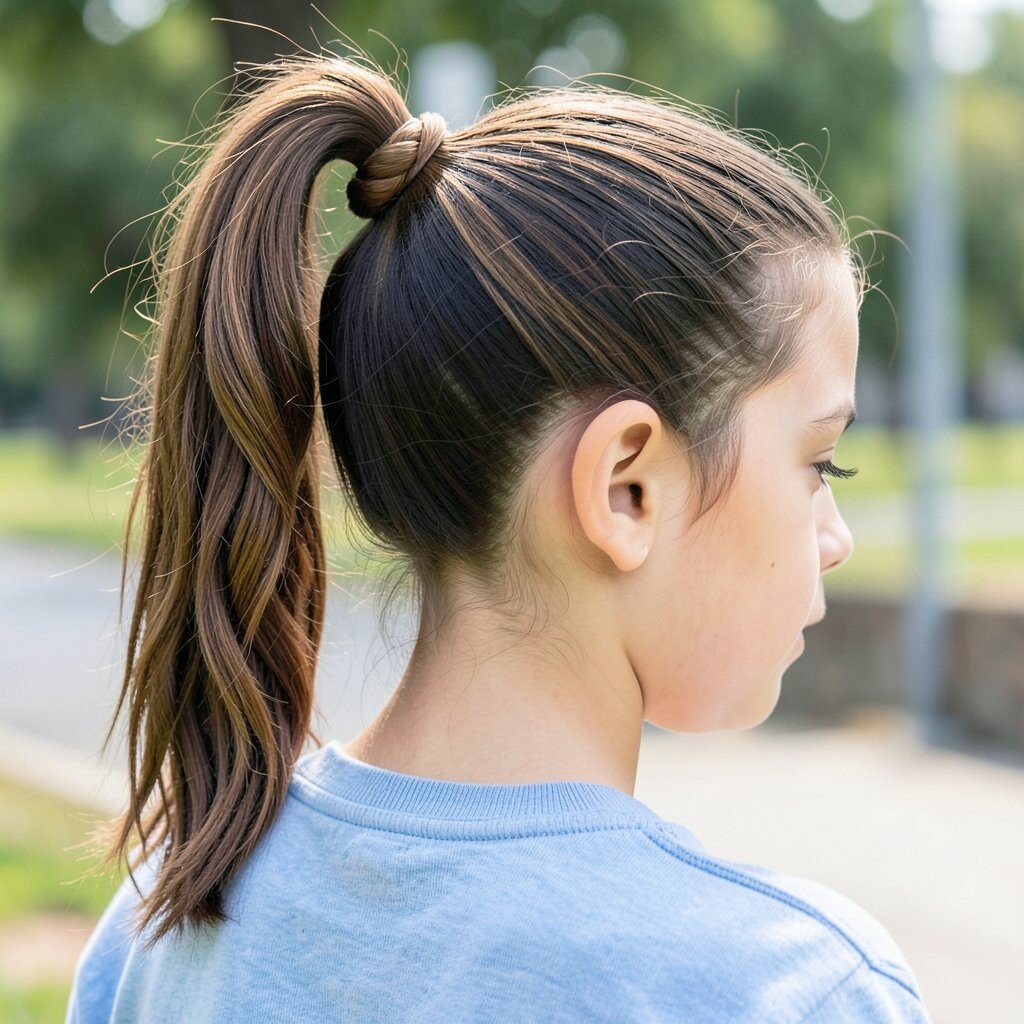
Gather your hair into a low ponytail and secure it with a hair tie. Then take a small strand from the pony and twist it around the tie to hide it.
This helps the pony look more finished without needing a lot of products. It also works well for different hair lengths because the wrap only needs a few inches.
Secure the wrap with a bobby pin underneath so it stays put. If you are in a rush, keep the strand thicker for faster wrapping and less fiddling.
For cost-friendly personalization, add a single charm clip near the wrap. You can keep the charm in your hair kit and reuse it all year.
9. Sleek Pigtails With Middle-Part Polished Edges
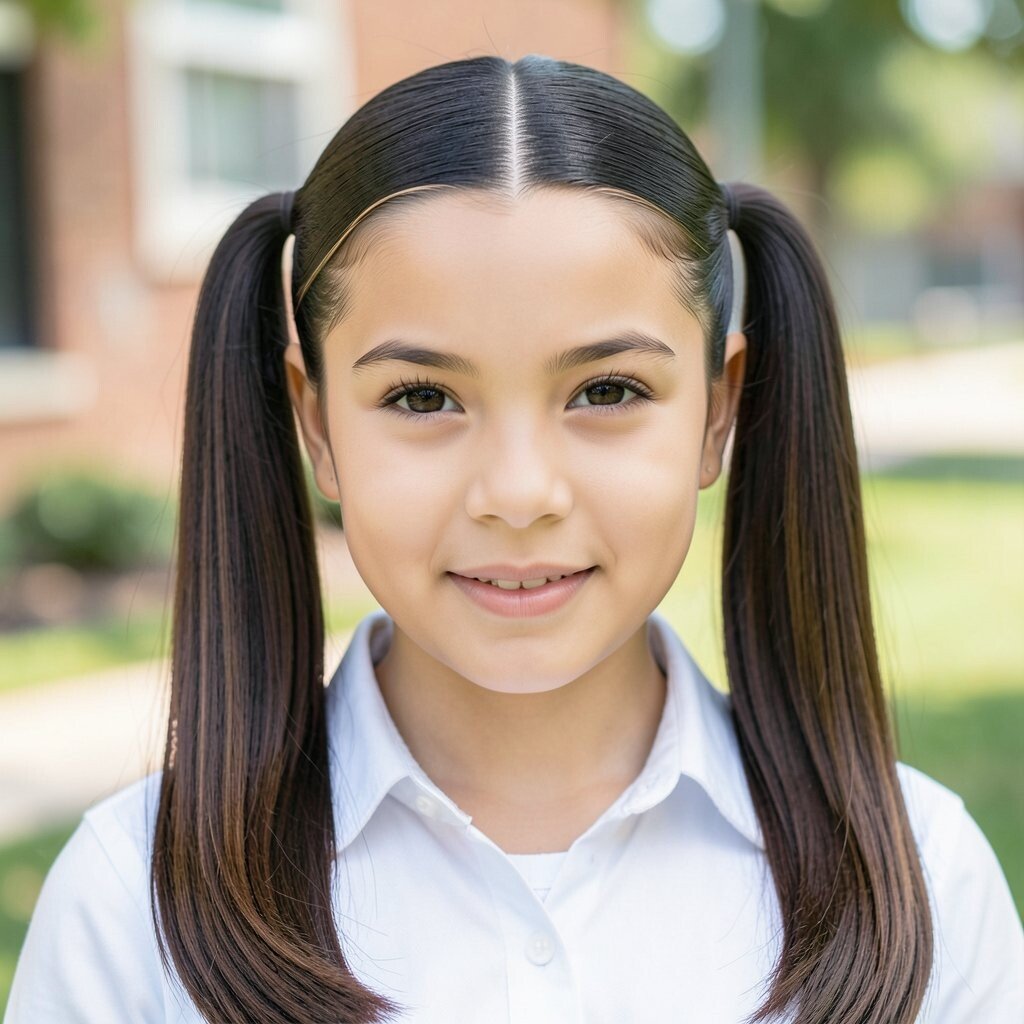
Part your hair down the middle, then make two pigtails on either side. Smooth the hair near your part and edges for a neat, clean look.
Sleek pigtails feel confident and ready for anything, from art class to PE. They also help shorter layers stay tidy instead of flipping around.
Use a small amount of gel or edge control on the part lines so your hair stays sleek. If you have curly hair, use curl cream for hold, then let the curls do the work.
10. Waterfall Braid With a Simple Clip End
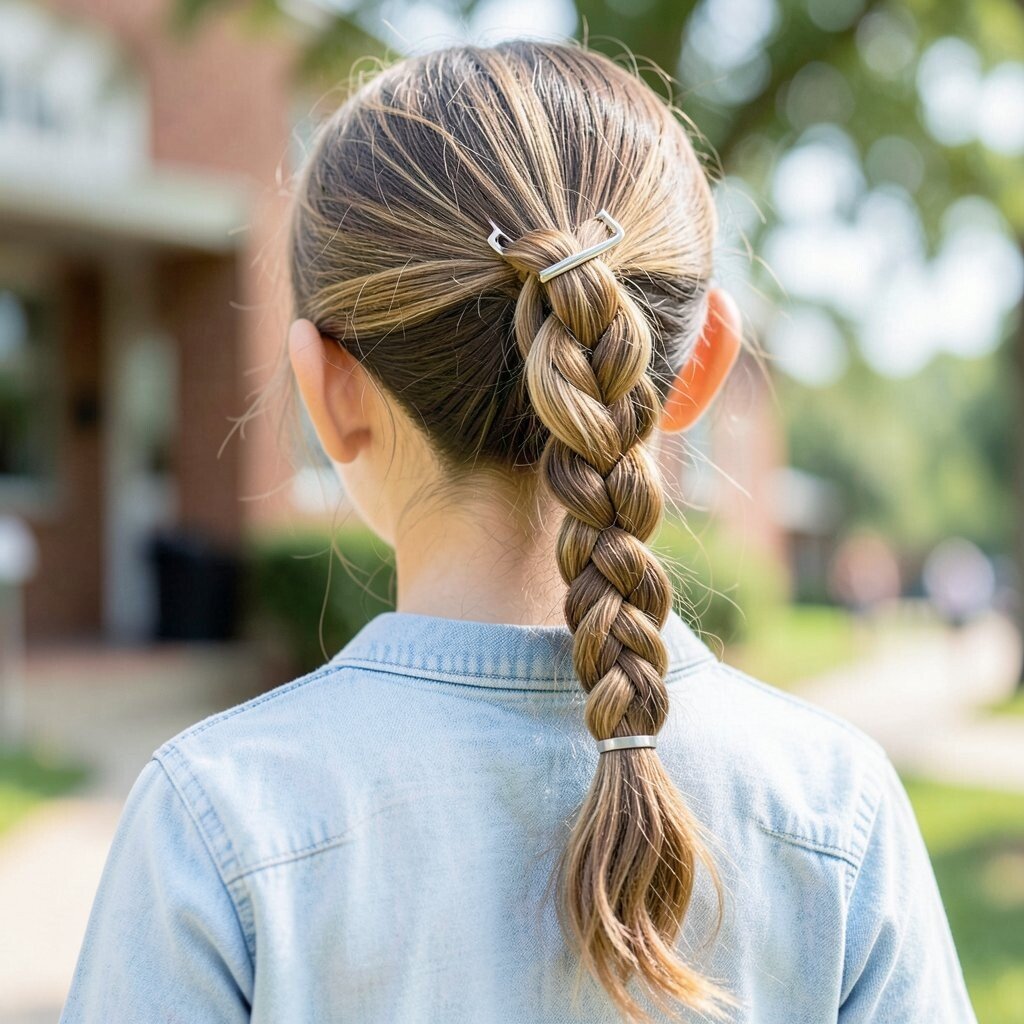
Work a waterfall braid along one side by letting a few strands “fall” through the weave. Keep the pattern gentle so it looks pretty, not complicated.
This braid adds movement and softness while still keeping some hair off your face. A simple clip at the end can make it feel special without extra styling.
Use a light hair spray before you braid to help slippery strands cooperate. Choose a clip color that pops against your hair for a quick style statement.
If you want a trend-forward twist, try a thicker waterfall section that shows more texture. This can be done with hair you already have, plus a few bobby pins and one clip.
11. Classic French Braids With a Soft Loosen
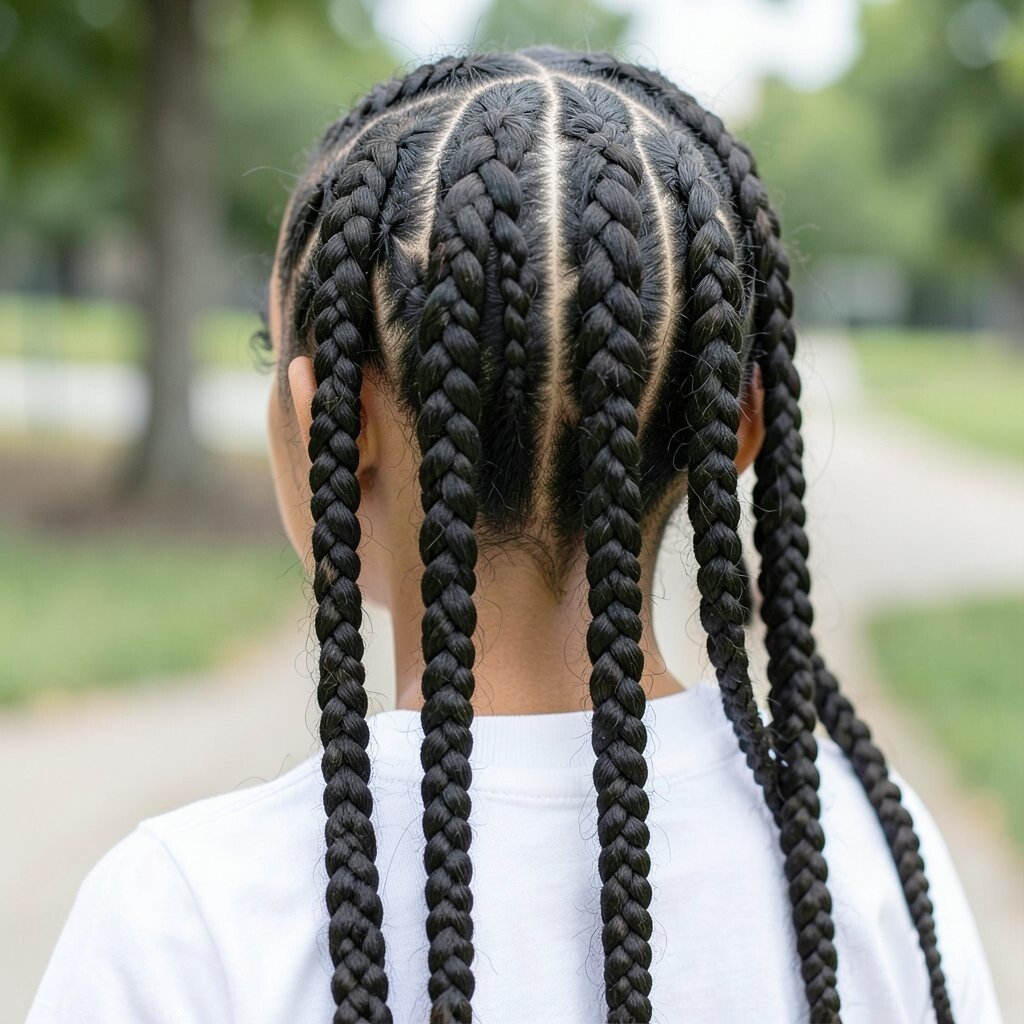
Make two French braids, starting at the top and feeding in hair as you go. When you finish, lightly loosen the braid sections so they look thicker and airier.
French braids are a school-day favorite because they stay put through busy mornings. The soft loosen gives a modern look while still being practical for recess.
For an easy win, braid with damp hair and let it dry fully for better hold. If your hair is fine, teasing the braid gently can create fuller volume.
To personalize, use a skinny ribbon or a single colored elastic at the ends. Cost stays low since braiding is mostly about technique and a few elastics.
12. Side Swept Bang Clip With Half Pony
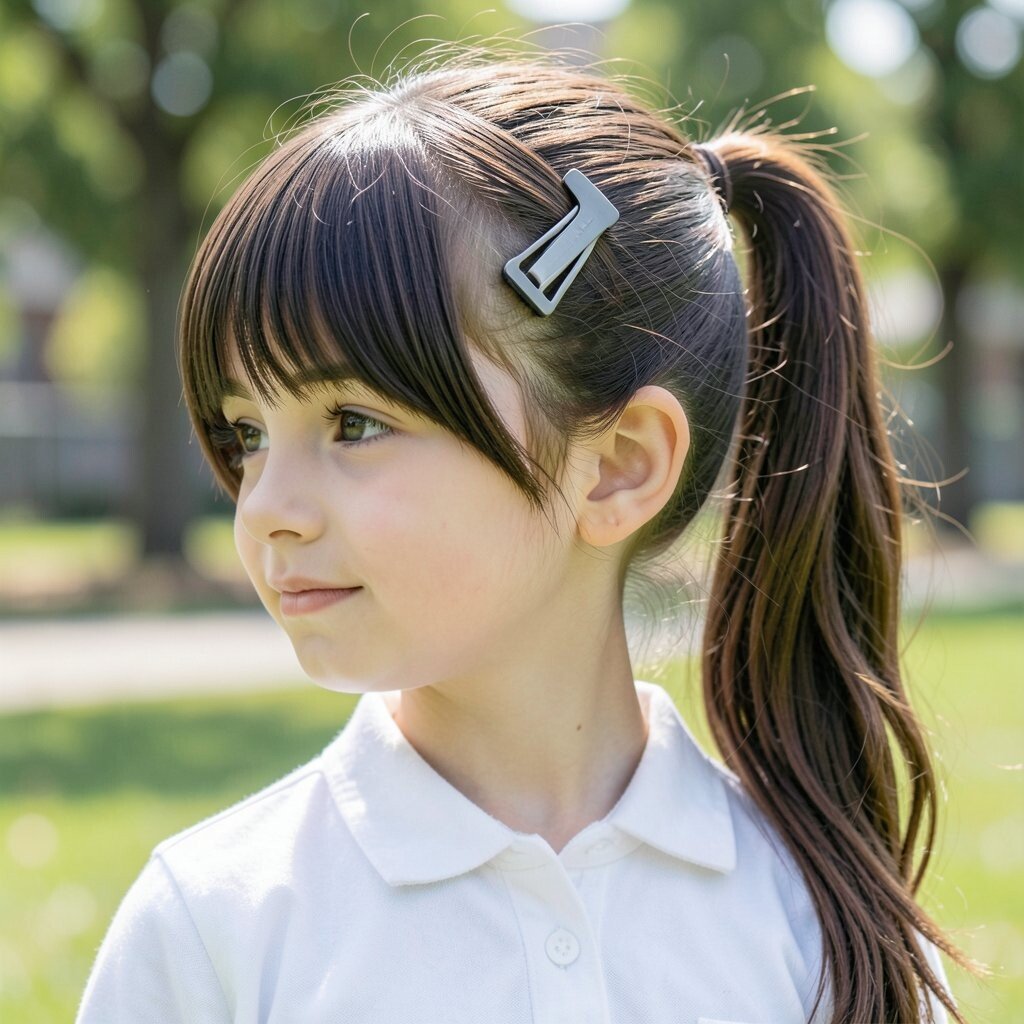
Gather the top half of your hair and secure it into a ponytail, then leave the rest down. Sweep a small section toward the side and clip it for that “styled in seconds” look.
Half pony styles give you the best of both worlds by lifting the top while keeping length flowing. It also prevents face-hair from poking your eyes during learning and reading time.
If you have bangs, clip them lightly to keep them from flipping. Pick a clip with a fun shape so it feels like you, not like a uniform.
13. Twisted Crown Bun for a Wind-Safe Look

Twist two sections from the front and wrap them around to build a bun at the back. Tuck the ends in and secure with bobby pins for a secure finish.
This bun is great if your school route includes wind, because the twists hold hair close. It also feels elegant while still being totally doable at home.
Use a matte styling paste if your hair gets shiny, so the bun looks modern and not too slick. If you are working with curls, stretch the front slightly with a comb so the twists form clean loops.
For personalization, add a small hair pin with sparkle or a favorite color. Most pins are affordable, and a few accents can make one hairstyle feel different every week.
14. Curly Ponytail With a High-Volume Hair Tie Technique
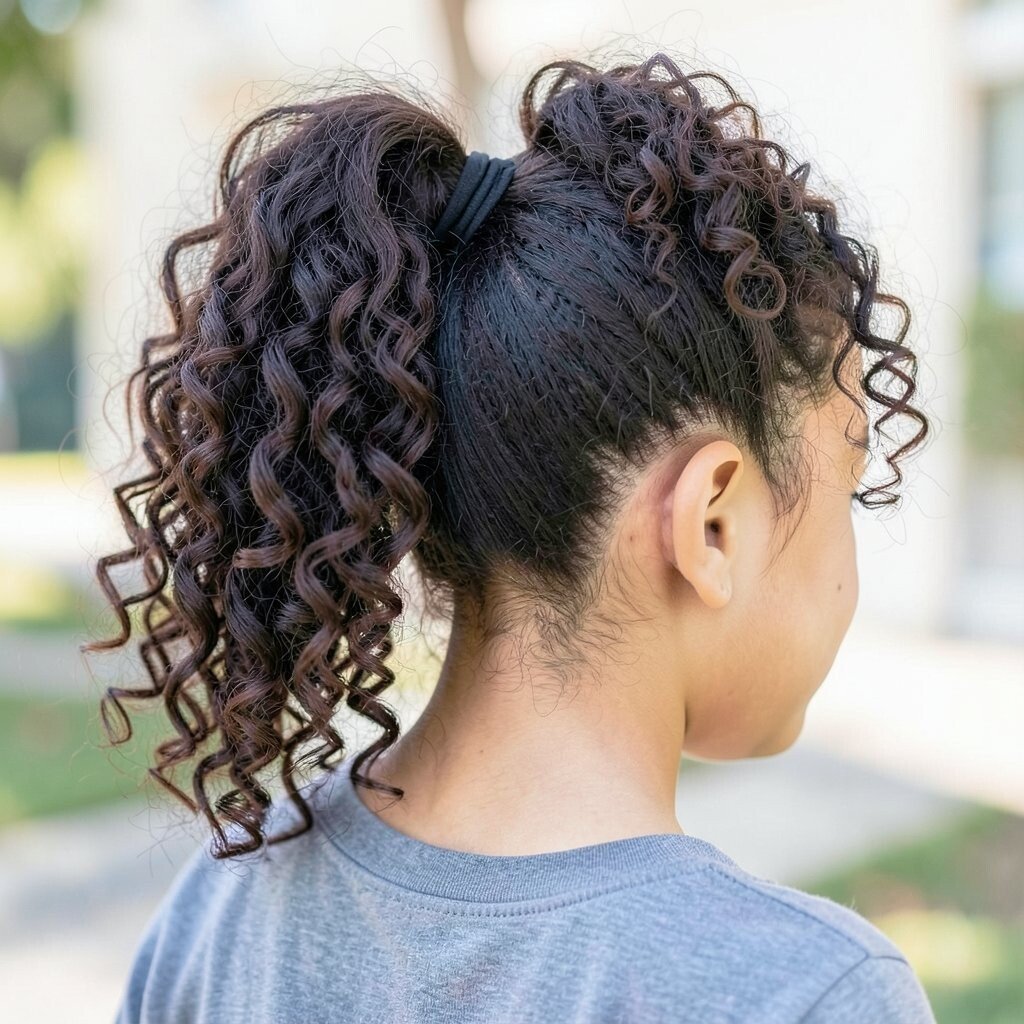
If you have curls or waves, gather your hair into a ponytail without flattening the texture. Use a scrunchie or fabric tie to keep curls bouncy instead of crushed.
This look celebrates your natural hair instead of fighting it, which feels refreshing on busy mornings. It also helps curls last longer because the pony protects them from friction.
To boost volume, pull the pony slightly upward and gently separate the hair around the tie. A quick fluff at the top makes a huge difference without extra steps.
For cost considerations, fabric ties are usually less damaging than tight elastics. You can also pack one spare tie in your bag for emergencies after lunch.
15. Braided Fringe With Two Tiny Side Plaits

Create two small braids right near the front on each side, then pin them back lightly. Leave the rest of your hair down so it stays soft and easy.
This style is unique because it frames your face without turning your whole head into a braid. It is also perfect if you want something cute but not heavy.
Keep the side braids thin for a delicate look, or make them slightly chunkier for a bolder vibe. Add a tiny clip between the braids to make it feel styled, not accidental.
16. Half-Up Knot Bun at the Back
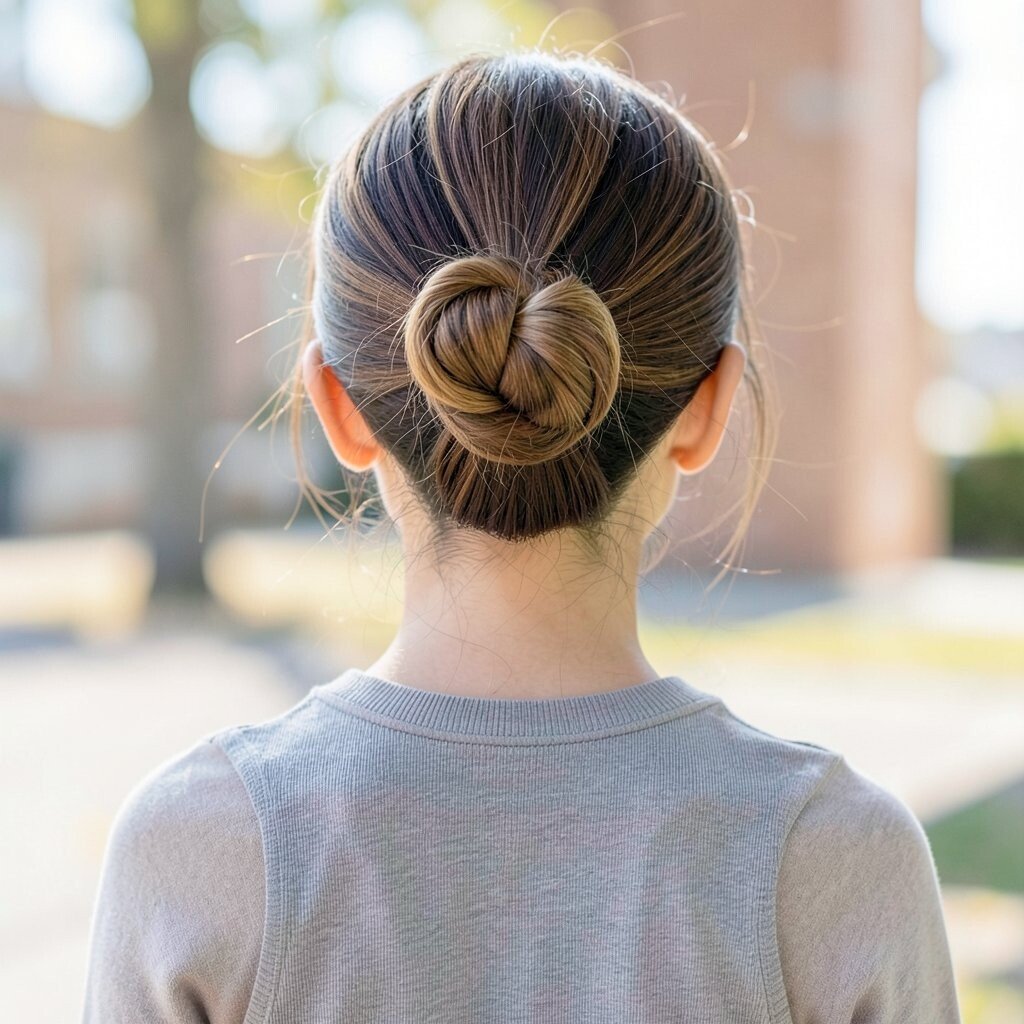
Bring two sections from above your ears and tie them together, then tuck the knot into itself. You get a small bun that looks sweet and neat.
It keeps hair from falling forward during the day while still showing your natural shape. Knot buns also work for many hair types, from straight to wavy to curly.
Use a strong hair tie for the knot so it does not loosen during the day. If your hair is slippery, add a tiny bit of mousse to the sections before tying.
To personalize, wrap the knot with a thin ribbon or add a decorative bobby pin. This is a low-cost style because the main tools are just elastics and pins.
17. Puff Style With a Low Pony and Hidden Bobby Pins
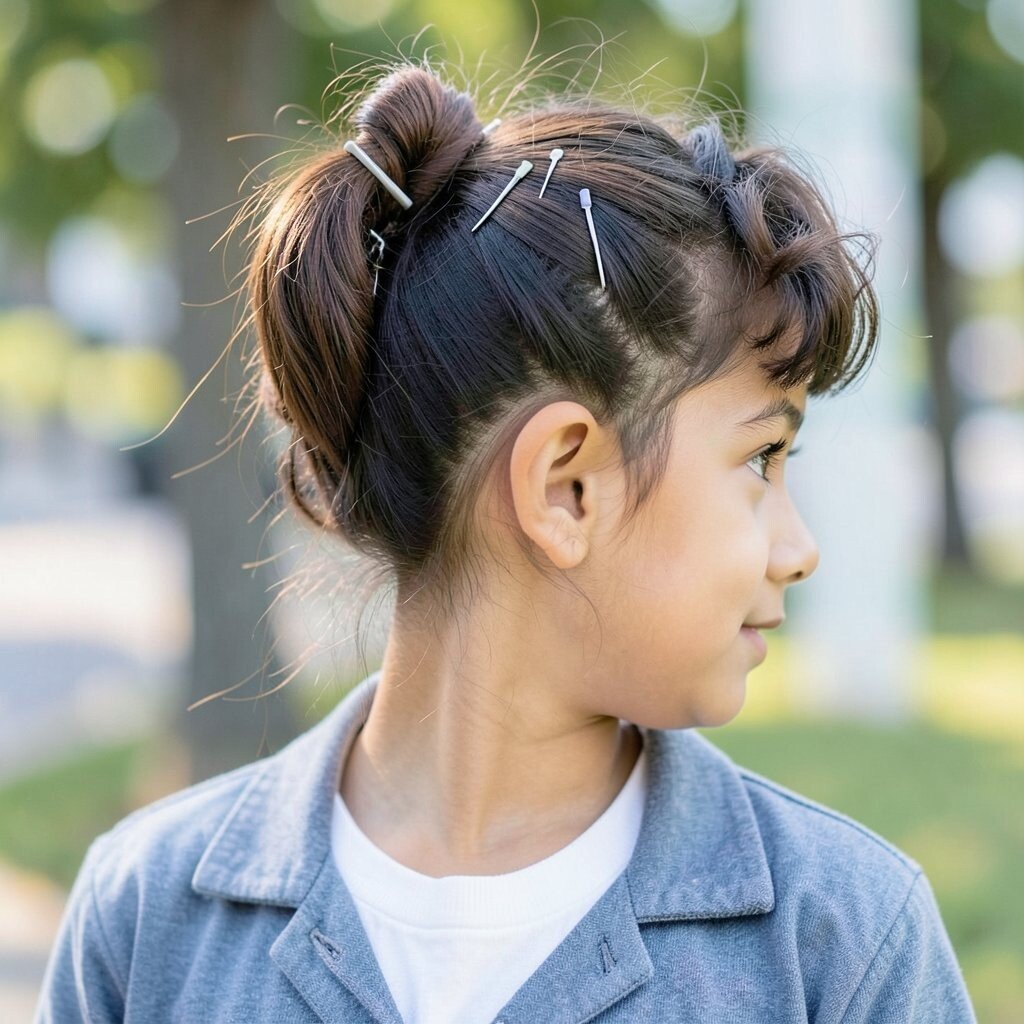
Create a puff at the top by gathering the front section and securing it with a hair tie. Then gather the rest into a low ponytail and hide bobby pins for extra hold.
The puff gives your hair height and makes your face look extra bright. The low pony keeps everything comfortable for long school days and moving around.
For a polished look, comb down the sides smoothly before tying the low pony. If you want a trendier feel, keep the puff slightly messy instead of perfectly neat.
Cost is minimal since you can get the whole look using elastics, bobby pins, and a little styling cream. A small mirror helps for pin placement, and that is a huge time saver.
18. Straight Hair With Micro Twist Rows
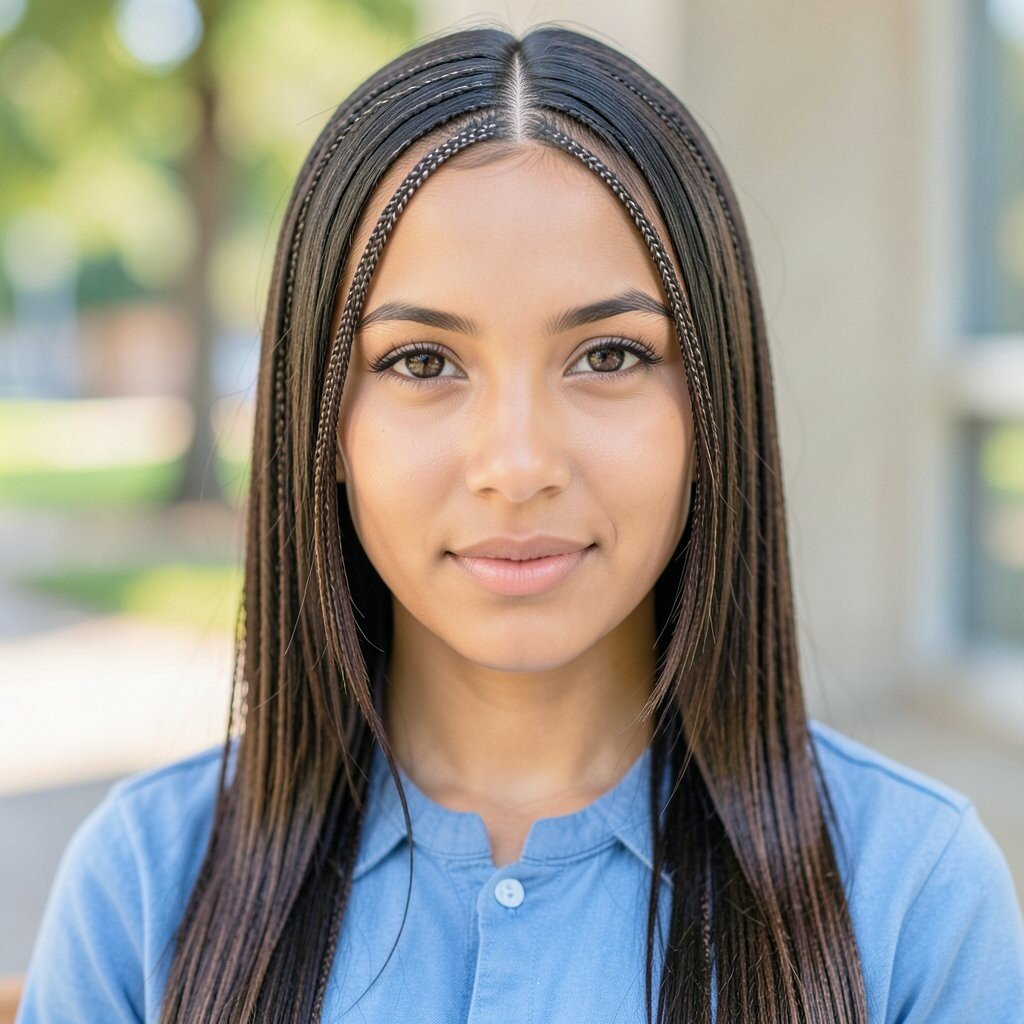
Part your hair into small sections and twist each row back, securing as you go. The result looks like tiny texture lines running through your hair.
This style is great if you want something different but still “everyday.” The twists prevent flatness and keep pieces from falling into your eyes.
Use a light leave-in or gel to help the twists hold their shape. For fine hair, keep the sections smaller to add interest without making it too heavy.
19. Crown Braids and Hair Accessories Combo
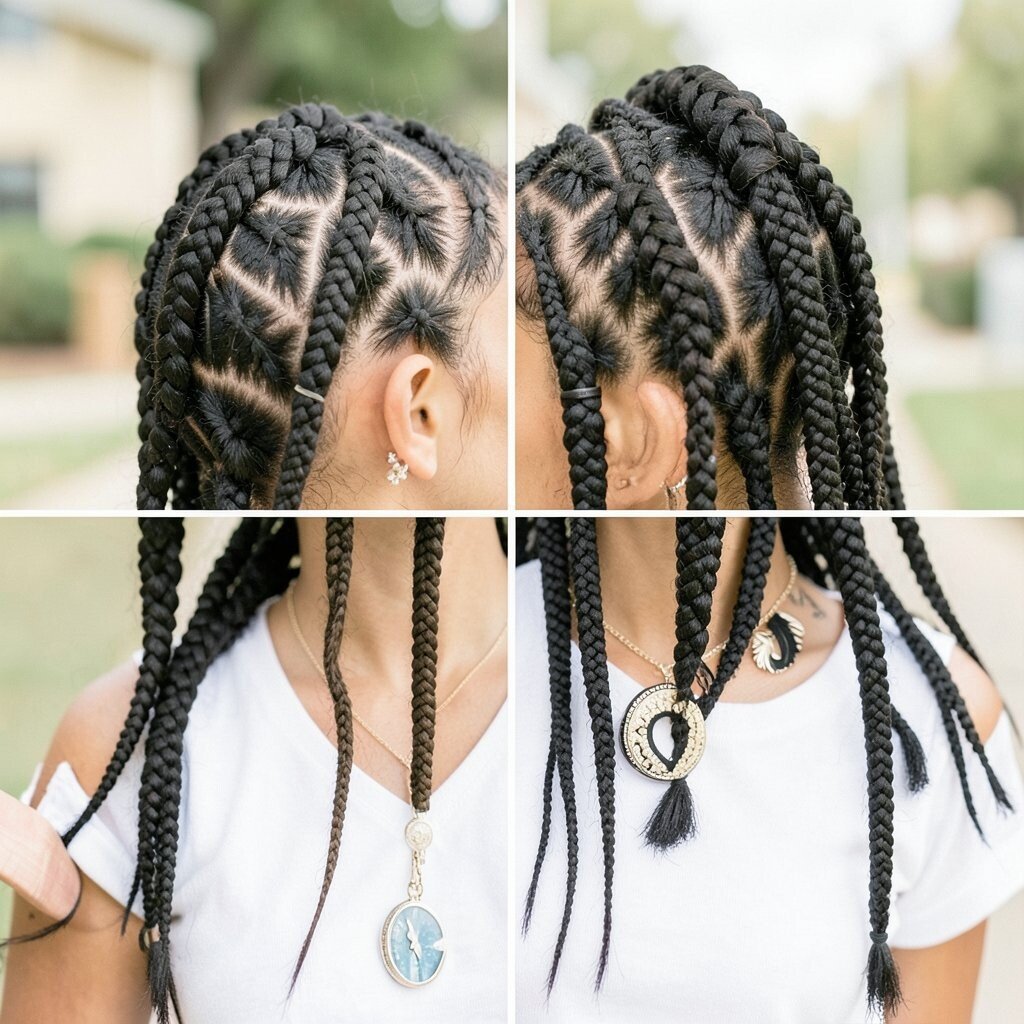
Mix a simple crown braid with an accessory that matches your outfit, like a headband or decorative clip. Keep the braid neat and the accessory visible so the look feels intentional.
This combo is unique because it blends structure with fun, so it feels like more than just a braid. It also lets you personalize by switching accessories depending on your mood.
Choose an accessory that does not tug too hard on your hair, especially if you have long days. For cost considerations, headbands and clips are reusable, so one good set can give you many looks.
To make it last through the day, spray lightly at the crown and tuck the ends securely. You will feel ready to learn when your hair looks great from morning through dismissal.