Your low bun can look polished or playful in seconds. The right style makes even a busy morning feel put together.
1. Sleek Low Ballet Bun With Side Part
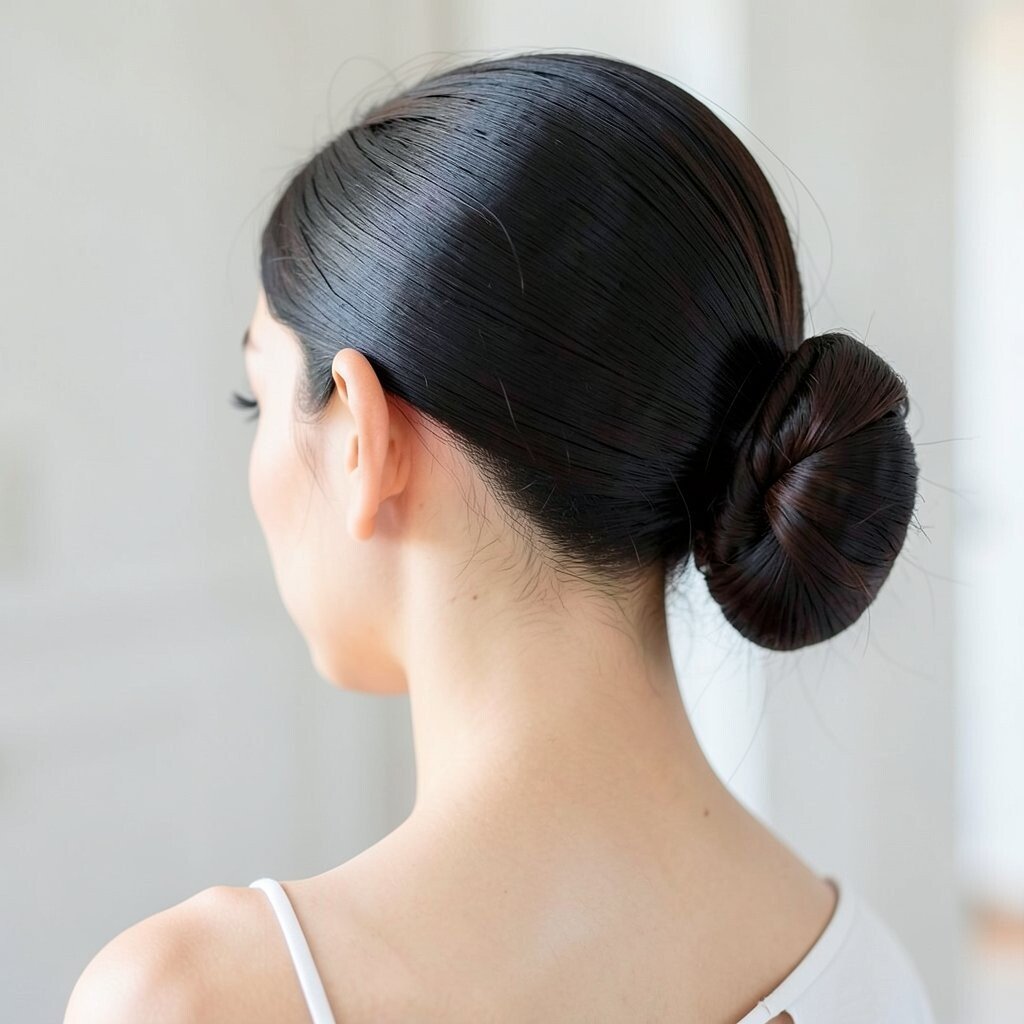
Start with a deep side part, then gather hair low at the nape. Smooth the surface with a light gel or cream so it shines like satin.
Twist the lengths into a neat bun and secure with bobby pins, pushing pins inward so they hide easily. This style looks fancy without extra effort, and it works great for work, dates, and events. If you want it to last longer, mist a small amount of setting spray before you pin.
2. Messy Low Bun With Soft Face-Framing Pieces

Gather your hair low, then leave a few strands loose near your cheeks. Pull the bun a little wider and less tight so it looks intentionally relaxed.
Spray a bit of sea-salt mist or texturizing spray first for grip, which helps the bun hold. You’ll get a casual, modern vibe that still feels styled, and it’s perfect when your hair is day-two or day-three. Add a tiny clip on one side for a cute touch that doesn’t take much time.
To personalize it, try different loose-strand angles and find the framing that flatters your jaw. For thicker hair, use an extra pin in the underside to keep the bun from shifting. For fine hair, backcomb gently at the crown area so the bun doesn’t look flat.
3. Braided Low Bun Crown
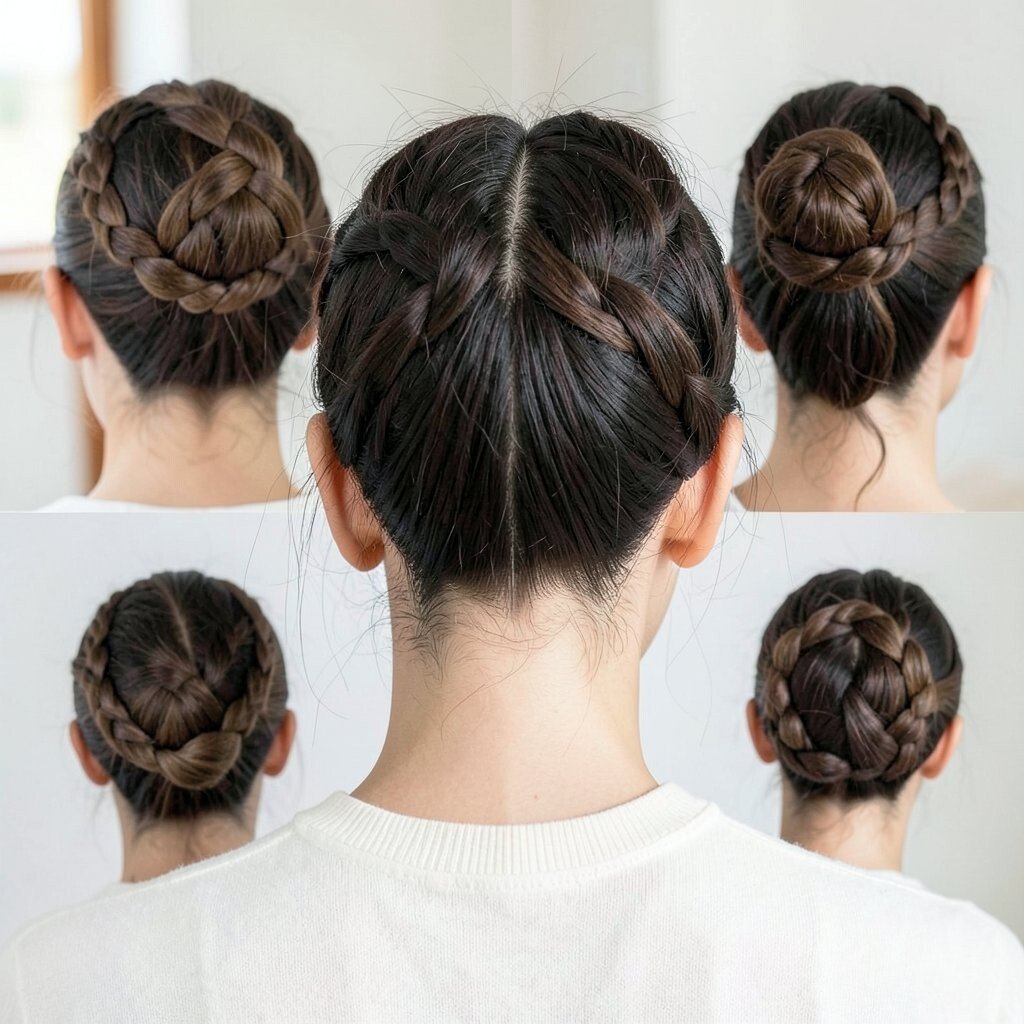
Braid a section from one side and continue around toward the back. Let the braid merge into a low bun at the nape so the whole look feels wrapped.
Choose a simple three-strand braid for an easy finish, or do a Dutch braid for extra texture. The benefit is that the braid adds structure, so your bun stays put even if you move a lot. This hairstyle also feels unique compared to a plain low bun, because the braid creates a mini “crown” effect.
Use small elastics to secure the braid before you twist it into the bun. If your hair is slippery, add a tiny bit of styling cream to the braid first. You can also sprinkle in a few mini pearls or a thin gold clip if you want a trendier, dressed-up feel.
For cost considerations, you can get the same look with inexpensive bobby pins in a color close to your hair. A stronger hold hairspray is often cheaper than fancy hair tools, and it makes a noticeable difference in longevity.
4. Twisted Low Bun With Hidden Elastic
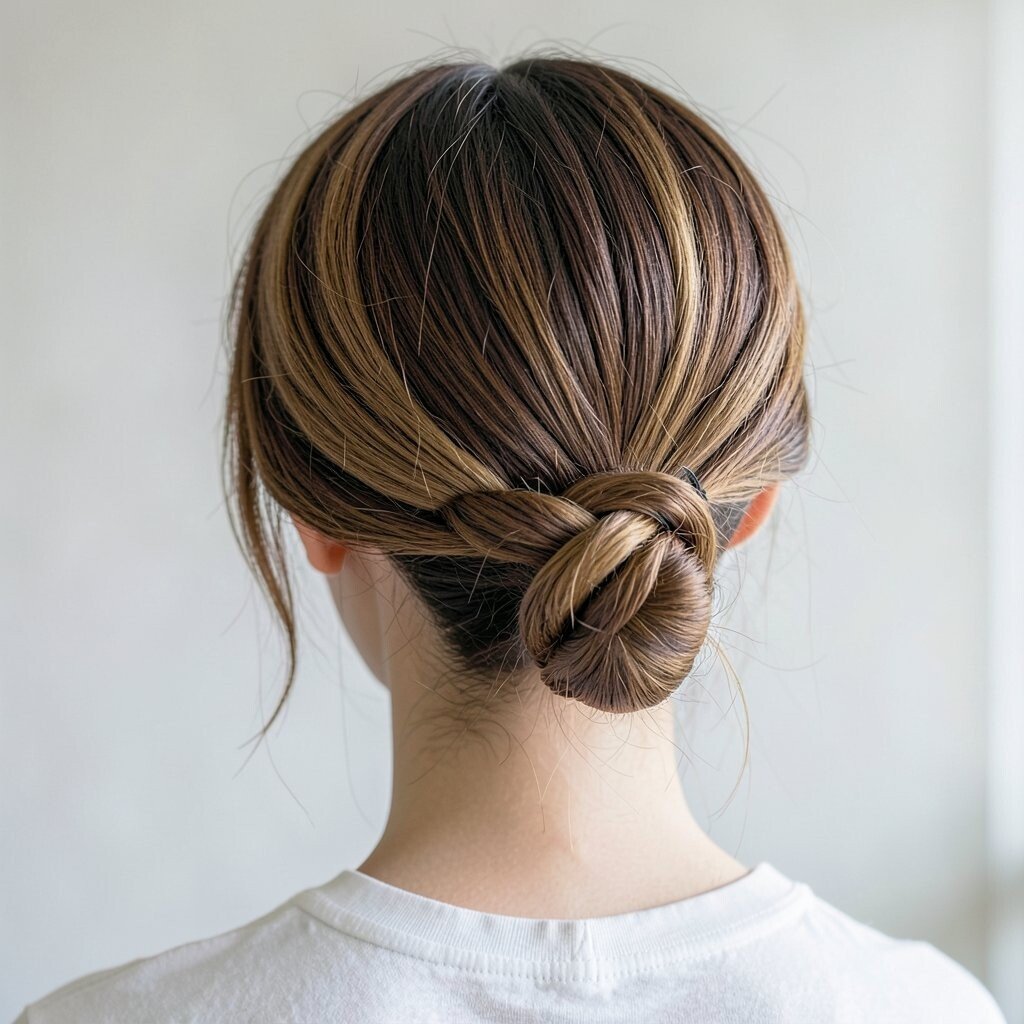
Start by tying your hair into a low ponytail with a clear elastic. Twist the ponytail loosely, then wrap it around the base to form your bun.
Press one bobby pin through the bun and the elastic area to anchor it without showing the elastic. This style feels sleek and tidy, and it’s great for hair that won’t cooperate when it’s fully exposed. For extra neatness, smooth the sides with a soft brush and a little hair oil on your fingertips.
If you want personalization, keep the twist tighter for a more formal vibe or looser for a softer look. This is a smart pick because it uses what you already have, like elastics and pins, and doesn’t require special tools. Pair it with small hoop earrings to make the bun feel intentionally styled.
5. Low Bun With Micro Bang Tuck

If you have bangs or face-framing layers, tuck them into your bun instead of letting them fall free. Use two or three bobby pins to hold the ends near the bun base.
This creates a clean, youthful look and keeps hair out of your eyes all day. The uniqueness comes from the contrast between smooth sides and the tucked fringe, which makes your bun feel styled from the front. It’s especially good for people who want a low bun but still love the look of bangs.
To personalize it, try tucking bangs slightly off-center for a playful asymmetry. For practical hold, set your pins by lightly pulling the fringe into place, then press firmly. If your hair is thick, use a stronger pin or two pins spaced apart so nothing slips.
6. Wrap-Around Low Bun With Hair Pin “X” Hold
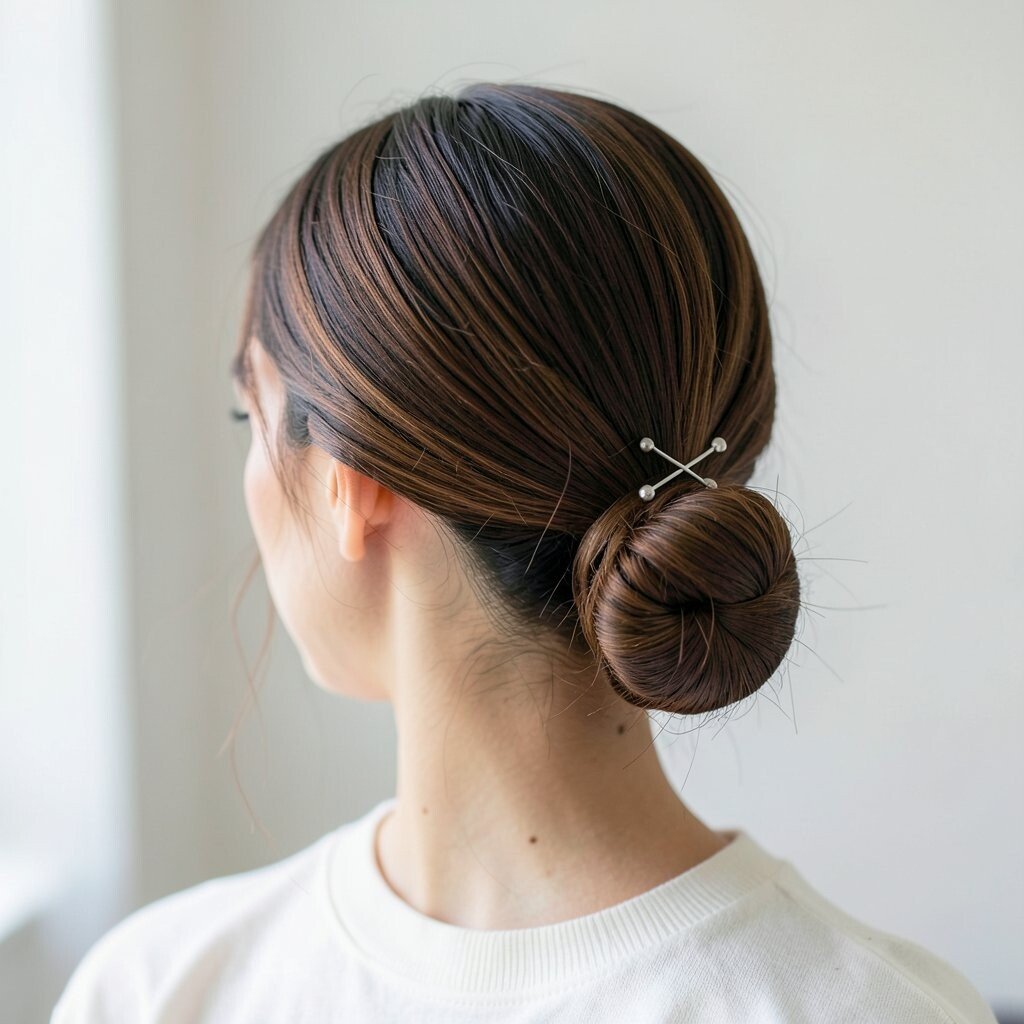
Make a low ponytail and wrap it into a bun, then position two bobby pins in an X shape. Push the pins downward into the bun so they grip the hair inside.
This method keeps the bun secure and helps it look smooth on top. You’ll love how it feels professional without needing heavy hairspray, which can weigh some hair down. For added uniqueness, wrap a thin strand of hair around the bun base to hide the pin ends.
7. Ribbon-Tied Low Bun for Instant Charm

Gather hair into a low bun, then tie a ribbon around the base as if it’s a bow wrap. Keep the ribbon slightly off-center for a more natural, artsy look.
Choose a ribbon that matches your outfit or pick a classic neutral for easy pairing. This hairstyle benefits from being playful while still looking neat, and it’s perfect for parties, festivals, or weekend errands. If you want it to feel current, try a satin ribbon with a subtle sheen that catches the light.
Use small hair-safe clips to keep the ribbon from slipping, especially if your hair is fine. For cost, ribbon is usually inexpensive, and you can swap it out to match seasons. Personalize by mixing textures, like pairing a velvet ribbon with a slightly messy bun for contrast.
8. Low Bun With Crown Volume and Smooth Sides
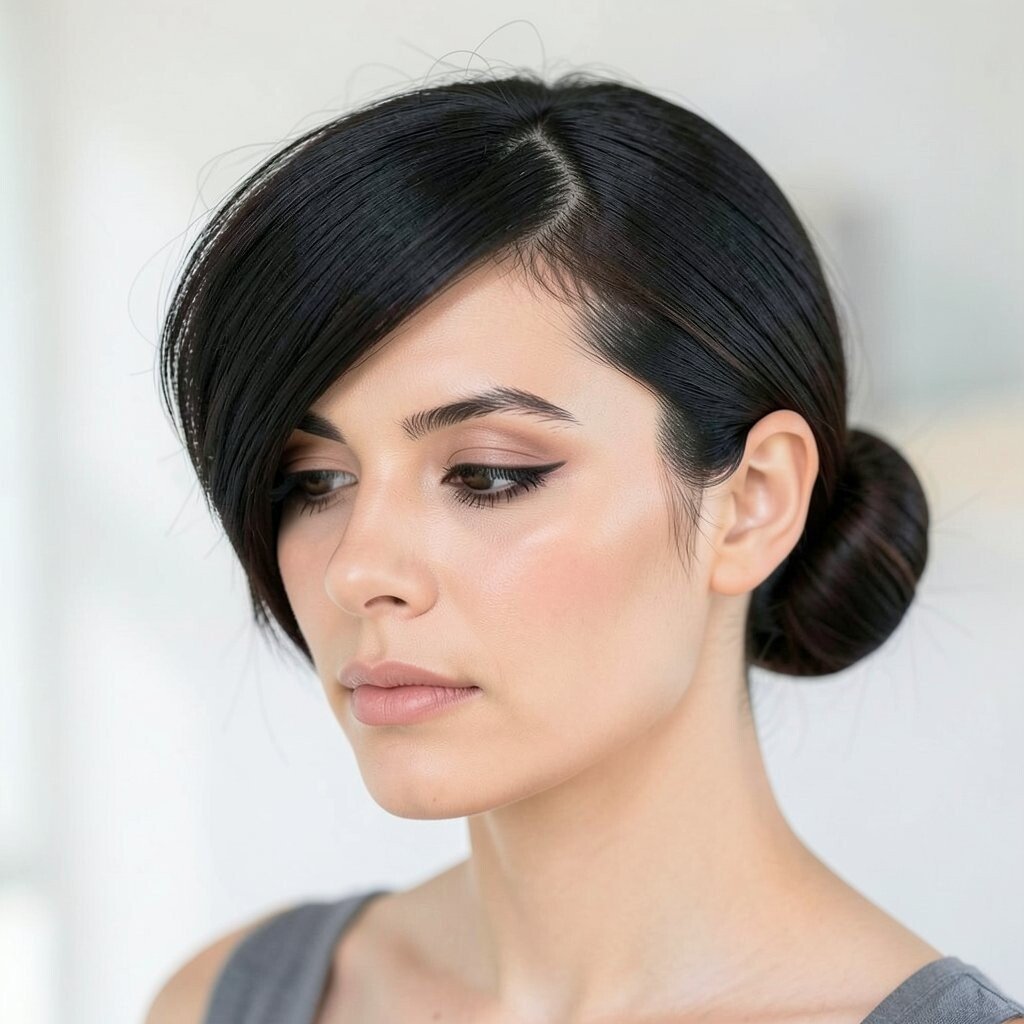
Create volume at the crown by gently teasing the top section before you gather your hair. Then smooth the sides and pull everything into a low bun at the nape.
The benefit is a balanced silhouette that makes your head look lifted while still keeping the bun neat. This style feels trendy because lots of recent looks focus on volume contrast, with clean edges and soft height. If your hair is naturally flat, use a root-lifting spray before teasing.
To personalize, keep the bun small for a delicate look or make it fuller for a dramatic finish. For practical tips, secure the bun with pins in a triangle shape so it holds evenly. A light shine serum on the outer layer will make the smooth parts look extra polished.
9. Low Bun With Side Dutch Braid Into the Knot
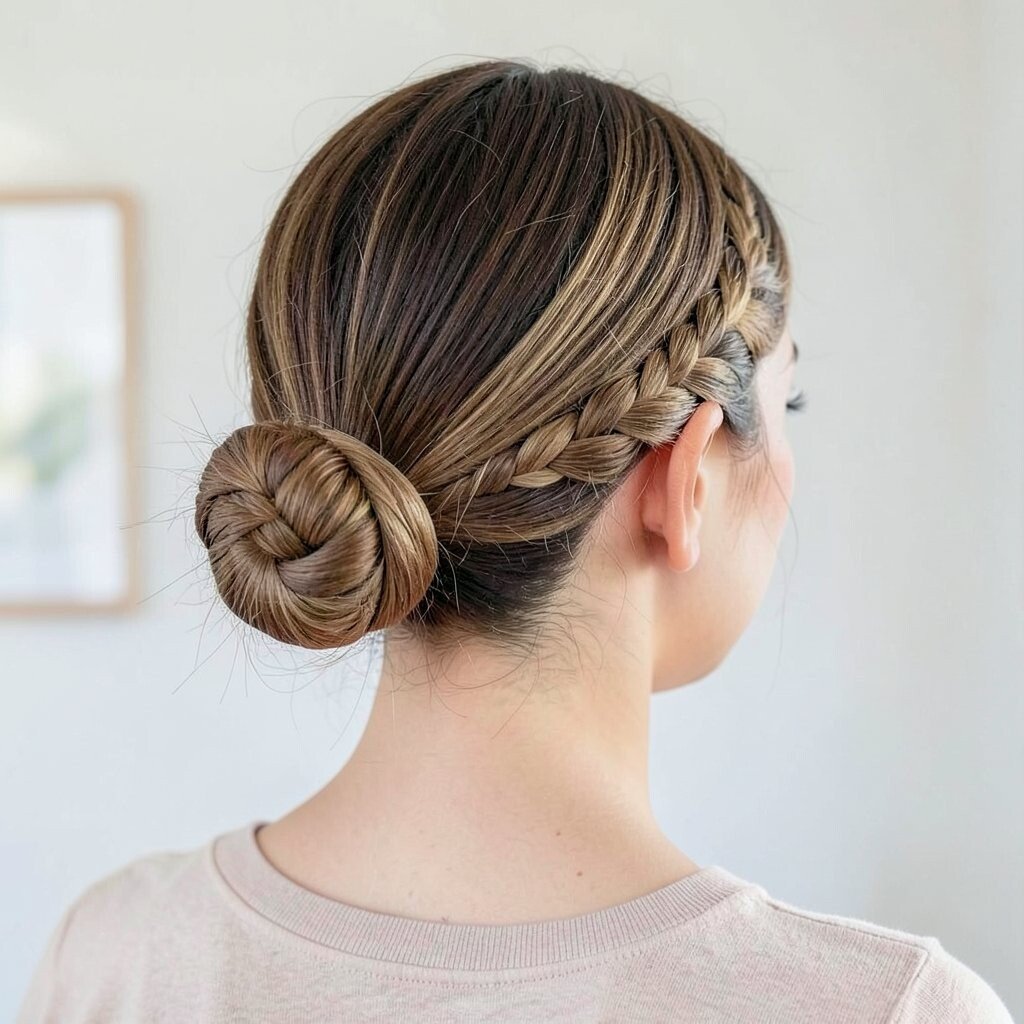
Start a Dutch braid on one side, pulling in hair as you go. When the braid reaches the back, connect it to a low bun and secure everything at the nape.
This is a gorgeous combination of structured and soft, and it looks more detailed than a basic bun. The uniqueness shows up through the braid’s raised pattern, which adds texture even when the bun is simple. It’s also a great practical choice because the braid helps distribute weight, so the bun feels comfortable for long wear.
If your hair is short-to-medium, braid from the front and pin the remaining lengths around the base. For personalization, try a thinner braid for a delicate look or a thicker braid for bold impact. A small touch of hair spray on the braid can help prevent flyaways and keep the pattern crisp.
10. Wrap Bun With Checkerboard Pin Detail

Make a low bun and secure it with bobby pins, then arrange a few pins in a checkerboard pattern for a subtle design. Keep the pins close together so the layout looks intentional.
This gives a unique, creative feel without changing the hairstyle shape too much. The benefit is that the extra pins stabilize the bun, which helps it hold through a full day. If you enjoy experimenting, choose pins with a slight metallic finish to add shine.
To personalize, place the checkerboard closer to the underside for hidden drama or nearer to the top for visible artistry. For practical tips, press each pin firmly into place so it doesn’t poke. If you want a cleaner look, smooth the hairline first with a damp brush and a tiny bit of styling cream.
11. Low Bun With Bubble Strands and Mini Elastics
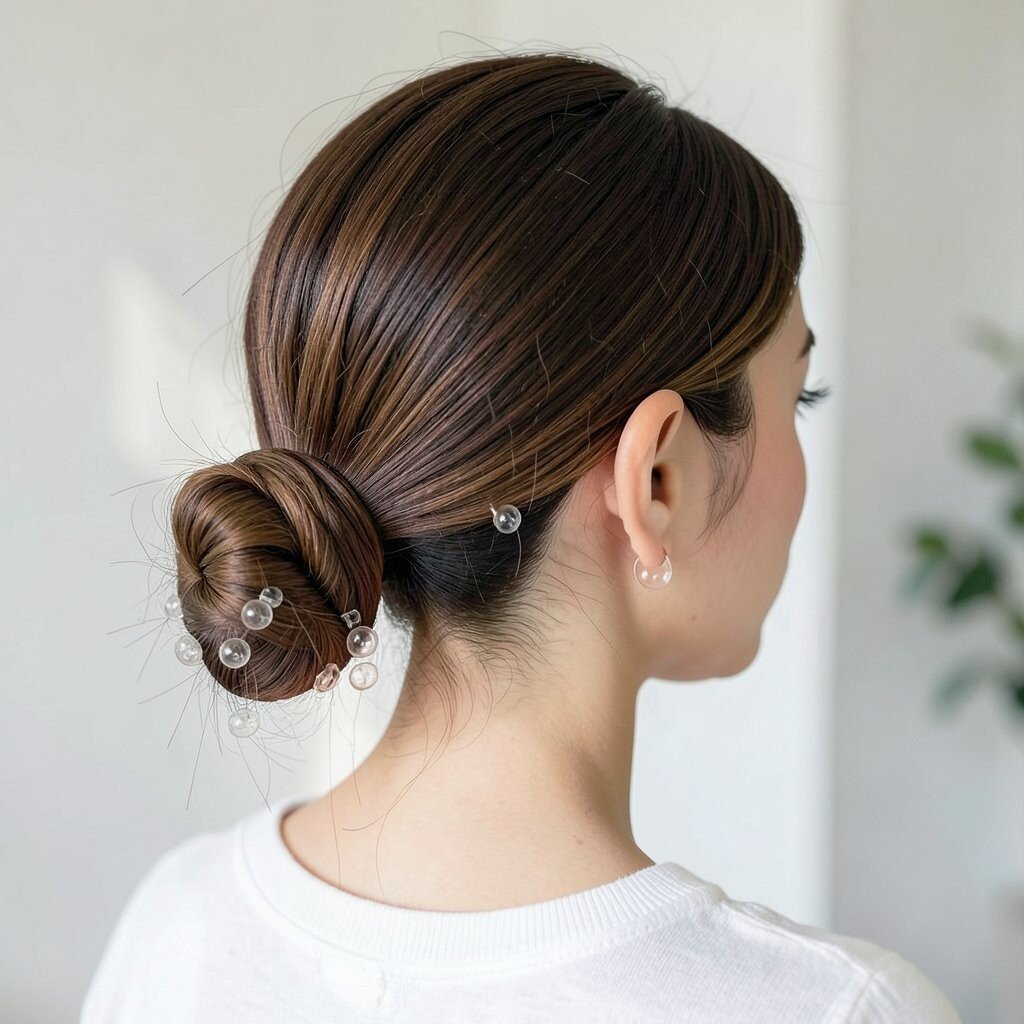
Divide your low ponytail into sections and create small “bubbles” by tying mini elastics along the length. Twist the bubble segments into a low bun so each section shows its rounded shape.
This hairstyle looks fun and graphic, and it’s a great way to make a bun feel fresh. The benefit is extra texture and hold, since each elastic keeps pieces in place. It’s also surprisingly practical because you can adjust how tight you want the bubbles depending on your day.
Personalize by choosing elastics that match your hair color or by using clear ones for an airy look. If your hair is fine, add a little mousse before you tie the mini elastics for more volume. For cost considerations, mini elastics are low-cost and easy to replace, so you can practice different placements without worry.
12. Low Bun With Half-Up Twist at the Crown
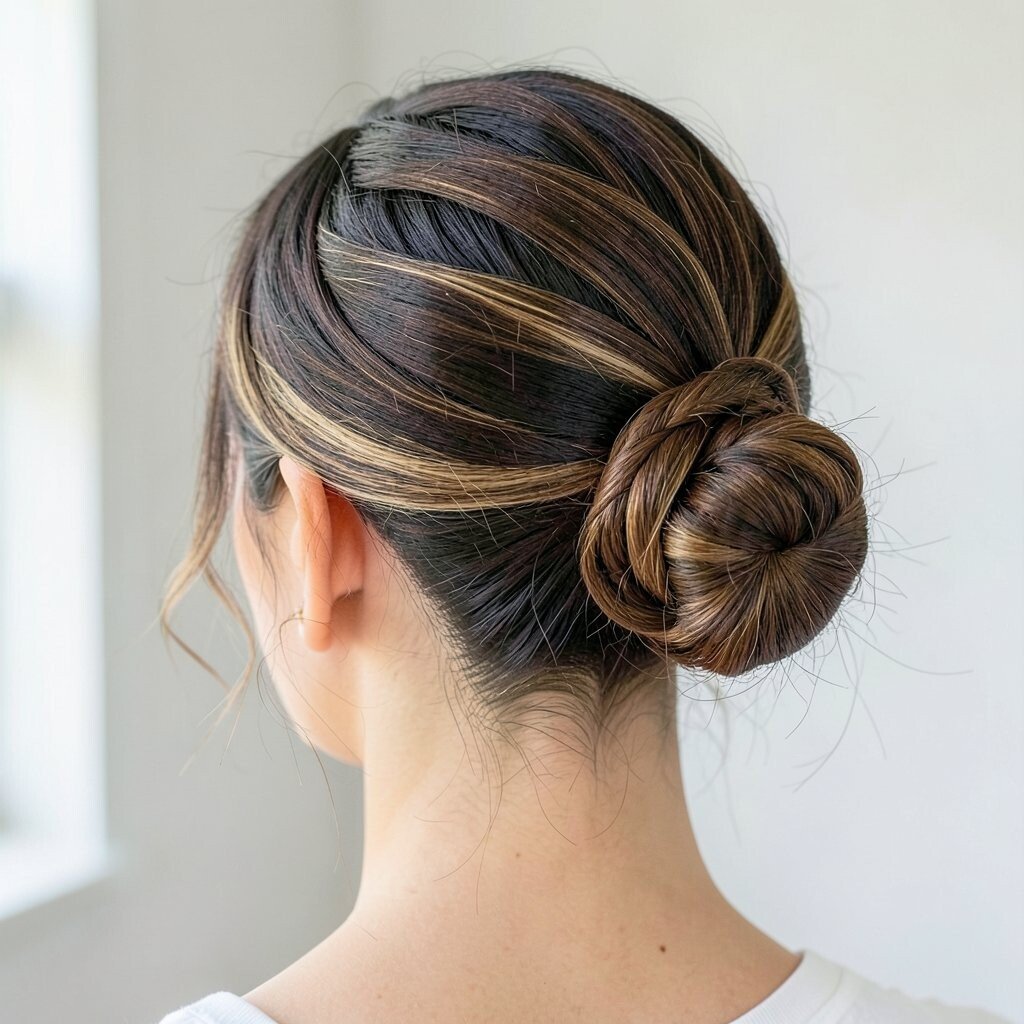
Take the top front section, twist it back, and secure it with pins before gathering the rest into a low bun. This creates a half-up twist that adds interest at the crown.
The benefit is that it gives you a styled look even if the bun itself stays simple and smooth. This style feels unique because the “twist crown” draws attention upward, which frames your face nicely. It’s also a smart choice for hair that needs a little help staying together, since the twist anchors the front.
13. Low Bun With Loose Coil Texture
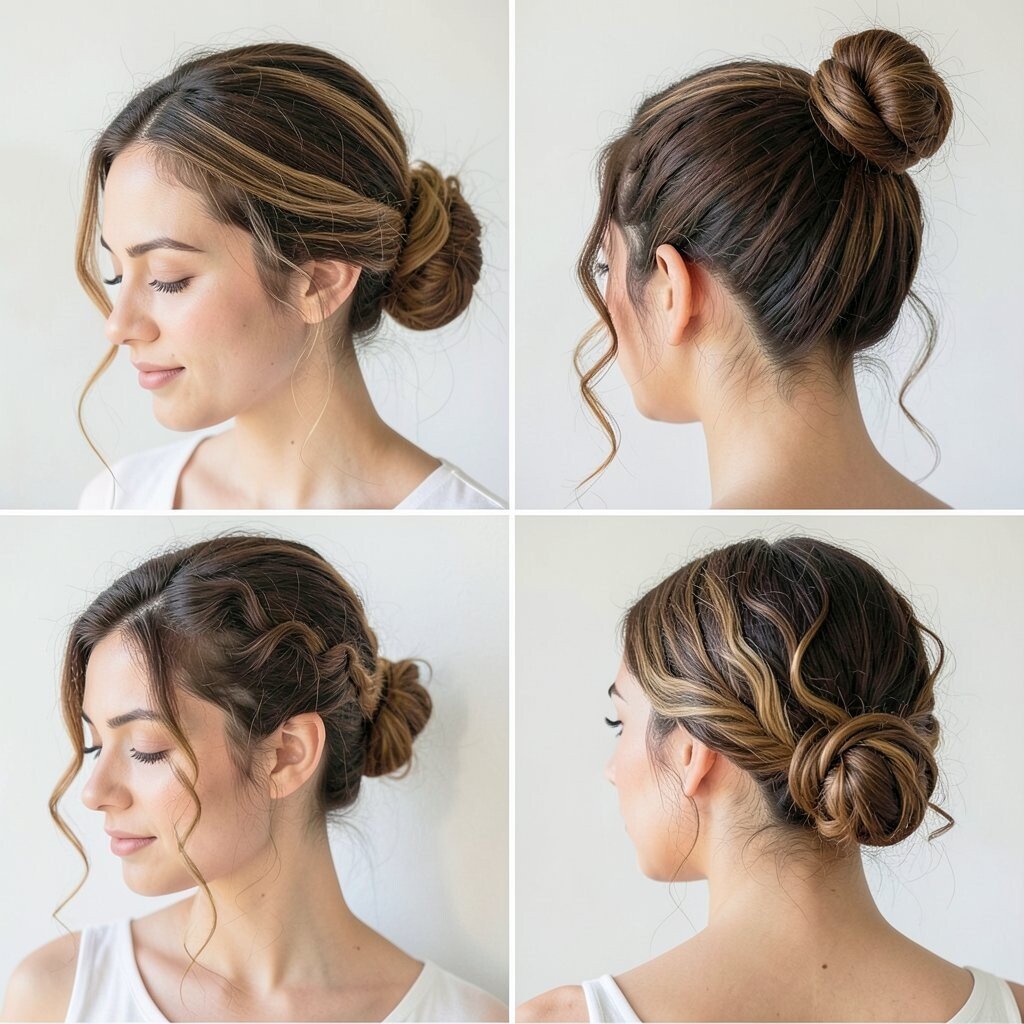
After gathering hair, twist small sections into loose coils rather than one tight twist. Wrap the coils into a bun and let a few ends peek out for a soft, effortless look.
You’ll get a natural texture that looks romantic and modern at the same time. The uniqueness comes from the coil pattern, which feels more artsy than a standard bun. This can also be practical for busy days because you don’t have to chase perfection; the shape forgives imperfections.
Personalize by choosing how many coils you make, with fewer coils for a chunkier look and more coils for a delicate finish. For practical hold, pin the base first, then pin the coils outward so they don’t unwind. A tiny drop of styling cream on your fingers can help tame flyaways without making the coils heavy.
For cost, you only need basic hair pins and a light product, so this stays budget-friendly. It’s also trending because lots of current hairstyles focus on “lived-in” texture rather than strict sleekness.
14. Sleek Low Bun With Long Scarf Wrap

Brush your hair into a sleek low bun, then wrap a long scarf around the bun base. Tie it in a knot or a bow near the side to add a fashion-forward detail.
This hairstyle benefits from scarf support, because the fabric can help keep the bun stable while adding comfort. It’s also unique because you’re combining a classic low bun with a strong accessory statement. You can match the scarf to your outfit for a cohesive look, or choose a contrasting color for extra pop.
For personalization, fold the scarf in a narrow strip for a tidy wrap or use a wider fold for a fuller effect. If you want a more current look, try a scarf with bold prints and keep your bun extra smooth for contrast. To keep it from slipping, use a couple of bobby pins to anchor the scarf at the underside.
15. Low Bun With Feathery Layers and Pin-Through Ends
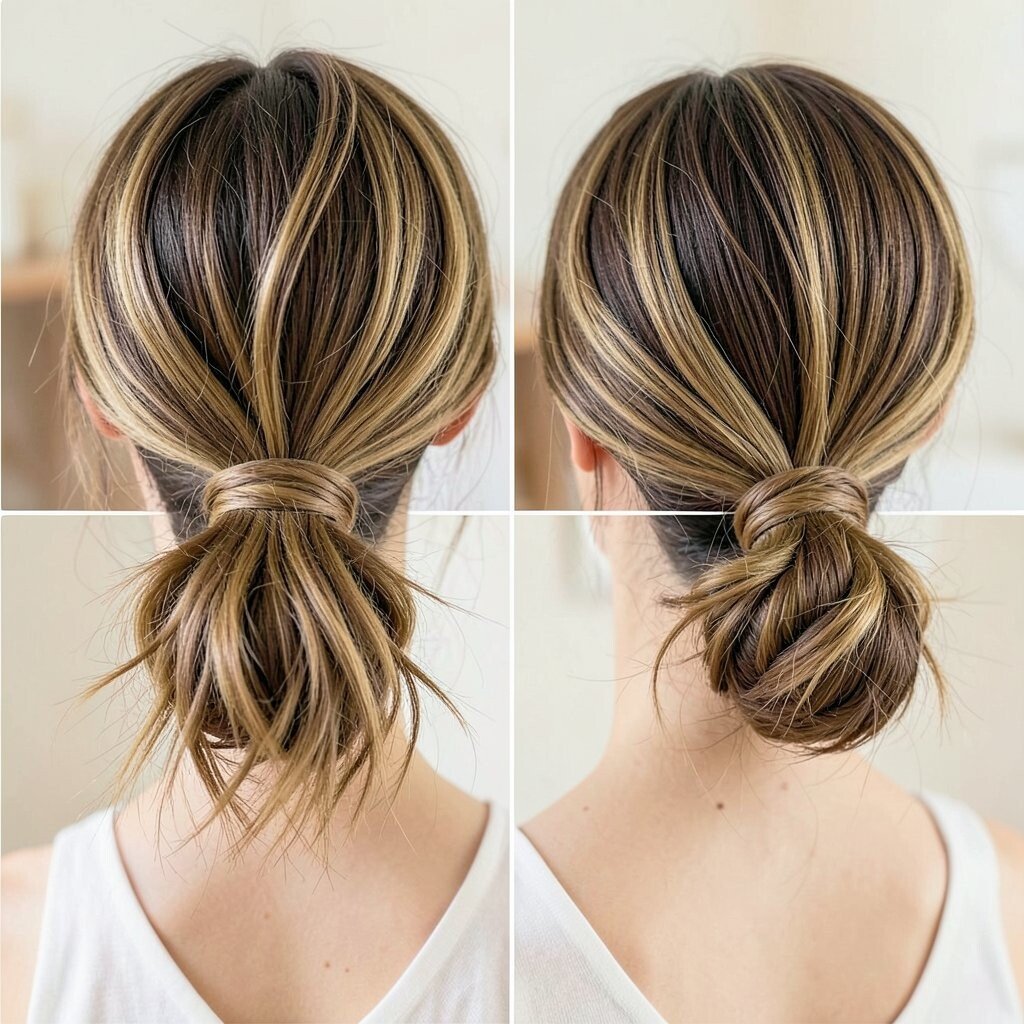
Shape the bun at the nape, then use pins to secure the ends so the outer layer stays feathery. Leave a few thin strands soft around the bun so it looks airy, not heavy.
This style feels lightweight and flattering, especially if you like a bun but don’t want a super tight look. The benefit is that it highlights your hair texture while still keeping everything gathered neatly. It’s also a great option for personalization because you can choose how many strands to keep loose based on your comfort.
For practical tips, pin the ends first, then adjust the outer layer gently so the bun forms a smooth circle. If your hair is fine, add a small amount of mousse to the lengths before styling for more movement. For cost considerations, you can rely on basic pins and a small styling product, making this a budget-friendly “high impact” hairstyle.
This look fits current trends because it blends soft texture with a clean base, giving a balanced, modern finish.