
Picture day makes everyone want to look extra put-together. The right hairstyle can do it without feeling fussy.
1. Classic Side-Swept Waves With a Soft Clip

These waves fall like a gentle curtain, with most of the hair sweeping across one shoulder. A small clip at the side catches the light and keeps flyaways from stealing the spotlight.
This look is great because it frames your face and makes hair look fuller in photos. For practicality, use a light mousse before styling so the waves hold up through the whole school day. Choose a clip color that matches a favorite accessory, like a tiny pearl or a pastel tone, so your look feels personal.
2. Half-Up Twists With a Tiny Bow

Starting at the front, two twists pull sections upward, creating a cute crown effect. The ends stay soft and airy, and a small bow adds a sweet finish.
You get the benefits of face-framing hair without having to fully secure everything. Keep the twists neat by using a comb to part cleanly, then pin with bobby pins that match your hair color. This is a budget-friendly option since you only need a few pins and one bow, and you can reuse them for other events.
To personalize, try twisting closer to your part for a bold look or twisting farther out for a wider frame. Current trends love playful details, and bows are especially popular for picture-day photos. If your hair is fine, add a tiny bit of dry shampoo at the roots for extra texture.
3. Sleek Low Bun With a Middle Part Shine

A sleek low bun sits neatly at the back, and the middle part makes your face look even more balanced. In photos, the smooth finish gives a polished, confident vibe.
This hairstyle is unique because it looks professional while still feeling cute. Use a smoothing cream or a tiny amount of hair gel to tame frizz, then wrap hair around the base and secure it firmly. For practical comfort, place a soft elastic at the crown so the bun doesn’t feel tight.
If you want personalization, add a thin hair scarf wrapped like a ribbon around the bun. For cost, a basic bun tool or claw clip works, but you can also do it with just pins. If your hair is thick, loosen the top slightly with your fingers so it looks natural instead of overly tight.
4. High Ponytail With a Ribbon Wrap
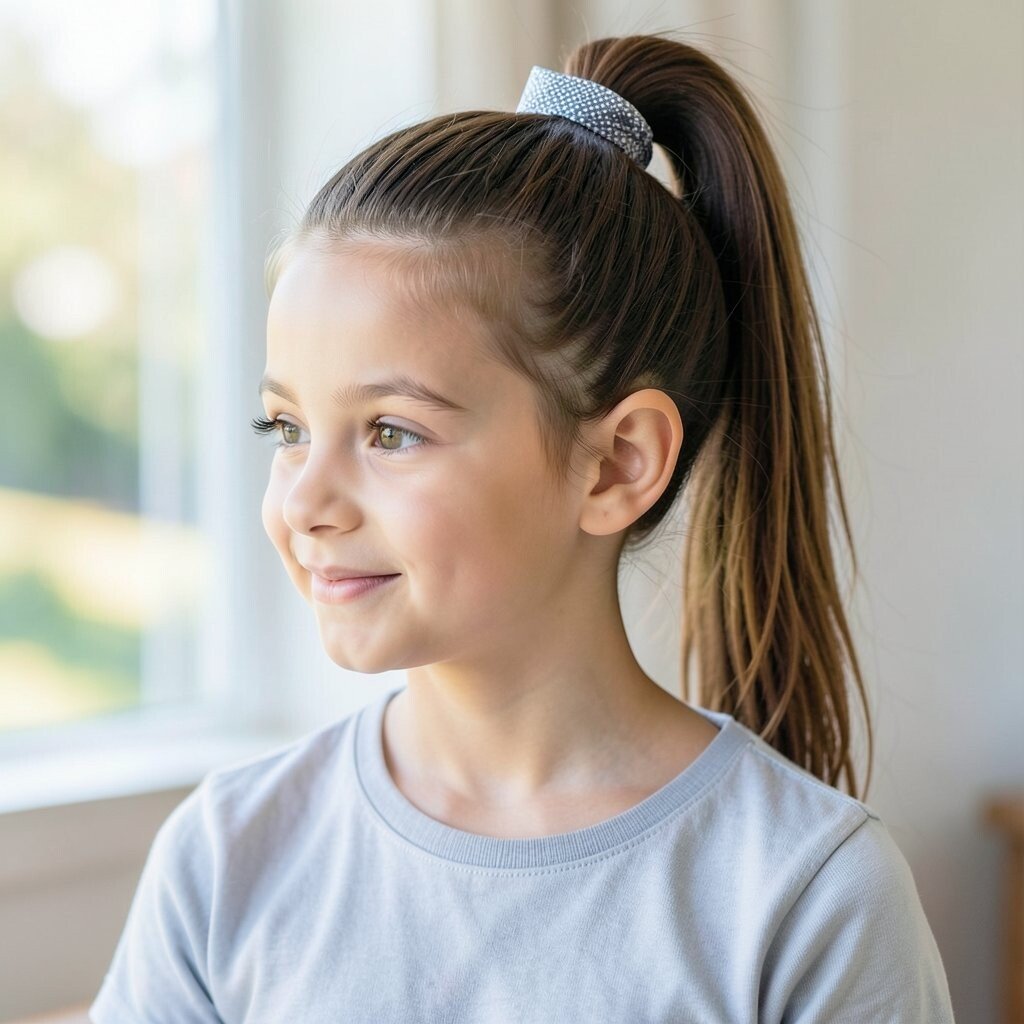
A high ponytail pulls the whole look upward, making you look bright and energetic. When you wrap a ribbon around the base, it turns a simple pony into something photo-ready.
This style benefits you by keeping hair away from your face, which helps your eyes show clearly. To keep it tidy, brush thoroughly and secure with a strong elastic, then wrap the ribbon and pin it down. Choose a ribbon color that matches your outfit so the whole photo feels coordinated.
5. Loose Curls and a Sparkly Headband

Soft curls bounce around your shoulders, and a headband keeps hair from falling forward. The sparkle catches light, so your hairstyle looks lively even in bright classroom lighting.
This option is easy because you can use a curling wand or even hot rollers depending on your hair type. Add a little shine spray at the ends to make the curls look smooth, not dry. For a personalized touch, pick a headband with a pattern that matches your personality.
If you want something trendier, choose a thin metallic band, since shiny accessories have been showing up in everyday looks. Cost-wise, headbands are usually affordable, and you can switch them between outfits. If your hair tends to frizz, mist a light anti-humidity spray before styling for better hold.
6. French Braid Crown for a Royal Feel
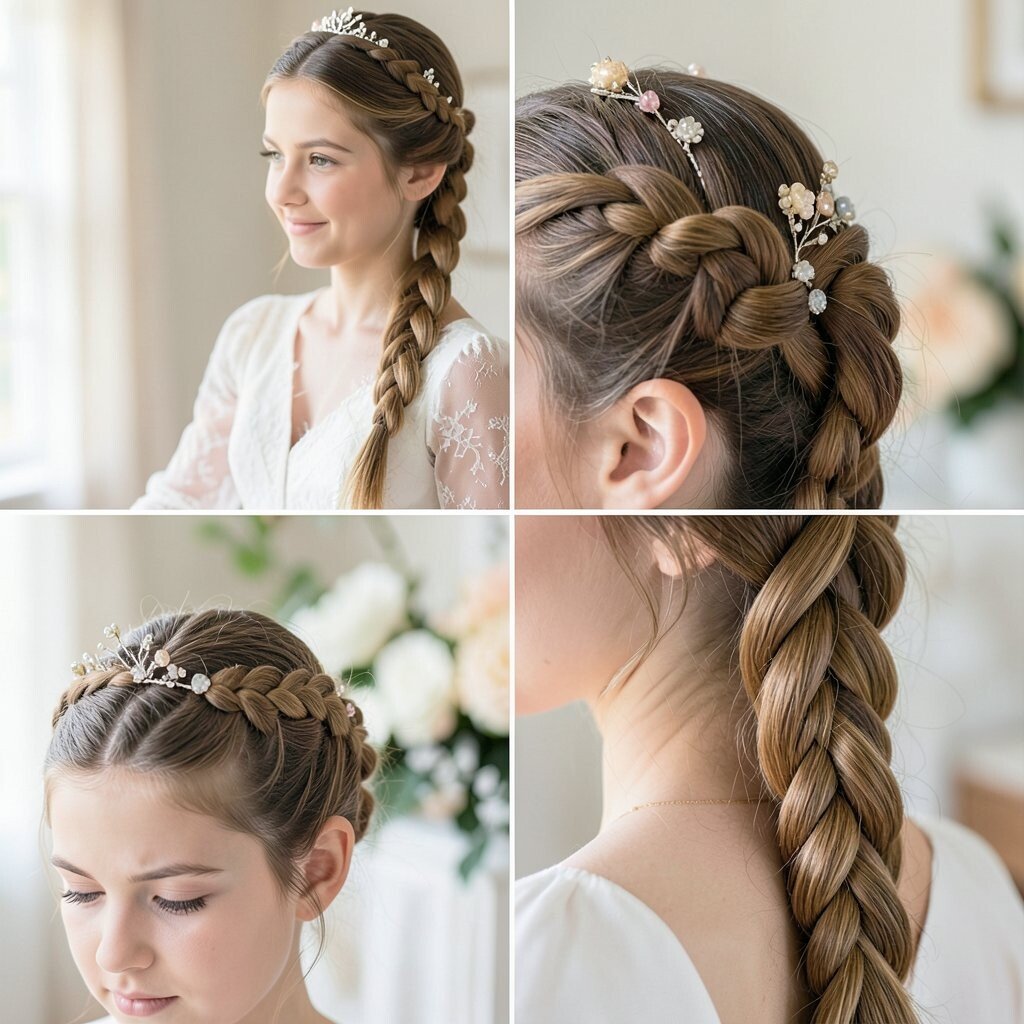
A crown French braid sits across the top like a delicate halo. It looks detailed in photos, with each section lined up neatly for a tidy, elegant vibe.
This hairstyle is unique because it feels special without requiring fancy tools. Start braiding from one side of your scalp and work across, then secure at the other side with pins. For practical tips, braid with slightly larger sections for a softer look, and tug gently once it’s done so it doesn’t look too tight.
Personalize it by adding tiny beads at the ends or using a colored elastic near the base. If you have short hair, try a smaller crown braid or a half-crown version. For cost, it’s mostly just time and a few pins, which makes it a great value.
7. Waterfall Braid With Loose Ends
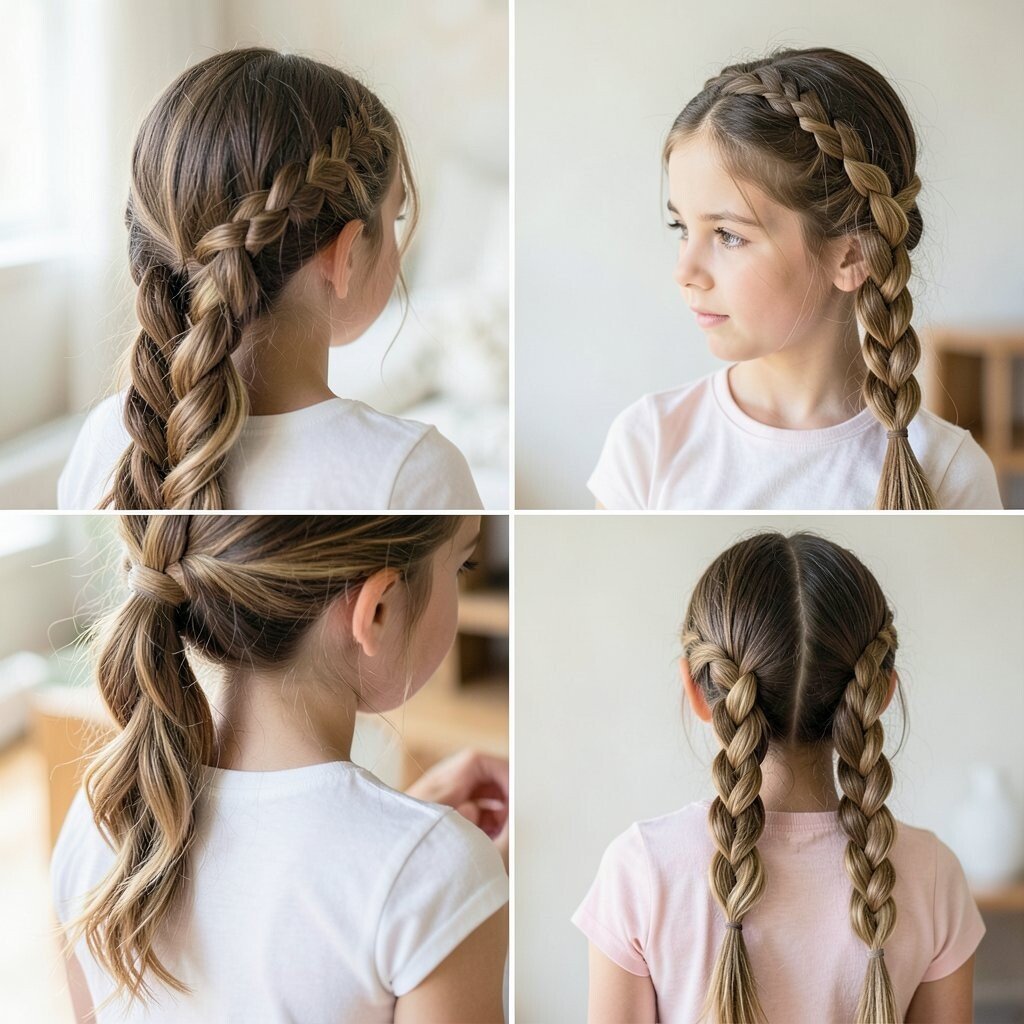
A waterfall braid creates a ribbon-like pattern down one side, while the rest of the hair stays loose and bouncy. In photos, that flowing mix looks romantic and playful at the same time.
This look benefits you by adding structure near the top while still showing off your length. Use a light styling cream so the loose pieces look smooth instead of frizzy. Keep it manageable by braiding only the top sections and leaving the lower hair free.
8. Messy Bun With a Face-Framing Strand

A messy bun looks effortless, with wispy strands around the face for a soft, casual charm. It’s the kind of style that still looks cute even if hair gets a little movement during the day.
This hairstyle is practical because it hides second-day hair and reduces fuss. Gather hair into a bun, then pull a few strands forward and twist them gently with your fingers. For personalization, choose whether you want the front pieces subtle or more dramatic, depending on how bold you feel.
If you’re following current trends, messy buns with natural texture are still a favorite. Cost considerations are easy since you can use what you already own, like bobby pins and a scrunchie. A tiny bit of dry shampoo at the roots can make the bun hold better without looking greasy.
9. Bubble Ponytail With Clear Elastics

Multiple small sections create a “bubble” effect that looks fun and full. The ponytail sits high and round, making your hair look thicker in the camera.
This style offers benefits that matter for picture day, like keeping hair secure and away from your face. Clip the bubbles evenly by measuring with your eyes as you go, then smooth each section gently. Use clear elastics if you want a clean look, or colored elastics if you want it to feel more playful.
To personalize, add a small bow at the top bubble or tuck a tiny charm near the base. Bubble ponytails are unique because they look like a mini hairstyle party, not just a pony. For cost, elastics are inexpensive, and you can reuse them for other hairstyles.
10. Sleek Ponytail With Micro Braids at the Part
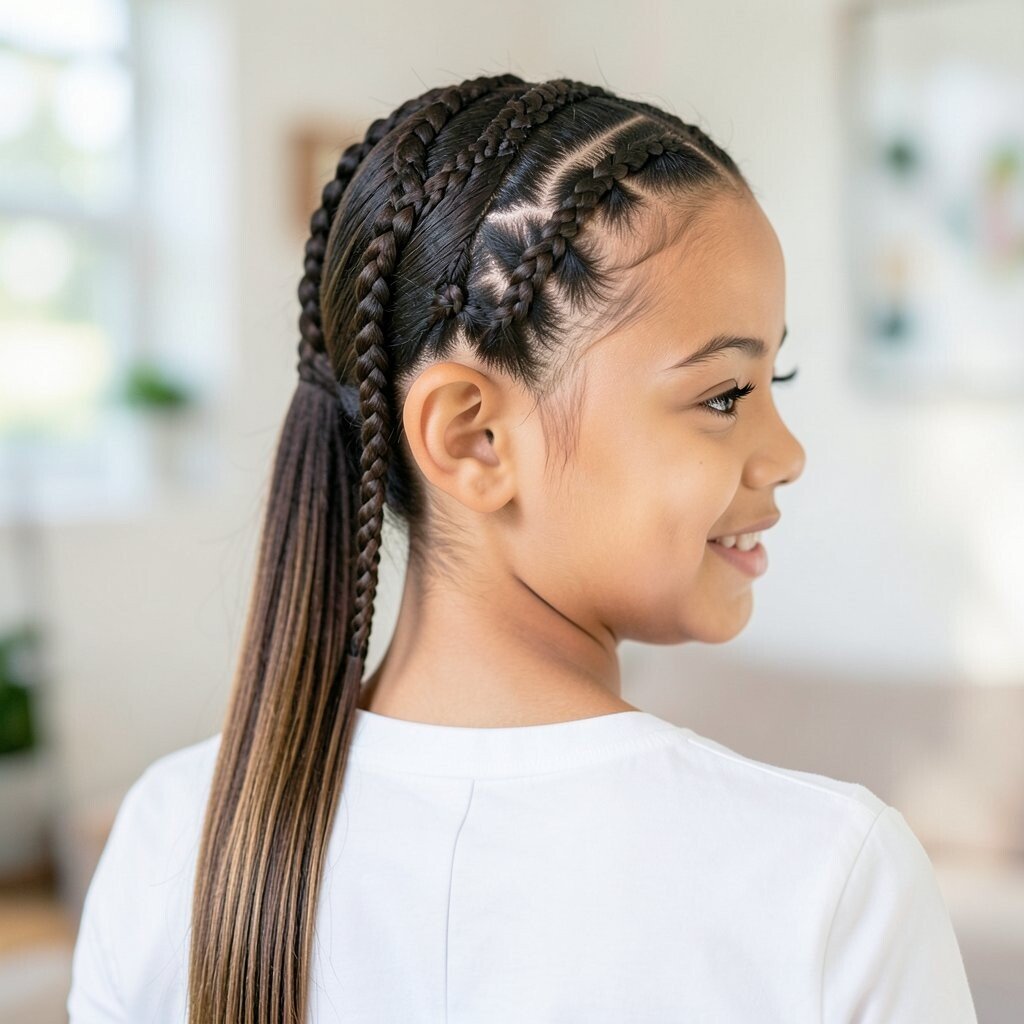
Keep the ponytail smooth and simple, then add two tiny braids along the part for extra detail. The contrast between sleek hair and braided accents makes this look stand out in photos.
This hairstyle is great because it feels neat and controlled while still showing creativity. Make the micro braids using thin sections, then secure the ends into the pony with the same elastic. For practical tips, use a little edge control or gel so baby hairs stay put instead of puffing up.
11. Curly Frohawk Ponytail for Confidence

If your hair is naturally curly, a curly frohawk ponytail turns your texture into the star. The sides stay shaped, while the top gathers into a playful pony that looks bold on camera.
This look is unique because it celebrates curls instead of fighting them, and photos show definition clearly. Use a curl cream and scrunch to keep ringlets bouncy, then gather the top section for the pony. Don’t pull too tight, since comfort matters when you have to sit for multiple pictures.
For personalization, try a low or high placement based on your comfort level and outfit neckline. Cost considerations stay low since you only need a few hair products you likely already use for curly hair. For current trends, natural textures and expressive shapes are very popular, and this style fits right in.
12. Half-Up Crown With Twisted Side Sections

This style lifts the top in a crown-like shape while leaving the rest of your hair flowing. Twists on the sides guide the look toward your face, which makes you look extra framed and bright.
This hairstyle benefits you by keeping hair out of your eyes without flattening everything. Start by parting the hair horizontally across the top, then twist each side and pin into place. Use pins that blend, and consider adding a small ribbon or barrette if you want a cuter finish.
13. Classic Bob-Style Waves With a Pin Curl Accent
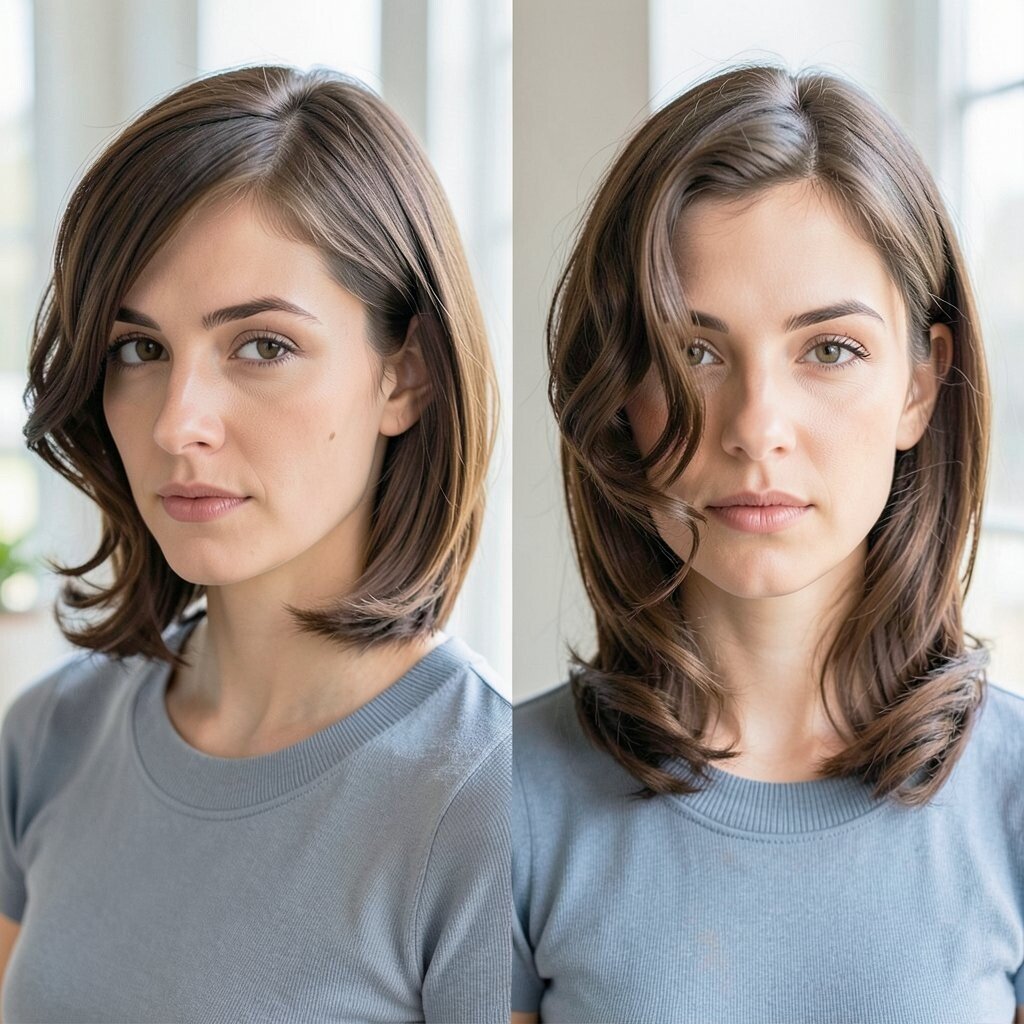
Even if your hair is longer, you can create a bob-like look using waves that start near the cheeks. Add a small pin curl near the front for a vintage-inspired detail that shows up beautifully in close-up photos.
This option is practical because you can style with a curling iron and set the front curl while you get ready. Let the pin curl cool fully before releasing so it stays crisp. Personalize by choosing the curl placement higher for a retro vibe or lower for a softer, modern look.
For uniqueness, the pin curl accent makes the whole hairstyle feel like a special occasion. Cost considerations are simple since you only need heat tools and a few pins. If your hair is very straight, apply a heat protectant and use a flexible hairspray for hold.
14. Braided Side Ponytail With a Flowing Finish
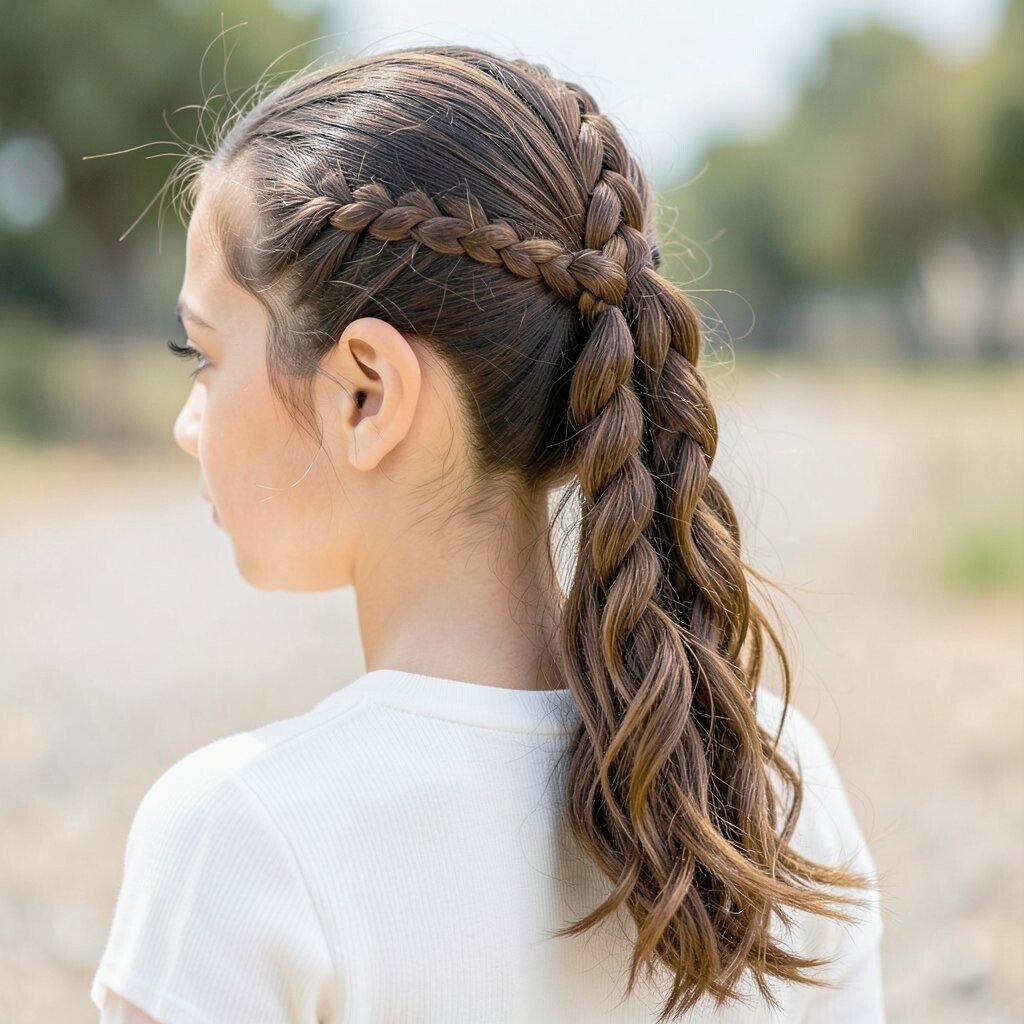
A side ponytail with a braid on top gives you the best of both worlds: secure hold and a pretty braided pattern. The braid adds texture that looks amazing in bright classroom lighting.
This hairstyle benefits you by keeping hair controlled while still letting some length show. Braid a section near the crown, then pull the rest of the hair into a side pony and secure it. For practical tips, keep the braid snug and the pony smooth so the shape stays clean in photos.
To personalize, switch the braid direction so it angles more dramatically toward your cheek or stays more subtle. This style is also flexible for different hair types, since braids work well for straight or slightly wavy hair. Cost is low since you’re using basic elastics and pins, plus a small brush for a polished finish.
15. High Twisted Bun With a Decorative Pin
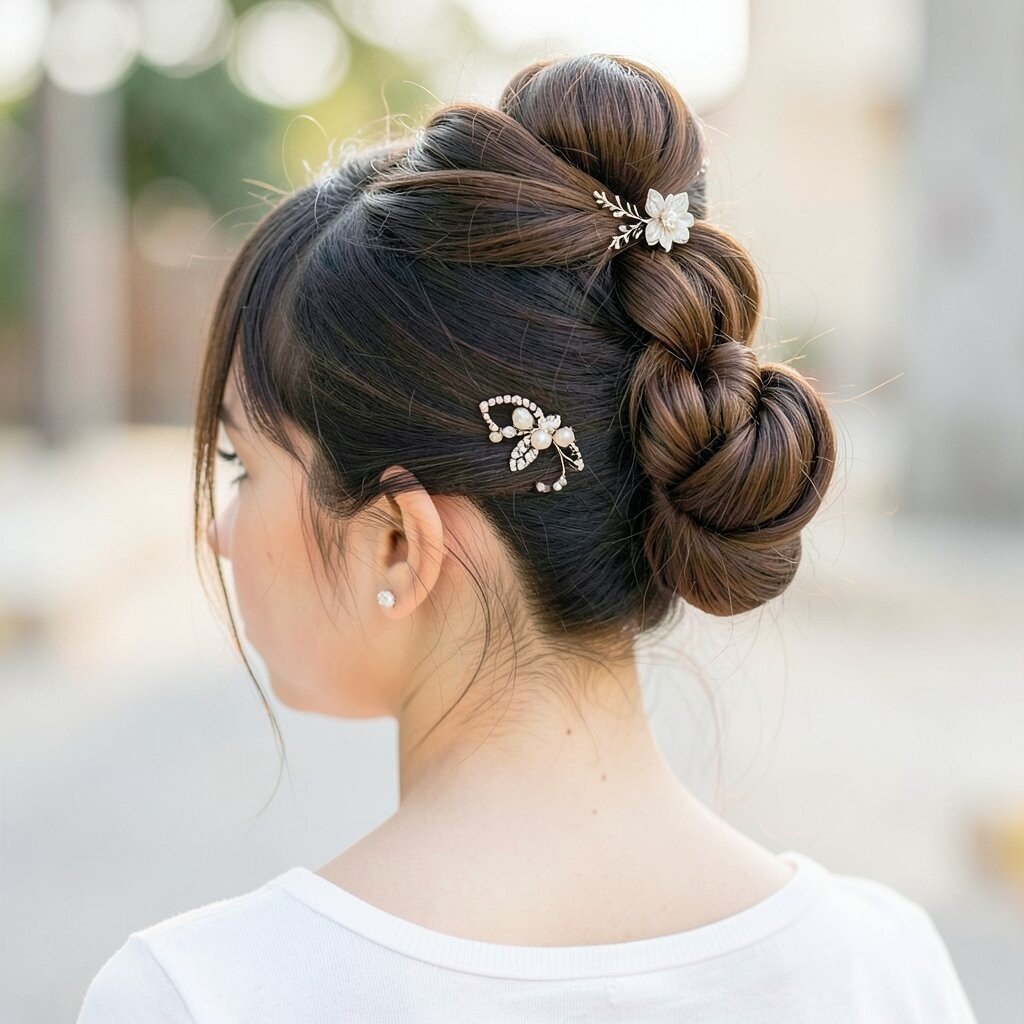
A high twisted bun sits like a little updo sculpture, with twists winding around the base. One decorative pin at the side turns the bun into a picture-day statement.
This look is unique because the twists create dimension even if your hair is fine. Use a thickening spray or a tiny amount of texture powder to give the bun more grip. Secure with pins in a crisscross pattern so it stays put, especially if your school day includes walking outdoors.
Personalize by using a pin shape that matches your style, like a star, heart, or flower. For cost, decorative pins are usually inexpensive and can be reused for other events. If your hair is thick, leave a tiny bit of volume at the bun edges so it looks airy rather than bulky.
16. Low Waterfall Twist With Soft Shine

Picture a waterfall effect, but with twists that guide hair down in smooth lines. The ends stay loose, and a touch of shine makes everything look fresh and healthy.
This hairstyle benefits you by adding interest without requiring a full braid all the way down. Use a shine serum on the outer layer, then twist a small section near the crown and pin it to create the flowing look. For practical tips, start with slightly damp hair and let it finish drying before you move much.
17. Tucked-In Bangs With Sleek Layers
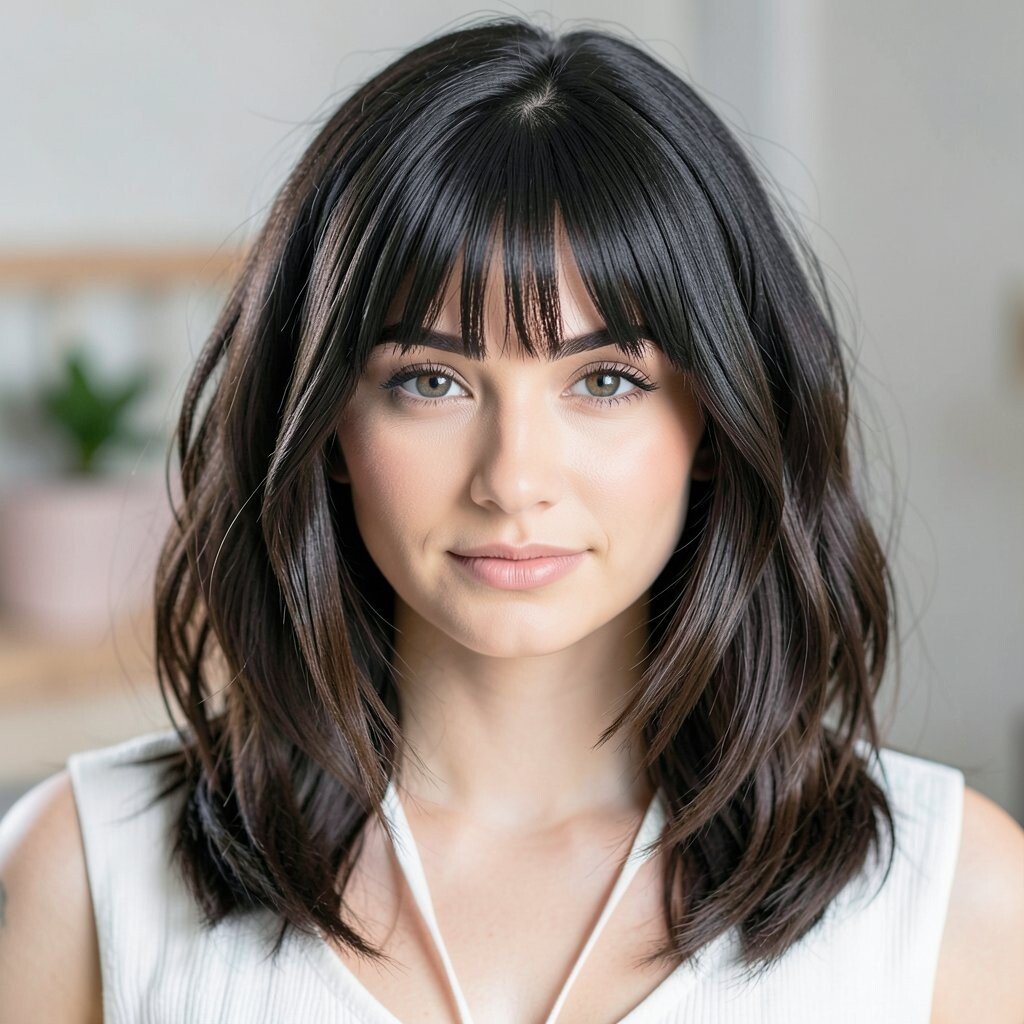
If you have bangs or face-framing layers, tuck them neatly so your eyes stay front and center. Sleek layers help the rest of your hair fall smoothly, making the whole look feel tidy.
This option is practical because you can fix messy bangs quickly before you leave the house. Use a small amount of gel and a brush to guide hair where you want it, then pin lightly if needed. Personalize with a gentle side part or by pinning just one side for a subtle asymmetry.
For cost considerations, a brush, gel, and a few pins are usually all you need, and they are easy to keep in your hair kit. Current trends often favor polished and minimal looks, and tucked-in bangs fit that vibe nicely. If your hair is frizzy, use a smoothing mist so the layers stay calm in changing classroom air.
18. Crown Braid With a Ribbon Bow Tie
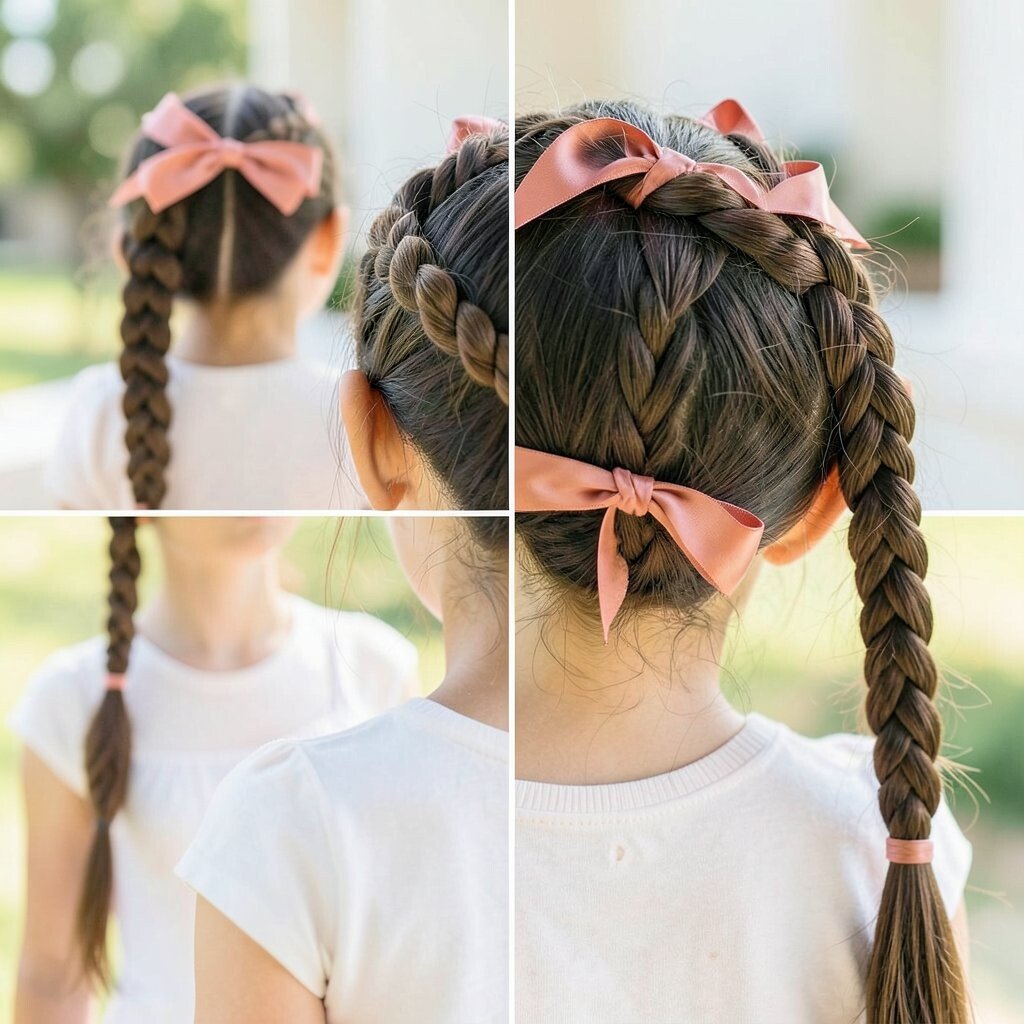
A crown braid looks sweet and careful, and adding a ribbon bow makes it extra adorable. The braid holds everything in place so your hair looks neat from the morning to the final photo.
This hairstyle is unique because the ribbon adds a classic touch that feels like a special occasion. Weave the ribbon in as you braid or tie it near the end, then adjust until the bow sits just right. For practical tips, keep the ribbon length short so it won’t drag or tangle on clothing.
Personalize by choosing ribbon fabric that matches your outfit style, like satin for dressy days or cotton for a casual look. Cost considerations are easy since ribbons are affordable and often come in multipacks. If your hair is slippery, pin the braid more often and lightly mist hairspray over the crown section.
19. Bubble Braids Two Ways for Extra Fun
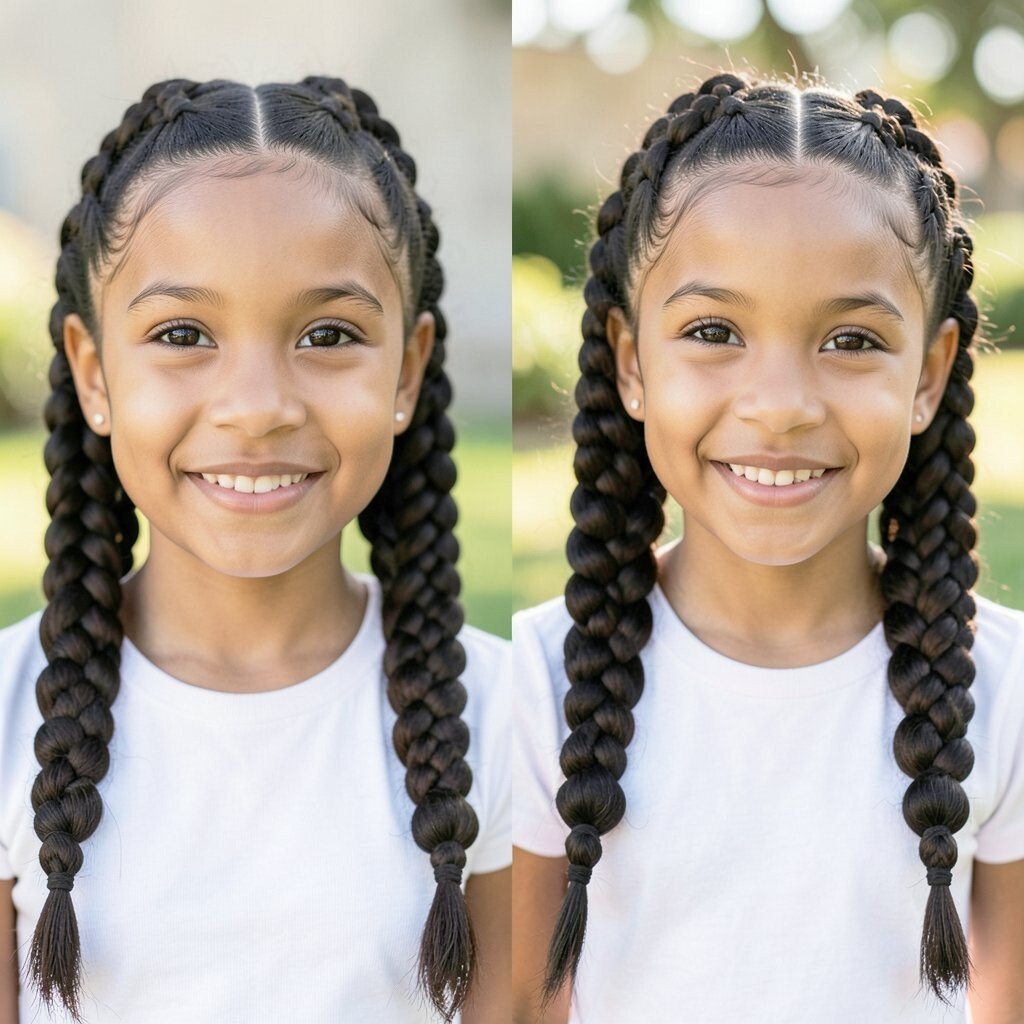
Bubble braids combine braids and elastic sections, creating a playful texture that looks like mini balloons. You can do one on each side or double them for a fuller look.
This hairstyle benefits you by keeping pieces secure while still letting hair look fun and bouncy. Start by braiding smaller sections, then add elastics along the braid to form the bubbles. For practical tips, use the same size elastics so the pattern looks even in the camera.
To personalize, add a colorful elastic at the top or choose a metallic one for a more sparkly look. Bubble braids are trending because they look creative without being too complicated. Cost is low since elastics and bobby pins are usually inexpensive and easy to store.
20. Side Part Curled Pony With Loose Tendrils

A side part helps everything look styled, and a curled ponytail makes your hair feel extra bouncy. Loose tendrils around the face add softness and keep the photo from looking too strict.
This hairstyle benefits you by showing off your face shape while keeping most hair gathered. Curl the ponytail ends separately, then wrap the hair around the elastic so it looks smooth at the base. For practical tips, leave two tiny strands unpinned near the cheeks so the look feels natural.
Personalize by adjusting the curl size, with tighter curls for a lively look or bigger curls for a soft romantic vibe. For cost considerations, a curling iron plus a bit of hairspray is enough, which keeps this budget-friendly. Current trends often include loose tendrils because they make even neat styles look effortless.
21. Top Knot With Two Braided Strands in Front

A top knot pulls hair up and away from your face, giving you that ready-for-the-camera feeling. Two braided strands in front create a cute frame, like tiny decorative accents.
This look is unique because it mixes a simple bun with detailed braids that stand out in close photos. To keep it practical, secure the bun well and tuck the braided strands so they don’t float into your eyes. Use a light styling gel on the front section so hair stays smooth and clean.
Personalize by choosing how thick the braided strands are and whether they connect near the top knot or stay separated. Cost stays reasonable since you only need elastics and pins, plus maybe one hair accessory if you want extra shine. If your hair is short, try a mini top knot or a braided headband style instead.
22. Sleek Low Braid With a Braided Crown Accent
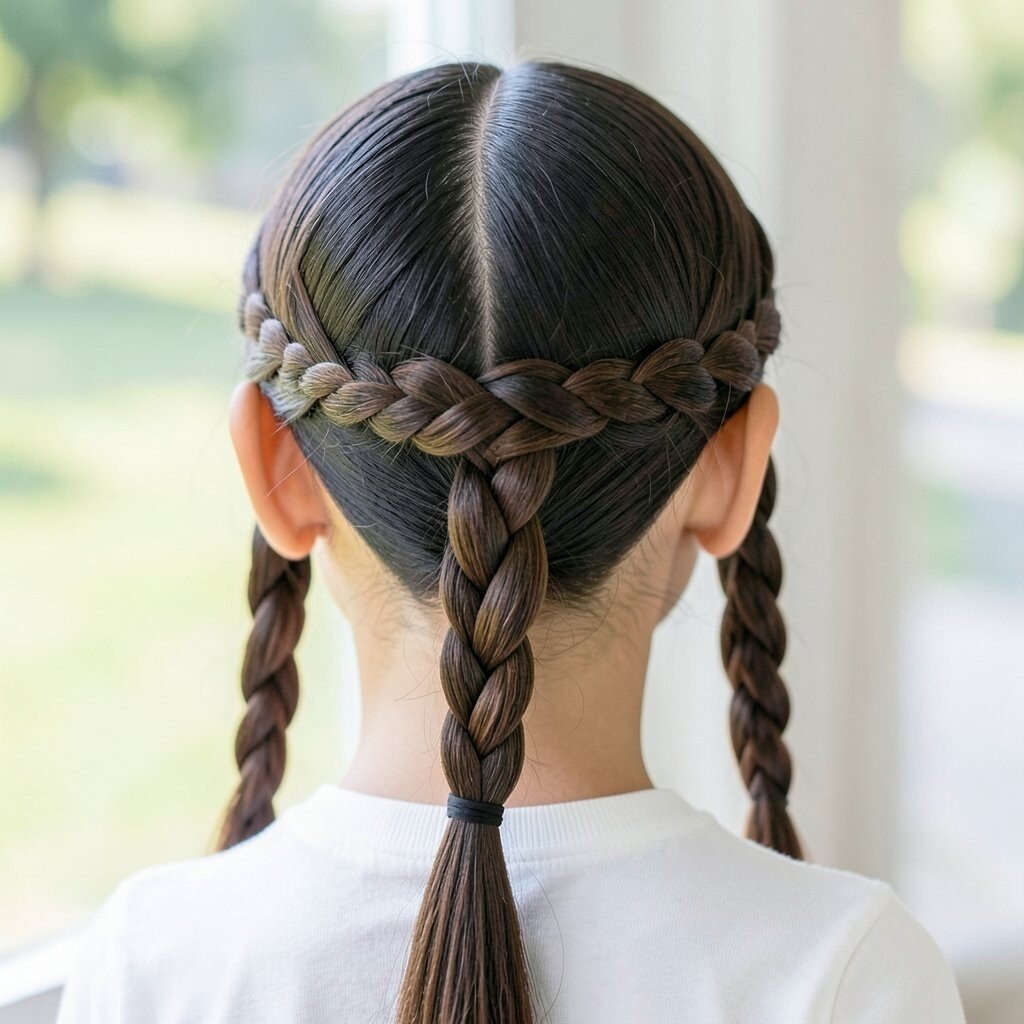
A sleek low braid looks classy, and a braided crown accent adds a special touch near the top. The combination creates a polished look that still feels fun and youthful.
This hairstyle benefits you by keeping hair organized and preventing tangles during the day. Start with a smooth brush-through, then braid the length tightly and secure the end with an elastic. For practical tips, pin the crown accent in place so it holds its shape even if you move around.
Personalize by adding a tiny bow at the braid end or choosing a hair tie that matches your outfit colors. Cost considerations are simple since most of what you need is basic hair tools and a little shine product. For current trends, sleek styles with one standout detail are very popular because they photograph well and look neat from every angle.