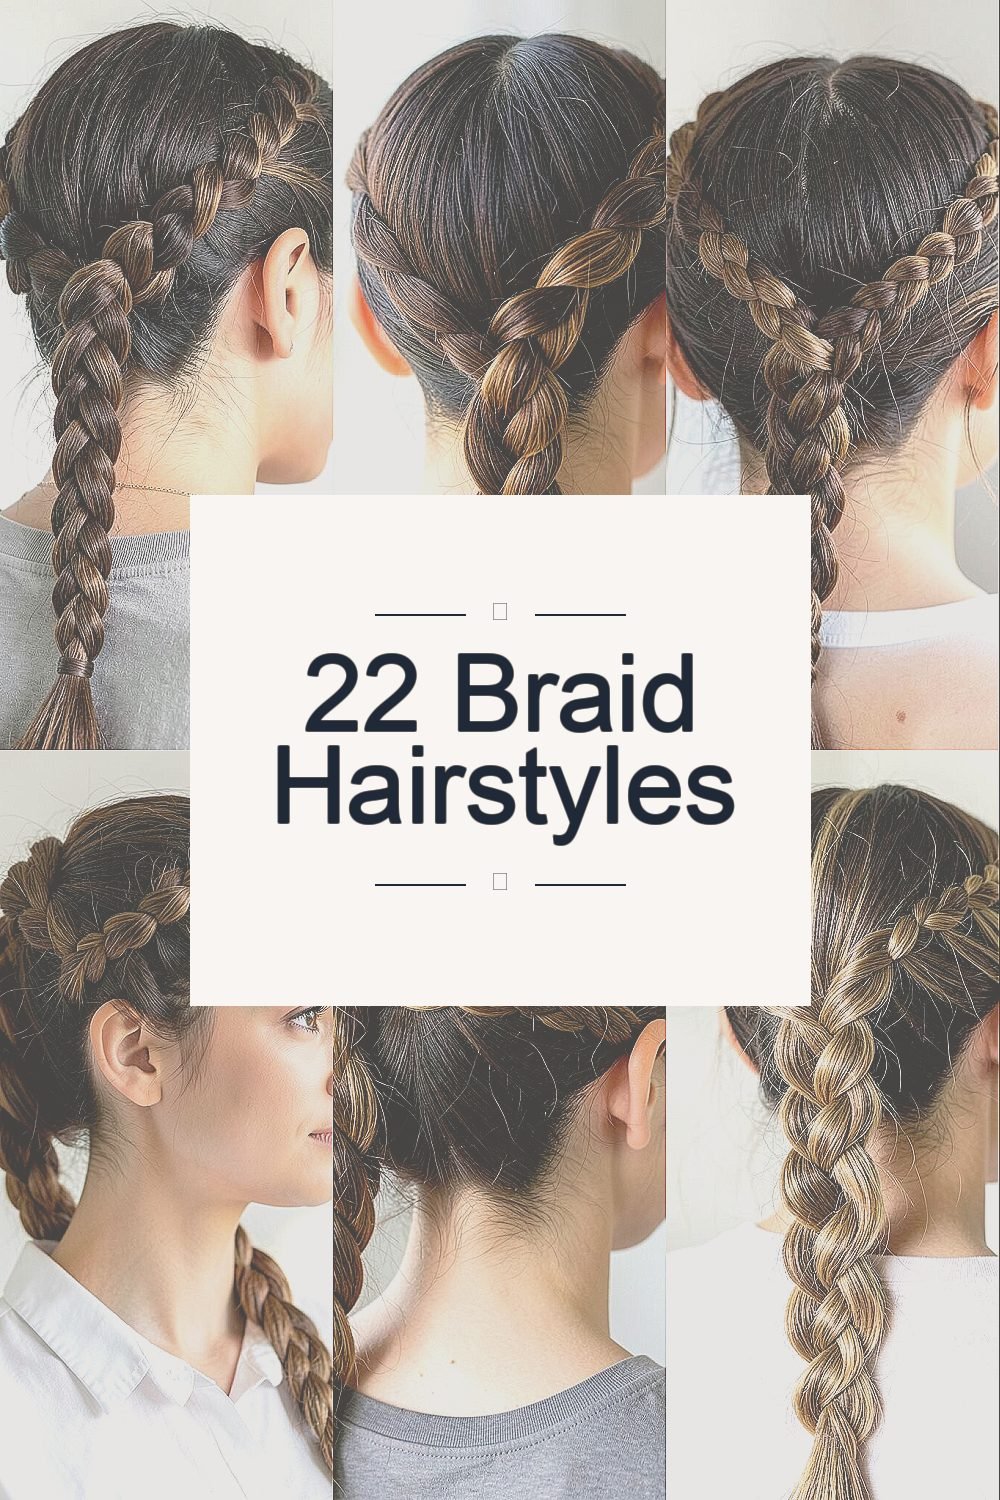
Two braids can change the whole mood of your look. Pick one style and watch how quickly your hair feels more put together.
From quick school-day fixes to party-ready shapes, braided hair has room for your personality. You’ll find options here that work with your hair texture, your schedule, and your comfort level.
1. Half-Up Halo Braid
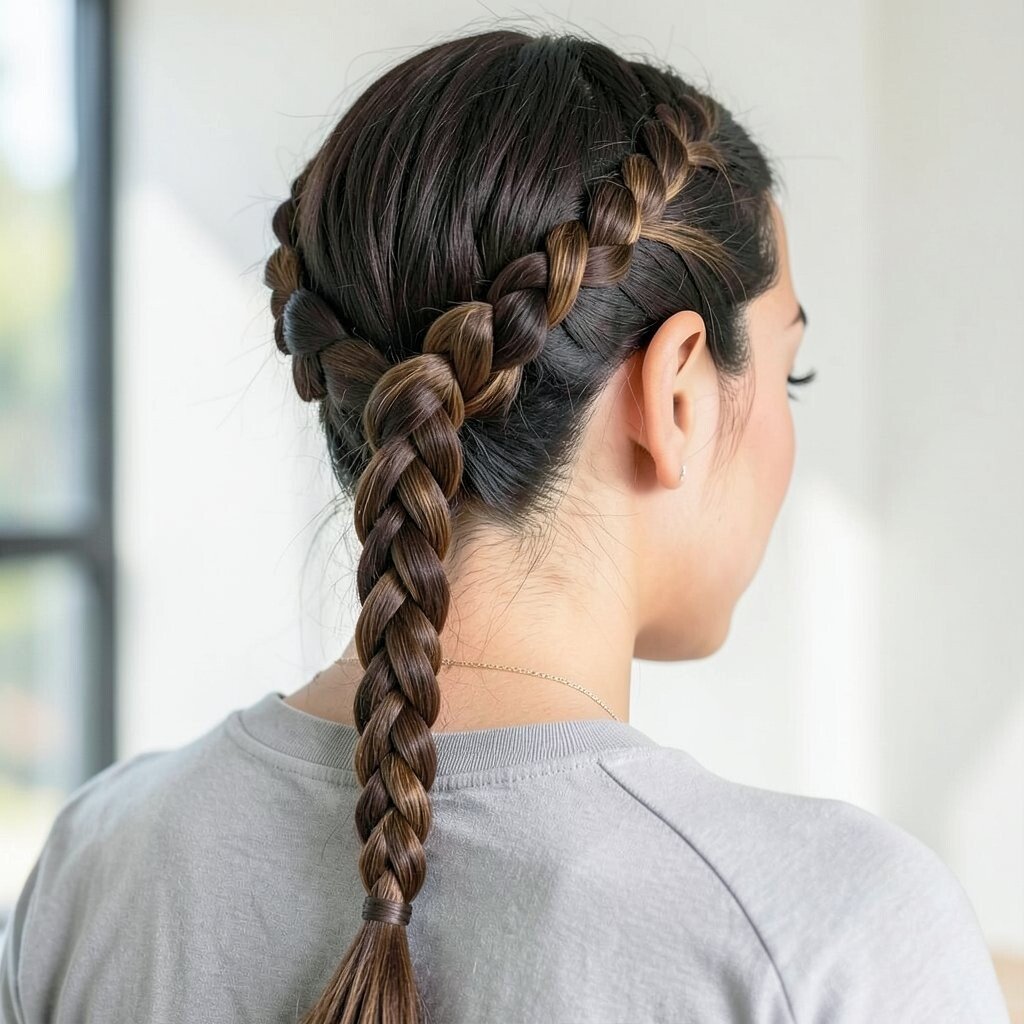
This braid sits like a soft crown around your head. You’ll see neat segments hugging your hairline, while the rest of your hair falls in gentle waves.
It helps keep flyaways calm and frames your face in a flattering way. If you want a polished look without heavy styling, this is a great choice because it takes attention where you want it.
Start by parting your hair slightly off center, then gather sections from both sides toward the back. Use a light gel or styling cream on your hands so the braid looks smooth, not fuzzy.
For personalization, try a smaller halo for a delicate vibe, or make it wider for a bold, romantic feel. Pair it with a soft side part, and consider adding two tiny braids into the halo for extra detail.
Cost is usually low since you can use basic elastics and maybe a few bobby pins. If you already own braid-friendly products, this style can feel like a salon look at home.
2. Classic Three-Strand Side Braid
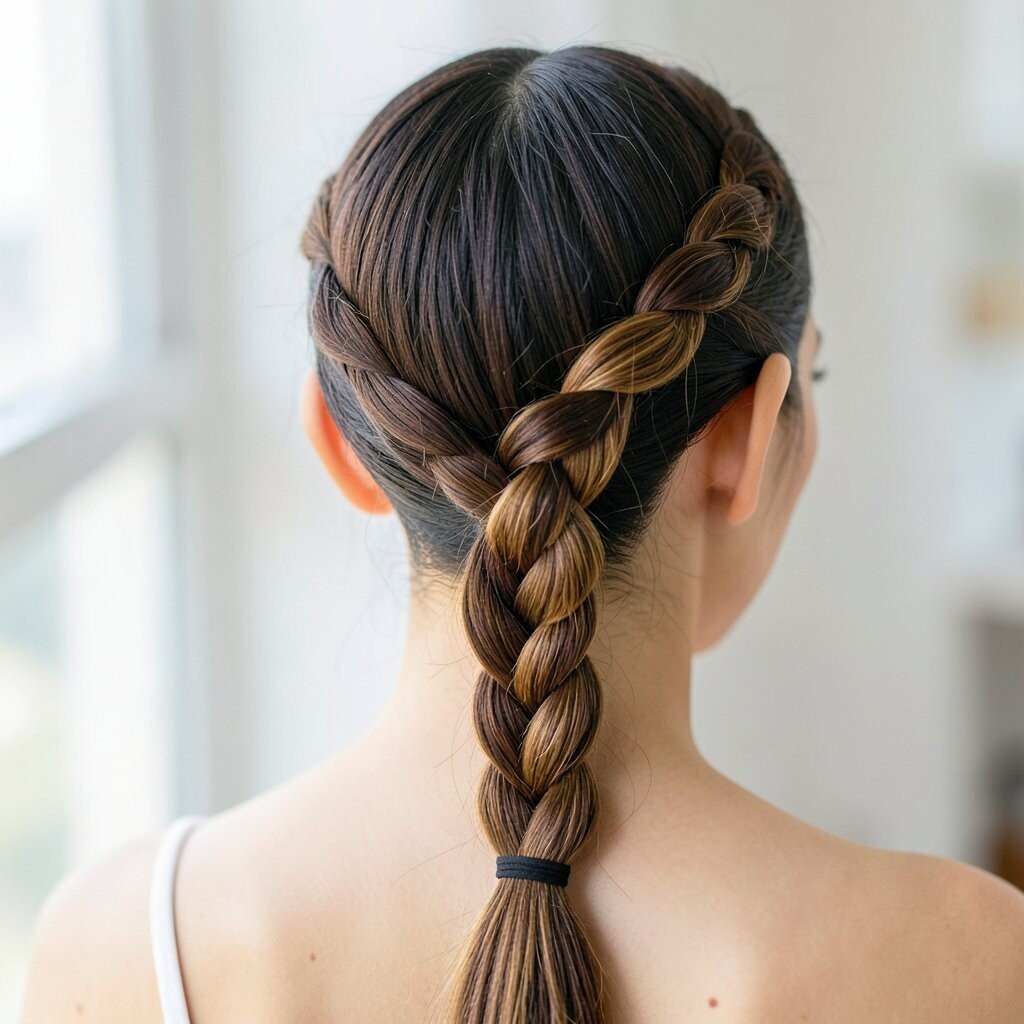
A side three-strand braid looks simple, but it can look very chic. Imagine your hair swept over one shoulder, with a clean braid that catches light as it moves.
This style is great for everyday days and also for events when you want something tidy. It keeps hair off your neck, which is a real comfort boost when you’re busy.
To make it last, braid snug at the top and then slightly loosen the middle for a soft, “lived-in” look. Secure the end with a small elastic and tug gently at the braid loops to create a fuller shape.
If your hair is fine, backcomb lightly at the crown before braiding so the braid has lift. If your hair is thick, split your strands into equal sections and keep the tension steady for a neater pattern.
For cost, you only need elastics and pins, which are usually already in your drawer. Current trends favor this clean, side-swept look, especially when paired with minimal accessories.
3. French Braid with a Loose Braid Crown
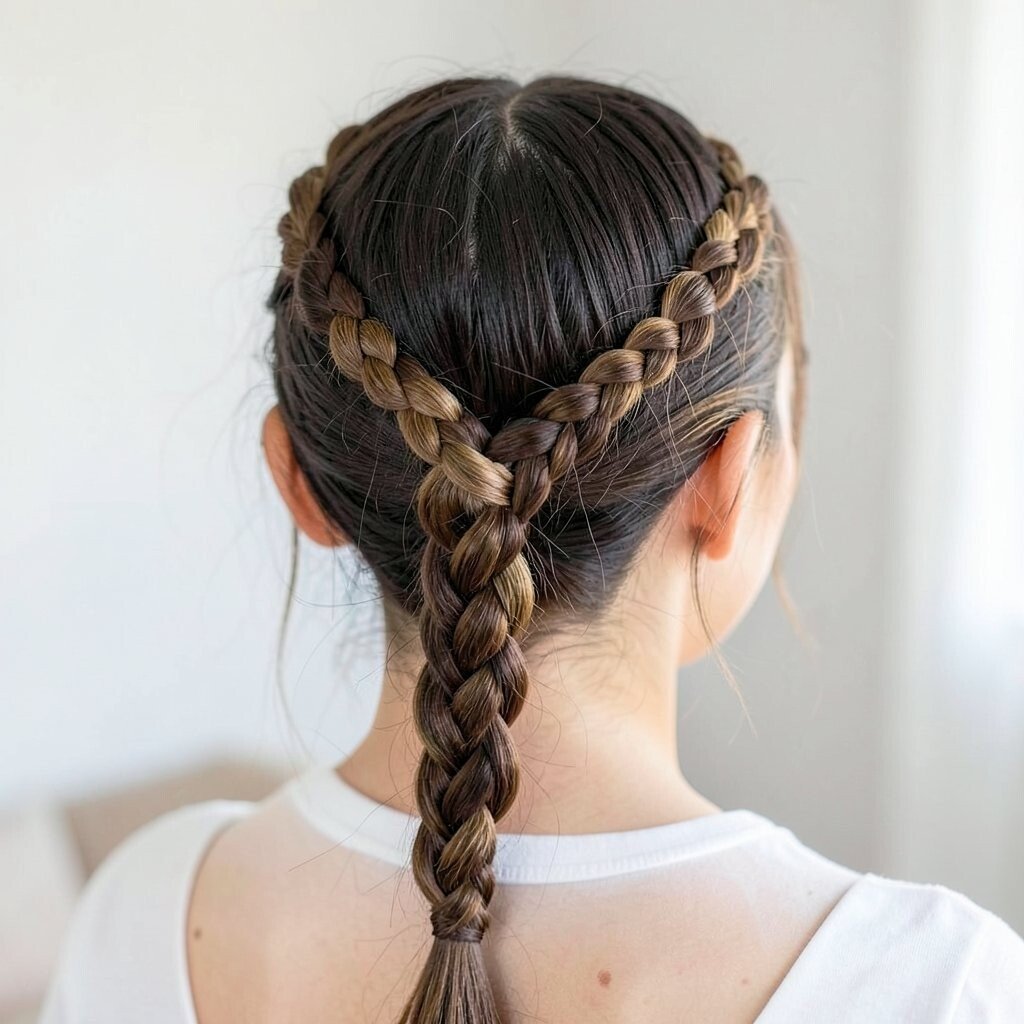
A French braid built at the top creates structure from the very first stitch. You’ll notice the braid starts flat at the scalp and then turns into a relaxed, textured crown near the back.
This hairstyle is perfect when you want your hair secured but still want volume and movement. It works well for active days because the base braid holds while the loose crown adds comfort.
Start with small sections at the top, cross them steadily, and keep the additions consistent on each side. When you reach the center, you can stop adding hair and braid the rest normally.
Then gently loosen the braid by sliding your fingers under sections. For personalization, braid slightly higher for a lifted look, or lower for a more natural, soft style.
You can also weave in a thin ribbon for a playful pop without spending much. If you’re aiming for a trend-forward vibe, match the looseness to your outfit style, from sporty to romantic.
To keep it from getting frizzy, spritz a light mist of hairspray over your hands before adjusting the loops.
4. Dutch Braid Ponytail
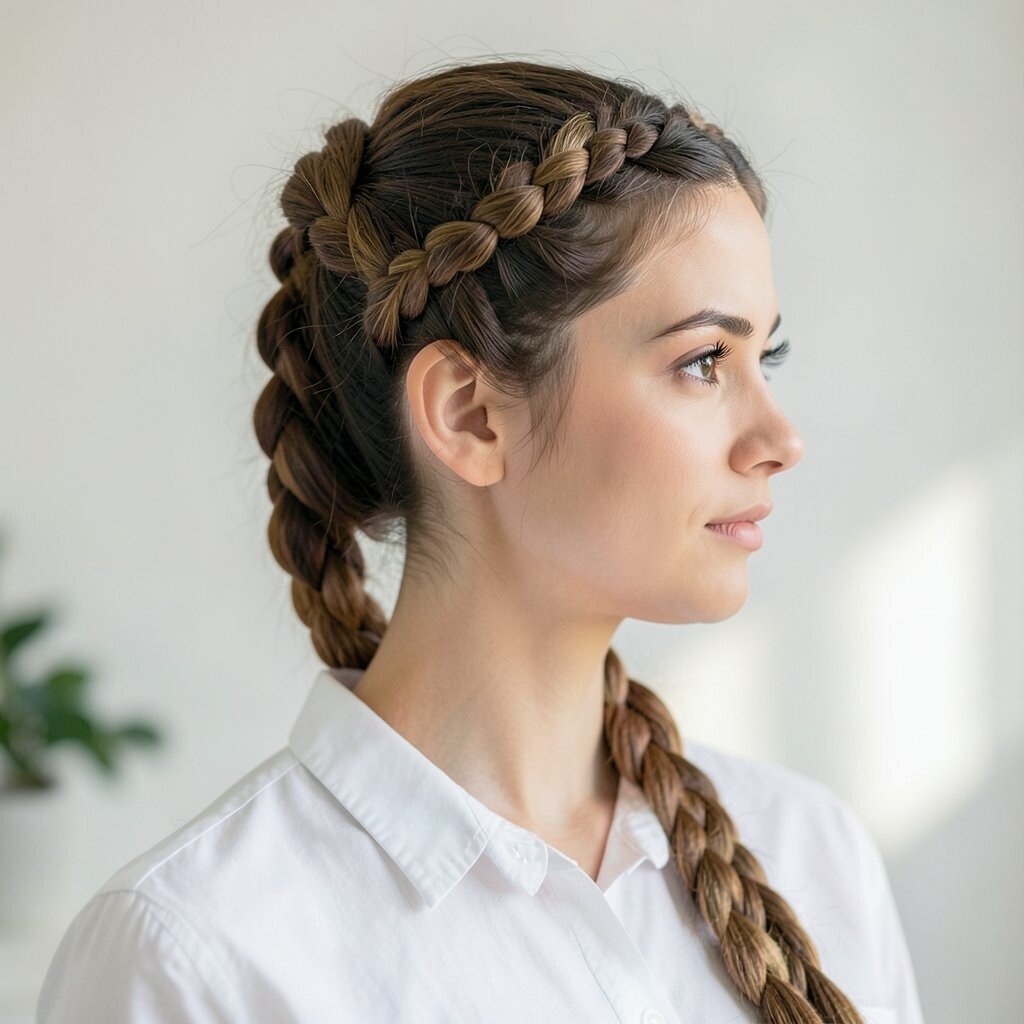
A Dutch braid ponytail looks bold because the braid sits raised, not flat. Picture a braid traveling along your head, then joining a smooth ponytail that bounces when you walk.
This is a strong choice for workouts, long school days, or anytime your hair needs to stay put. It combines the grip of a braid with the convenience of a ponytail.
Begin the Dutch braid from the front using three sections, crossing under with each new add. Secure it at the back, then gather the remaining hair into a ponytail and fasten with a sturdy elastic.
For a more stylish finish, wrap a small strand from the ponytail around the elastic. If your hair is short, you can use extensions or braiding hair to get the ponytail length you want.
Cost considerations are simple here since elastics and bobby pins do most of the work. Popular right now is a high, sleek ponytail with a bold braid that looks almost sculpted.
5. Rope Braid with Minimal Effort
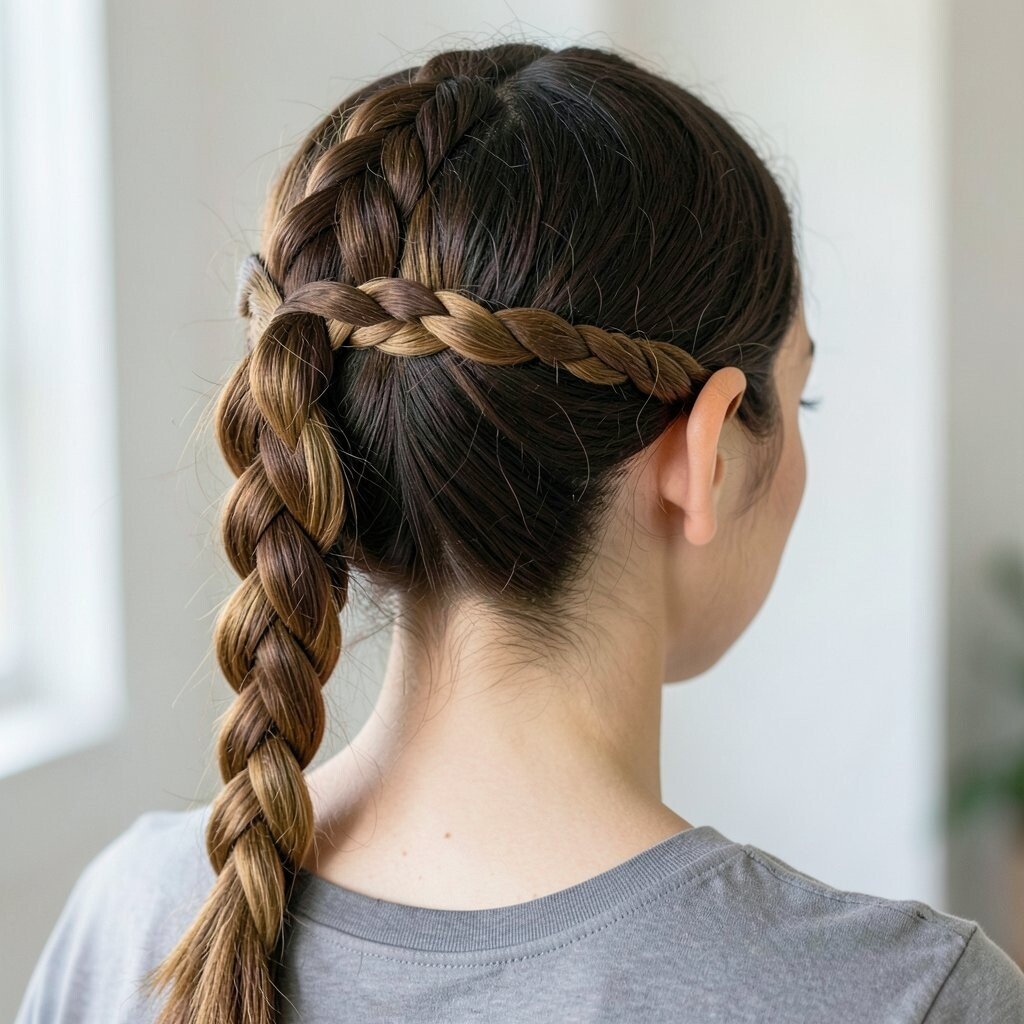
A rope braid twists into a smooth, rope-like braid that looks extra polished. You’ll see two strands spiraling around each other, creating a clean pattern even on simple hair days.
This style is great when you want something fast but still special. It also tends to hold up well, especially if you keep the twist tight at the start.
Split your hair into two equal sections, then twist each section in the same direction. Cross them around each other while continuing the twists, and secure the end tightly.
To personalize, loosen the braid slightly after securing so it looks thicker and softer. If you want extra shine, apply a small amount of hair oil to your lengths before twisting.
For cost, it’s basically free if you already have a brush and elastic. Trends keep leaning toward neat, twisty styles because they look modern without needing complicated steps.
6. Waterfall Braid with Soft Cascades
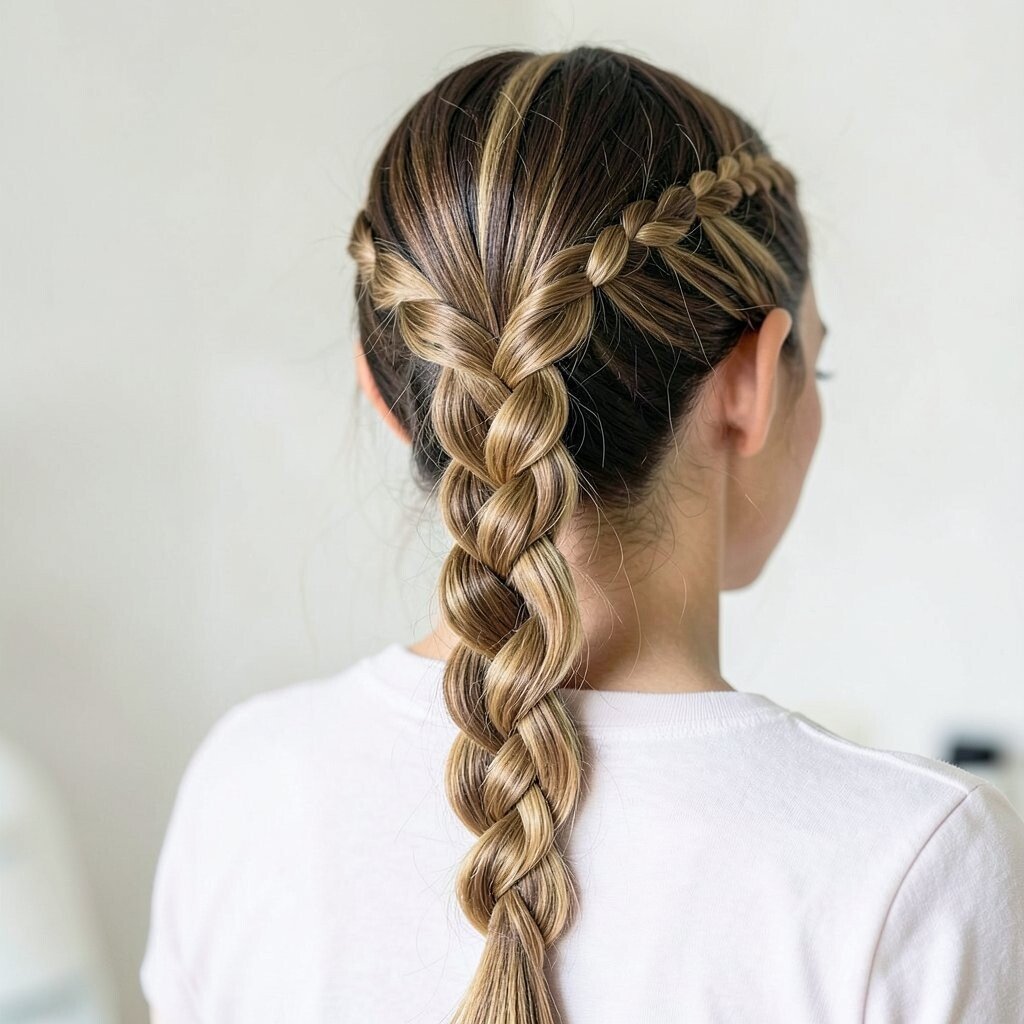
A waterfall braid looks dreamy because some strands “fall” through the braid pattern. You’ll notice a ribbon-like line of braiding that releases pieces into loose waves below.
This hairstyle adds romance while still feeling airy and light. It’s perfect for dates, brunch, or any time you want your hair to look extra pretty without feeling heavy.
Start with a side section near the temple and braid loosely across, dropping one strand each time you add a new section. Use a small elastic or bobby pins to hold the waterfall line in place as you go.
After you finish, style the loose strands with a curling wand or even a quick bend with a flat iron. For personalization, try a wider waterfall for bold drama or keep it thin for a delicate look.
Cost is low because you can use pins and basic styling tools you probably already own. Current trends favor soft, natural-looking waves under braids, so this one fits right in.
7. Dutch Braid into a Bubble Style
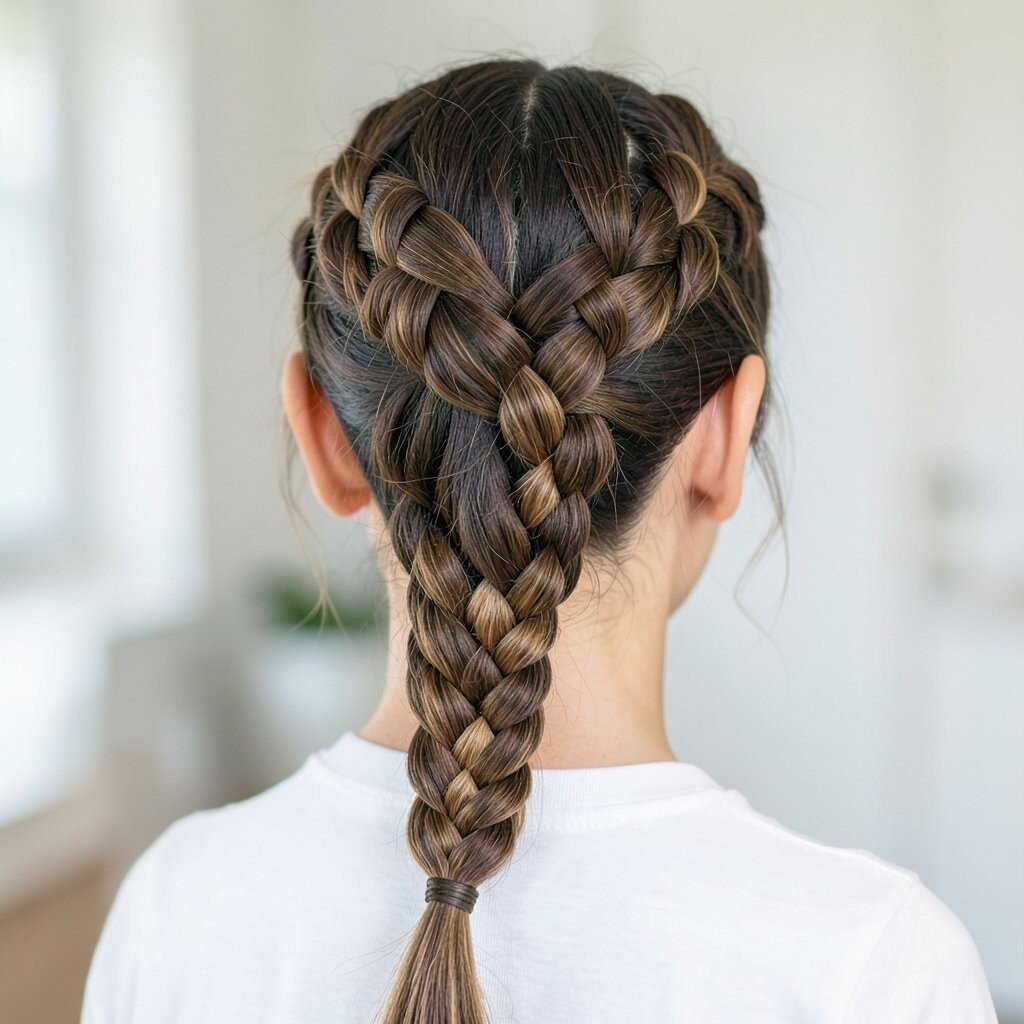
This braid turns heads because it looks like a braid stretched into bouncy bubbles. Imagine a Dutch braid base, then gathered sections that are tied off in rounded, spaced loops.
It’s fun, playful, and still neat enough for everyday wear. The bubble shape adds volume, which is helpful if your hair feels flat.
Make the Dutch braid as usual, then secure it with a small elastic at intervals to form bubbles. Gently pull each bubble outward so it looks round and full.
For personalization, keep the bubbles close together for a cute, clustered look. You can also match bubble size to your hair thickness so everything looks balanced.
Cost is usually just elastics and pins, which are easy to find. If you’re following current trends, bubble braids are popular because they feel youthful and photogenic.
Finish with a light mist of hairspray to help the bubbles stay crisp all day.
8. Three-Section Braided Bangs
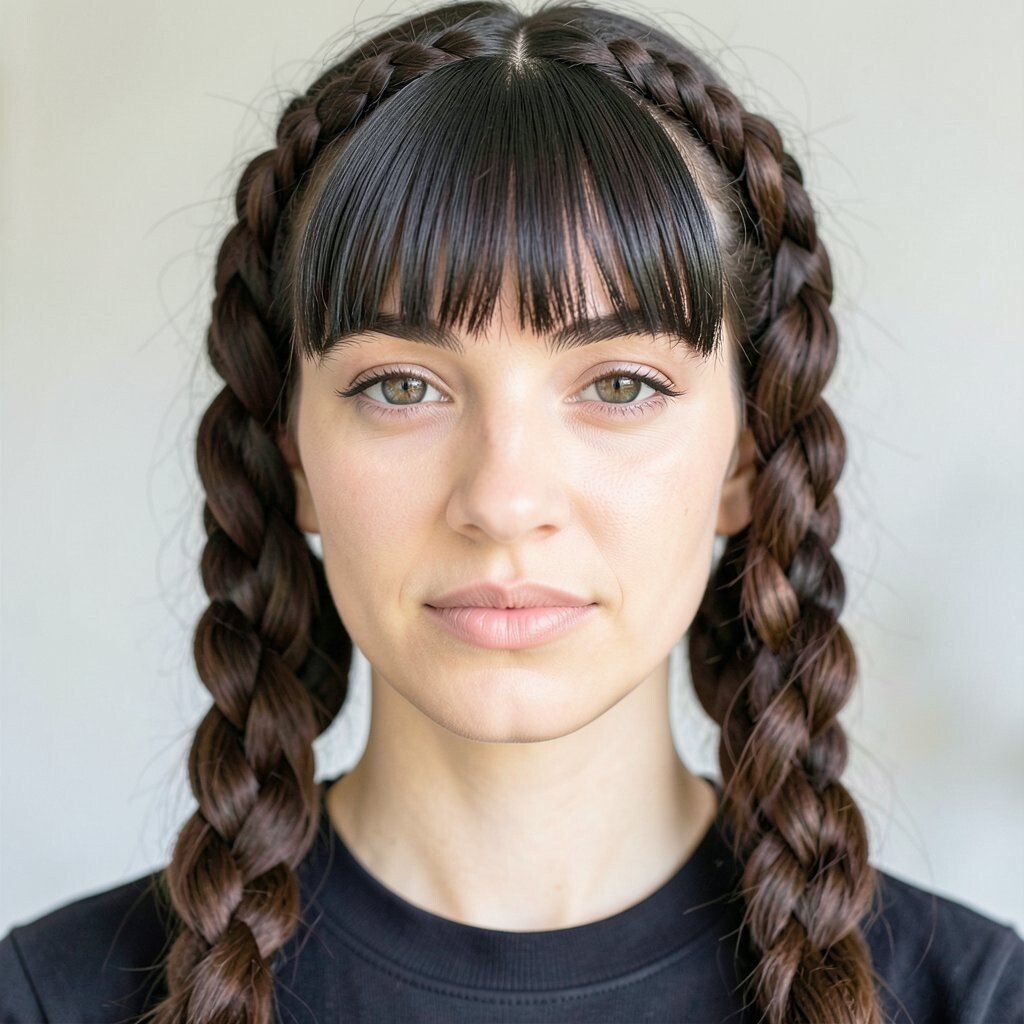
If you want a small braided detail, braided bangs are a smart choice. Picture a tiny braid line that blends into your hairstyle and frames your forehead.
This style is unique because it focuses on one area instead of braiding all your hair. It’s also a great way to keep shorter layers from annoying you.
Choose a small section at your front hairline and split it into three strands. Braid across lightly, adding small bits only from the top section to make it look connected.
Secure it with a pin near your crown, then blend the rest of your hair with a brush so the braid looks natural. For personalization, try a zigzag part and braid from the peak for a more creative effect.
Cost considerations are easy since you only need a few bobby pins. Braided bangs also match a current trend toward face-framing details rather than full updos.
9. Side-Swept Crown Braid with Twists
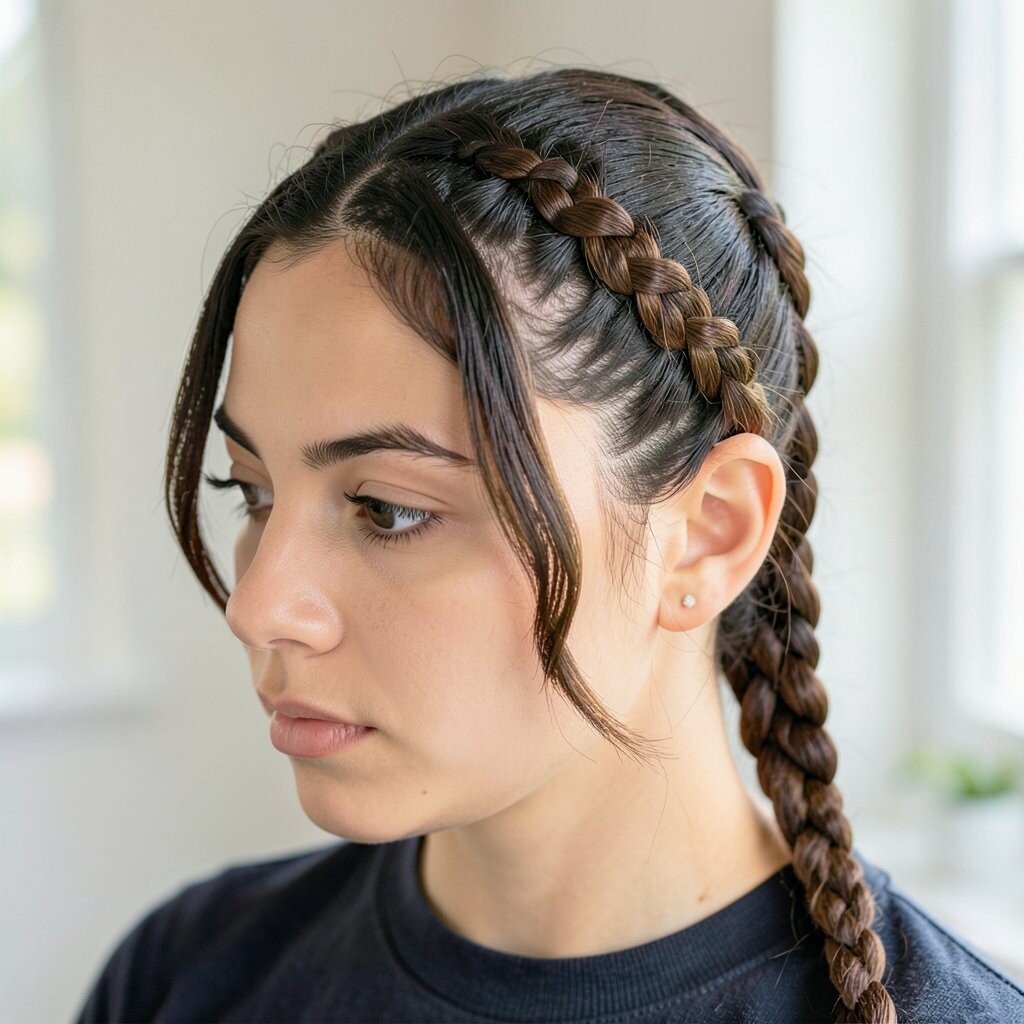
This crown braid feels elegant because it mixes braided structure with small twists. You’ll see twisted sections woven near the front, then a smooth braid that wraps across the head like a belt.
It’s a great option when you want something special but still wearable. The crown shape keeps hair secure while the front twists add extra character.
Start with a side part, then create two small twist sections near your temple. Cross them into a three-strand braid, then continue wrapping as you gather more hair.
When you reach the opposite side, tuck the braid end underneath and pin it. For personalization, add a tiny braided strand near the crown to create a layered look.
Keep tension moderate so the braid looks soft rather than stiff. This style can stay budget-friendly if you skip expensive accessories and rely on pins and light styling product.
To match trends, pair it with sleek hair or gentle waves depending on your outfit.
10. Milkmaid Braids with a Middle Part
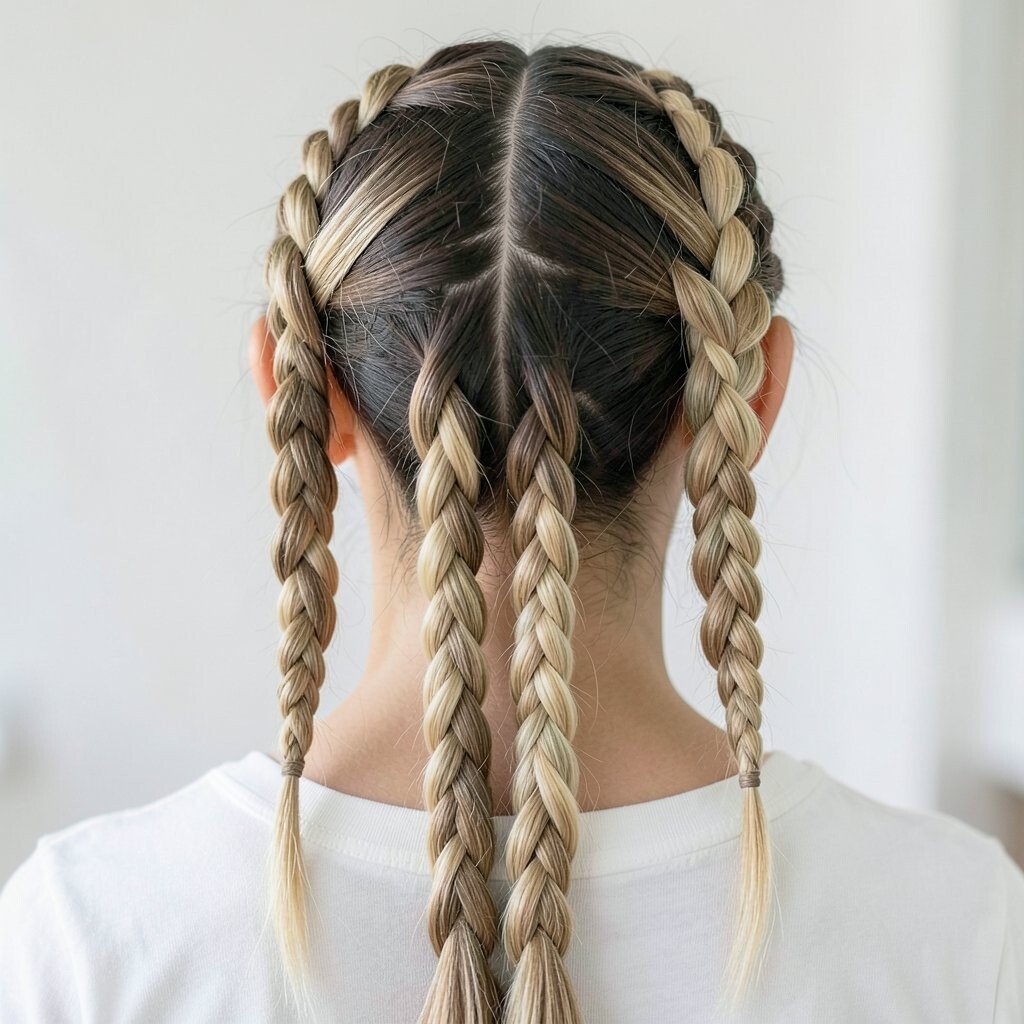
Milkmaid braids create a classic, romantic vibe that looks instantly put together. Imagine two braids starting from the crown and meeting at the back, forming a soft halo shape.
This hairstyle is useful when you want your hair out of your face while still feeling pretty. It also works well for days when your hair needs to last through activities.
Part your hair down the middle, then braid both sides using a regular three-strand or Dutch method. Secure each braid, then wrap one across and pin it, followed by the other.
For personalization, switch to Dutch braids for more contrast and height. If your hair is thin, gently tug each braid loop to create a thicker look.
Cost is low because you only need elastics, pins, and maybe a little smoothing cream. Milkmaid braids remain a go-to trend because they look timeless in photos.
Finish with a light hold spray so the pins stay in place and your braid stays tidy.
11. Skinny Braid Headband
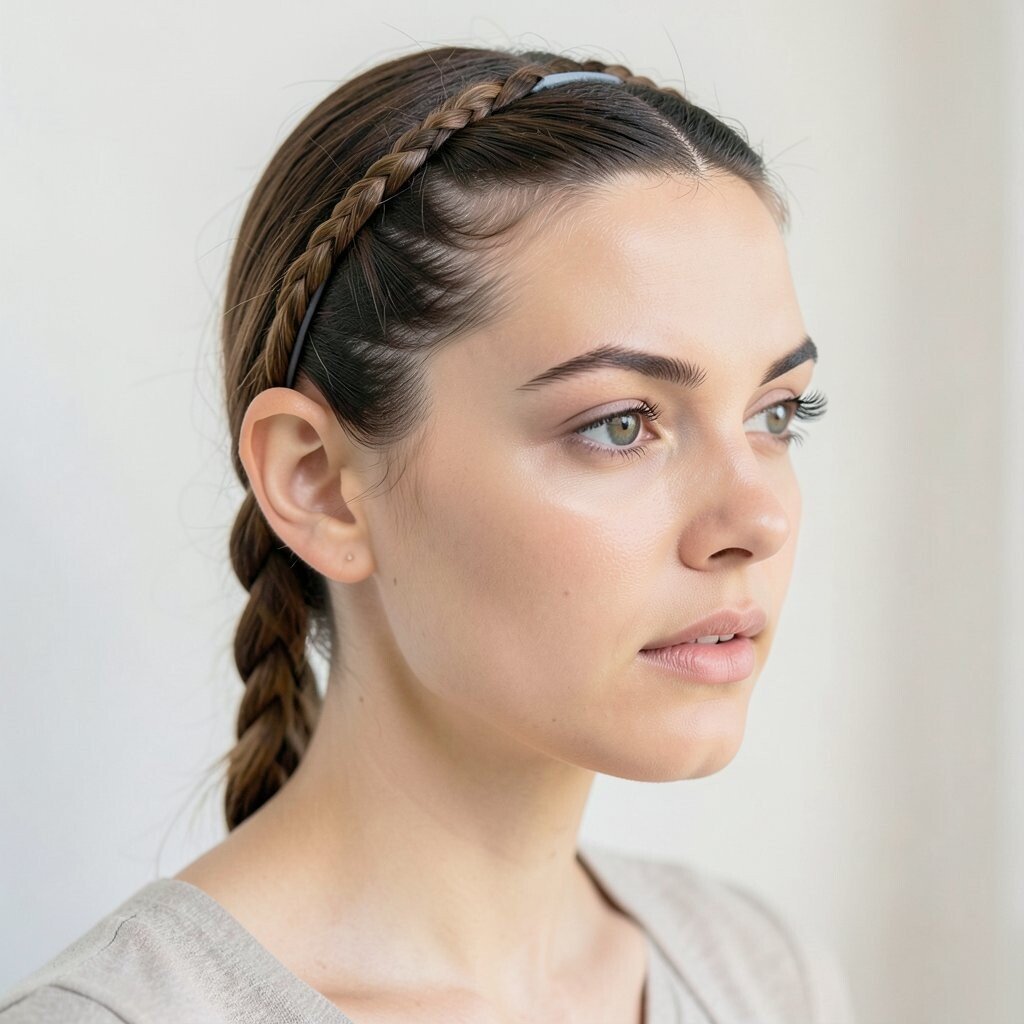
A skinny braid headband is delicate and stylish without taking over your whole look. You’ll see a thin braid band across your hairline, while the rest of your hair stays down and soft.
This one is perfect when you want a braid but don’t want to commit to an updo. It also helps hold back bangs and short layers naturally.
Make a tight three-strand braid from one side of your head, then bring it across to the other side. Pin the end carefully so it looks like a headband.
For personalization, try adding a tiny elastic near the ends so you can pull the braid slightly for a “wider band” effect. You can also do two skinny braids instead of one for a more detailed finish.
Cost considerations are minimal since the look uses simple tools and easy technique. Current trends lean toward minimal braiding that feels clean, modern, and effortless.
12. Ladder Braid for Texture and Shine
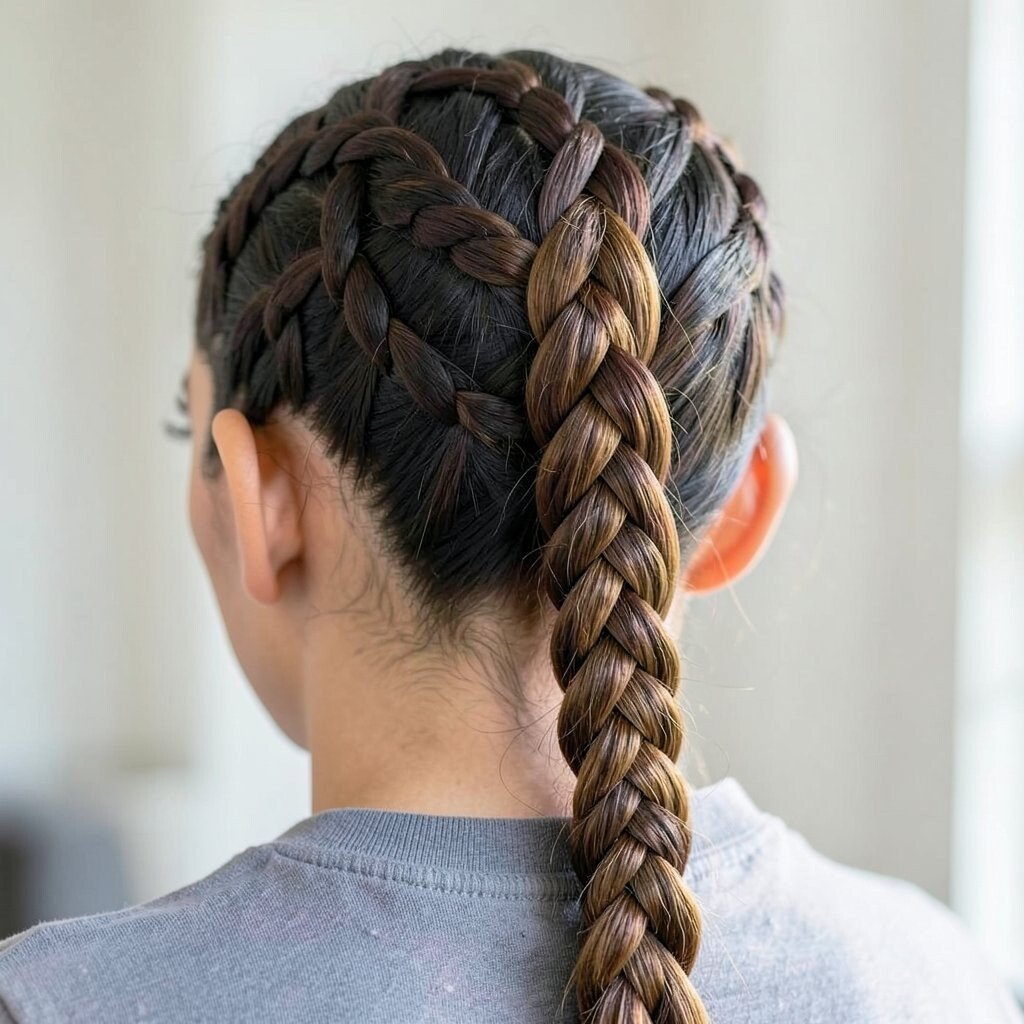
A ladder braid looks striking because it forms small rungs that resemble a ladder. You’ll see sections that create a repeating pattern, especially when the braid sits visible along your hair.
This is a unique style that adds texture without needing heavy styling. It also gives your hair movement since the braid isn’t solid all the way through.
Start by making a regular braid base, then use your fingers to pull small sections outward to form the ladder gaps. Keep the braid centered so the pattern stands out clearly.
If you want a more dramatic effect, use slightly thicker sections as you braid. For a softer vibe, make the rungs smaller and more spaced out.
Cost is usually low, and you can keep it budget-friendly by using existing elastics. Trends in textured braids keep growing because they look interesting even with simple outfits.
To reduce frizz, smooth each section with a little leave-in conditioner before you pull the ladder loops.
13. Boxer Braids with Curled Ends
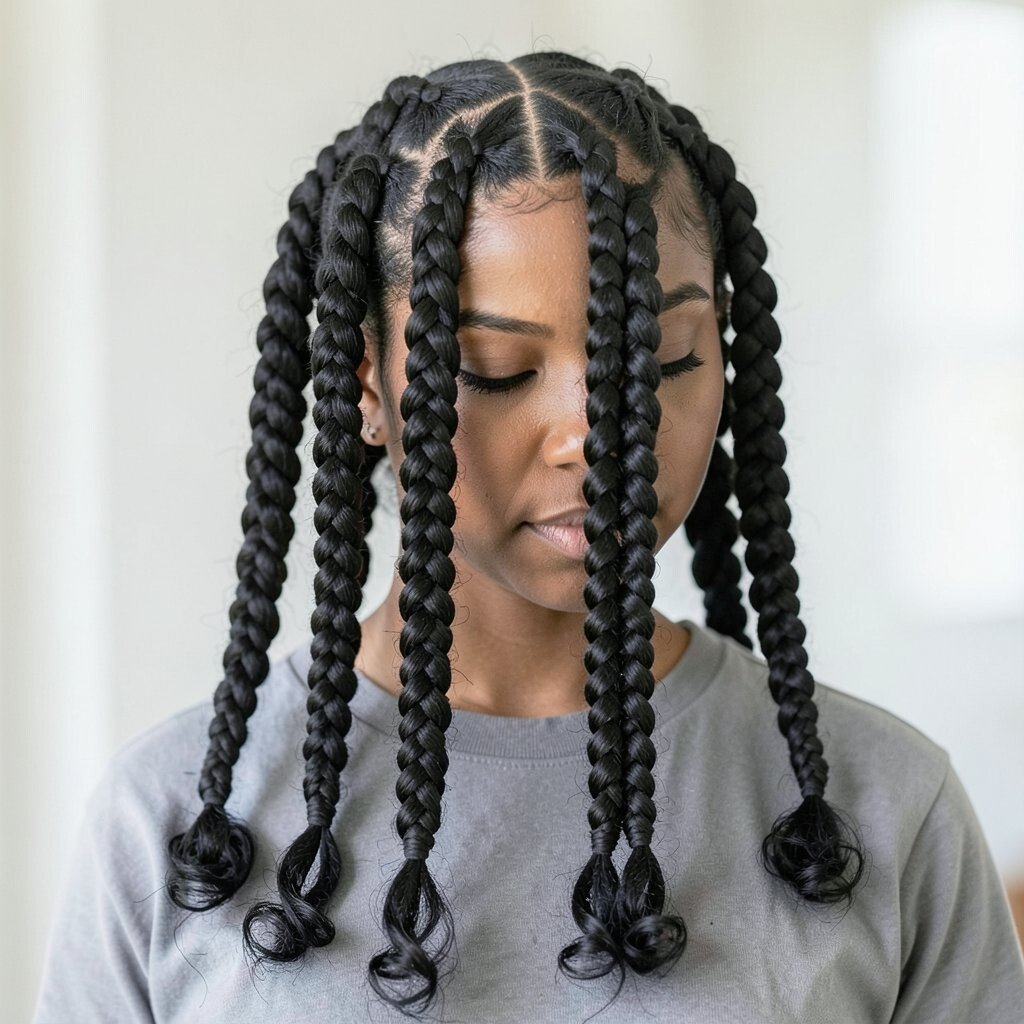
Boxer braids are bold because they sit high and close to the scalp. You’ll see two raised braids that look strong, then you can finish with curled ends for extra softness.
This style is great for anyone who loves a confident, sporty look. It also keeps hair secure during busy days, especially if your hair tangles easily.
Split your hair into two sections and braid each one using the Dutch method. Keep your tension even, then secure the ends with elastics.
For personalization, curl the ends with a wand or use flexi-rods for an effortless wave. If your hair is short, you can braid closer to the front and pin extra sections behind.
Cost considerations are simple since boxer braids mainly need elastics and maybe some edge control for smoother lines. Current trends love the mix of sporty braids plus soft, bouncy ends.
14. Crown Braid Chignon Style
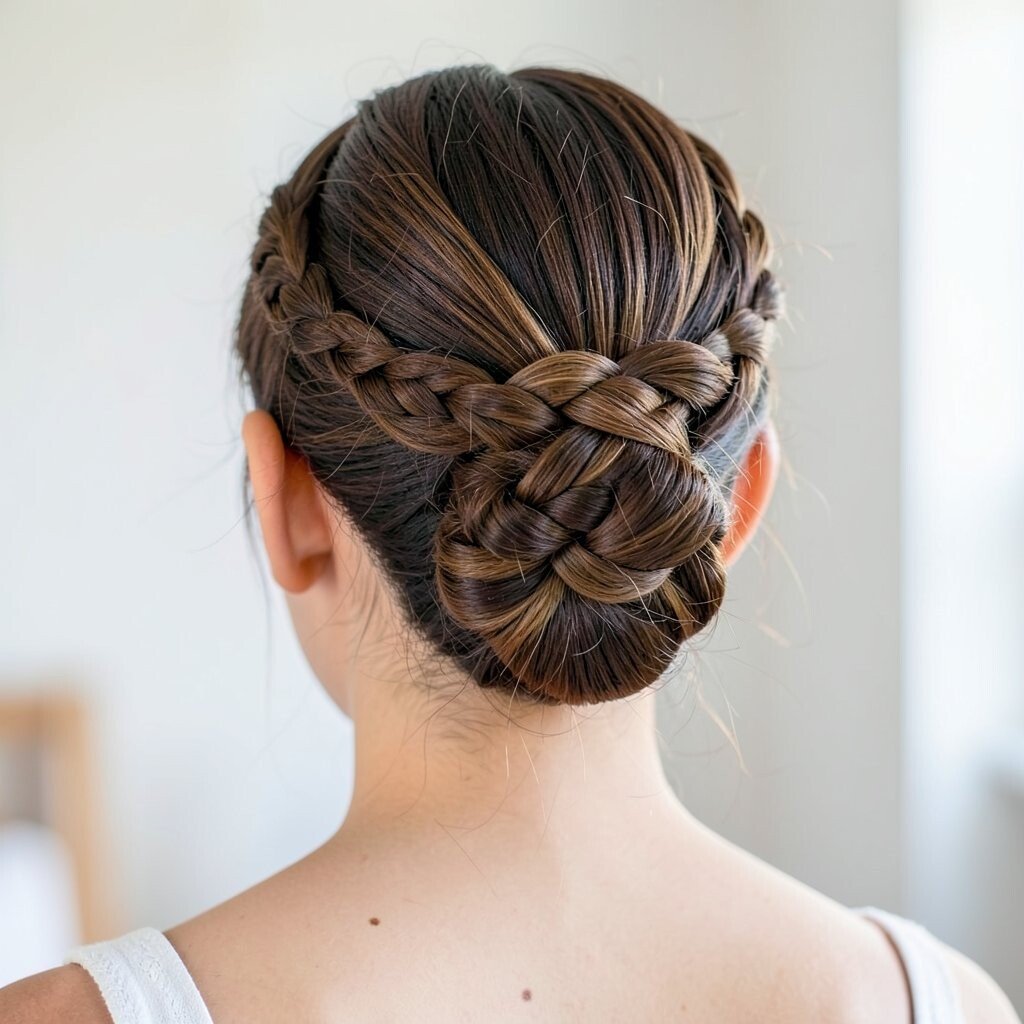
A crown braid chignon feels fancy because the braid wraps around a gathered bun. You’ll see a neat braided band above, then a smooth bun underneath that looks polished.
This hairstyle is perfect for dinners, weddings, and events where you want a clean silhouette. It’s also helpful if you want your hair to feel lightweight because the bun lifts it up.
Start with a French braid around your head, then gather remaining hair and twist it into a bun. Secure with bobby pins and an elastic as needed.
For personalization, keep the braid tight for a sleek look or loosen it for a romantic, softer feel. Adding a small hair accessory can make it look more expensive without extra effort.
Cost is usually manageable because you can use your regular hairpins and a basic bun maker if you have one. This style fits current trends toward braided updos with defined shapes.
Spray lightly before you pin so everything stays in place when you move.
15. Braided Space Buns
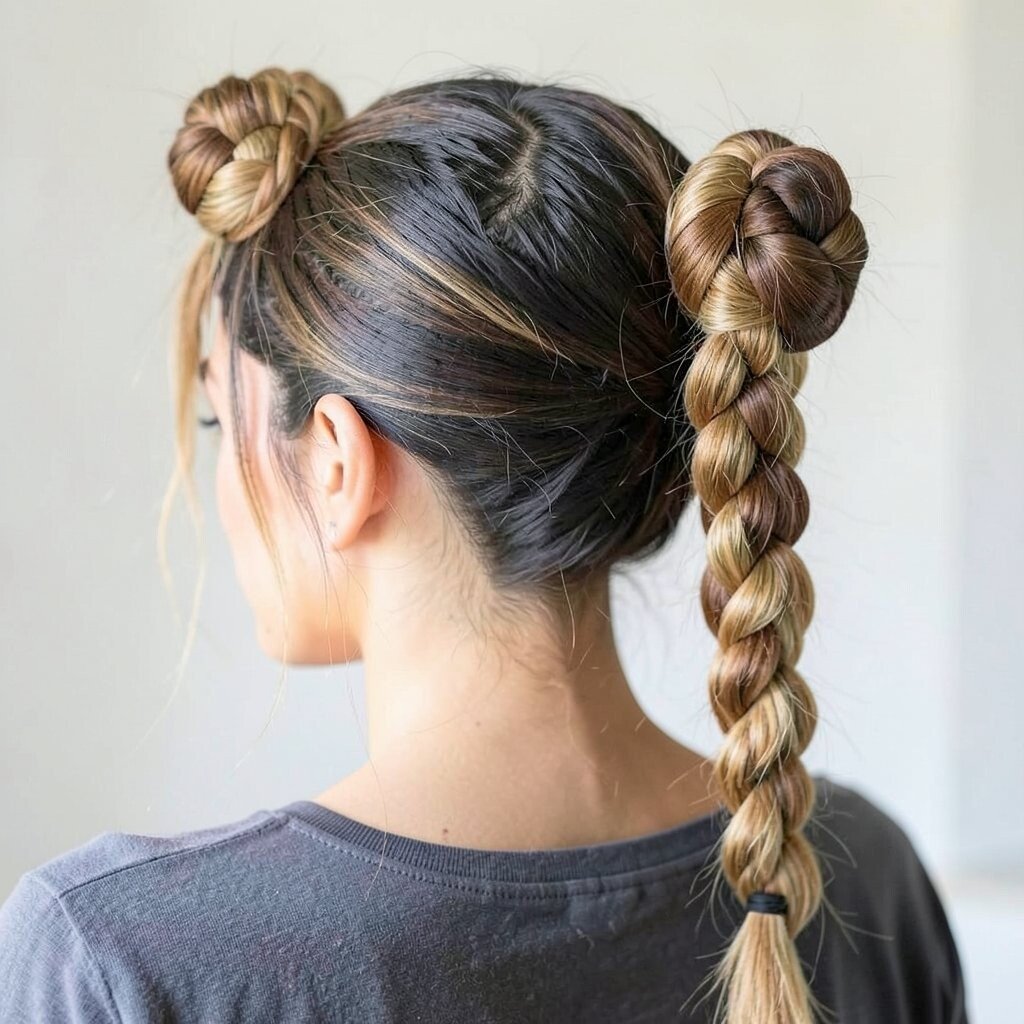
Braided space buns are playful and energetic, and they look amazing in photos. You’ll notice two small buns topped with braids, giving a fun “two stories” hairstyle effect.
This style is great for festivals, casual parties, or anytime you want your hair to feel lively. It also keeps your hair off your shoulders, which is a bonus when it’s hot.
Section your hair into two halves, then braid each section before forming buns. Secure each bun with pins and elastics, and adjust the braid so it wraps neatly around the bun.
For personalization, add small colored elastics to the braid ends or wrap a thin ribbon around the bun. If you have curly hair, let the curls peek out for a softer look.
Cost considerations are low, and you can create the whole look with basic hair tools. Trends keep leaning into fun, graphic hairstyles like this because they feel bold and fresh.
16. Side Dutch Braid with Twist Finish
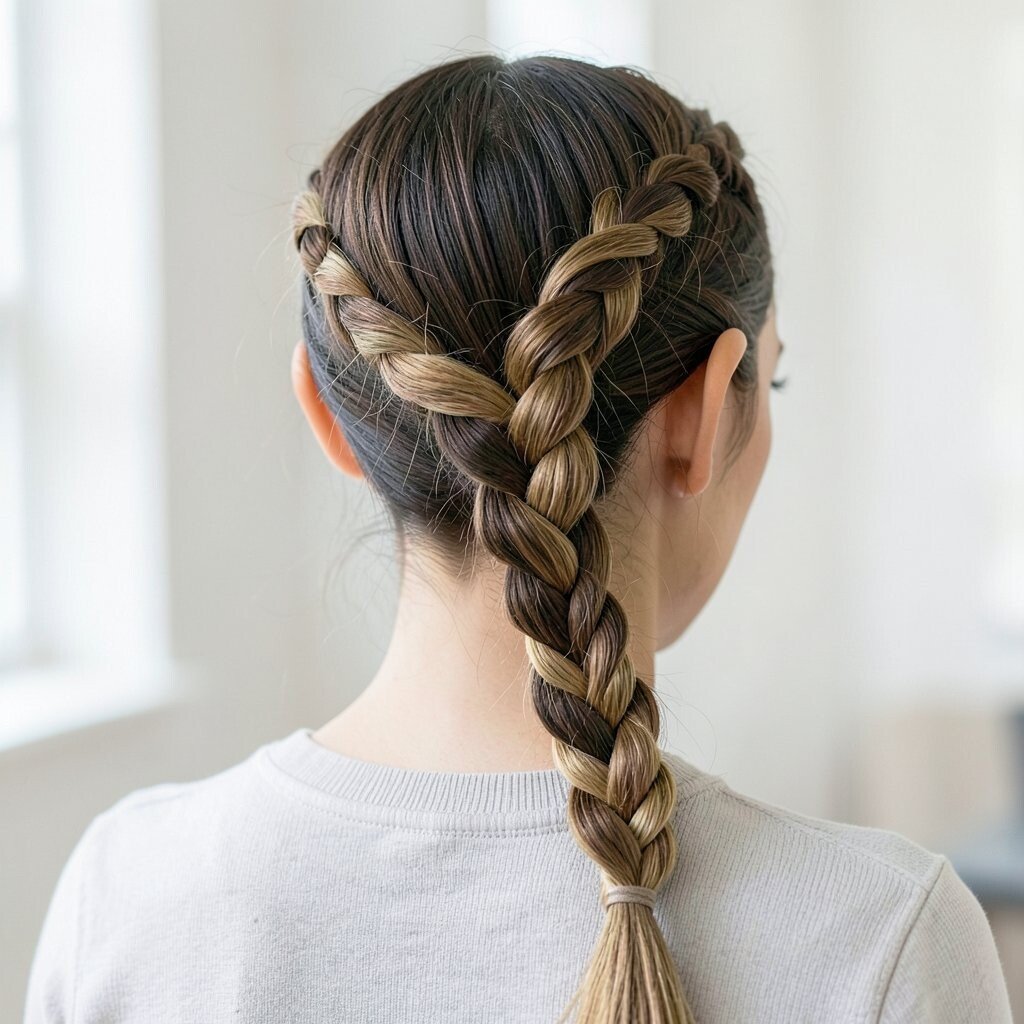
A side Dutch braid looks artistic because the braid travels diagonally across your scalp. You’ll see the braid raised and visible, then it ends in a twisted section instead of a standard three-strand braid.
This is a good choice when you want something that looks “styled” but not overly complicated. The twist finish gives a smooth end that won’t unravel easily.
Begin the Dutch braid from the crown area, using small additions so the braid stays neat. When you reach the end, stop adding hair and twist the remaining lengths around each other.
Secure the twist with a pin and gently tug a few loops to add volume. For personalization, choose a deeper side part so the braid line looks extra intentional.
Cost is minimal, and you only need pins, elastics, and maybe a styling cream. Current trends highlight asymmetry, so this style naturally feels modern.
If you want extra shine, use a light serum on the twisted end.
17. Halo Braided Ponytail
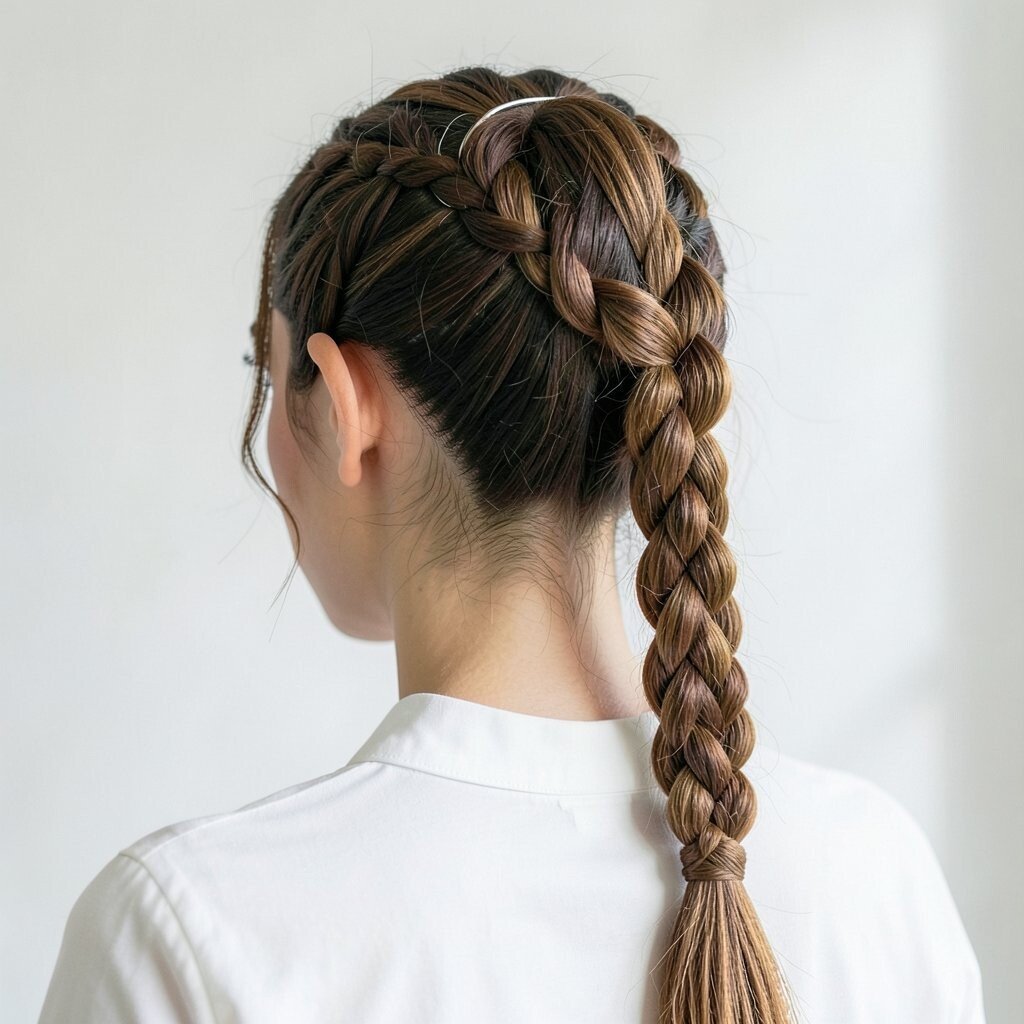
This braided ponytail feels like a sporty crown, mixing the ease of a ponytail with braid detail. You’ll see a ponytail secured high, with a braid wrapping around the base like a halo.
It’s perfect for school, travel days, and workouts since it keeps hair controlled. The braid around the base also helps hide the elastic so the style looks cleaner.
Make a high ponytail, then take a small strand from underneath and braid it. Wrap the braid around the base and pin it in place, then smooth the ponytail with your hands.
For personalization, braid the ponytail itself or add small loops by lightly tugging the ponytail sections. If your hair is thick, use a stronger elastic so the ponytail stays secure.
Cost considerations are low because it’s mostly basic tools. Trends favor sleek ponytails with braided details since they look neat and current.
18. Braided Bun with Zigzag Part
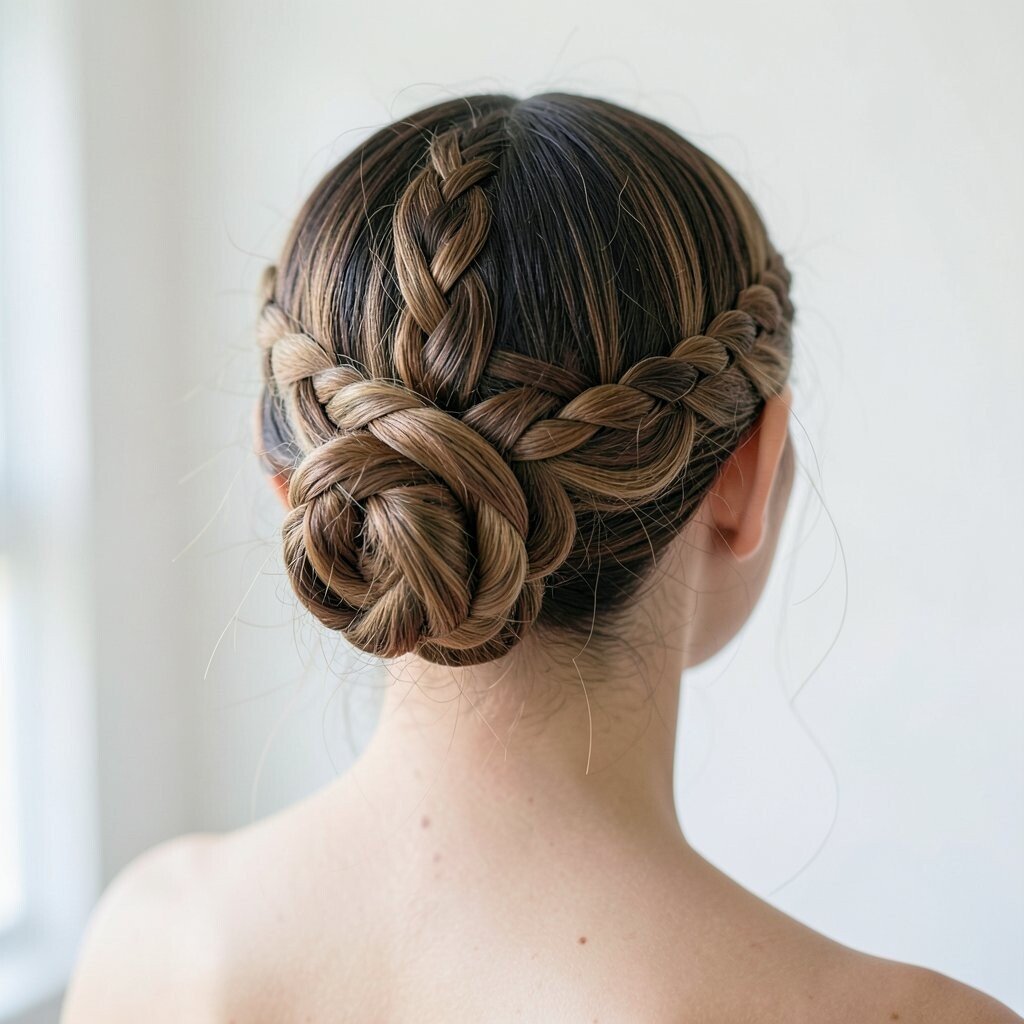
A zigzag part makes this braided bun look extra creative. You’ll see a sharp, wave-like parting line, then braids gathered into a bun for a structured finish.
This hairstyle is unique because the part itself becomes the design. It’s also practical when you want your style to last since the bun keeps everything tucked away.
Create a zigzag part using the tip of a comb, then braid each side or twist sections into one direction. Gather into a bun at the back and secure with pins.
For personalization, keep the bun tight for a sleek look or loosen the braid loops for a softer, fuller effect. If you have bangs, blend them into the braid so the design looks intentional.
Cost is budget-friendly since you can do it with standard hair tools. This style fits current trends toward graphic parts and braided structure.
Use a light hold spray at the end so the zigzag part stays crisp all day.
19. Mohawk Braid with Corners and Curls
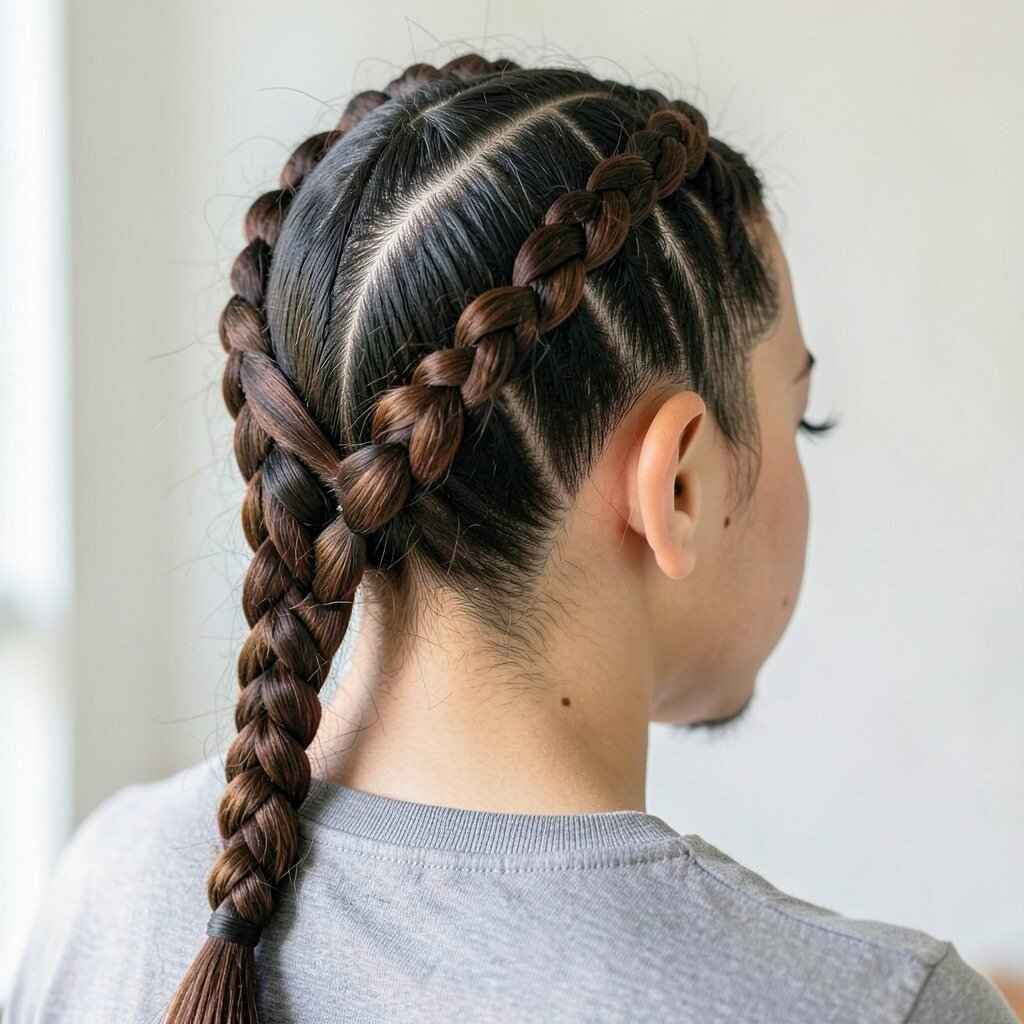
A mohawk braid creates an edgy look that’s still wearable when you keep it neat. You’ll see a central braid that runs like a stripe down the top, with corners defined by added sections.
This style is great when you want something daring but still practical for events. It also keeps hair controlled while showing off your face and neck.
Start by parting out a central section of hair, then braid that section using a Dutch method. Add hair only from the sides of the central strip to create clean edges.
For personalization, make the braid pattern tighter for a sharp vibe or loosen it slightly for a softer mohawk. Finish the ends with curls so the look balances bold structure with a gentle finish.
Cost considerations are moderate only if you need extra styling tools like a curling wand. Trends keep favoring statement braids, so this one is perfect for getting attention in a fun way.
20. Braided Crown for Curly Hair
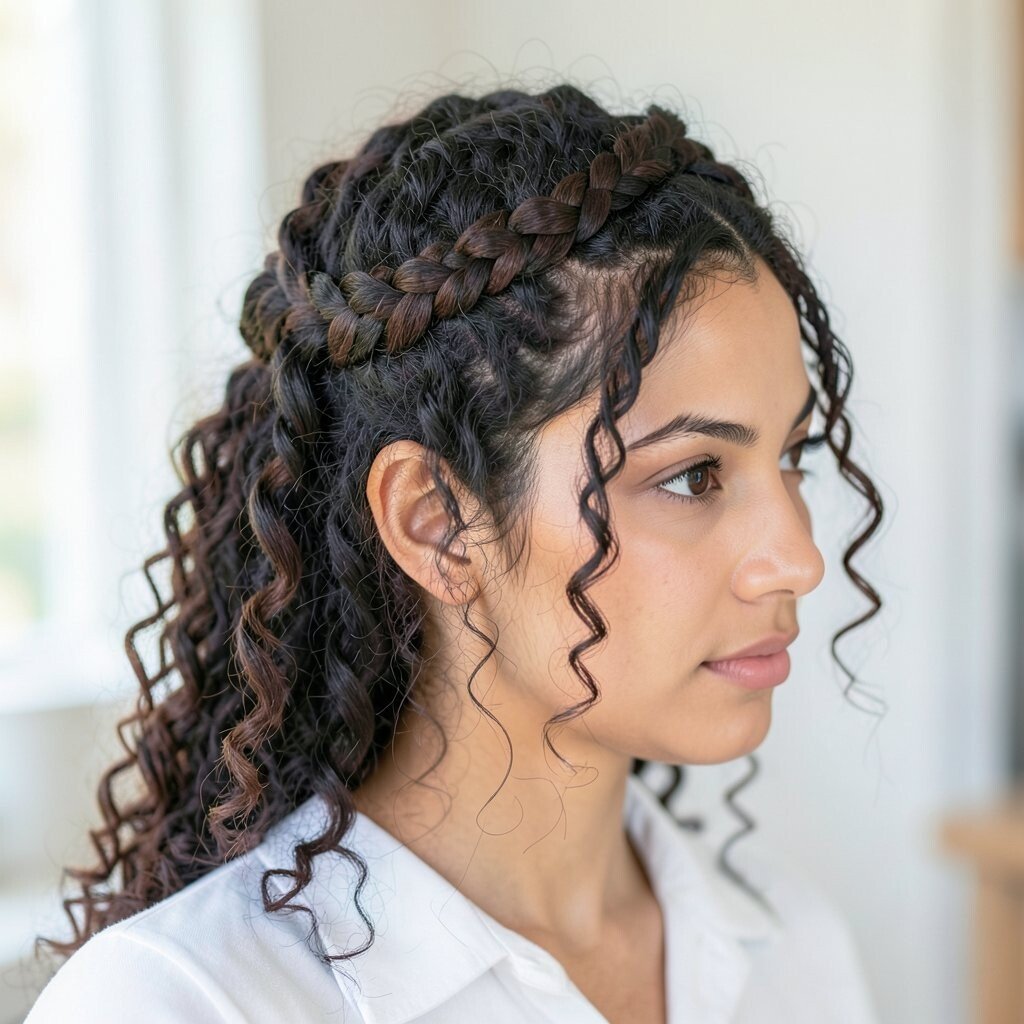
Curly hair makes a braided crown look especially lush and full. You’ll see a braid that blends into your curls, creating a natural halo effect with lots of texture.
This hairstyle is beneficial because curls already hold shape, so the braid looks defined longer. It also reduces tangling by guiding curls away from your face.
Start with slightly damp hair and use a leave-in product to help curls stay bouncy. Create a braid from the front, adding small sections as you go, then pin the end underneath.
For personalization, keep the braid thin for a gentle look or make it wider for more crown volume. You can also use a soft scrunchie instead of tight elastics to avoid flattening curls.
Cost is low since you likely already have curl-friendly products at home. Current trends love natural texture, and this style is a beautiful way to show yours off.
After pinning, let your curls fall naturally so the crown looks effortless.
21. Braid-and-Scarf Updo
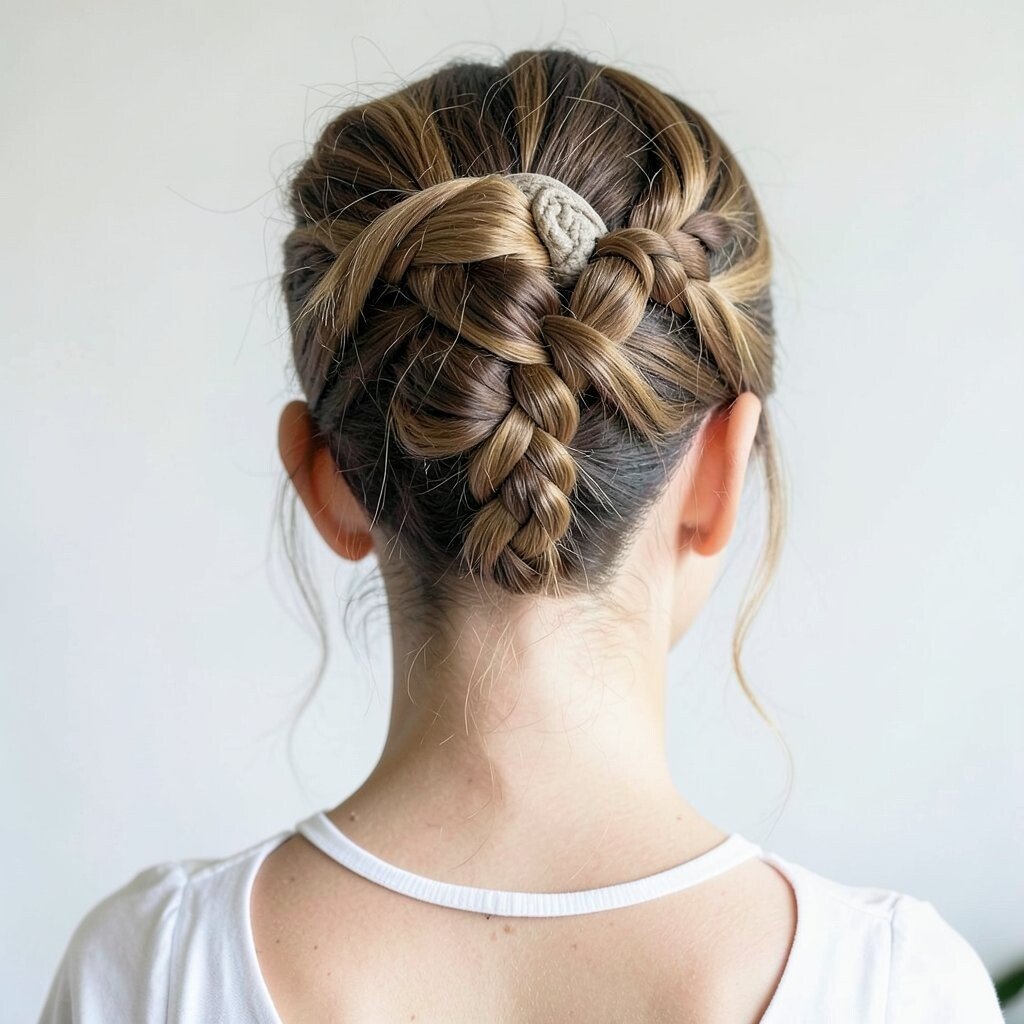
A braid-and-scarf updo looks unique because the scarf adds color and depth. You’ll notice a braid wrapped around a bun or twist, with fabric strands weaving in for a stylish finish.
This style is great when you want a ready-to-go look without buying lots of new accessories. The scarf also helps hold your hair in place and adds comfort to your scalp.
Choose a scarf that matches your outfit, then tie it around your bun base after you braid or twist your hair. Use bobby pins to secure loose ends so everything stays neat.
For personalization, use a patterned scarf for a bold vibe or a solid color for a sleek, classic mood. You can also braid the scarf ends into the braid for extra visual interest.
Cost considerations are friendly because scarves are often reusable and affordable. This style fits current trends toward head accessories and retro-inspired hair moments.
To keep it polished, smooth flyaways with a small dab of cream before you pin everything down.
22. Braided Curtain Bangs with Clips
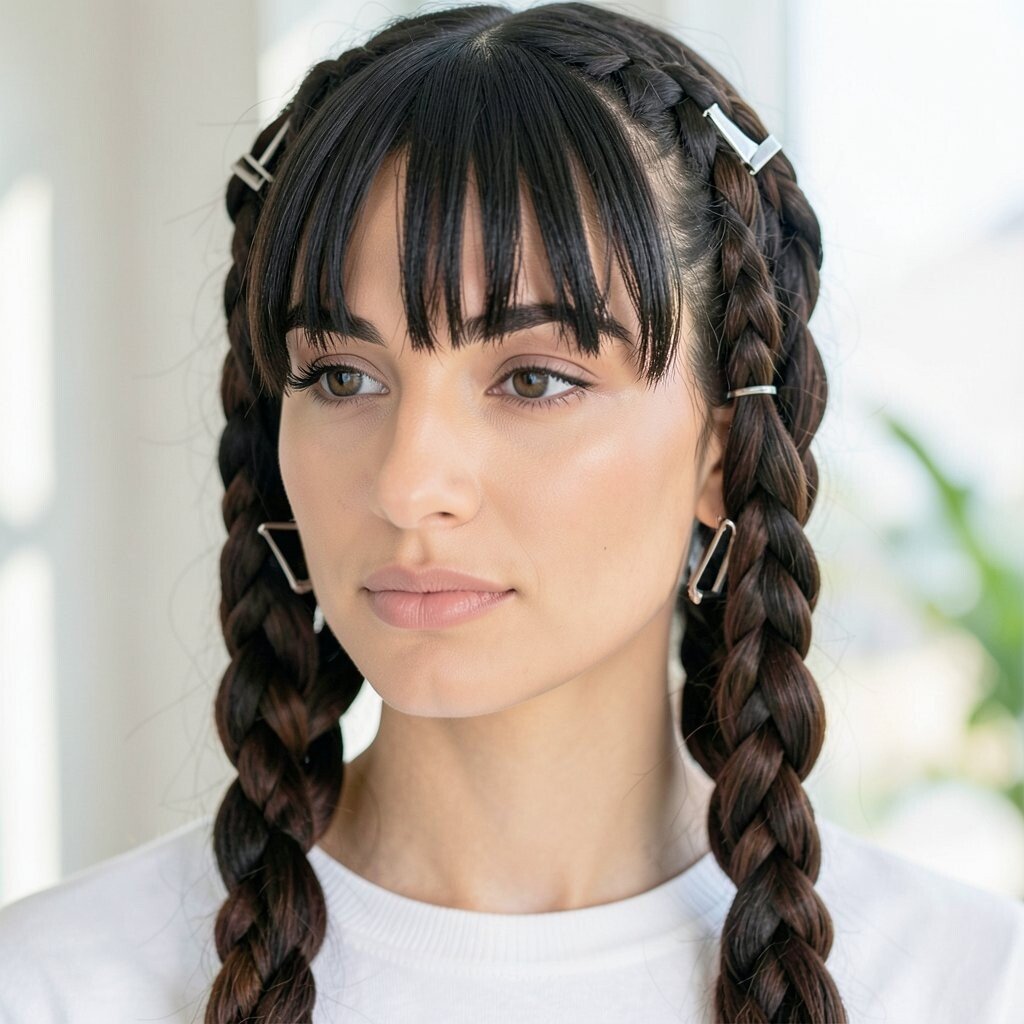
Braided curtain bangs make your front hair look styled while still natural and flowy. You’ll see two soft braid lines on either side, letting your bangs hang in a gentle frame.
This hairstyle is beneficial because it keeps the front neat while letting the rest of your hair move. It’s also a nice option if you’re growing out your bangs and want a cute in-between style.
Take small sections near each temple, then braid them lightly while leaving the center fringe free. Secure each braid end with small clips so your hair falls like a curtain.
For personalization, make the braids slightly thicker for drama or thinner for a delicate look. You can also add tiny beads near the ends for a fun touch.
Cost is low since clips and elastics are usually inexpensive. Current trends favor face-framing shapes, and this style matches that mood perfectly.
Finish by lightly misting the bangs area so the braided sections hold their shape without feeling crunchy.