
The camera loves a hairstyle that looks neat, comfy, and full of personality. Picture day is the perfect chance to make hair feel special without making mornings feel stressful.
With the right cut, a little styling help, and smart comfort choices, kids can feel confident the whole day. Below are picture-ready ideas that fit different hair types, school dress codes, and time limits.
1. Cozy Side Part With Soft Waves
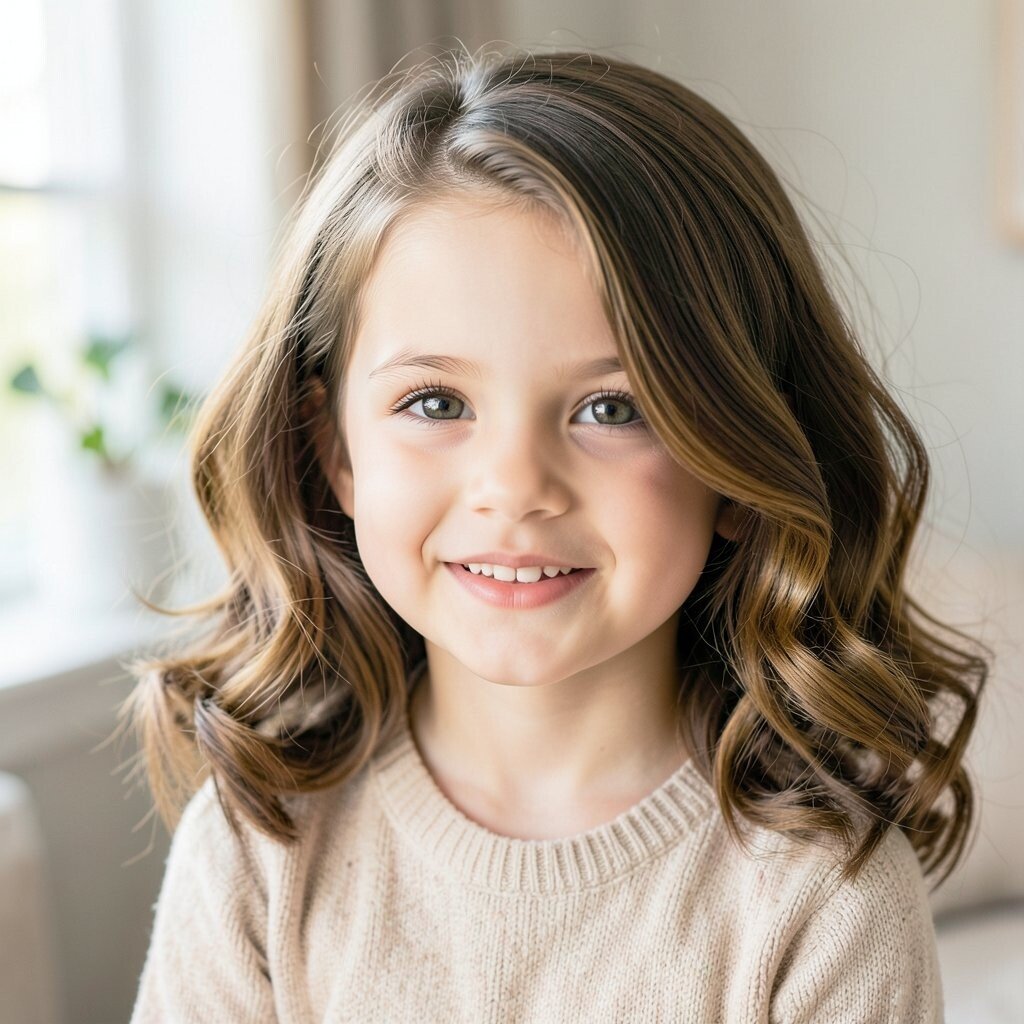
Start with damp hair and make a gentle side part using your fingers. Sweep the hair to one side and add light waves with a brush and a tiny bit of styling cream.
This style looks tidy in photos because the waves catch light without looking messy. It also keeps hair out of the face, which helps kids stay focused during picture day. For personalization, try a deeper side part for thick hair or a flatter part for finer hair so it matches your child’s natural volume.
2. Bubble Braids With Tiny Ribbons
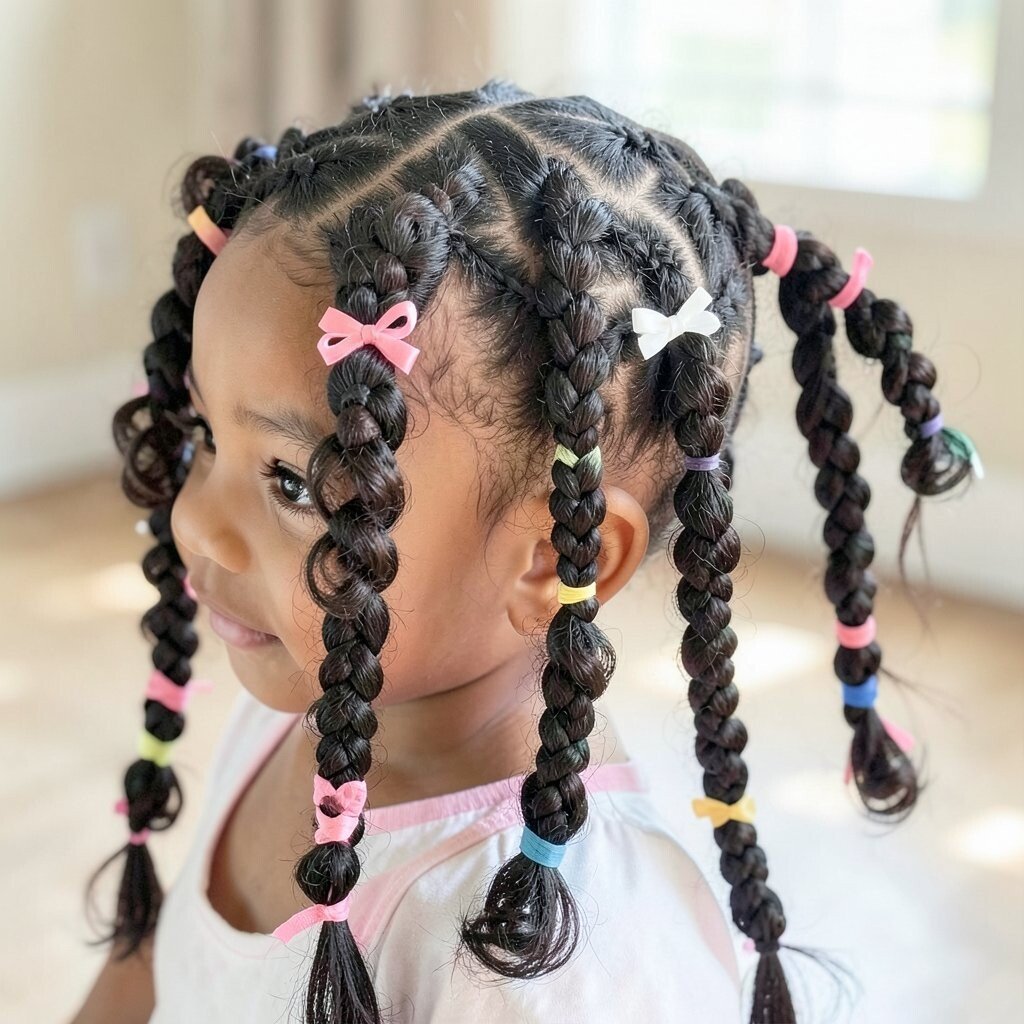
Section hair into small sections and braid each one, then tuck little “bubbles” along the braid. Add a small ribbon at the end of each braid, using colors that match a favorite shirt or backpack.
Bubble braids look playful but still polished, so the photo shows both sweetness and order. They are unique because the pattern creates lots of visible texture, even from far away. If hair is slippery, use a light gel before braiding, and consider spending a little on comfortable no-snag elastics that won’t pinch.
This is also great for kids with medium to long hair who want their style to last through classes and recess. To make it practical, braid slightly tighter near the scalp and loosen the ends just a bit for a softer look. For current trends, many kids are loving “micro” decorative details, and ribbons feel classic while still feeling modern.
3. Sleek Half-Up Clip With a Shine Finish
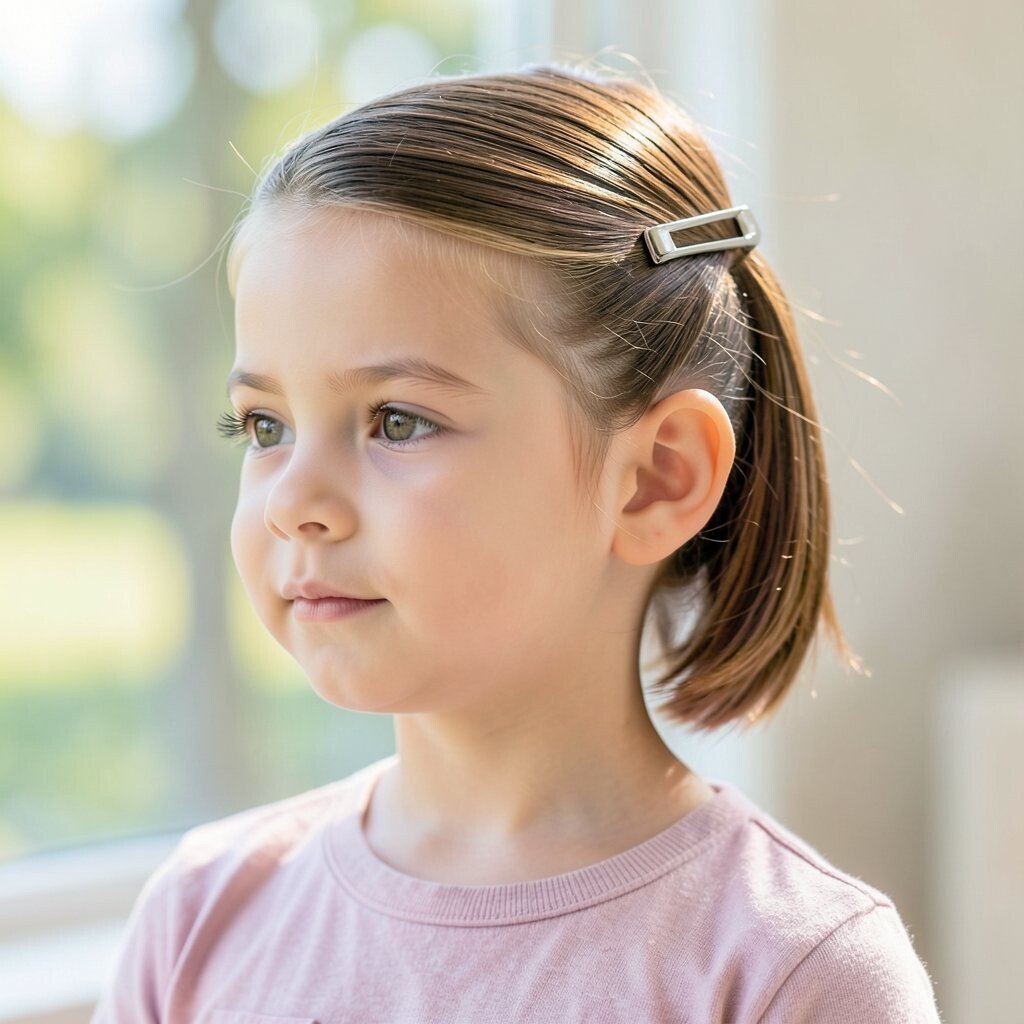
Gather the top section of hair and clip it back with a cute barrette or claw clip. Smooth the rest of the hair down with a soft brush so it looks glossy and calm.
This half-up style shows the face clearly, which makes smiles look brighter in school photos. It also works for many hair types, including straight and wavy hair, because the top section keeps everything tidy. If you want uniqueness, choose a clip with a tiny star or flower shape and match it to the outfit.
For practicality, use a small amount of shine spray or smoothing serum so flyaways don’t pop up later. It can be a budget-friendly choice because one good clip can be reused for multiple events. If your child has fine hair, tease very lightly at the crown before clipping so it holds without feeling heavy.
In trends right now, clean lines and simple accessories are getting lots of attention, and this style fits that vibe perfectly.
4. French Braid Crown for a Regal Look
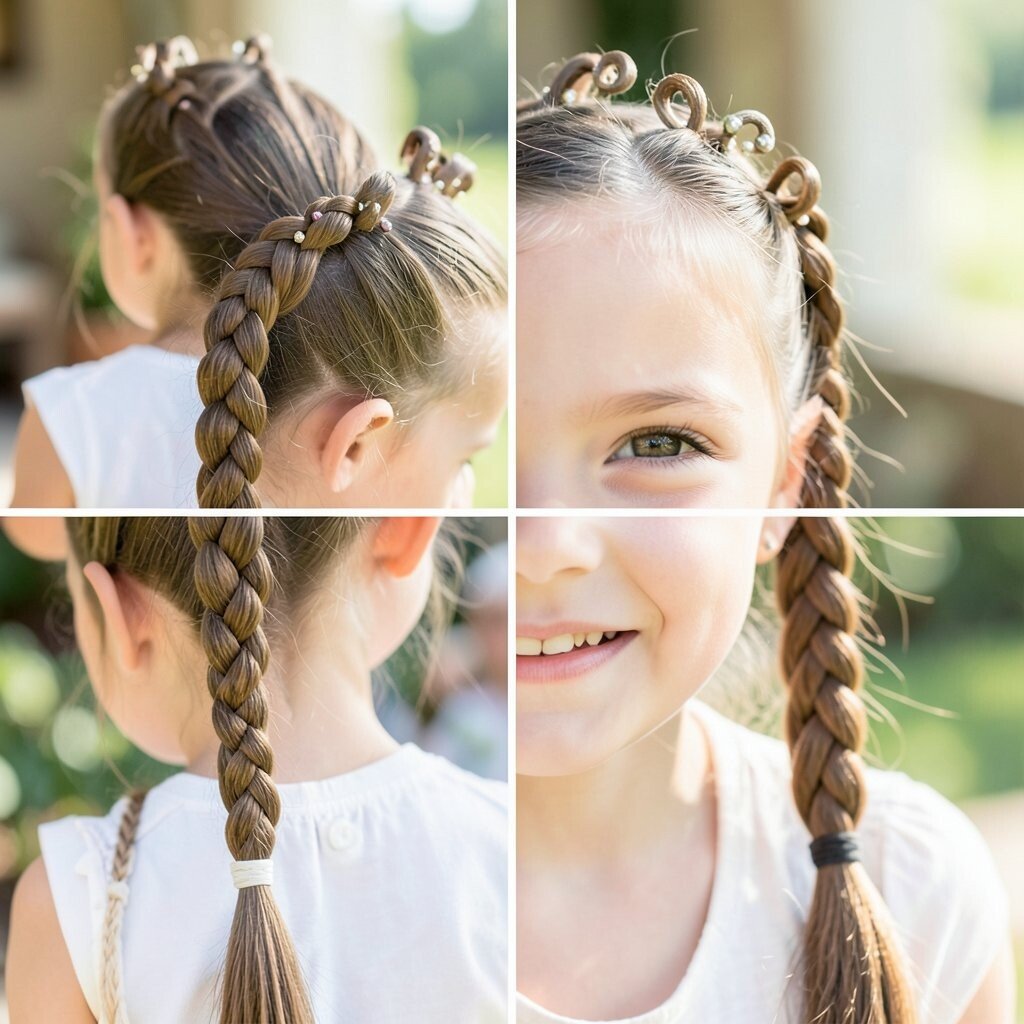
Part hair in the middle and start a French braid along the hairline, gradually adding hair to each side. Continue until the crown wraps around, then secure the end under the braid with a hidden elastic.
A braided crown looks elegant in photos and helps keep hair perfectly in place. It is especially helpful for active kids because the braid reduces tangles and flying hair. To keep it comfortable, choose a soft elastic and avoid pulling too tightly near the edges.
5. Messy-to-Perfect Top Knot With Soft Tendrils
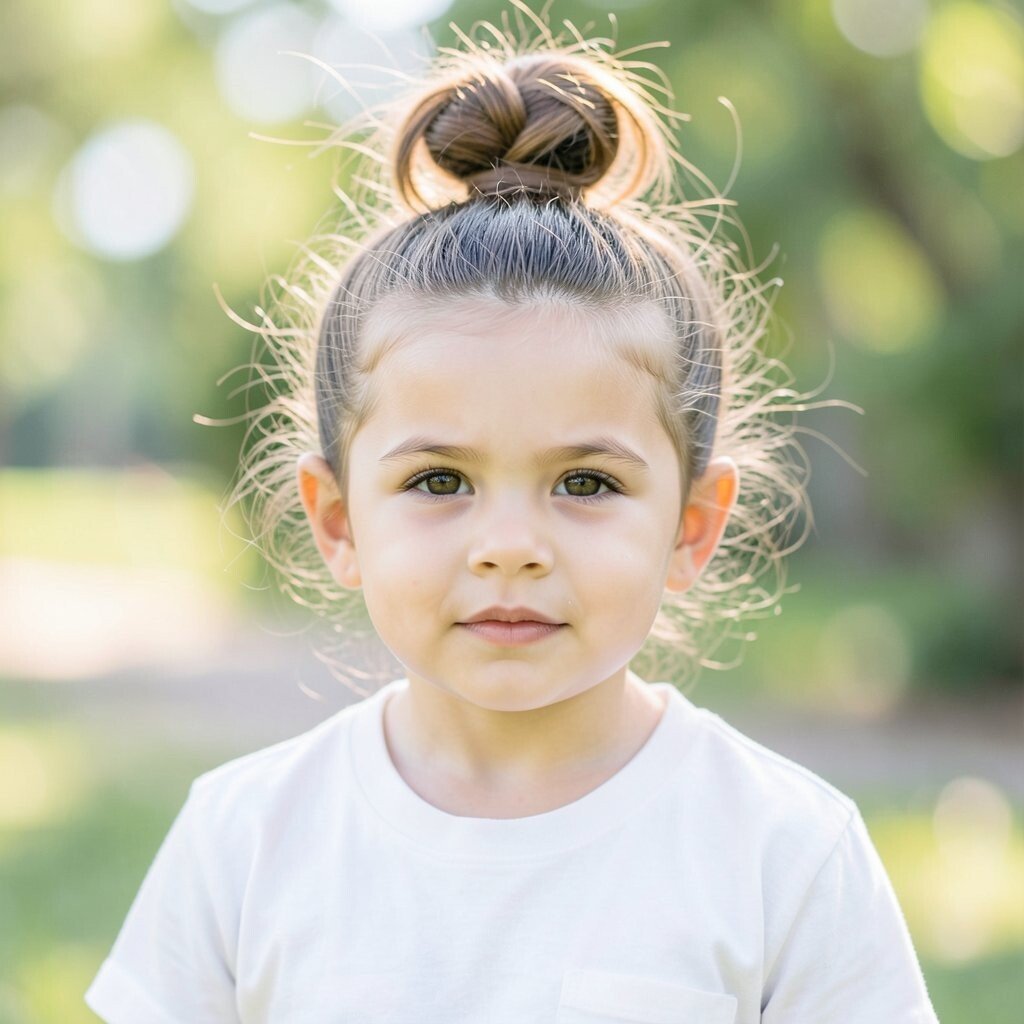
Pull hair into a high or mid top knot, then leave a few loose strands near the temples. Wrap with a scrunchie or elastic, and gently tug for volume so it looks intentionally styled.
This option is unique because it blends “cool” texture with photo-ready neatness. It benefits kids who dislike complicated braids because it’s quick and doesn’t require many steps. For personalization, swap the elastic for a patterned tie or add a small bow if your child loves extra cute details.
For a practical trick, lightly dampen hair before tying so it holds longer through the day. Cost is usually low since you need only an elastic and maybe a small amount of hair spray. Current trends are leaning into relaxed buns and playful flyaway strands, so this style feels trendy without looking like you tried too hard.
6. Classic Low Ponytail With Braided Strap
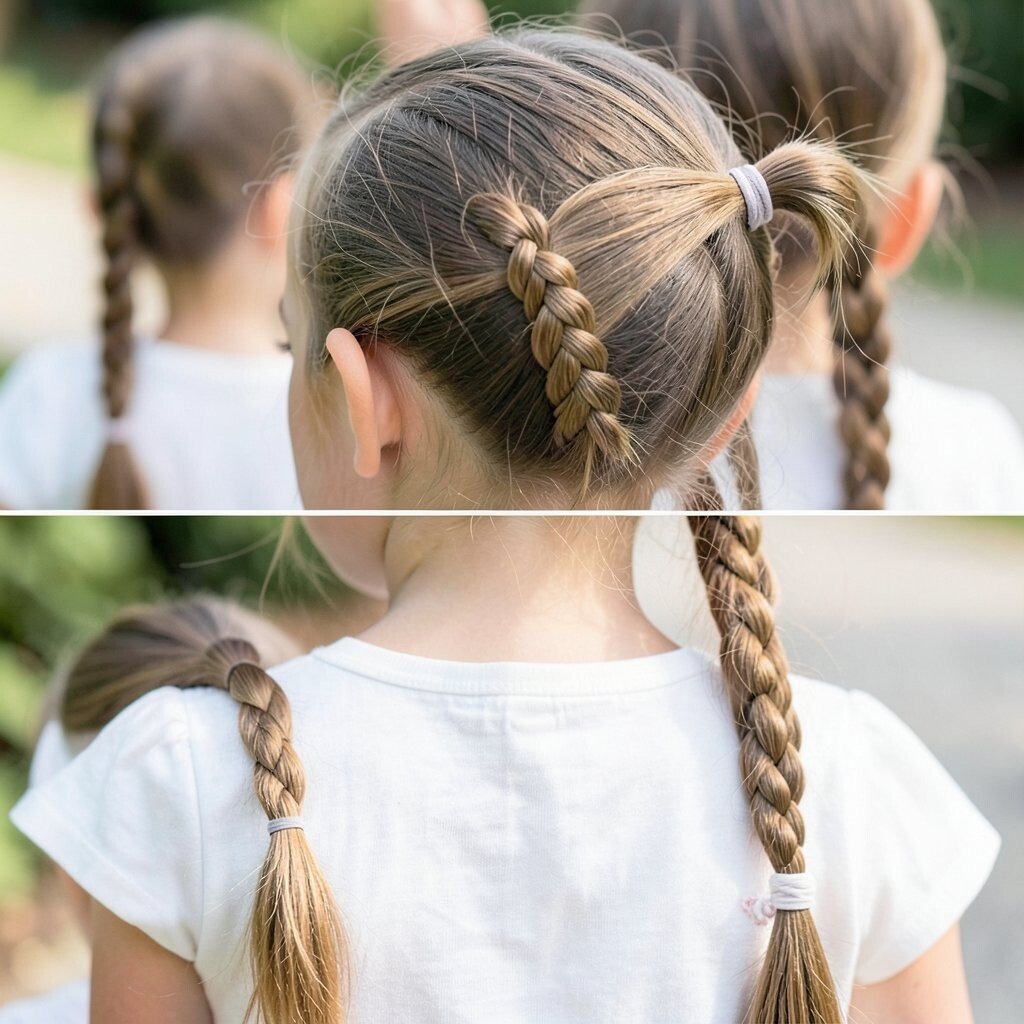
Start with a low ponytail and secure it at the nape of the neck. Take a small piece of hair from the ponytail, braid it, and wrap the braid around the elastic to hide it.
The braided strap makes a simple ponytail look more special in photos. It benefits kids with straight or slightly wavy hair by keeping hair smooth and less tangled. For personalization, use a ribbon or a small charm at the end of the braid for a fun accent.
If your child’s hair is thick, make the braid a bit wider for a balanced look. If it’s fine, use a tiny bit of mousse at the roots so the ponytail has a little lift. Keeping the braid snug but not tight helps comfort, which matters when photos take a while.
7. Two Side Pigtail Braids With Even Spacing
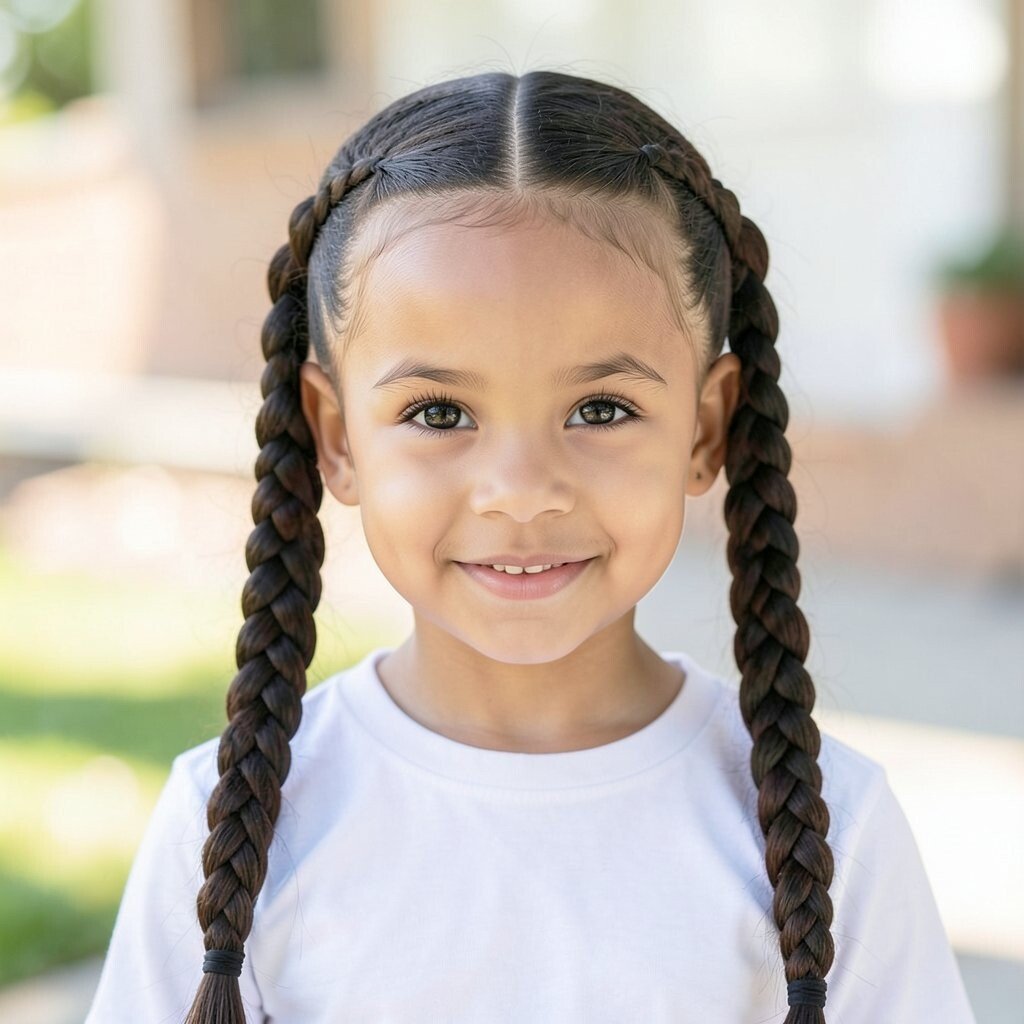
Divide hair into two equal sections and create pigtails on each side. Braid each pigtail the same way so the symmetry shows clearly in pictures.
This hairstyle looks bright and friendly because the braids frame the face from both sides. It’s also great for kids who like their hair off the shoulders but still want something fun to watch. To keep it practical, use the same number of braid sections or guiding fingers so both sides look neat.
For personalization, choose hair ties in different colors or pick one color that matches the outfit. Cost considerations are easy here since elastics and a basic brush cover most of the needs. If your child has curly hair, start with a leave-in conditioner to reduce frizz and keep braids looking smooth.
Right now, balanced, tidy braids are popular because they look sharp in school photos and hold up well in different lighting.
8. Half-Up Twisted Crown With Small Clips
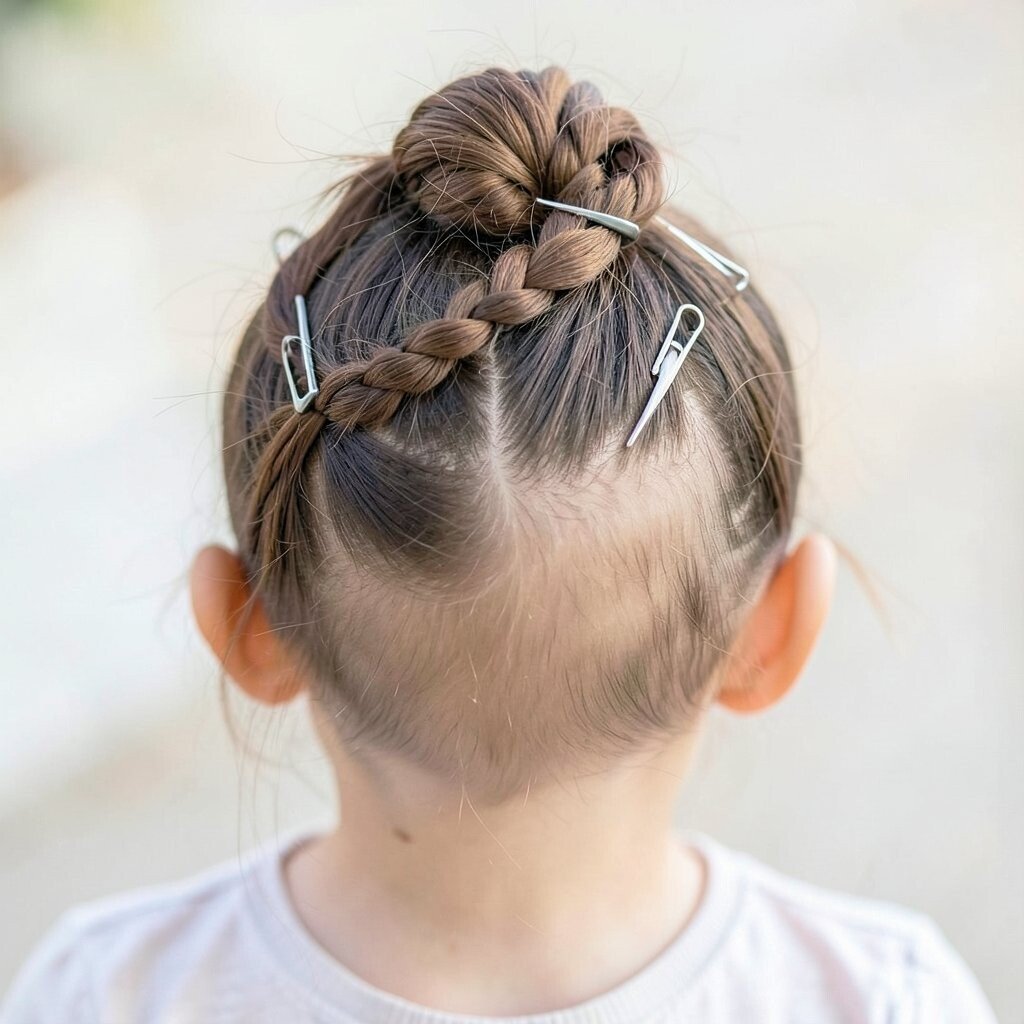
Take two small sections near the temples and twist them back, then cross them over the top. Secure with small clips or bobby pins, leaving the rest of the hair down.
This look feels unique because the twists create a tiny crown without the full braid work. It benefits kids with medium-length hair by keeping the front neat while letting the rest fall naturally. For personalization, add clips with simple designs that match the school theme or a favorite color.
9. Straight Hair With a Front Flip Pin
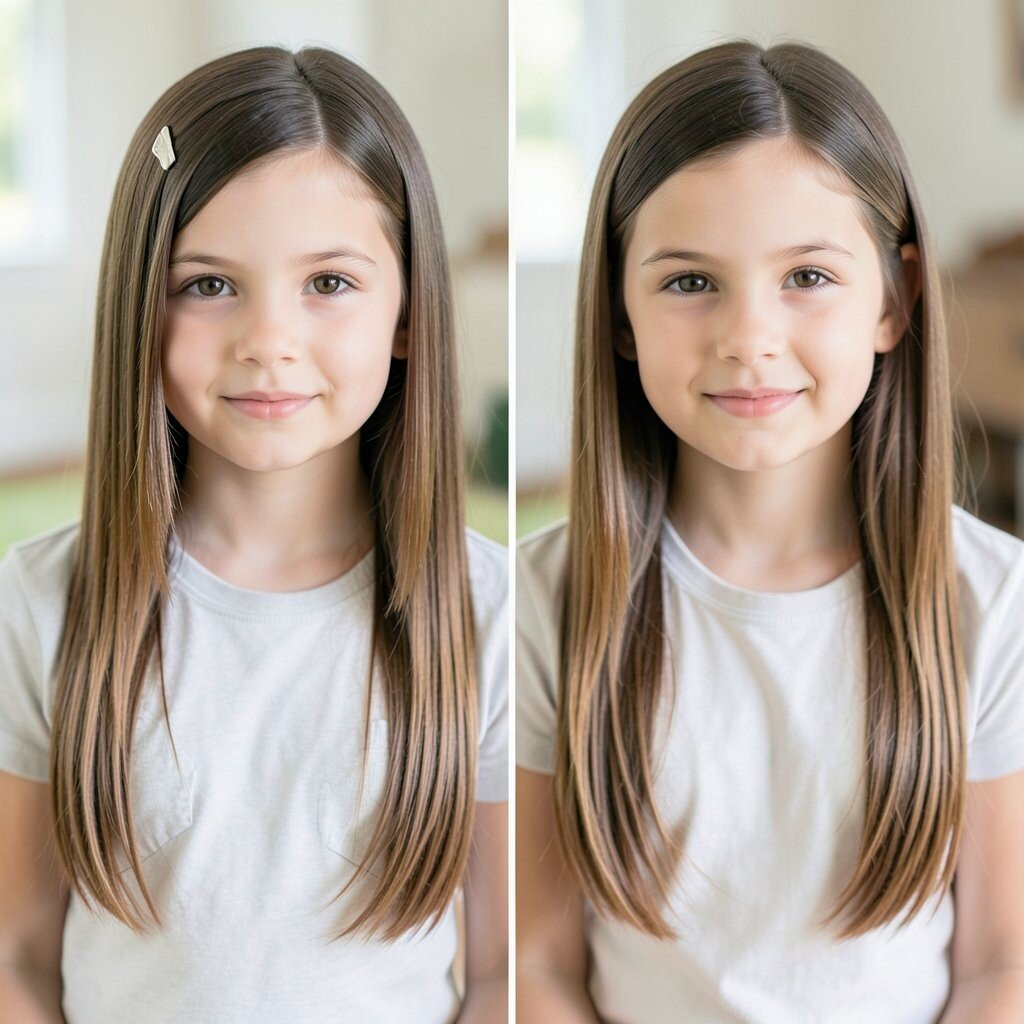
Brush hair until smooth and create a tiny front “flip” by rolling the ends inward near the face. Use a small pin or clip to hold the rolled section so it stays picture-ready.
This style makes hair look glossy and intentional, especially when lighting hits the front pieces. It also helps kids who get annoyed by hair touching their cheeks. For practical comfort, use soft pins and place them where hair naturally lies so they don’t poke.
To personalize, try a side flip instead of a center flip for a playful look, or add a sparkly clip if your child loves shine. Cost is usually low because it’s mostly brush work and a few pins. Current trends include simple, neat styling tricks rather than heavy heat, which makes this a great choice for busy mornings.
10. Pull-Through Ponytail With a Ribbon Bow
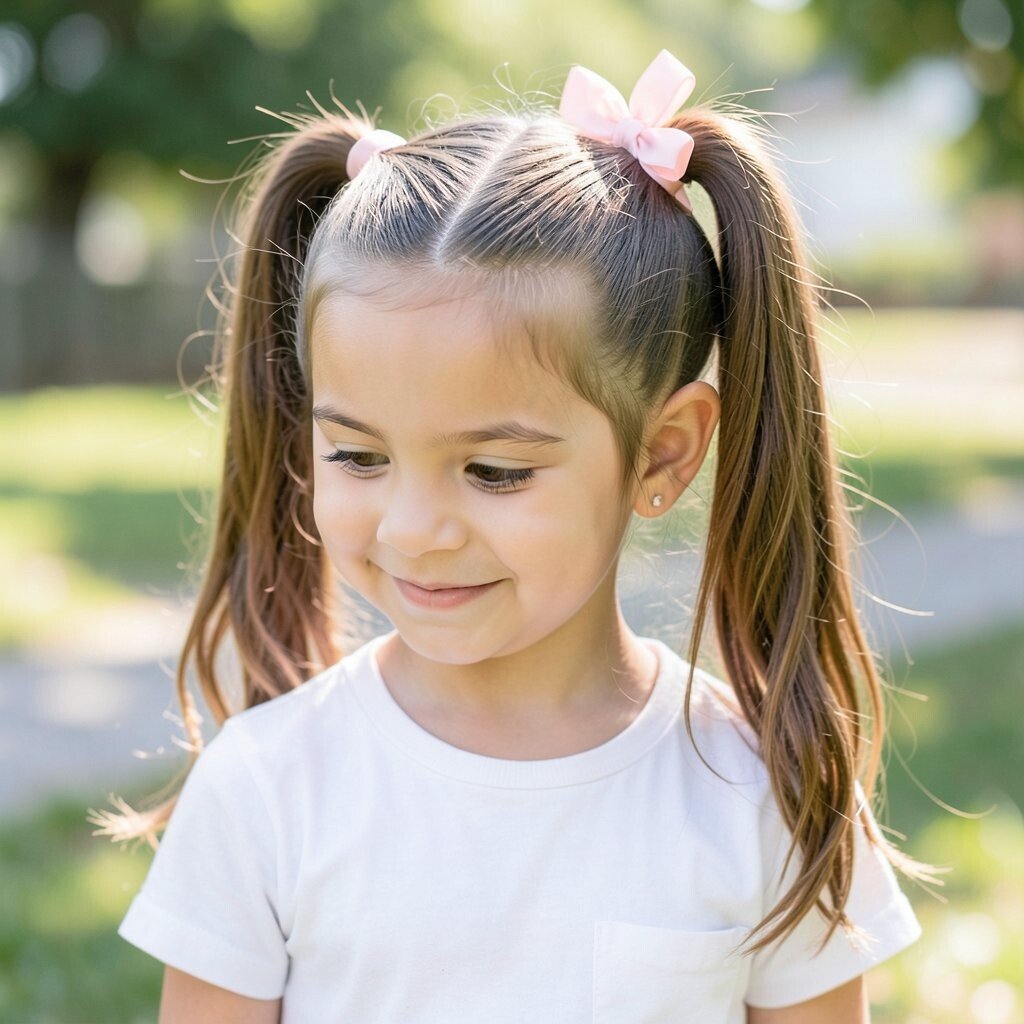
Secure hair into a ponytail and gently pull through the hair above the elastic to create a loop effect. Adjust the loop to look full, then finish with a ribbon bow tied around the base.
This pull-through style looks modern and photogenic because the loop adds shape and depth. It benefits kids who want something cute that still feels light and not too tight. For personalization, choose a ribbon color that complements the outfit, and keep the bow slightly off-center if your child likes a unique look.
For practical tips, make sure the elastic is strong so the loop doesn’t loosen. If hair is very slippery, use a small amount of dry shampoo or styling spray to help grip. While ribbons can cost a bit, one good ribbon can last many picture days and can be reused for other events.
11. Side Swept Bangs With a Soft Headband
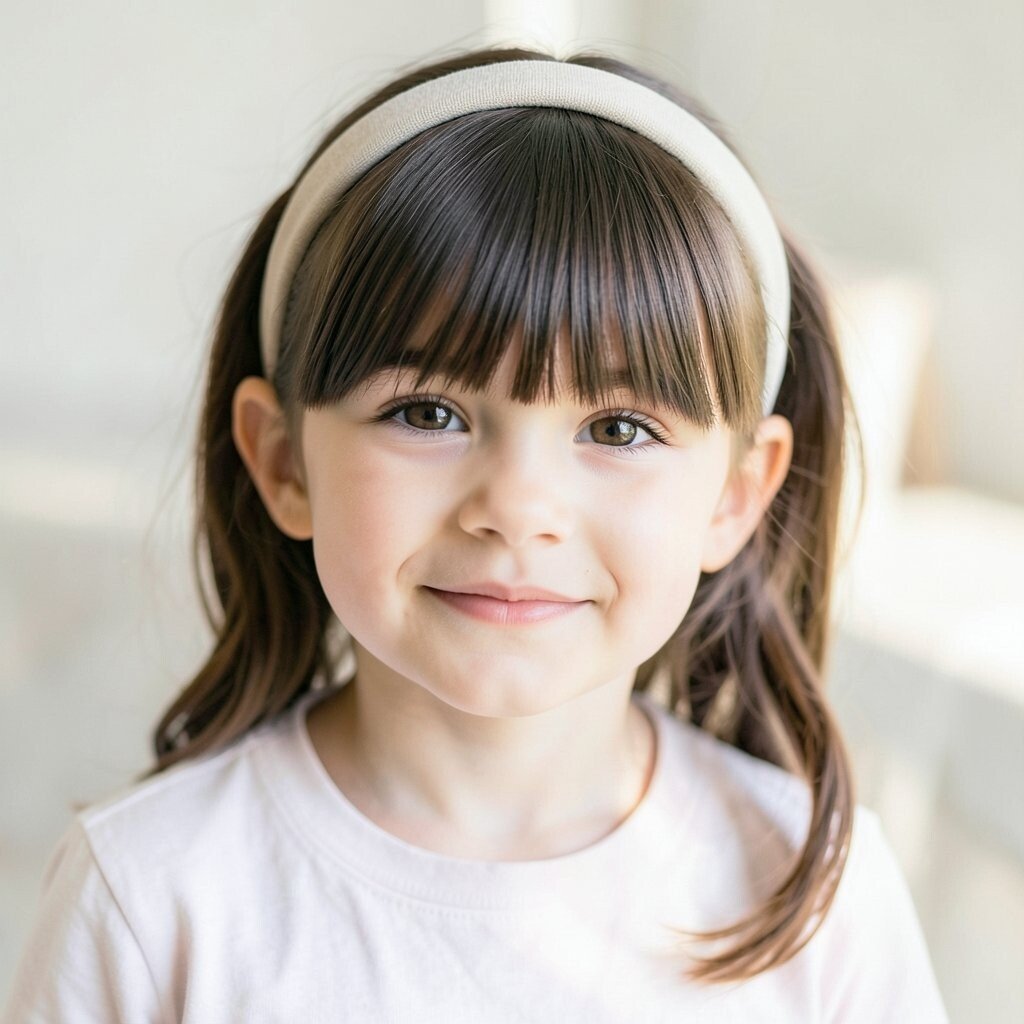
Sweep hair across the forehead and shape it with a brush so the front falls neatly. Add a soft headband that sits comfortably and keeps everything in place for photos.
This is a great idea for kids with bangs because it turns a day-to-day look into a polished photo style. It also benefits kids who dislike pins since headbands are quick and gentle. For uniqueness, pick a headband with texture, like fabric or a simple bow, and choose a color that stands out in pictures.
If your child has a lot of flyaways, lightly mist the hair with water and smooth it under the headband. Cost is often moderate depending on headband material, but basic fabric bands are usually budget-friendly and comfortable for long school days. Current trends favor cozy accessories, and soft headbands are back in a big way.
Make it practical by choosing a band that won’t slip when your child moves or runs during recess.
12. Curly Top With a Pineapple Tie
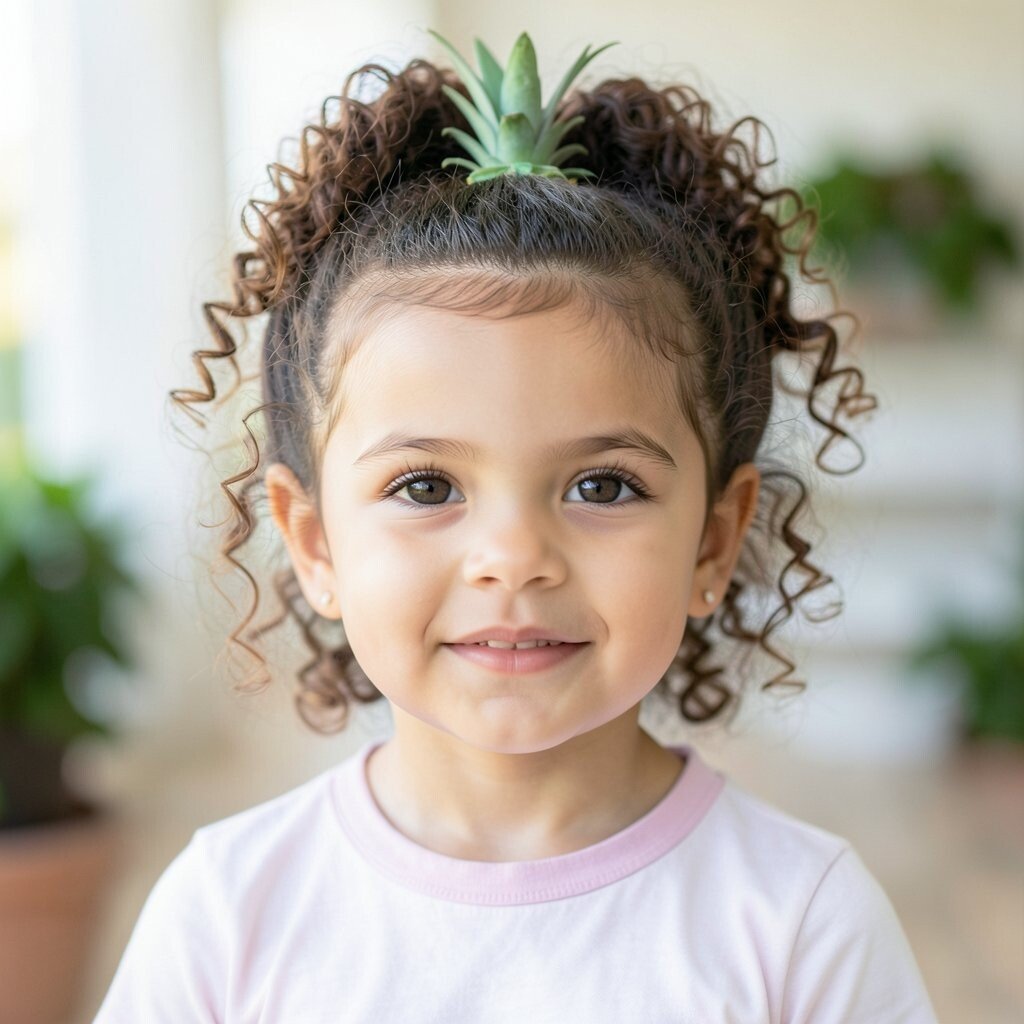
Gather curls into a loose high tie, leaving curls around the hairline as a soft halo. Use a scrunchie that won’t snag curls, then gently fluff for a rounded shape.
This style is unique because it celebrates natural texture instead of fighting it. It benefits curly hair by reducing tangles and keeping the curls bouncy for photos. For personalization, adjust the height to a mid tie if your child’s neck gets warm, or keep it higher for an extra cute “pineapple” look.
To keep it practical, add a small curl refresher or leave-in spray so curls look fresh and not dry. Cost is usually low since you may already have curl products, but a good scrunchie is worth the investment. Trends are all about embracing texture, and this one looks great in close-up shots and wide portraits.
13. Classic Scalp Braid With a Clean Finish
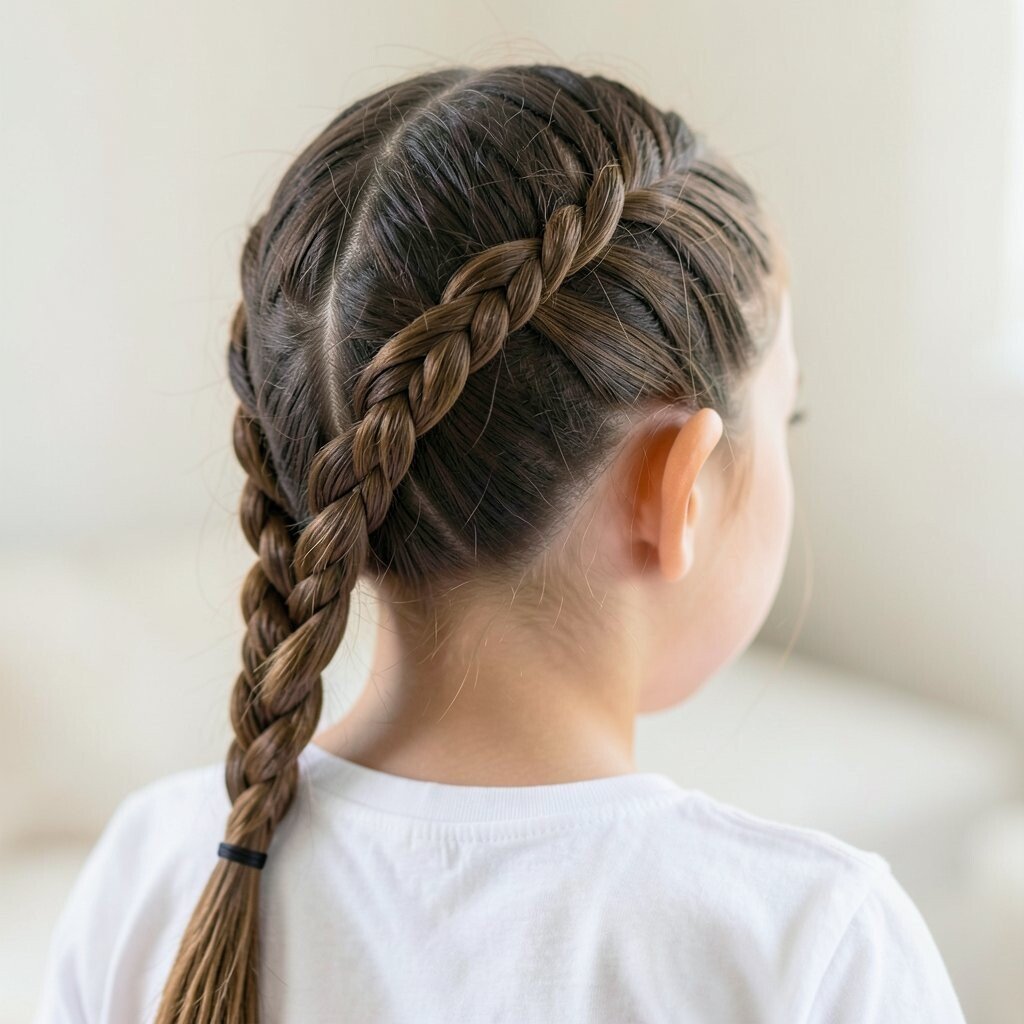
Create a single braid down the back, starting right at the scalp for a smooth look. Secure the end with an elastic and tug gently to make the braid look full without frizz.
This braid is a strong choice for picture day because it looks neat and consistent from every angle. It benefits kids with long hair since it prevents hair from getting tangled in coats or classroom desks. For personalization, add a small bow at the end or use a pastel elastic that matches the outfit.
If your child has thin hair, lightly backcomb the first section so the braid doesn’t look flat. For thick hair, keep the braid steady and don’t over-tighten so it stays comfortable. Cost considerations are simple because it’s mostly elastics, a brush, and maybe a little smoothing cream.
14. Low Bun With a Side Twist Detail
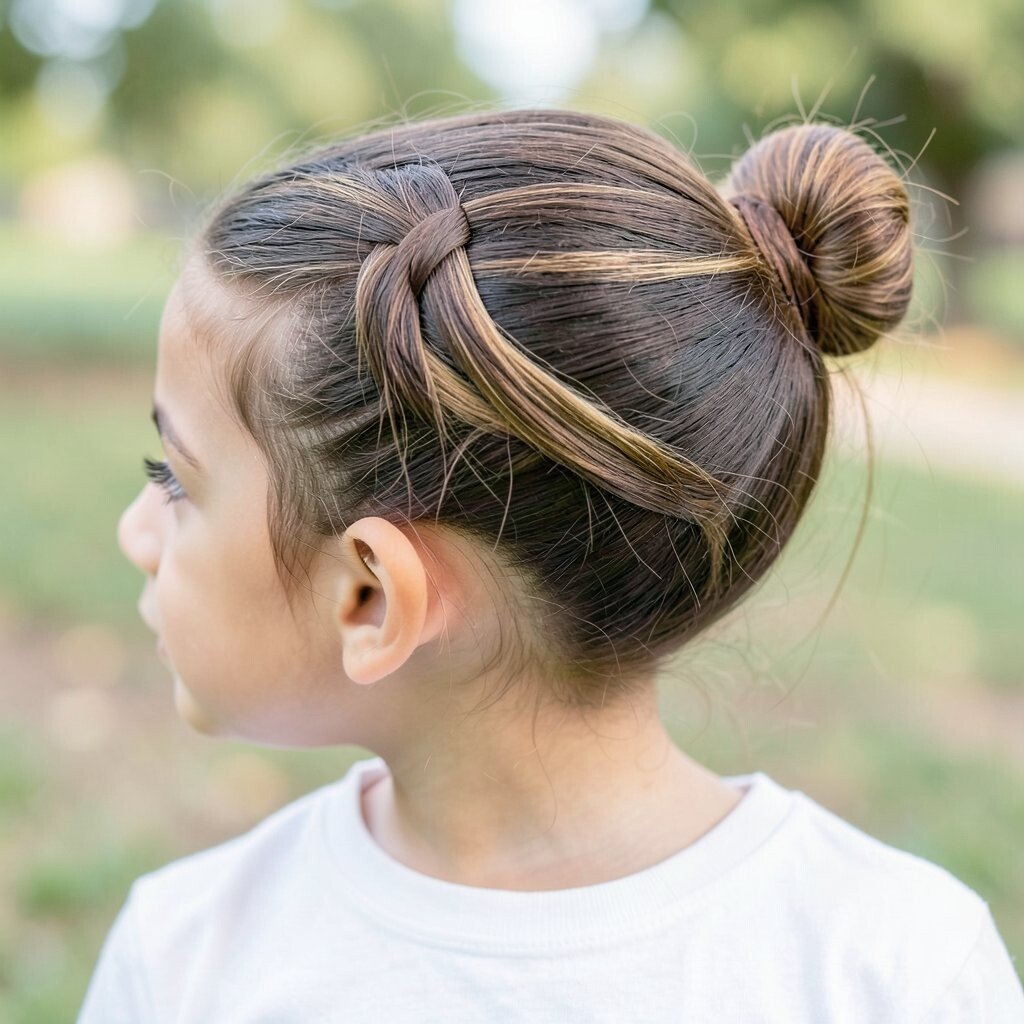
Part hair slightly off-center and twist a small section along one side before bringing it into a low bun. Secure the bun with bobby pins and a soft elastic, then tuck the ends neatly.
This bun feels special because of the side twist detail, which adds visual interest without extra mess. It benefits kids who want hair off the face but still want a soft, elegant look. For personalization, add a tiny clip near the bun for a sparkle that shows in photos.
To make it practical, use a detangling brush and pin strategically so the bun doesn’t shift while your child is seated for the picture. Cost is usually low, especially if you use items like bobby pins and a hair tie you already have. Current trends favor sleek-but-soft buns, so this looks modern yet classroom-friendly.
15. Waterfall Braid With Easy Front Sections
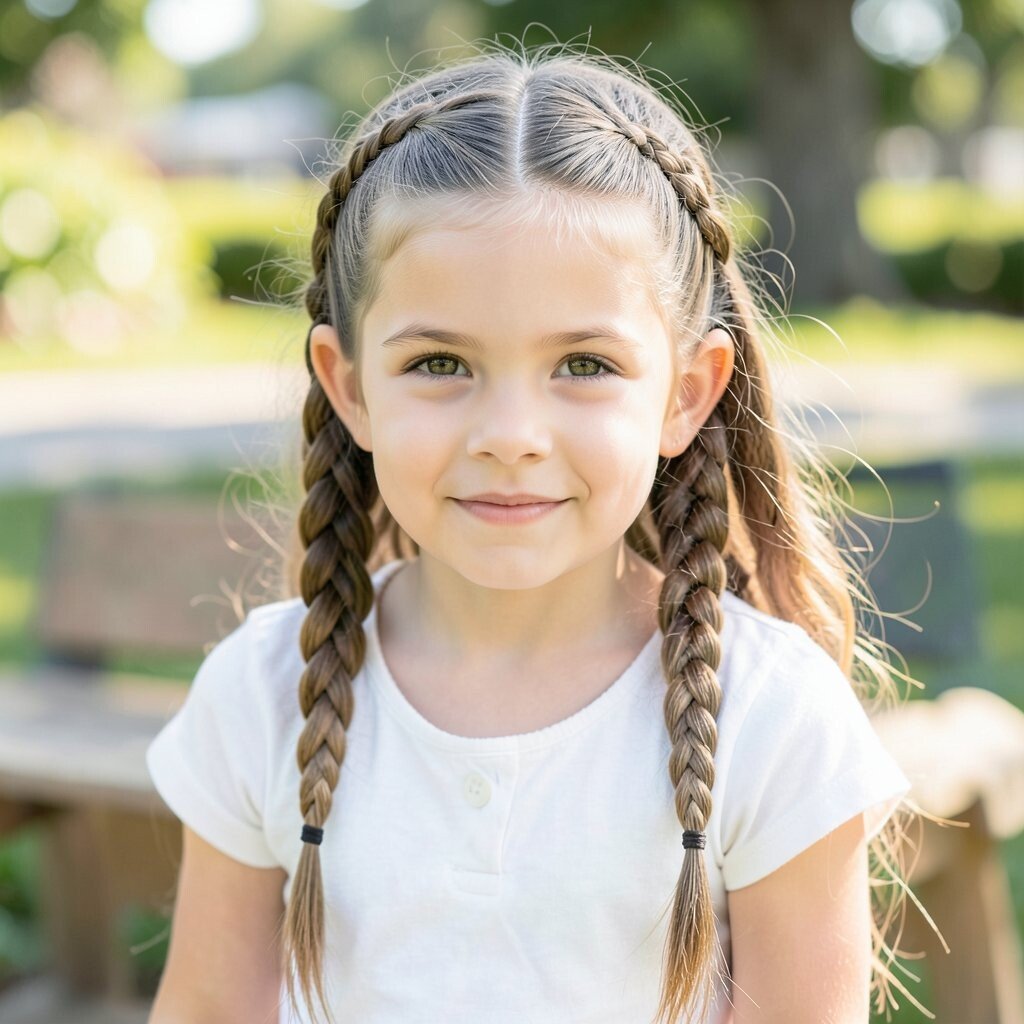
Start a braid near the side and work across the head, dropping small strands forward as you braid. Secure the end with an elastic so the “waterfall” effect stays in place.
This hairstyle is visually stunning because the dropped strands create a flowing pattern that stands out in photos. It benefits kids who like their hair down but still want a braid detail that looks fancy. For uniqueness, keep the waterfall strands smaller for a delicate look or larger for a bold look.
Practical tip time is all about grip, so use a light styling cream to reduce frizz and keep strands defined. The cost is moderate since you may want a few quality hair ties and maybe a braid-friendly brush. Trends are leaning toward braid designs that look airy rather than super tight, and this fits that mood.
16. Ribbon-Fastened Braided Ponytail
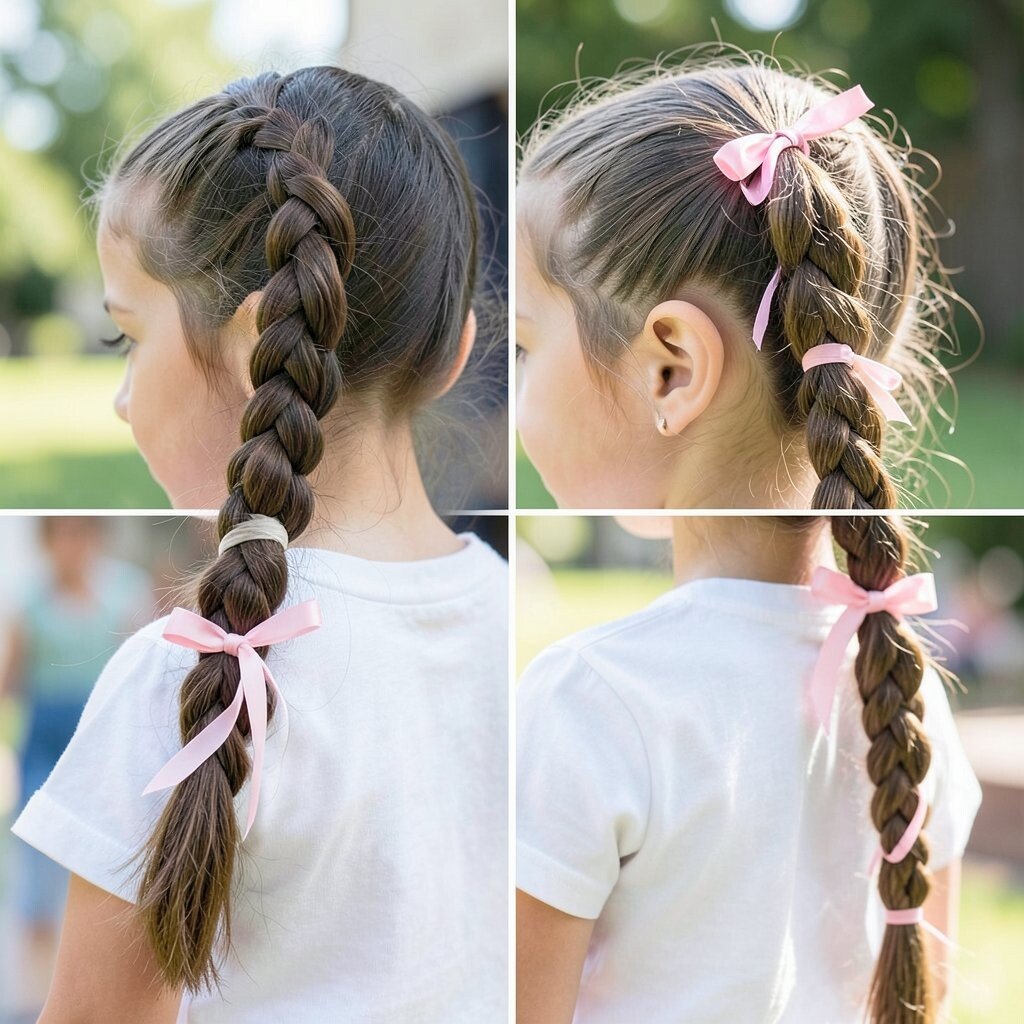
Make a ponytail and braid it, then wrap a ribbon around the elastic area and along part of the braid. Finish with the ribbon ends tied in a bow that sits flat.
This ribbon-fastened style looks festive and clear in school photos, even when the background is busy. It benefits kids because the braid keeps hair from swinging, while the ribbon adds a fun touch without much extra work. For personalization, pick ribbon colors based on the outfit or the season, like bright spring shades or cozy fall tones.
To keep it practical, choose a ribbon that won’t unravel easily and secure it with an extra small knot. Cost varies, but ribbons are usually affordable, and you can reuse them for other events. Current trends often mix classic braids with decorative elements, and this style is right on trend.
If your child has very fine hair, add a bit of texture spray before braiding so the ribbon doesn’t pull the braid too flat.
17. Side Part Sleek Bun With Baby Hairs Tamed
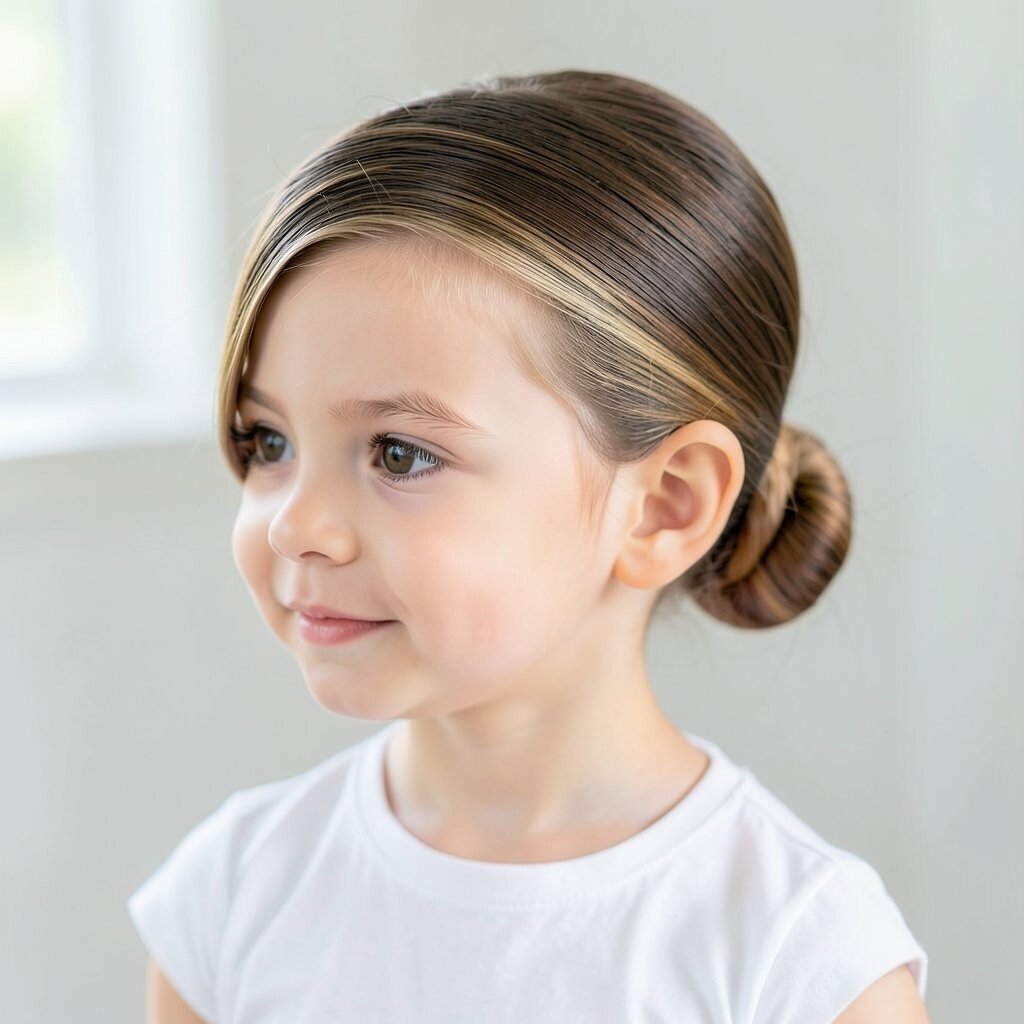
Create a neat side part and pull hair into a bun slightly off-center. Smooth the top with gel or cream so the bun looks controlled and tidy.
This bun looks especially sharp in photos because the side part gives structure and the bun stays calm. It benefits kids who have shorter hair or layers since the sleek top can hide uneven lengths. For personalization, keep the bun low for a classic look or slightly higher for a more energetic vibe.
18. Quick Two-Strand Twist Rows
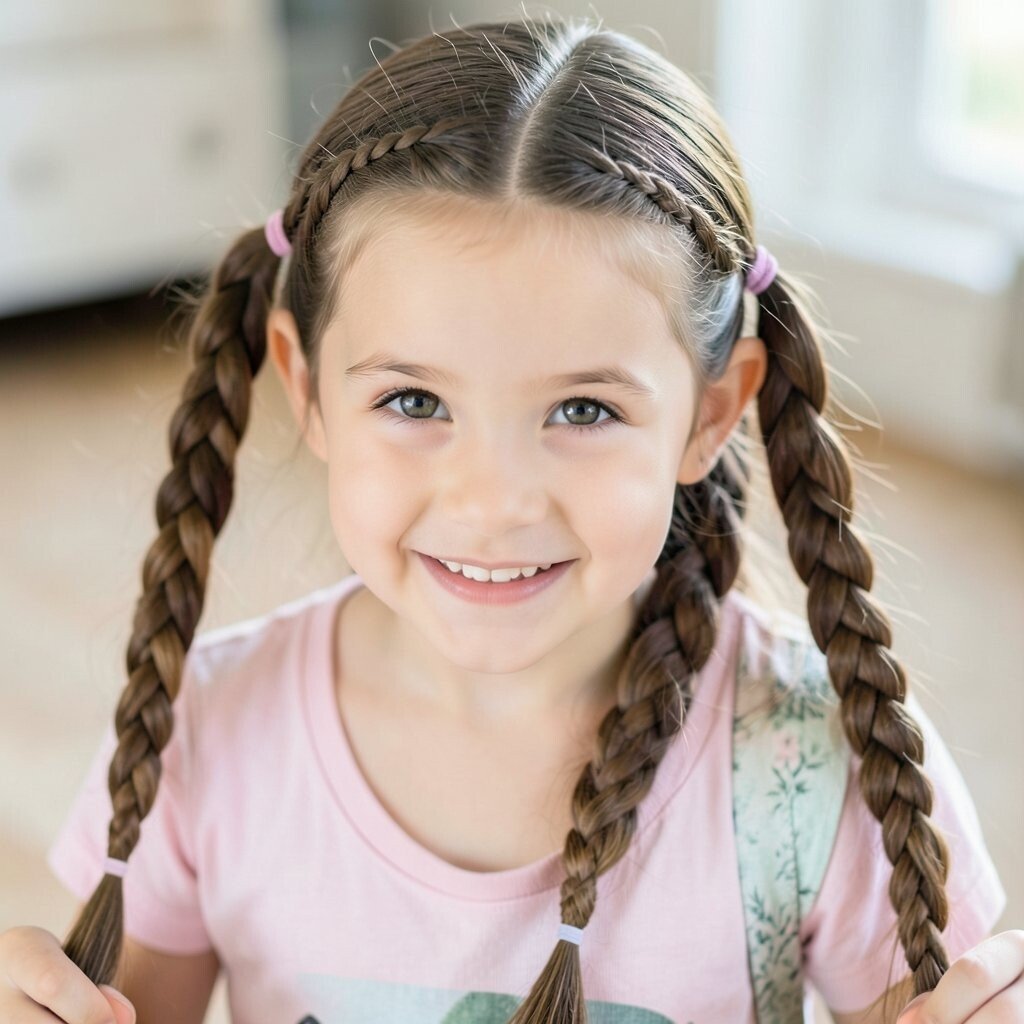
Divide hair into small sections and twist each section into two-strand twists, then connect them as you go. Secure with elastics so each twist line looks even and neat.
This style is unique because it creates a “row” pattern that looks more detailed than a basic braid. It benefits kids who struggle with traditional braiding because it’s simpler to do and doesn’t require complex weaving. For practical comfort, twist gently and keep the tension moderate so it doesn’t feel tight on the scalp.
Personalization can be fun with color, like using matching elastics for each row or adding one decorative clip at the end. Cost is low since you only need elastics, a brush, and a small product to reduce frizz. Trends are leaning into twist styles because they look neat, last longer, and don’t require constant touch-ups.
19. Soft Fringe With a Low Clip and Loose Ends
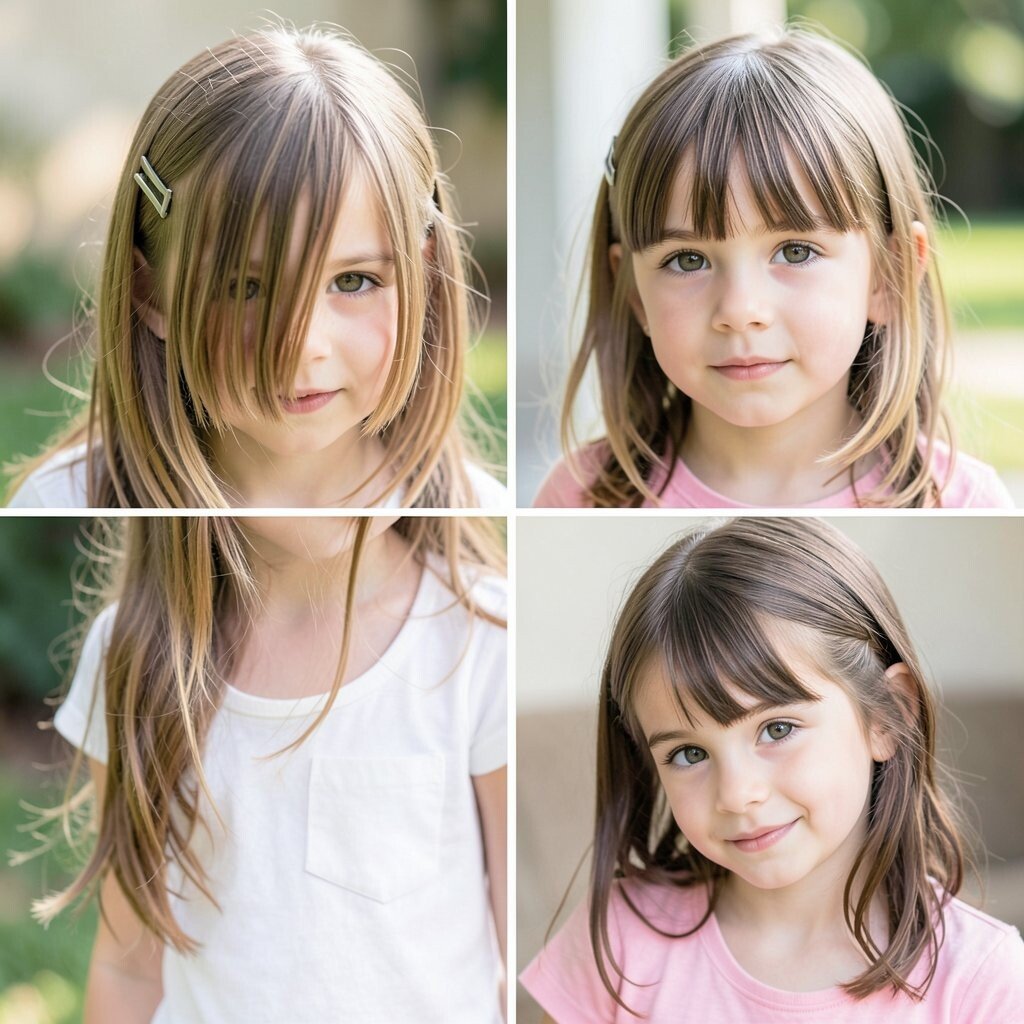
Clip a small section of hair near the crown while leaving the rest loose around the shoulders. Shape the fringe with a brush so it frames the face without falling into the eyes.
This hairstyle looks naturally cute because it’s not overly tight, yet it still keeps the face clean for the camera. It benefits kids with shoulder-length hair who want movement without losing control. For personalization, use a clip in a bold color or a classic neutral so the style matches the outfit.
For practical tips, use a tiny amount of styling cream on the fringe so it stays smooth all morning. Cost considerations are simple since clips are easy to find and can be reused. If hair is wavy, let the loose ends air-dry for a softer look that’s still photo-ready.
Current trends show more relaxed styling, and this fits right in because it looks effortless while still organized.
20. Half-Up Braided Knot for a Cute Picture Frame
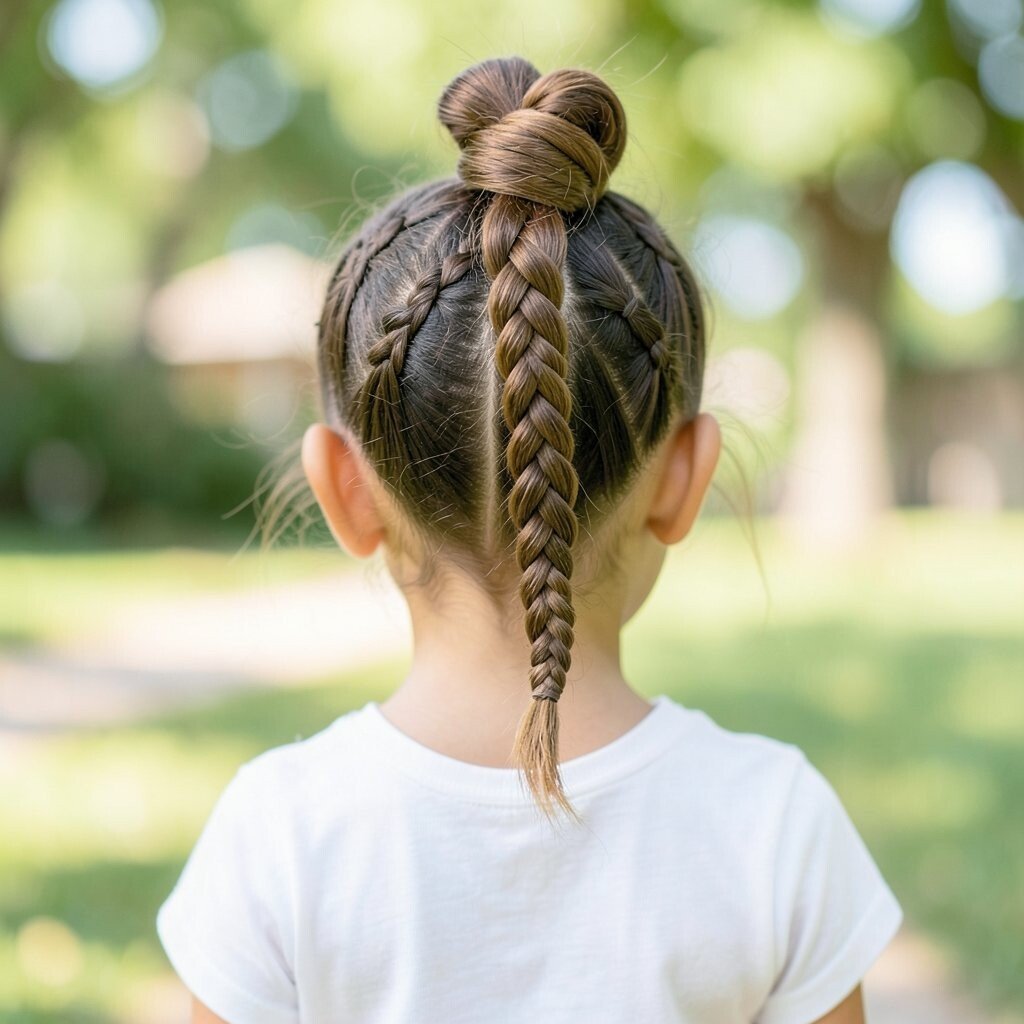
Create two small braids on the front and bring them together at the back to form a knot. Secure with an elastic and tuck the ends under so everything looks tidy and secure.
This style is unique because it combines braids and a knot, giving texture and a sweet “frame” around the face. It benefits kids by keeping the front neat while allowing the rest of the hair to fall naturally. For personalization, choose knot height based on comfort, like a lower knot for very active days or a higher knot for extra lift.
To make it practical, use a lightweight hold spray so the braids don’t unravel before picture time. Cost is usually budget-friendly because it relies on basic tools and maybe a cute elastic or mini clip. Trends are moving toward playful knots and mixed textures, and this one gives a cheerful look that photographs beautifully.
Adjust the braid thickness to match hair volume so it looks balanced in every portrait angle.