
The perfect bun can make your whole look feel finished. It also gives your hair a comfy, practical style for busy days.
From messy to polished, these buns are simple to do and fun to customize. You’ll find ideas that match your hair length, your mood, and the little details you love.
1. The Classic Low Bun With a Soft Twist
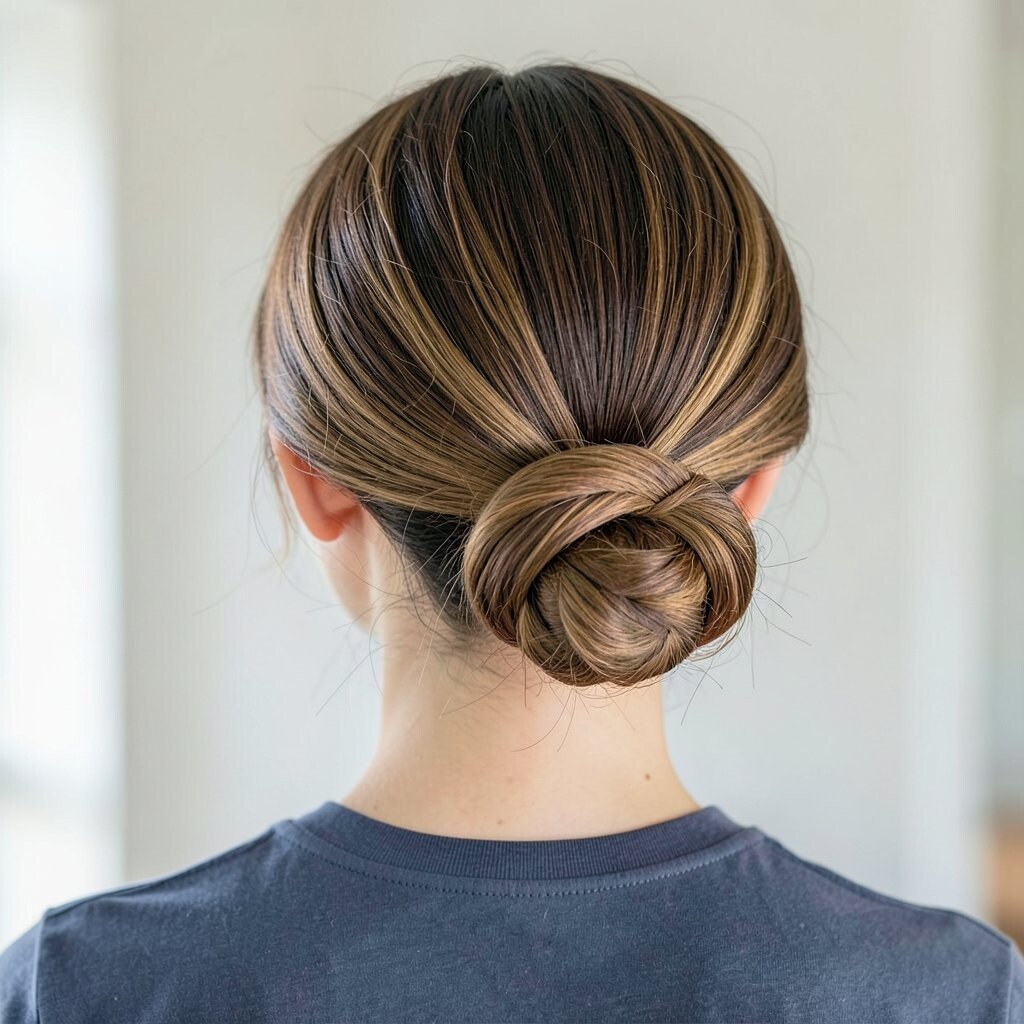
A low bun looks neat without feeling too strict. It sits at the back of your head and lets your hair fall smoothly around your face.
To make it pretty, twist two small sections of hair before you gather the rest. Use an elastic that matches your hair color, then wrap the bun and pin it under for a secure hold. Finish with a little hair oil on your fingertips to smooth flyaways, and you’ll get a glossy, clean finish that still feels effortless.
2. Messy Side Bun With Loose Face-Frames
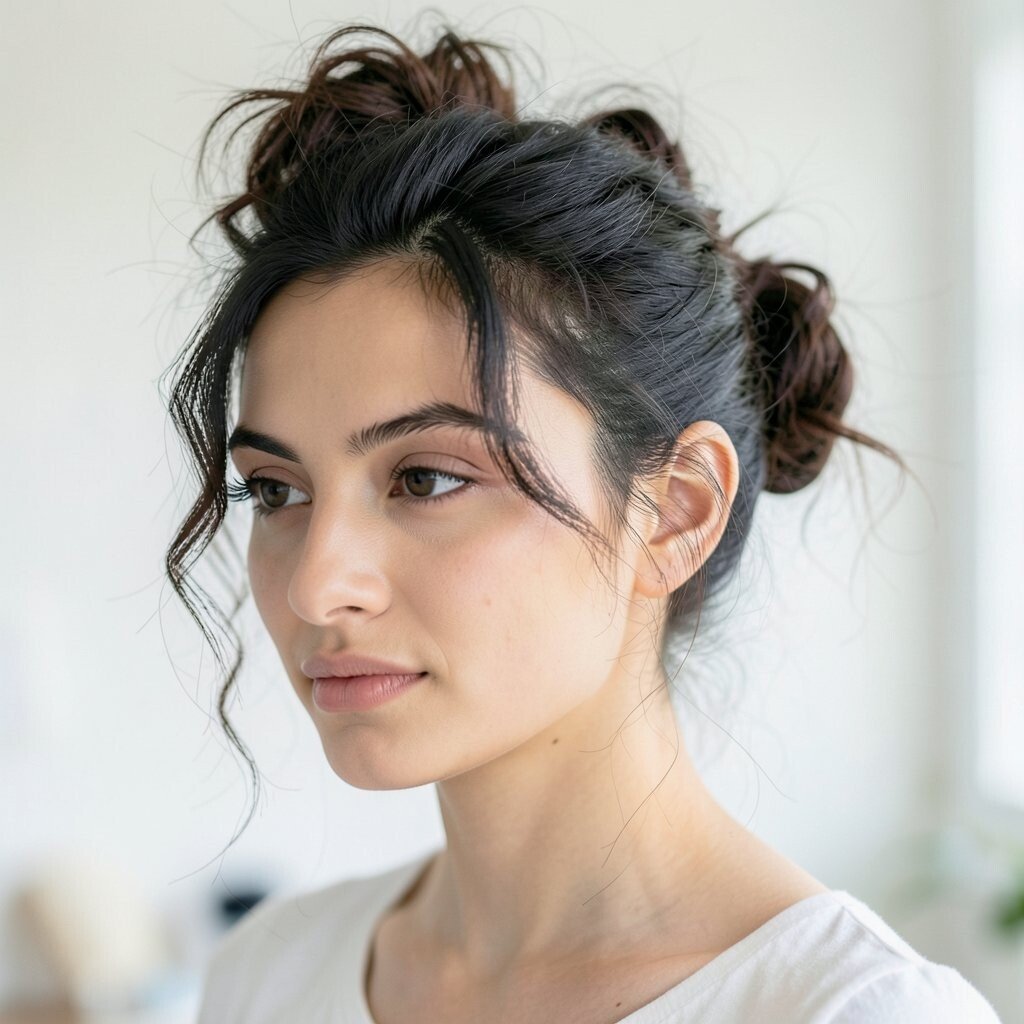
A messy side bun brings an instantly playful vibe. You’ll see a gentle swirl over one shoulder, with strands that softly frame your cheekbones.
This style works especially well when your hair has a bit of texture. Pull your hair to one side, twist it loosely, and pin the bun so it looks slightly undone. Lightly tug the bun edges and leave a few longer pieces out, because that relaxed look is part of the charm.
For personalization, try adding a tiny clip near the part line or use a ribbon instead of plain pins. It’s also budget-friendly since you can rely on bobby pins and a familiar elastic rather than special tools. If you want a more current feel, pair it with a center or soft side part, which is popular in everyday street style.
3. High Sleek Bun With a Skinny Ribbon Wrap
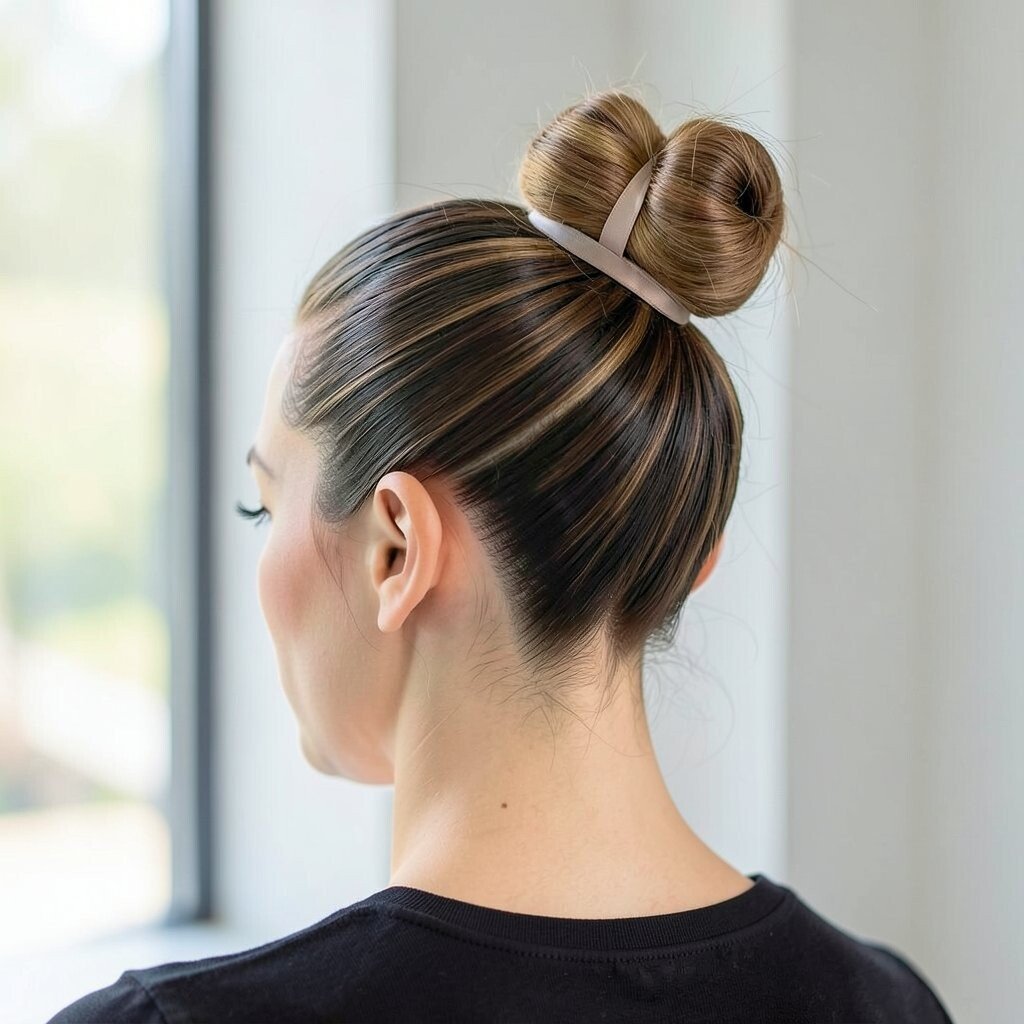
A high sleek bun stands tall and makes you look sharp right away. The top placement lifts your face and shows off your neckline.
Start with damp hair and smooth it with a light gel or cream, then gather it high. Wrap the base tightly, and use a thin ribbon around the bun to hide the elastic and add a cute touch. For extra hold, spritz a flexible hairspray before and after pinning.
Personalize it by choosing a ribbon color that matches your outfit or your mood. This idea also keeps things affordable because a ribbon or scarf is often cheaper than fancy hair accessories. The sleek look is very in right now, especially when it’s clean, shiny, and not overly bulky.
If you have bangs, tuck them into a side swoop so the bun feels balanced rather than boxy.
4. Bubble Bun With Elastic Rings
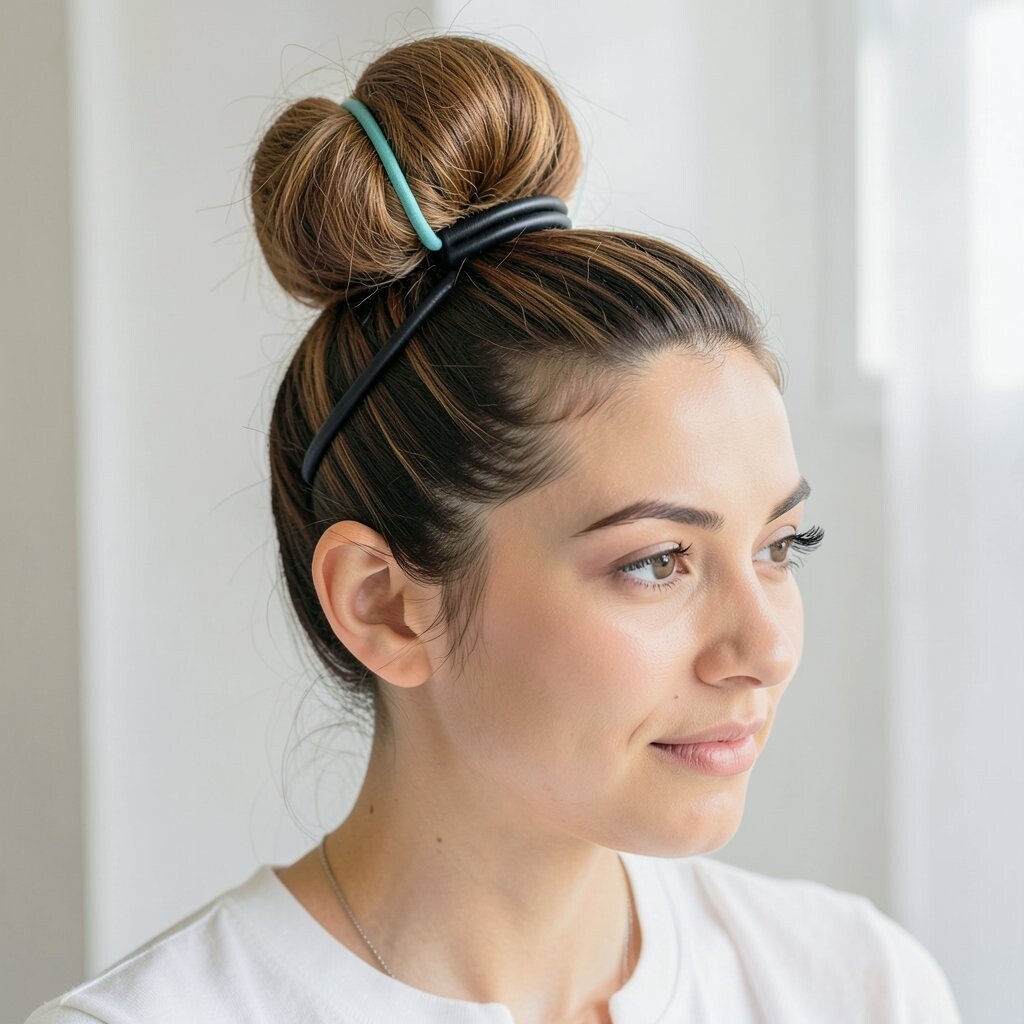
A bubble bun looks like a fun little chain of puffed sections. You’ll notice several rounded “bubbles” stacked along the length of the gathered hair.
It’s perfect when you want something different but still easy. Gather your hair into a ponytail, then split it into sections and secure each one with a small elastic. Continue wrapping the lengths into a compact bun shape, and pin the ends underneath so nothing slips.
5. Twisted Rope Bun for Everyday Polish
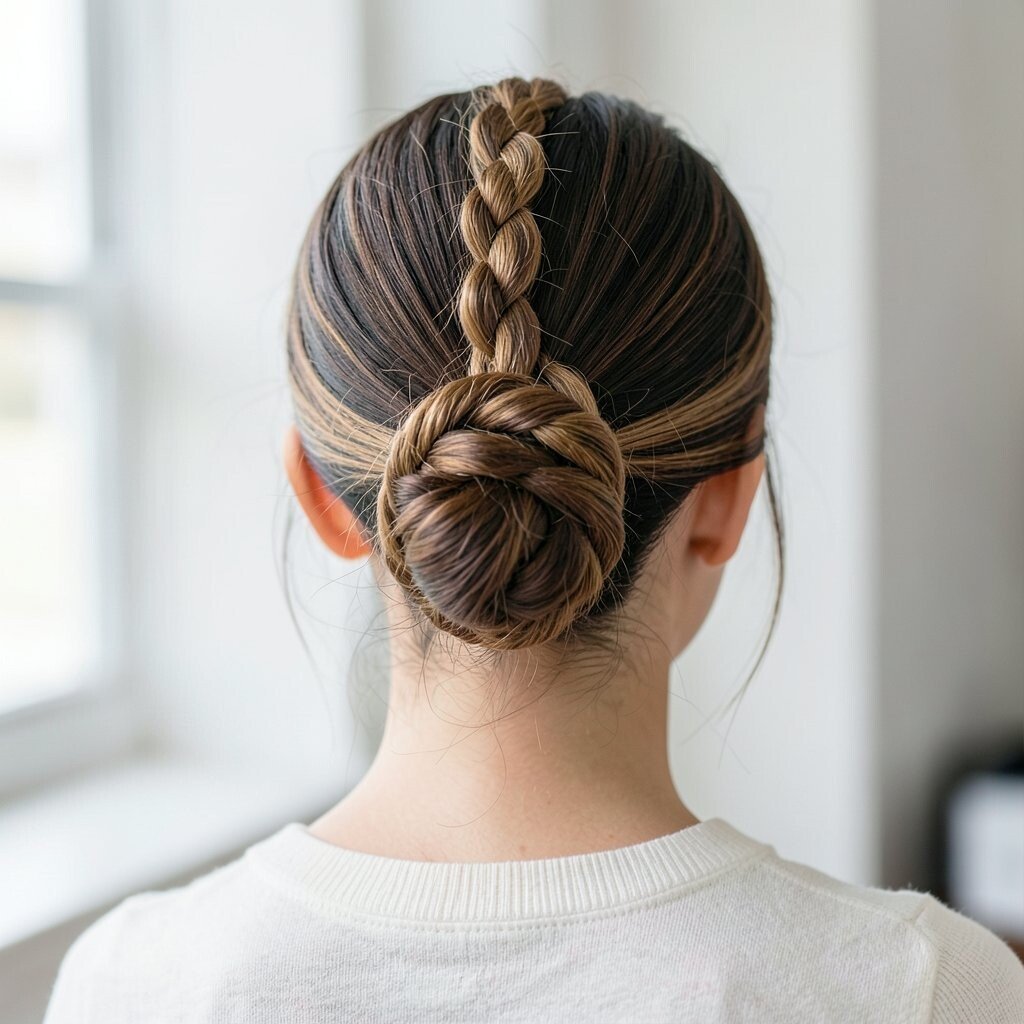
The twisted rope bun is all about a neat, rope-like spiral. It looks tidy from every angle, and it feels more special than a basic bun.
Begin by dividing hair into two even sections. Twist each section in the same direction, then twist the two together like a rope. Wrap the rope into a bun at your preferred height and secure with pins.
For benefits, it helps tame thick hair because the twist adds structure. To personalize, keep the spiral tight for a formal vibe or loosen it slightly for a softer, romantic feel. You can also add a small hair accessory near the base, like a pearl pin or a minimal barrette.
6. Bubble Braided Bun With a Soft Crown
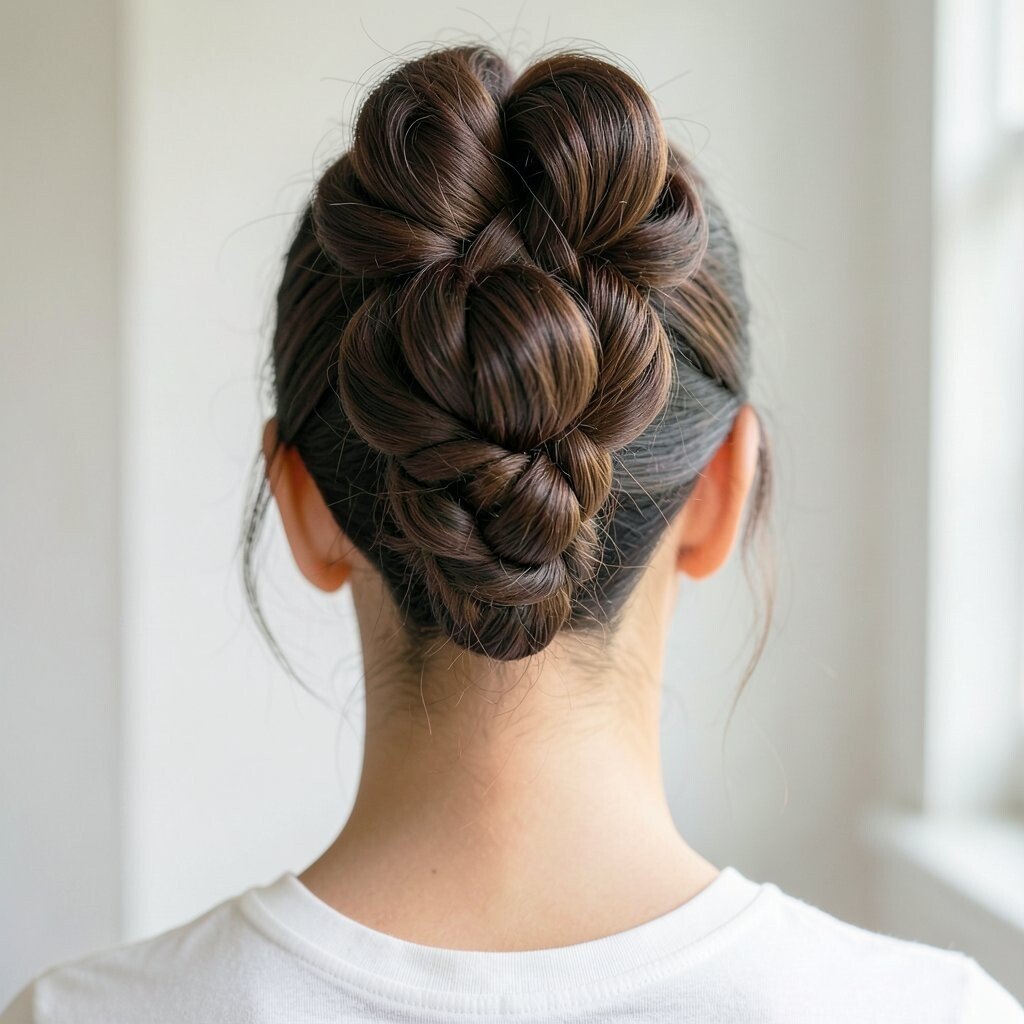
A bubble braided bun gives a playful crown effect. It looks like braided segments that puff up gently, so the bun feels light and airy.
Start with a ponytail, then create small braid-like sections using elastic bands along the length. Each time you add an elastic, gently stretch the hair between bands to create that rounded bubble look. When you wrap the braided shape into a bun, pin it carefully and keep the bubbles facing outward.
This is a great choice for medium to long hair because there’s enough length to form the bubbles. If your hair is fine, use a texturizing spray first to add grip and reduce slip. For cost considerations, you can get the look with inexpensive elastics and basic pins, then upgrade with one cute accessory if you want.
7. Sleek Wrapped Bun With Hidden Pins
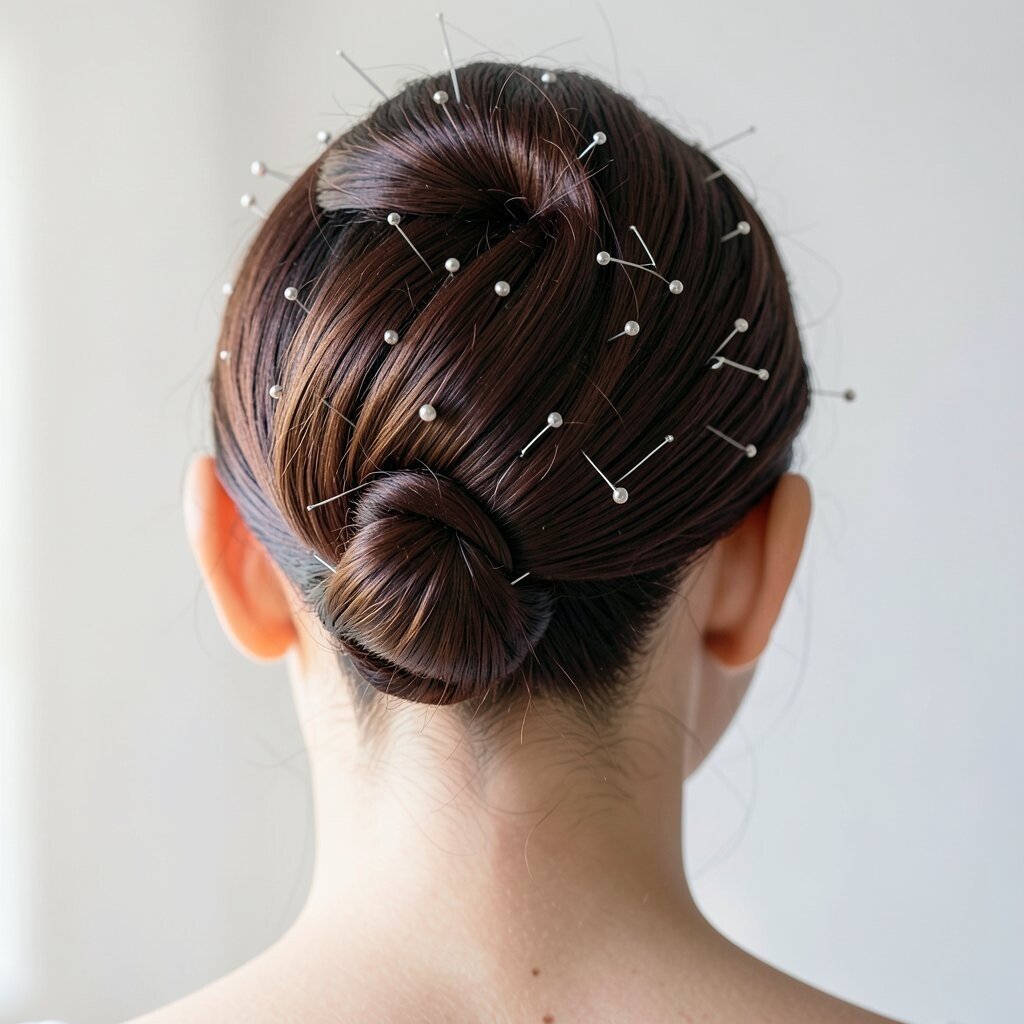
A sleek wrapped bun looks like you spent way more time than you actually did. The shape is smooth, and the pins disappear so it feels polished.
Gather hair into a low or mid ponytail, then wrap it around the base tightly. Tuck the ends in and secure with pins that slide under the bun rather than sticking straight out. Use a small brush to smooth the surface, and a tiny bit of styling cream helps the bun look glossy.
8. Half-Up Bun With a Flowing Bottom
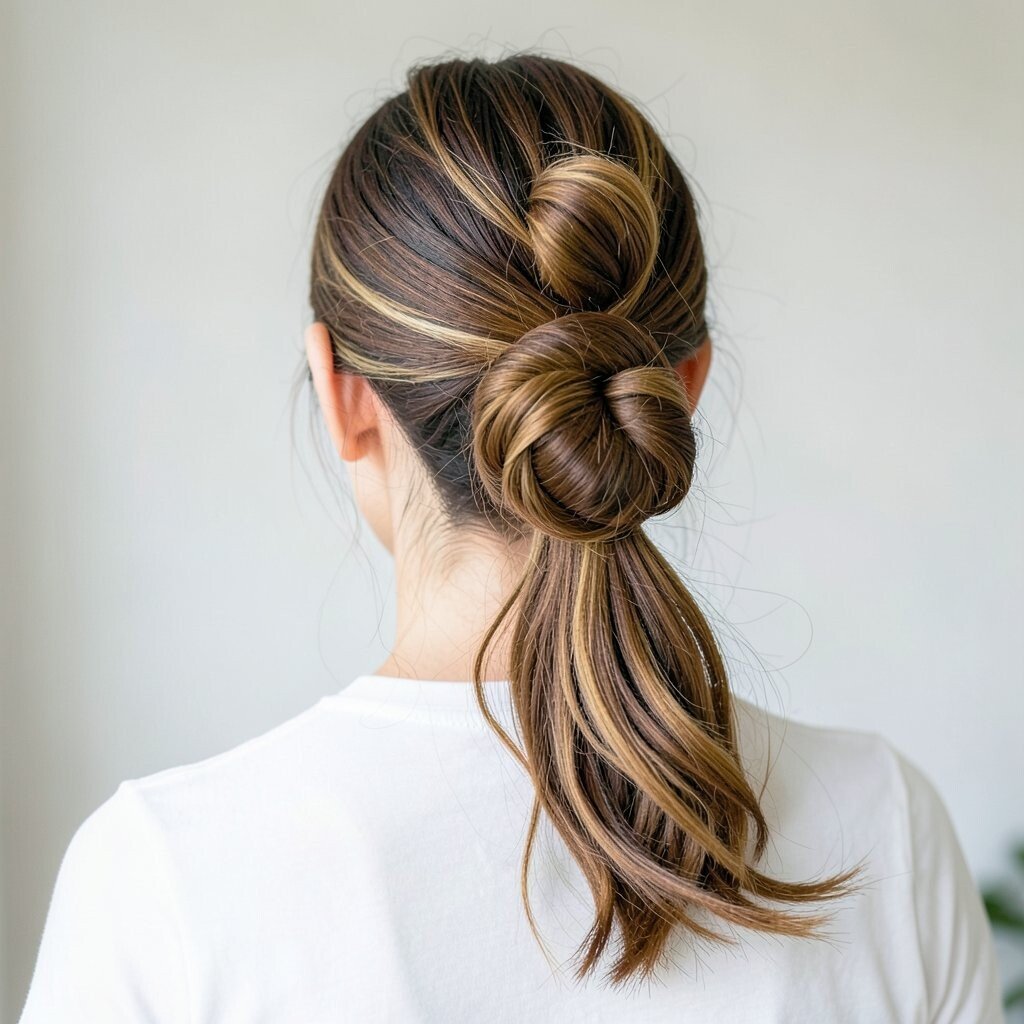
A half-up bun gives you the best of both worlds. The top part is neat and styled, while the rest of your hair stays free and bouncy.
Gather only the upper section from ear to ear, twist it, and wrap it into a mini bun. Secure it with pins and leave the bottom layers untouched so they move naturally. This is a practical choice for days when you want your hair off your face but still want length to shine.
For personalization, try adding a small claw clip for the base or keep the bun slightly messy for a casual vibe. It’s also trend-friendly since half-up styles stay popular across seasons. If you’re short on time, this bun is quick to redo and easy to adjust if a strand escapes.
9. Space Buns With a Polished Finish
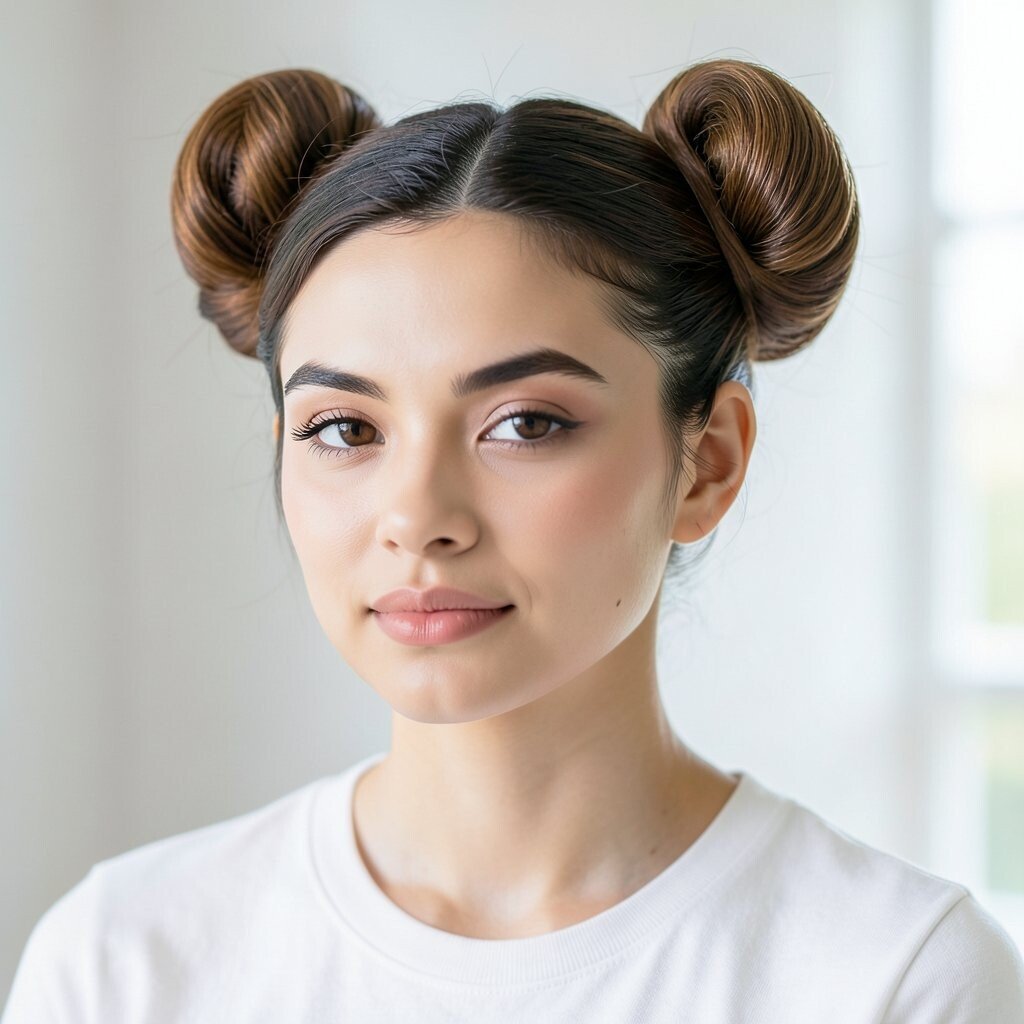
Space buns are playful and bold, and they can still look neat. You’ll see two small buns perched on the sides, giving your whole look a fun lift.
Part hair down the middle, then gather two high ponytails. Twist each ponytail into a bun and secure with pins, making sure both sides match in height for symmetry. Smooth the front with a light cream so the style looks intentional rather than chaotic.
This hairstyle is great for festivals, casual weekends, or any time you want your style to feel confident. If your hair is very slippery, use a bit of dry shampoo or texture spray before you gather. For cost, you can keep it simple with elastics and bobby pins, then add optional decorative clips if you want a little extra sparkle.
To personalize, try leaving a few face-framing strands or adding mini hair ties in colors that match your outfits.
10. Low Bun With a Knotted Center Detail
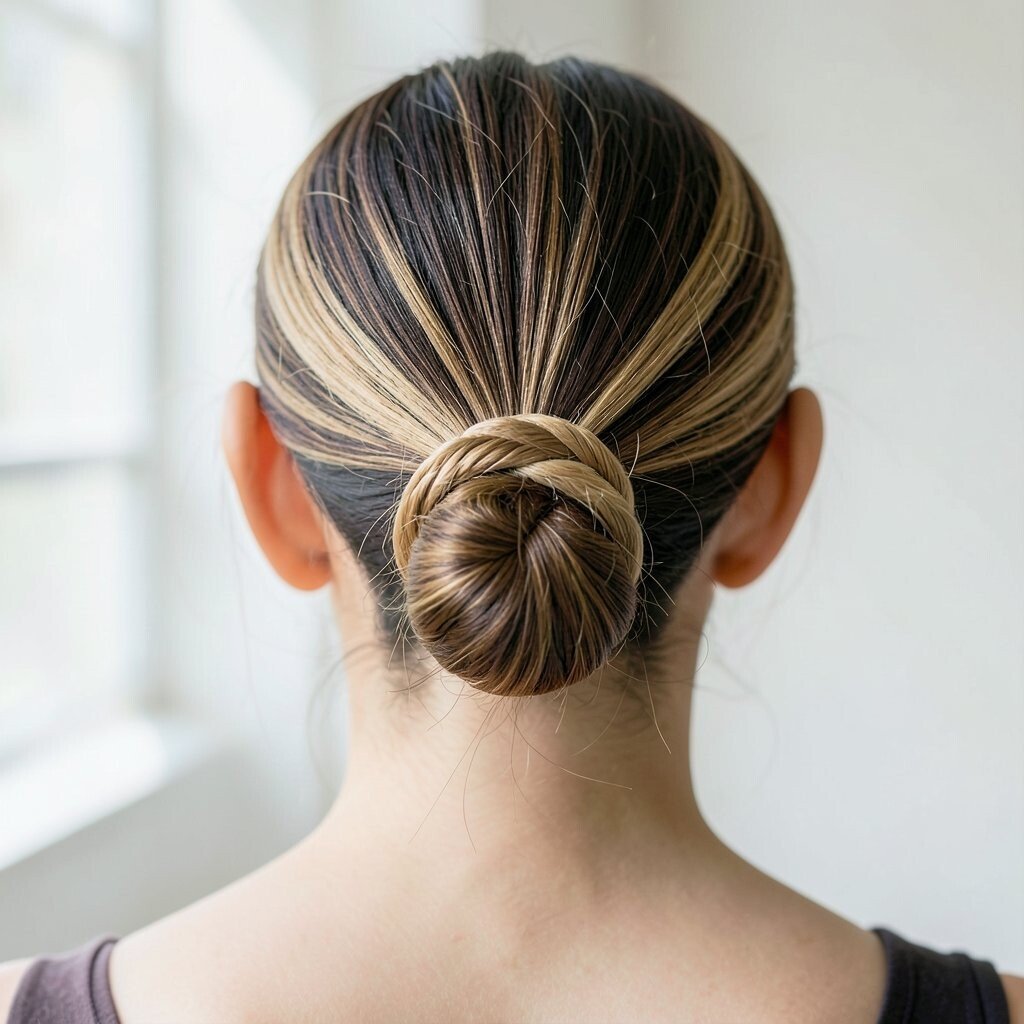
A low bun with a knot at the center looks elegant and a little artsy. The knot draws attention and adds visual interest to a simple style.
Gather hair into a low ponytail, then wrap the ponytail around the base. Before pinning everything down, create a small knot by looping a section and tucking it through. Pin it so the knot sits slightly above the bun, then secure the rest underneath for a clean finish.
11. High Messy Bun With Crown Volume
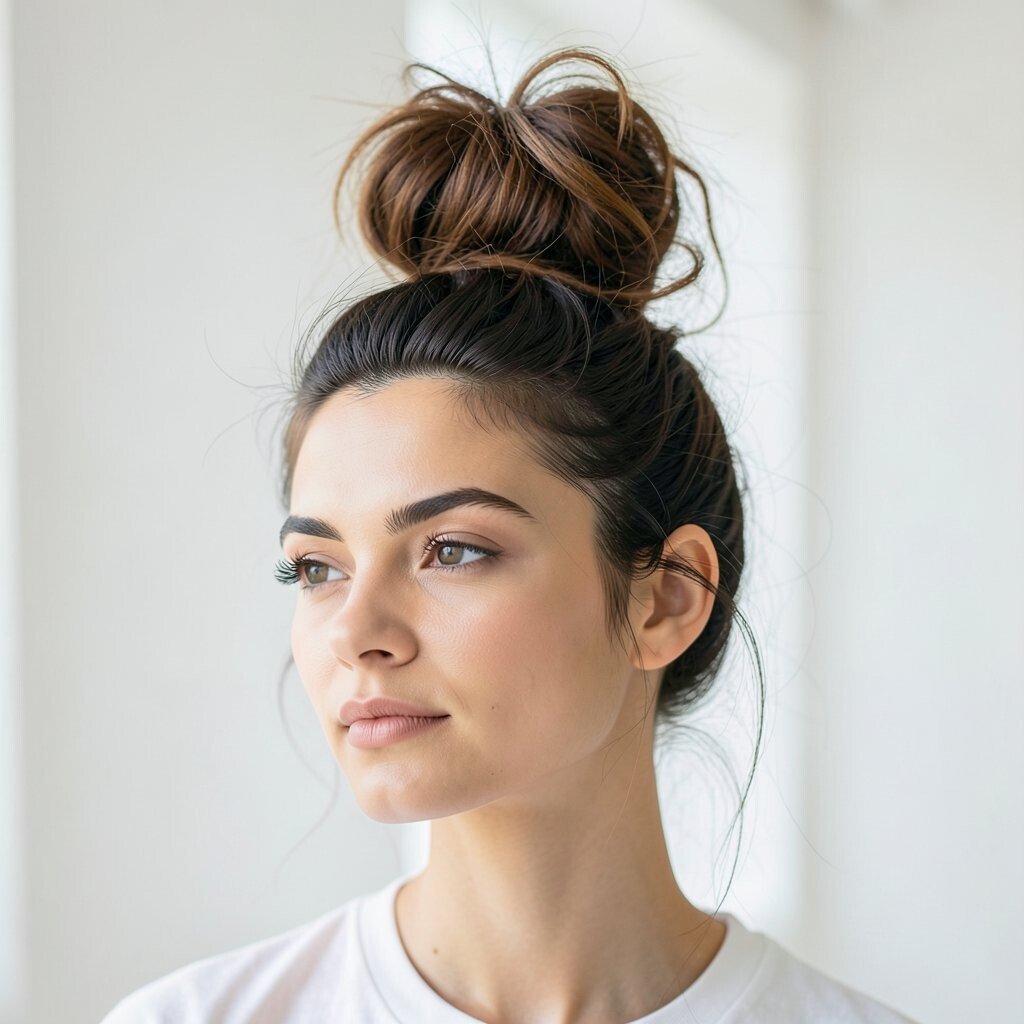
A high messy bun feels cozy, confident, and super easy to do. You’ll notice a full silhouette that looks like you added volume on purpose.
Gather hair high, then twist and wrap loosely rather than tightly. Pin the bun, then gently pull at the top and sides to create crown volume. If your hair is flat, back-comb lightly at the root before you gather, then smooth the outer layer so it looks soft and not too rough.
This style is perfect for busy mornings because it forgives flyaways and keeps hair out of your face. To personalize, add a headband, or leave a few strands out near your temples for a breezy vibe. Current trends often favor “lived-in” textures, and this bun matches that look beautifully.
Use a medium-hold spray so it stays put, especially if your day includes lots of movement.
12. Rope Knot Bun at the Nape
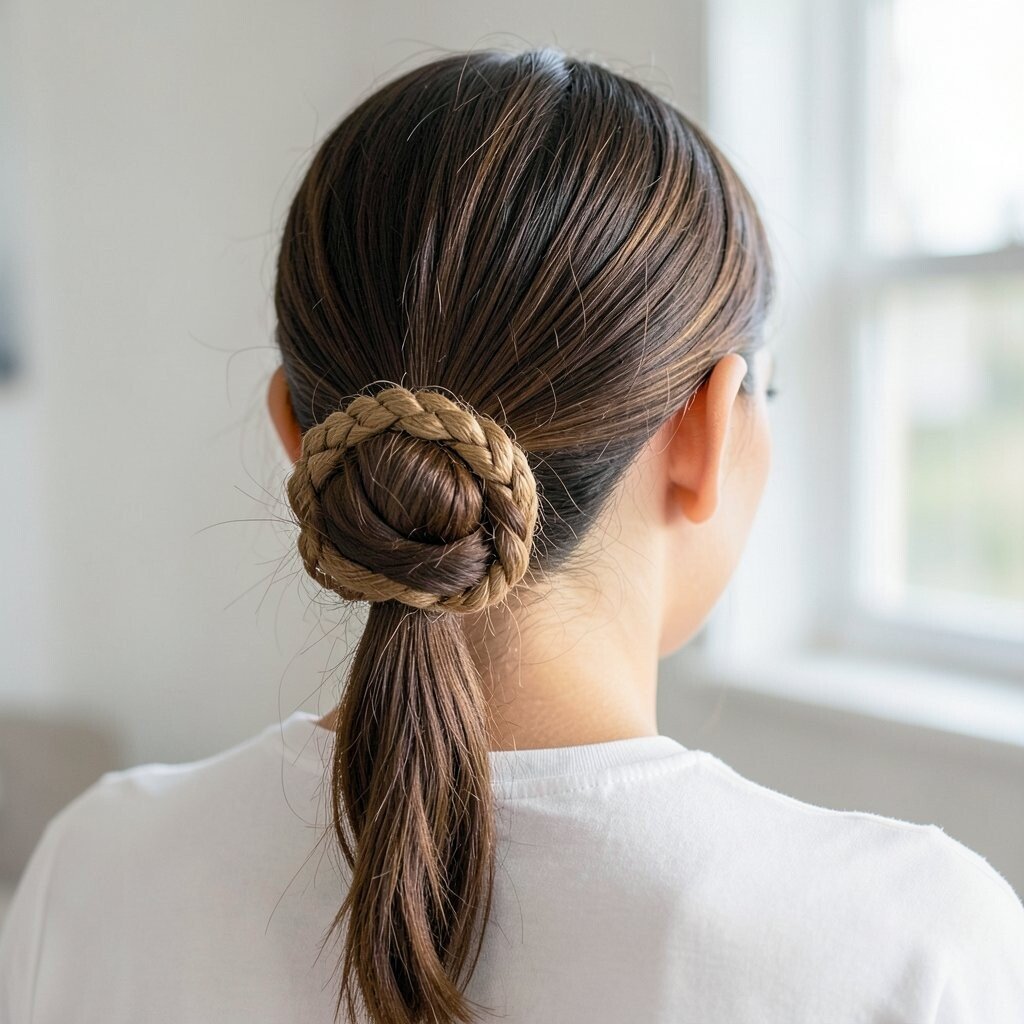
A rope knot bun at the nape feels refined and comfortable. It sits close to the neck, so it looks polished while still letting you move freely.
Make two sections, twist each one, and then twist the two together lightly. Wrap the rope around the base and shape it into a knot at the back of your head. Pin the ends underneath, and smooth the surface with your hands so the knot looks even.
13. Bun With a Hair Scarf Bow
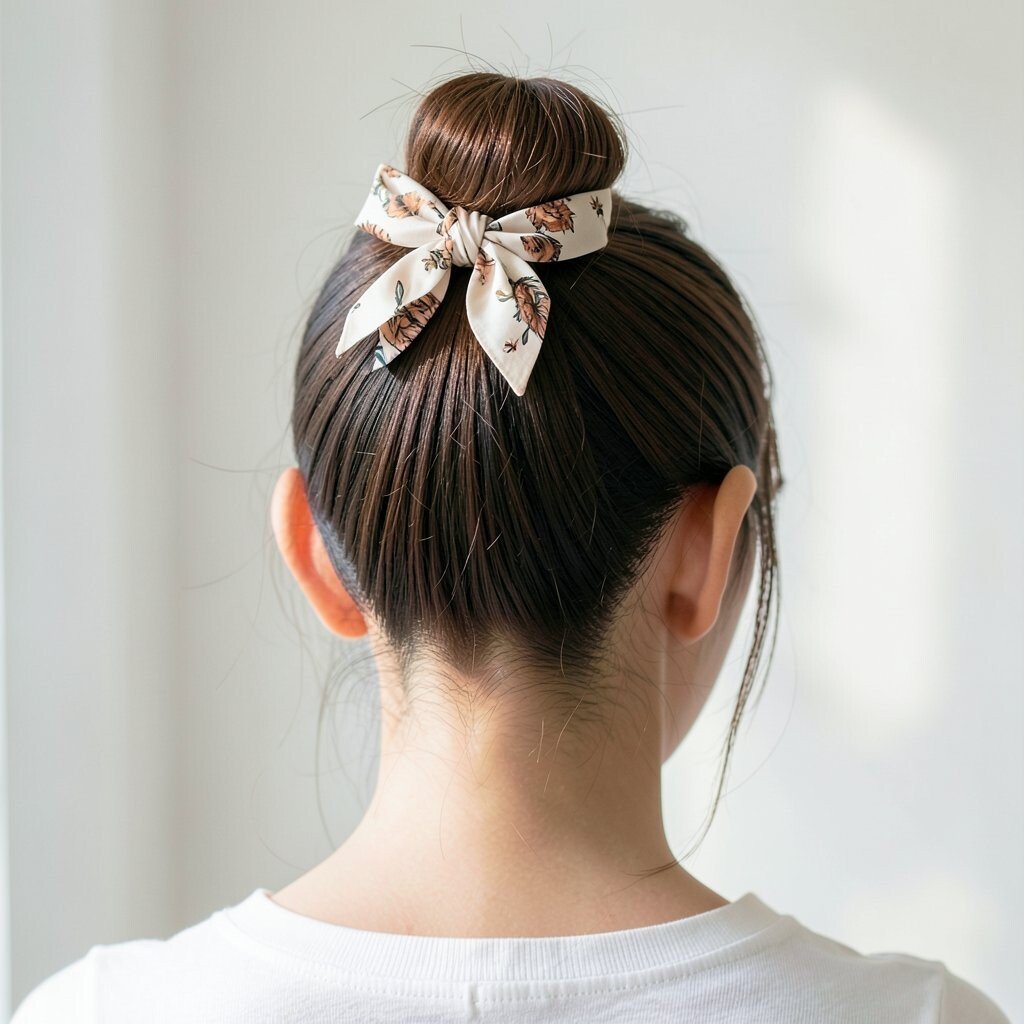
A bun with a scarf bow adds a pop of color in seconds. The bow makes the style feel cute, even if your bun is simple.
Make a basic bun at your preferred height, then wrap a scarf around the base like a headband. Tie the scarf into a bow at the front or side, and tuck the ends so they stay secure. This gives you instant personality without needing extra tools.
For cost, scarves are usually affordable and you can reuse the same one for many outfits. It’s also a great personalization idea for matching team colors, seasonal tones, or your favorite prints. If you want a current look, pick a scarf with bold patterns and keep the bun clean so the bow stands out.
For thicker hair, consider using a wider scarf strip so it holds comfortably around the bun.
14. Flat Twist Bun With a Side Sweep
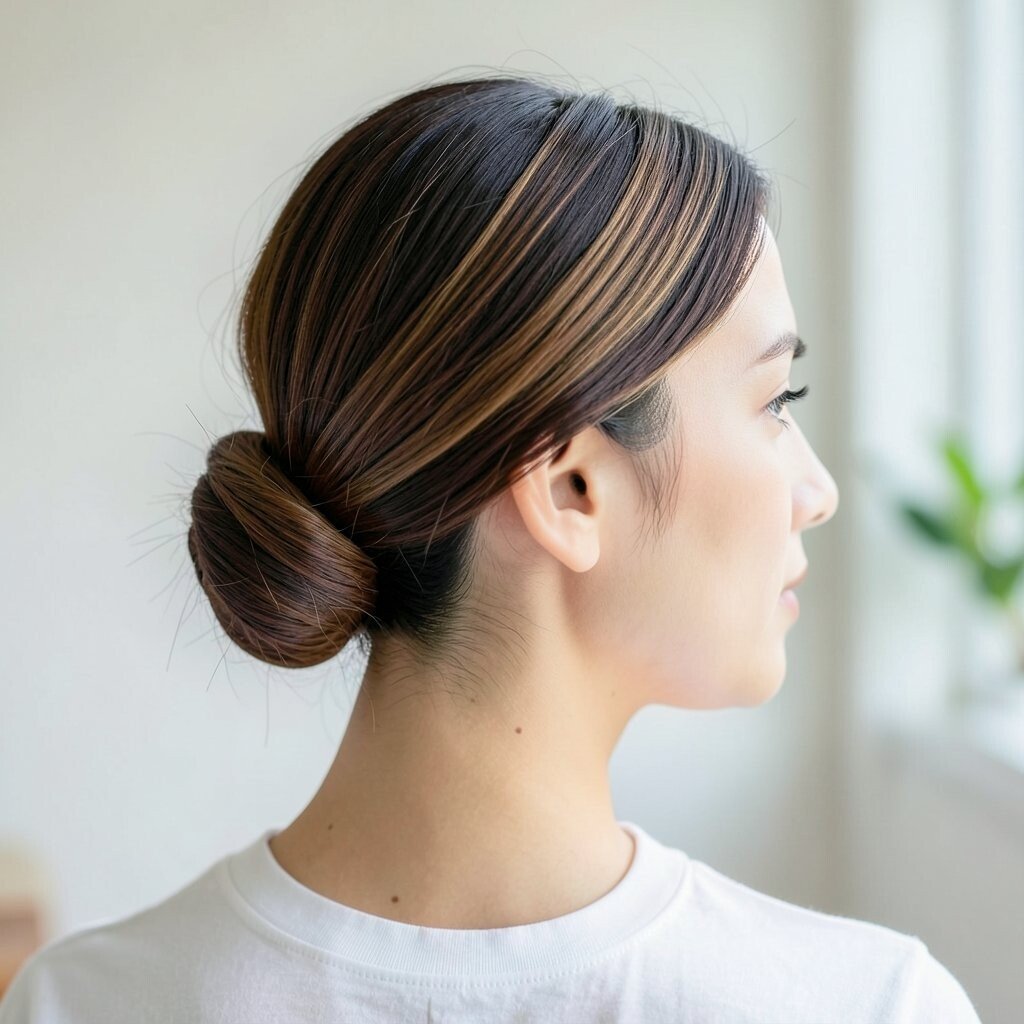
A flat twist bun looks sleek and tidy, with a gentle shape along the side. It’s the kind of style that looks neat even in windy weather.
Create a flat twist starting near your part and moving toward the back of your head. As you twist, incorporate more hair so it hugs your scalp. When you reach the base of your bun area, twist the remaining hair into a bun and pin it down.
This is a great benefit for people who want their hair controlled without a lot of bulk. To personalize, choose the side of the sweep based on your natural part, and adjust the twist height for a softer or sharper look. You can keep it minimal with just pins, or add a small decorative clip to make it feel special.
15. French Twist Bun for a Vintage Feel
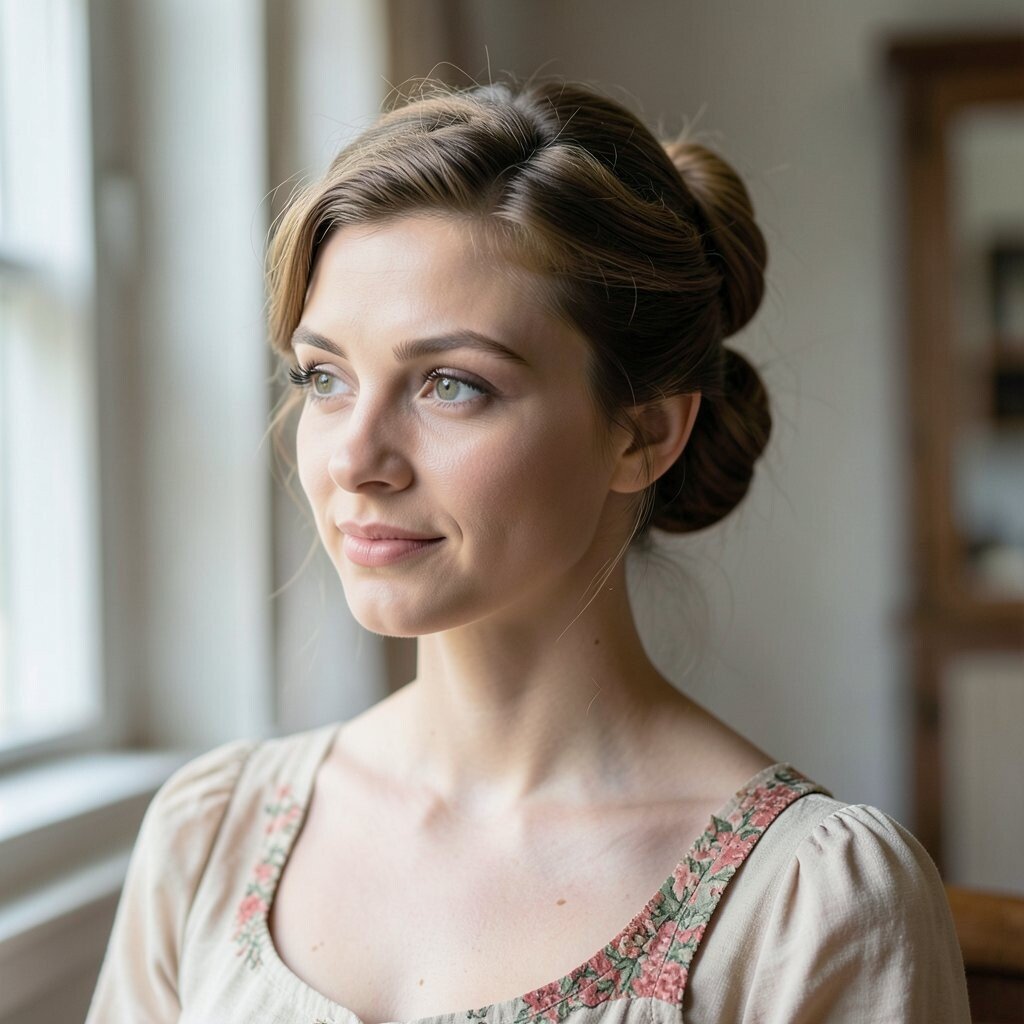
A French twist bun gives a classic, vintage-inspired silhouette. It feels elegant and works beautifully for events or even a fancy workday.
Start by smoothing hair into a low or mid section. Twist the hair upward toward the roots, then tuck the ends underneath and pin along the way. Keep the twist tight at the beginning and gradually loosen slightly in the center if you want a softer shape.
For personalization, add a pearl pin or a small comb accessory near the tucked end. It’s also a budget-friendly option because you don’t need special products, just steady pins and a little practice. The vintage vibe keeps coming back, and this style is a fun way to match that trend with a modern, clean finish.
If you’re new to twists, practice with slightly damp hair so it’s easier to control.
16. Wraparound Bun With Two Front Claw Clips
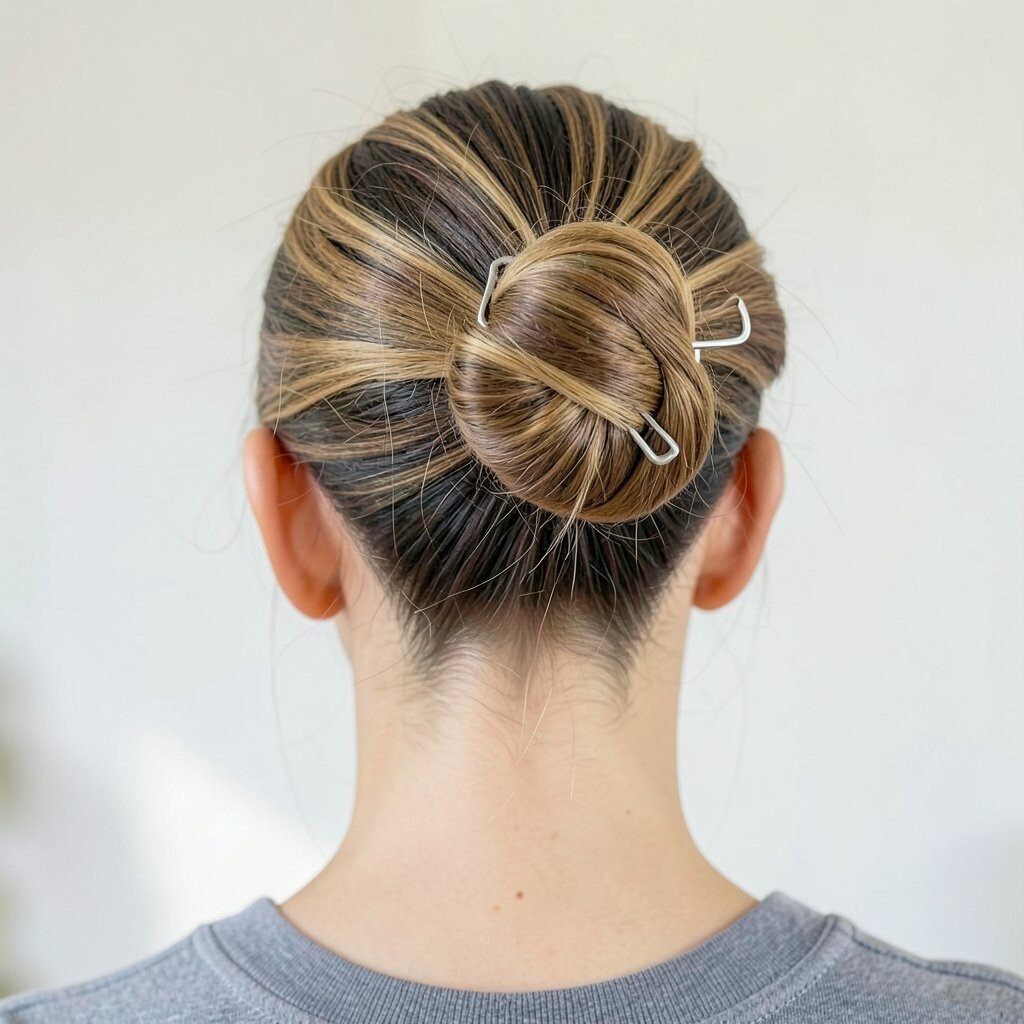
This wraparound bun feels playful because of the two front claw clips. Your bun stays secure, and the clips add a stylish touch right where people notice.
Make a bun by gathering hair and wrapping it around the base. Then place two claw clips at the front edges of the bun, anchoring any loose strands. Use the clips like tiny “handles” to keep the bun from shifting during the day.
This is especially helpful for fine hair that doesn’t hold twists well. For personalization, match clip colors to your outfit or go for clear clips that blend into the hair. Cost stays low since claw clips are usually inexpensive and also super reusable.
17. Crown Braid Bun With a Delicate Loop
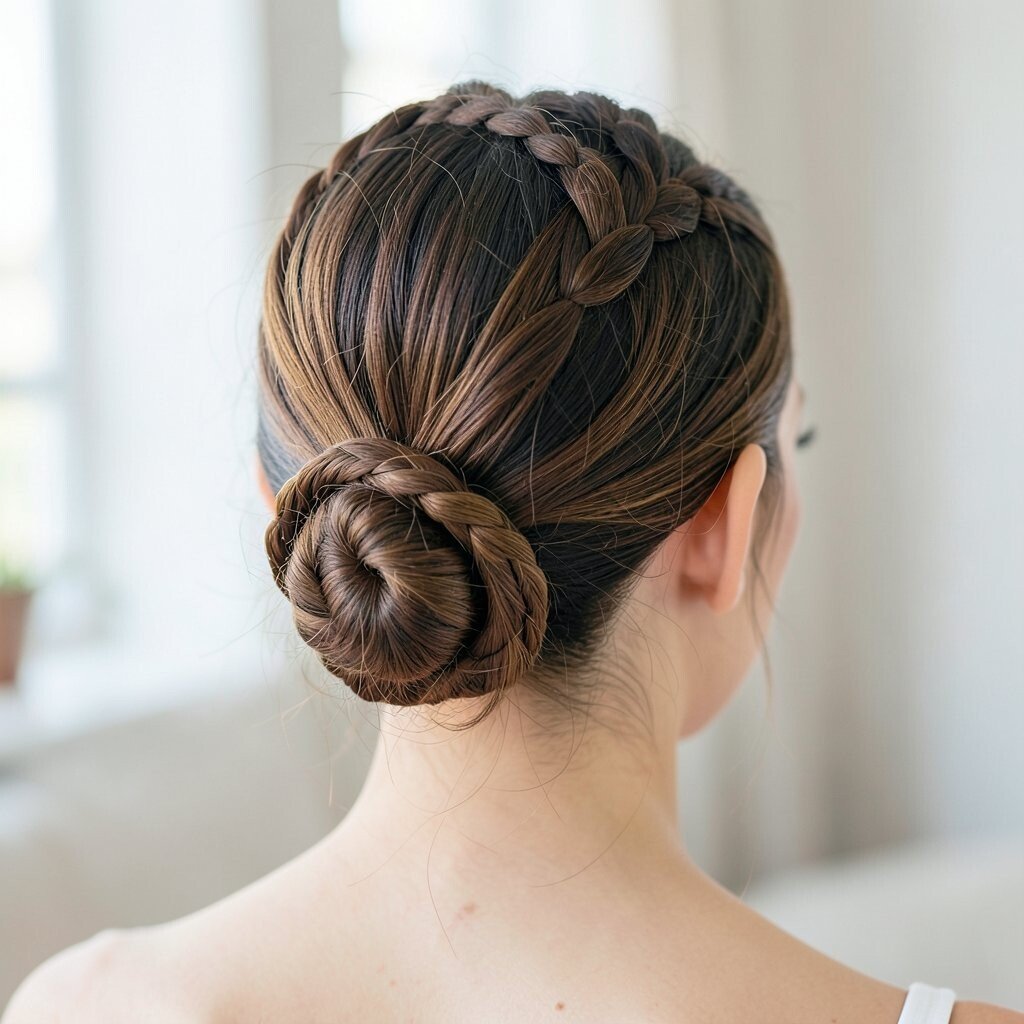
A crown braid bun looks romantic and detailed without being overly complicated. You’ll see a braided band circling the head, leading into a soft bun.
Create a braid across the top like a crown, then gather the rest into a bun at the back. Leave a small section to loop through the bun for a delicate accent, then pin it so the loop stays visible. This style is great because it naturally keeps hair off your face while still looking soft.
To personalize, choose a thicker or thinner braid depending on your hair volume. If your hair is shorter, make a tighter braid and use smaller pins for better grip. The braided crown look stays popular in current fashion, especially for spring and summer events.
Apply a light shine spray on the braid so it catches the light and looks fresh.
18. Spiral Bun With a Pinwheel Shape
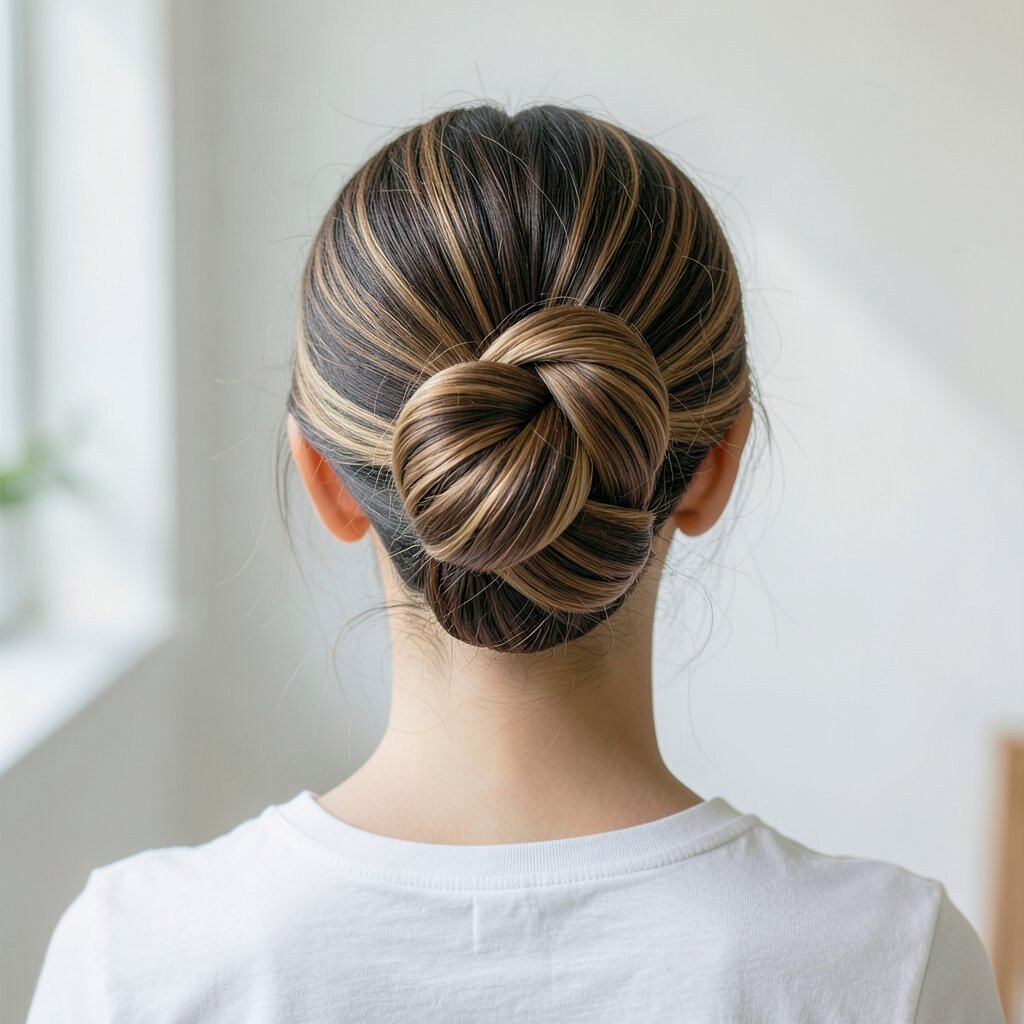
A spiral bun with a pinwheel shape is a fun way to look artsy while staying tidy. It forms a visible swirl that looks like it has movement.
Gather hair into a ponytail, then start wrapping the ponytail around the base in a spiral. Pin every few wraps so the spiral stays consistent, and tuck the end under. For a pinwheel effect, keep each wrap slightly angled so the spiral lines show.
This hairstyle is unique because it adds structure without needing heavy accessories. To personalize, make the spiral tighter for a sleek vibe or looser for a dreamy, romantic look. It’s also a practical option since the pins hold the shape firmly, helping it last through a long day.
19. Side Swept Bun With a Textured Crown
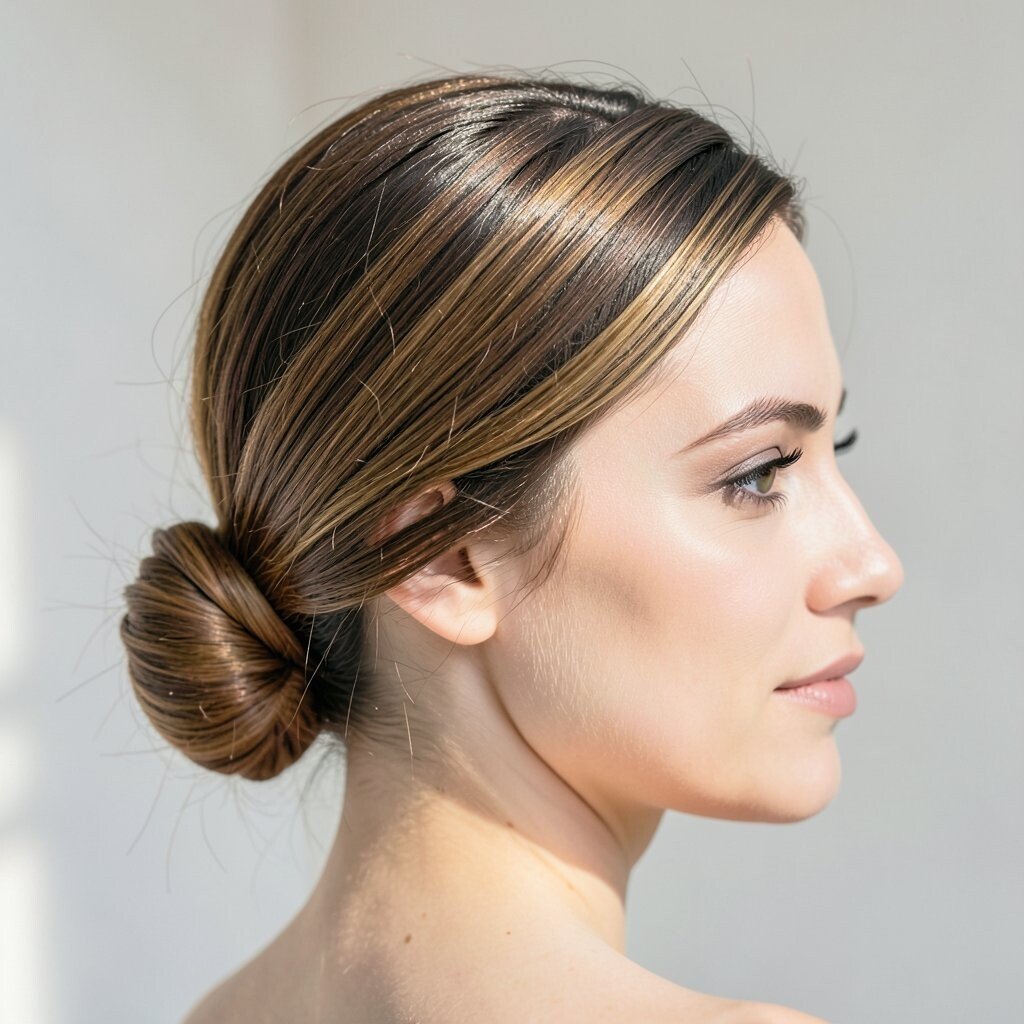
A side swept bun with a textured crown looks effortless and modern. The bun sits at an angle, and the top has gentle volume that feels airy.
Brush hair to one side, then gather and twist into a bun near the back. Create texture by lightly lifting sections at the crown before you pin everything. A flexible hairspray helps keep the volume without making your hair feel stiff.
For benefits, this style flatters many face shapes because the side placement balances your features. Personalize with a deep side part for drama or a soft side part for subtle charm. If you want to keep cost low, focus on a good elastic and a strong hold spray, then add one accessory only if you want a finishing touch.
20. Mini Bun Duo With a Single Middle Tie
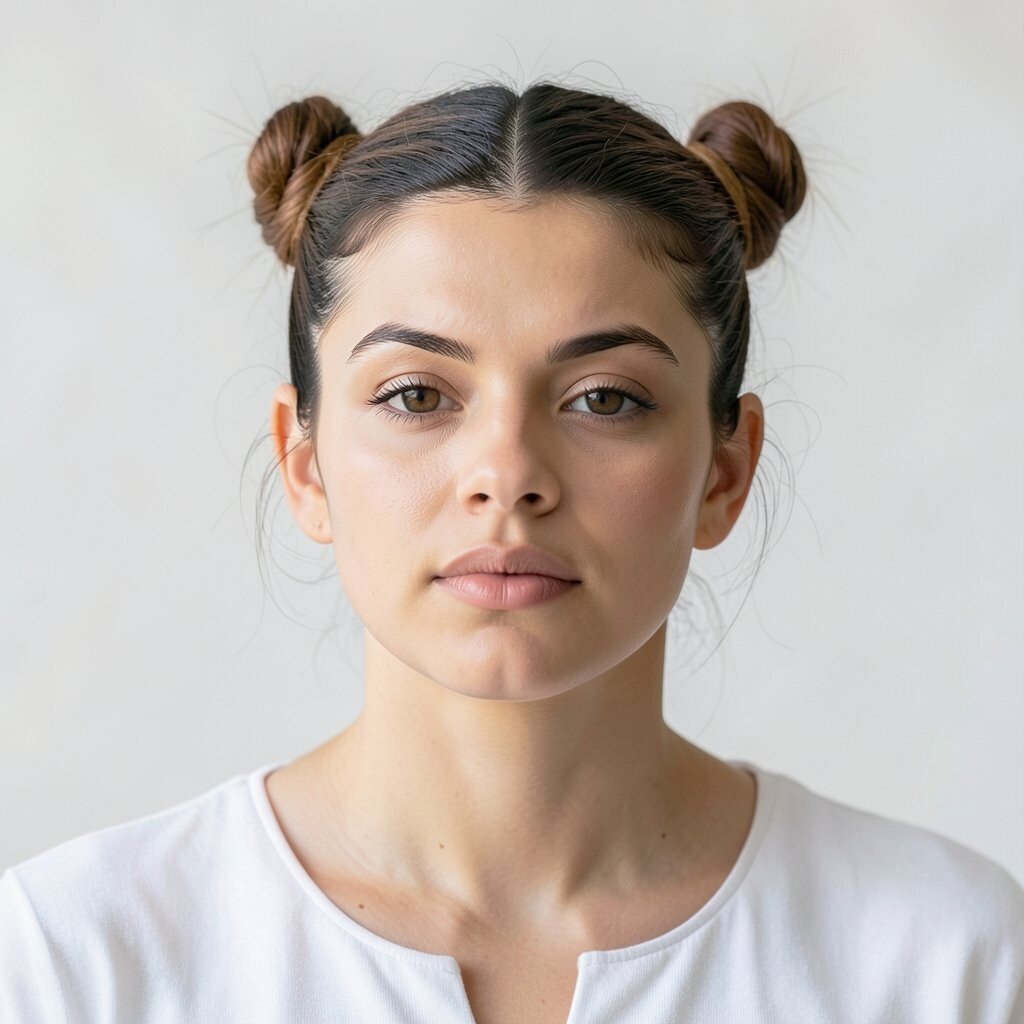
Mini bun duo gives a cute, playful look without requiring fancy braiding. You’ll see two small buns that feel sporty and sweet.
Part hair into two sections, then create two small ponytails. Twist each into a mini bun and pin securely, then gather any loose ends and smooth them so the buns look neat. Use one middle tie or small headband to unify the style, depending on your hair length and comfort.
This is a great option for kids, teens, or anyone who wants a youthful vibe. To personalize, use elastics in matching colors or add small charm pins to each bun. It also saves money because mini buns often require fewer pins than larger styles, and the look is forgiving if you’re learning.
If your hair is very long, you can blend the ends into a low wrap behind the mini buns for extra security.
21. Bun With a Half-Up Twisted Crown Band
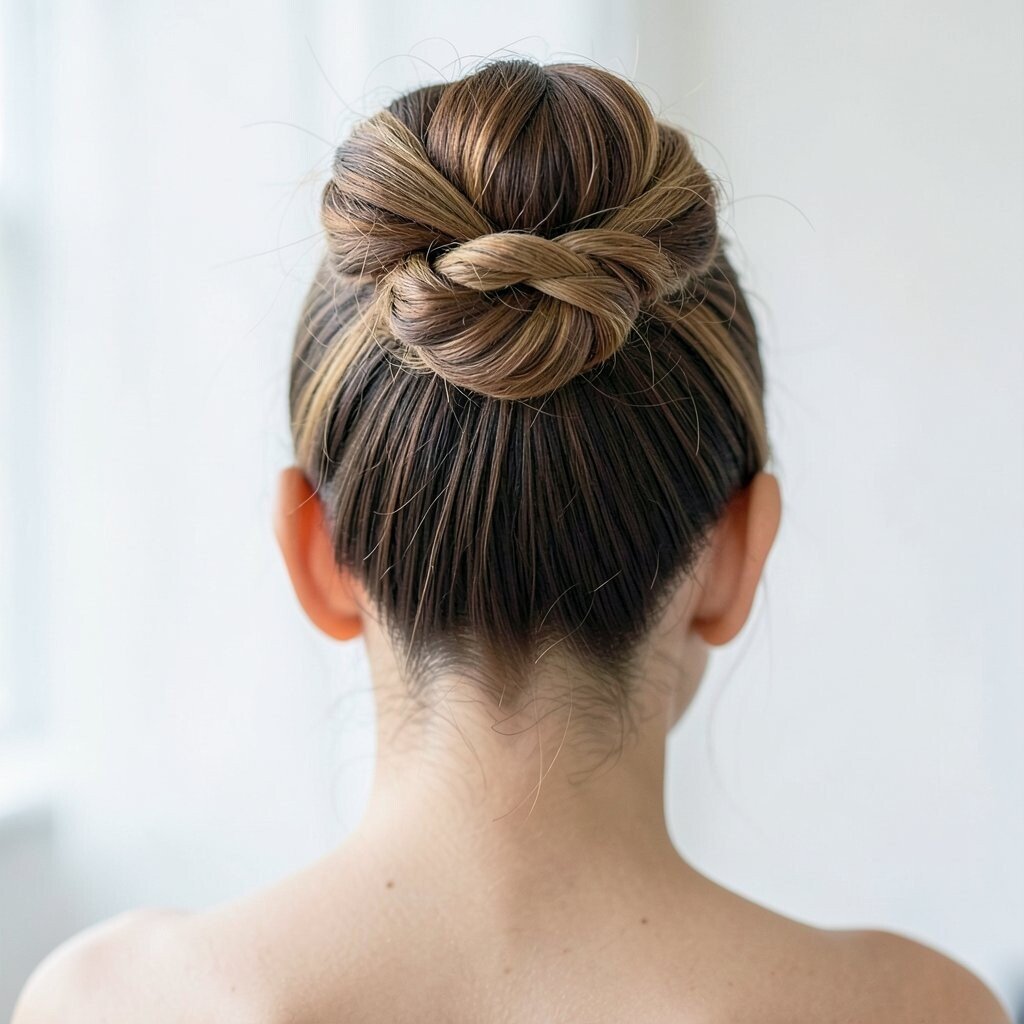
A half-up twisted crown band looks delicate and pretty, like you styled your hair with care. It creates a braided-like headband effect while keeping the rest of your hair smooth or free.
Take two front sections, twist them back toward the crown, and pin them so they form a soft band. Gather the remaining hair into a bun, then blend the twisted band into the bun area with pins. Leave a few wispy strands near your face if you want a soft, romantic finish.
This style is unique because it mixes a crown twist with a bun base, making it feel more special than a plain updo. For personalization, choose the bun height based on your outfit, and adjust the twist tightness for either sleek or airy results. It’s also a cost-friendly choice because it uses simple pins and a trusty elastic, and you can add a clip only if you want extra sparkle.
To keep it comfortable, don’t pin too tightly, and check the back of your head for any pin pressure before you head out.