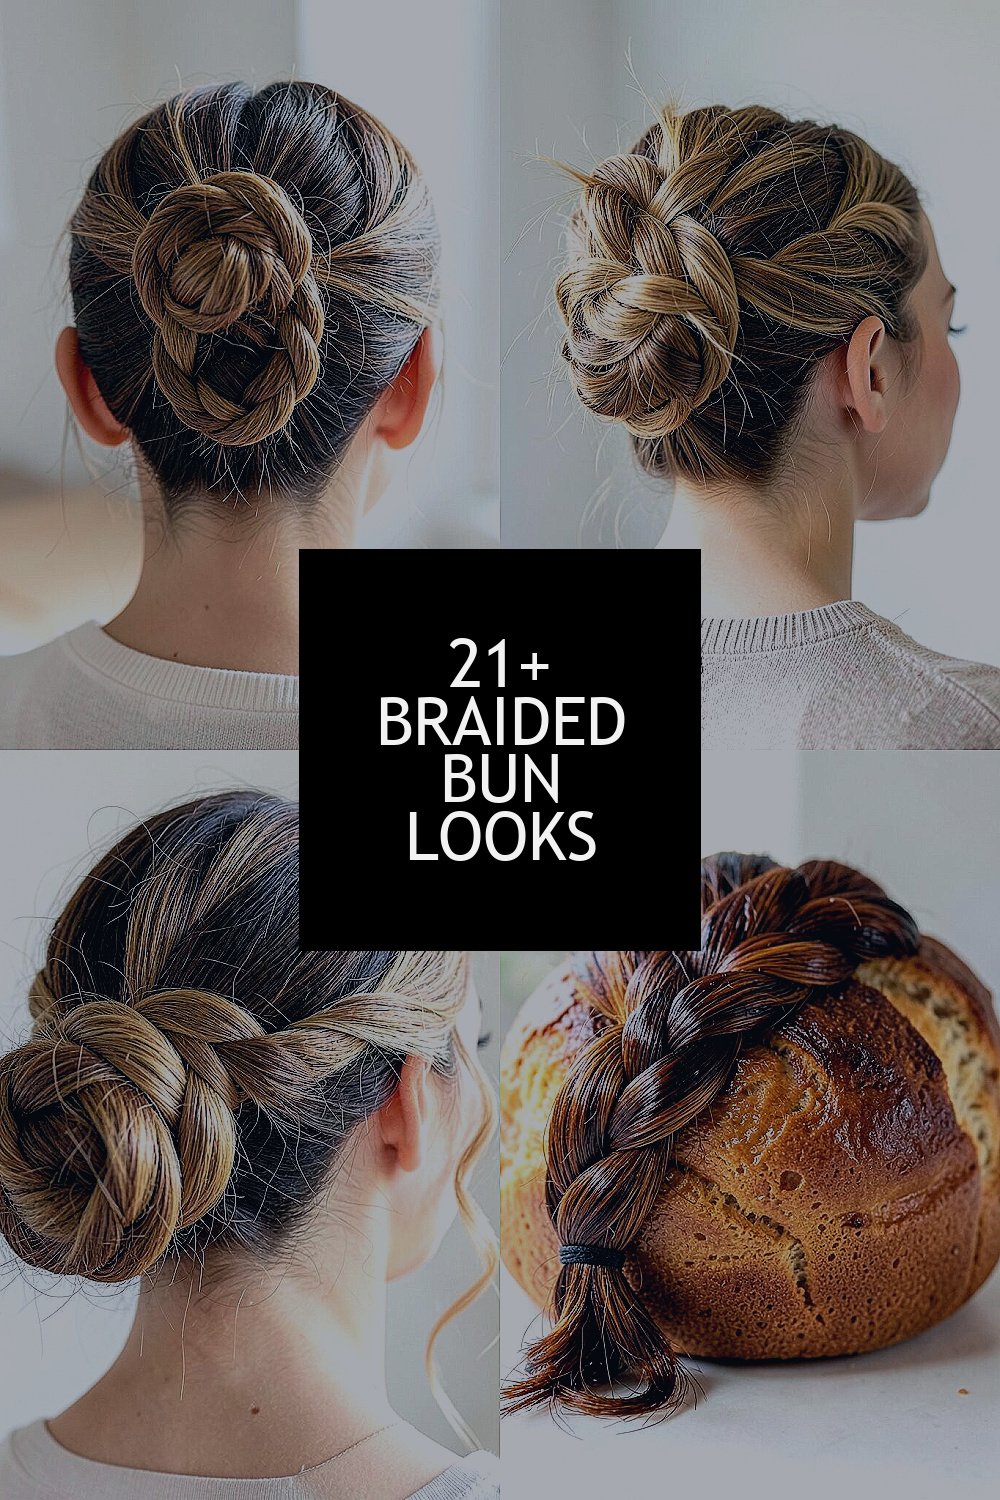
Your next hairstyle can feel both polished and playful at the same time. Braided buns bring texture that looks special in minutes.
From neat office-ready knots to windswept festival styles, there’s a braided bun for every mood. Once you see the options, you’ll want to try more than one.
1. Classic Three-Strand Braided Bun
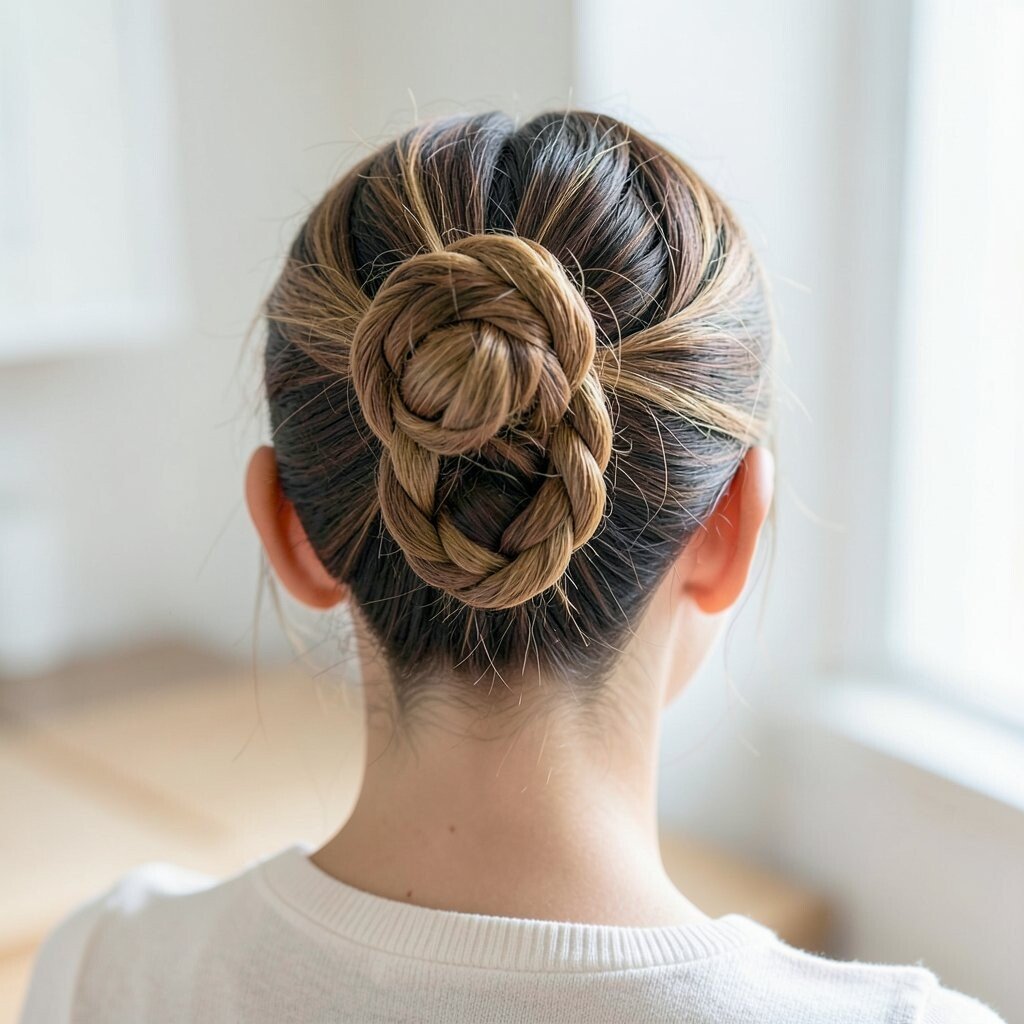
A three-strand braid wrapped into a bun looks timeless and easy to love. The braid adds visible detail, so even a simple outfit feels styled.
Start with clean, dry hair and add a light styling cream for grip. Braid close to the scalp, then twist the braid into a bun and pin it with matching bobby pins. Finish with a soft mist of hairspray so the braid stays put without feeling crunchy.
2. Dutch Braided Bun With Lifted Roots
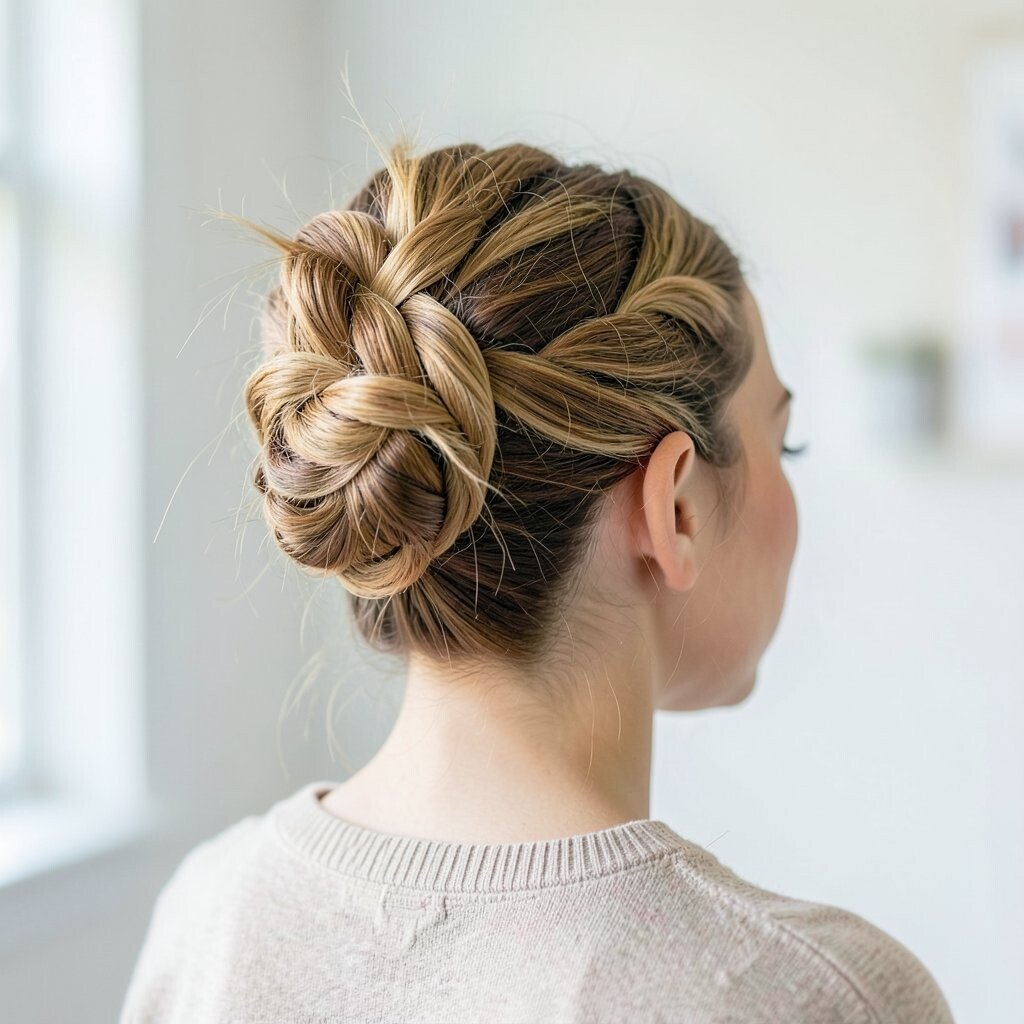
Dutch braids sit up and out, which makes the bun look taller and more dramatic. You’ll see chunky movement right away, even from the front.
Pull your sections a bit snug at the crown, then keep the braid slightly loose as you move toward the ends. Wrap the braid around a small base, then secure with pins in a crisscross pattern. For extra lift, gently tug the braid segments after pinning, and keep the edges smooth with a dab of gel.
If you’re shopping, this look doesn’t require extra tools beyond a brush, pins, and a hair tie. It also works with fine hair because the braid gives your bun shape. Choose a slightly stronger hold spray if your hair slips in humidity.
3. Side Braided Bun With Soft Waves
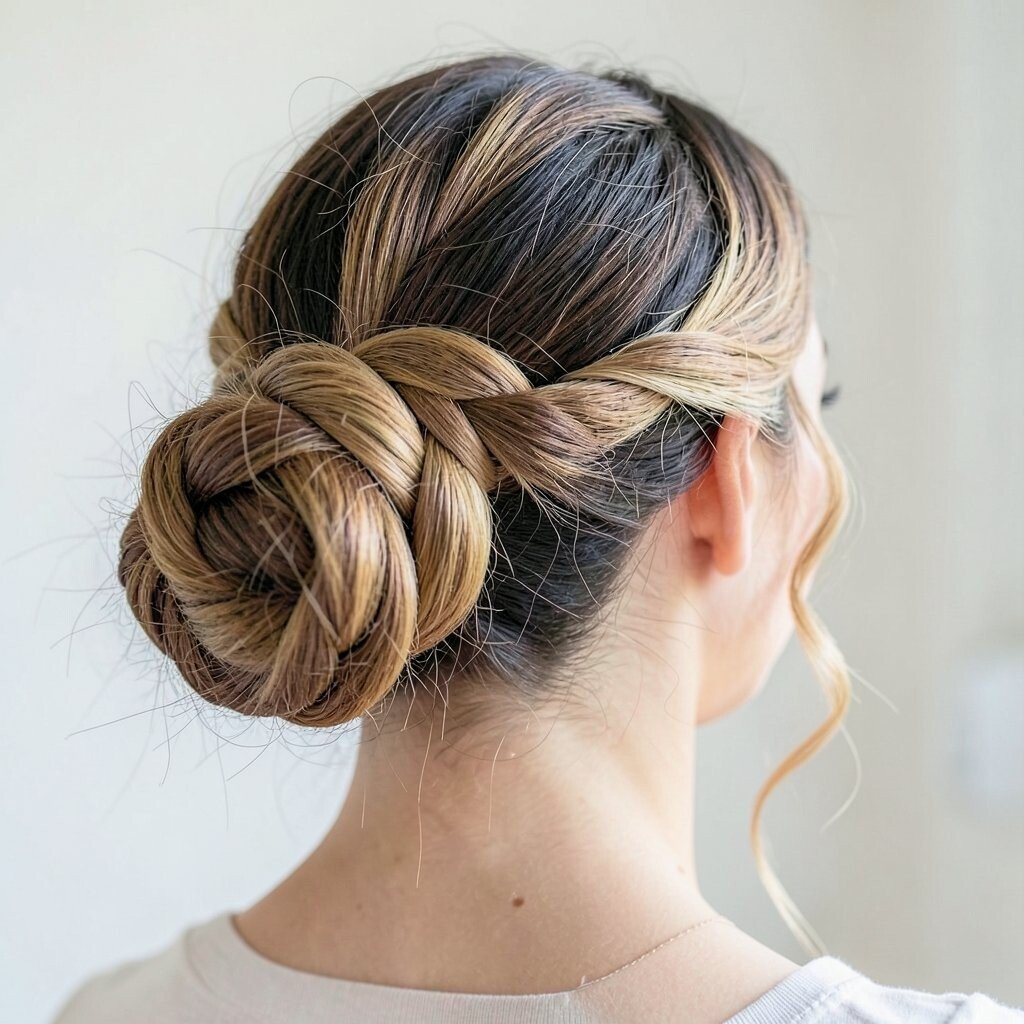
A side braided bun feels romantic and effortless, especially with loose waves nearby. The braid acts like a frame, so your face looks lifted.
Part your hair on a deep side, then gather hair toward one shoulder. Create a braid and coil it into a bun, leaving a few strands to curl around the pinned area. Mist with a heat protectant before curling, and keep the curls loose so the style stays airy.
This is great for brunch, dates, and days when you want a “done” look without looking too formal. If your hair is thick, start pinning at the nape first so the bun sits flat. If your hair is thin, add a small section of teasing at the crown before braiding to build body.
4. Fishtail Braided Bun With a Polished Finish
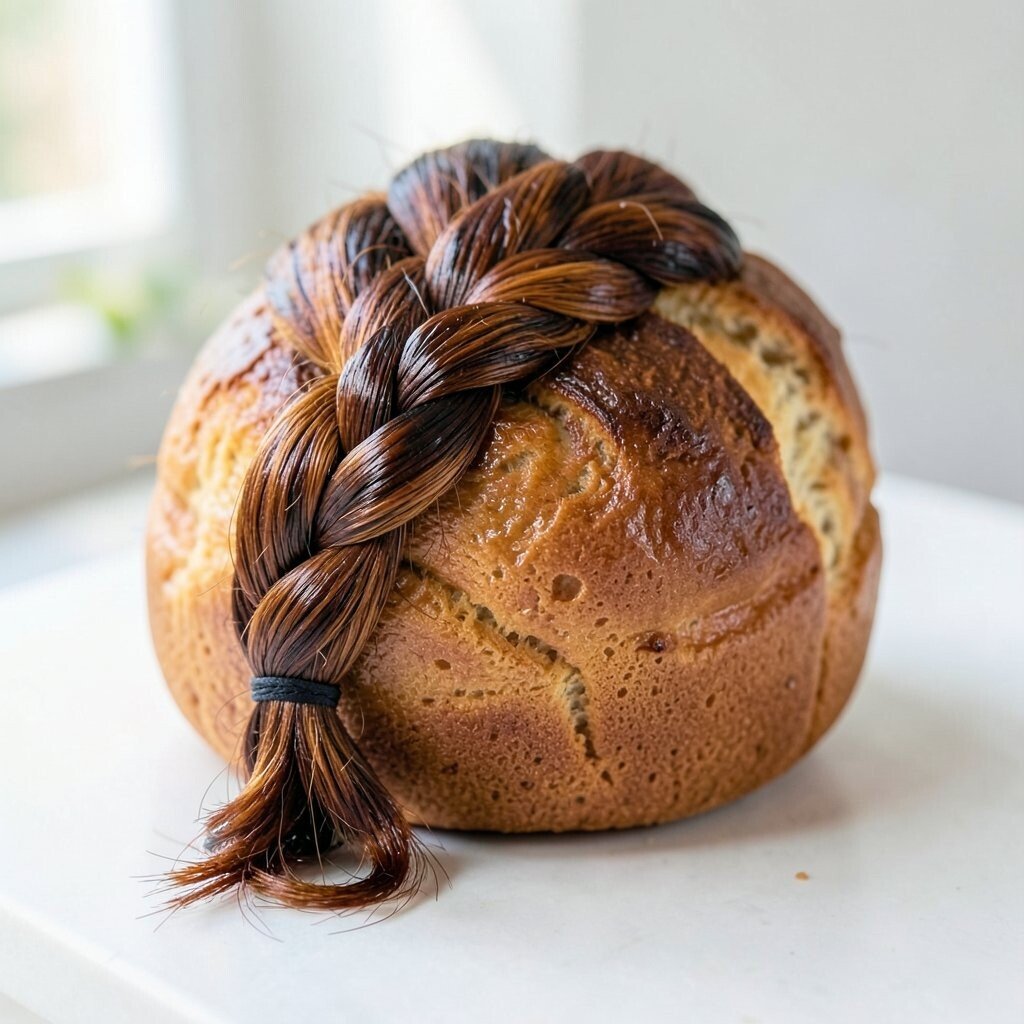
Fishtail texture looks fancy because the braid pattern shows detail from every angle. When it’s wrapped into a neat bun, it feels wedding-ready or event-ready.
Use a fishtail braid for the cleanest look by splitting hair into two sections and crossing small strands. Keep tension even, then coil the braid tightly for a smoother bun shape. Add shine spray on the surface so the braid glows under light.
5. Rope Braid Bun With a Modern Twist
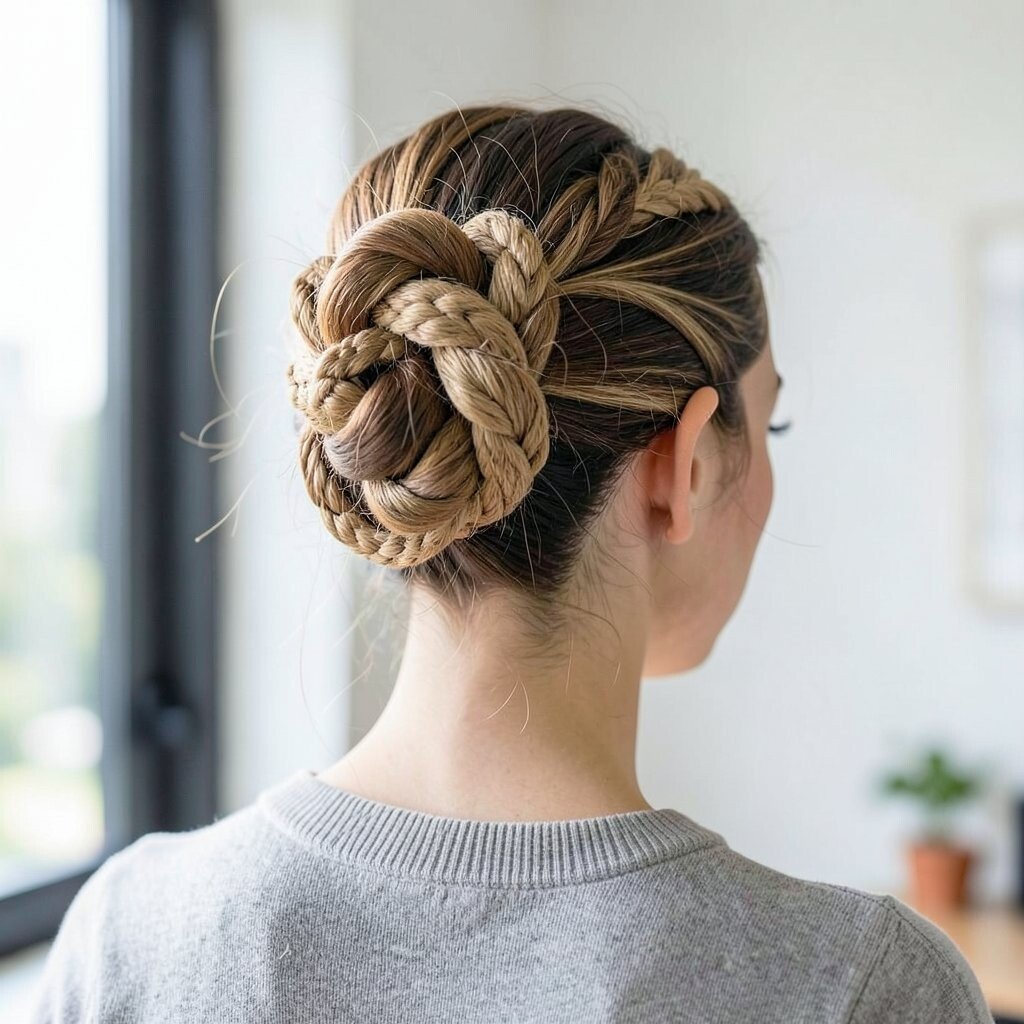
Rope braids look like twisted cords, and they give a sleek, fashion-forward vibe. This bun is a little more edgy than a classic braid, but still wearable.
Divide hair into two sections, then twist each section in the same direction. Wrap the twisted sections around each other in the opposite direction, then coil into a bun. Secure with pins and smooth flyaways using a tiny amount of edge control.
To personalize, leave the bun centered for a bold look or angle it slightly for a playful shape. Try this with slightly wavy hair so the braid looks softer. If you want it to last, use a firm-hold spray and avoid touching it after you pin it.
6. Crown Dutch Braid Into Bun
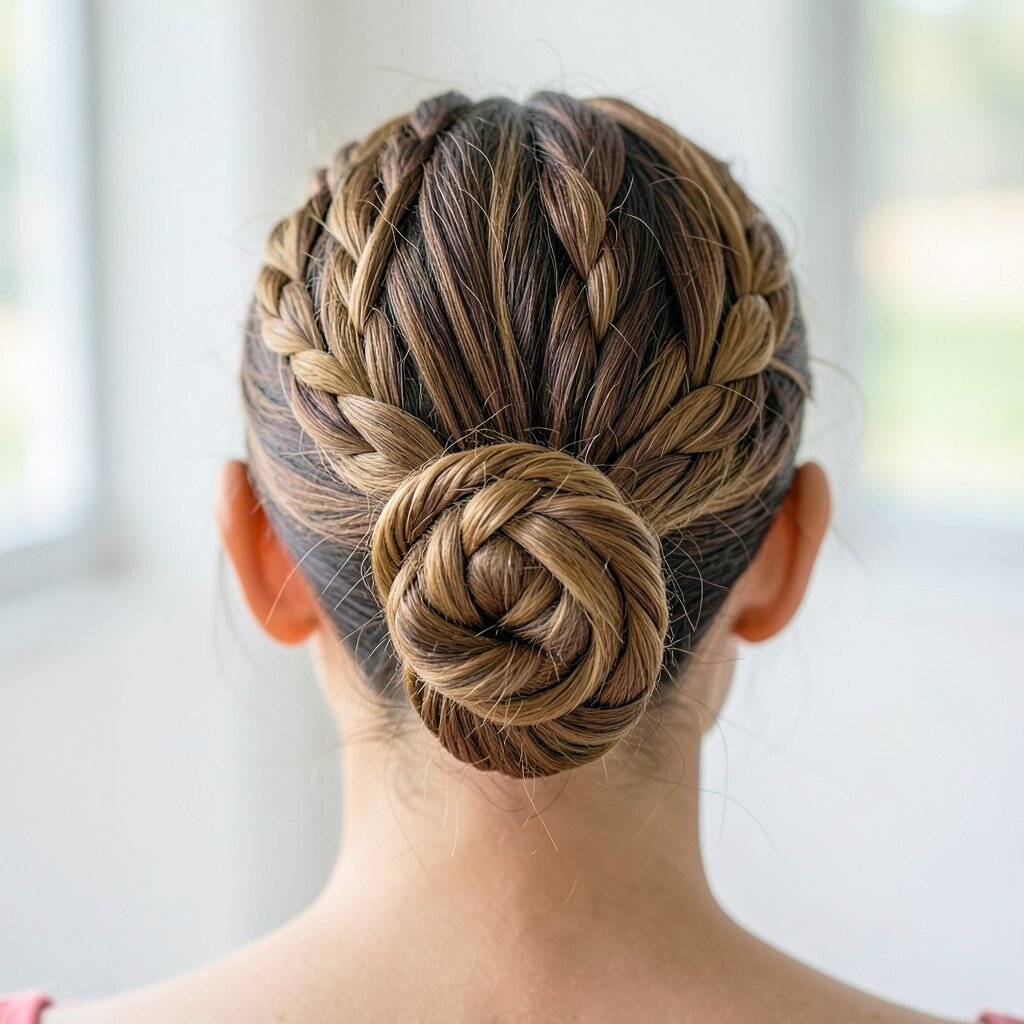
A crown Dutch braid makes the bun feel like part of a tiara. The braided band across the top adds structure and elegance.
Create the Dutch braid along your hairline, gradually adding hair as you move around the crown. When you reach the back, continue braiding the rest of the hair and wrap it into a bun. Use pins that match your hair color and tuck the ends inside so nothing sticks out.
Because the braid holds the shape, it’s a nice option for busy mornings. For a cost-friendly upgrade, use a few decorative bobby pins instead of buying new tools. Keep the braid tight at the hairline for clean edges, then loosen the bun slightly for a softer finish.
7. Waterfall Braid Bun With Textured Ends
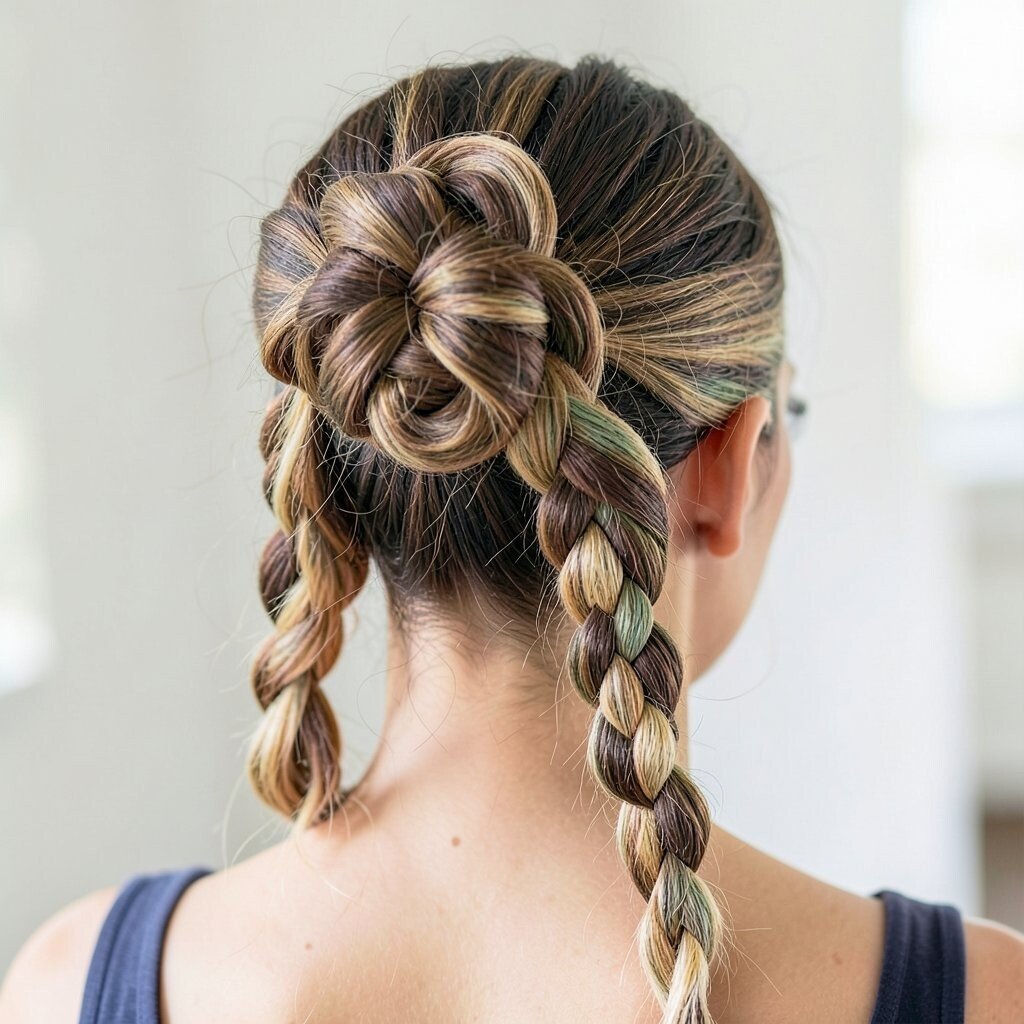
A waterfall braid gives a dreamy, flowing effect even when the hair is gathered. It makes the bun look lighter, like your style is floating.
Work with a slightly thicker braid near the top and let some sections drop as you build the waterfall pattern. When you reach the back, combine the remaining hair and wrap it into a bun. Curl or wave the dropped pieces before pinning so they blend naturally.
For personalization, choose a more dramatic waterfall by leaving longer “falls,” or keep it subtle for everyday wear. This look shines at hair events, garden parties, and photo days. If your hair is fine, use a texturizing spray before braiding to add grip and thickness.
8. Braided Bubble Bun With Elastic Sections
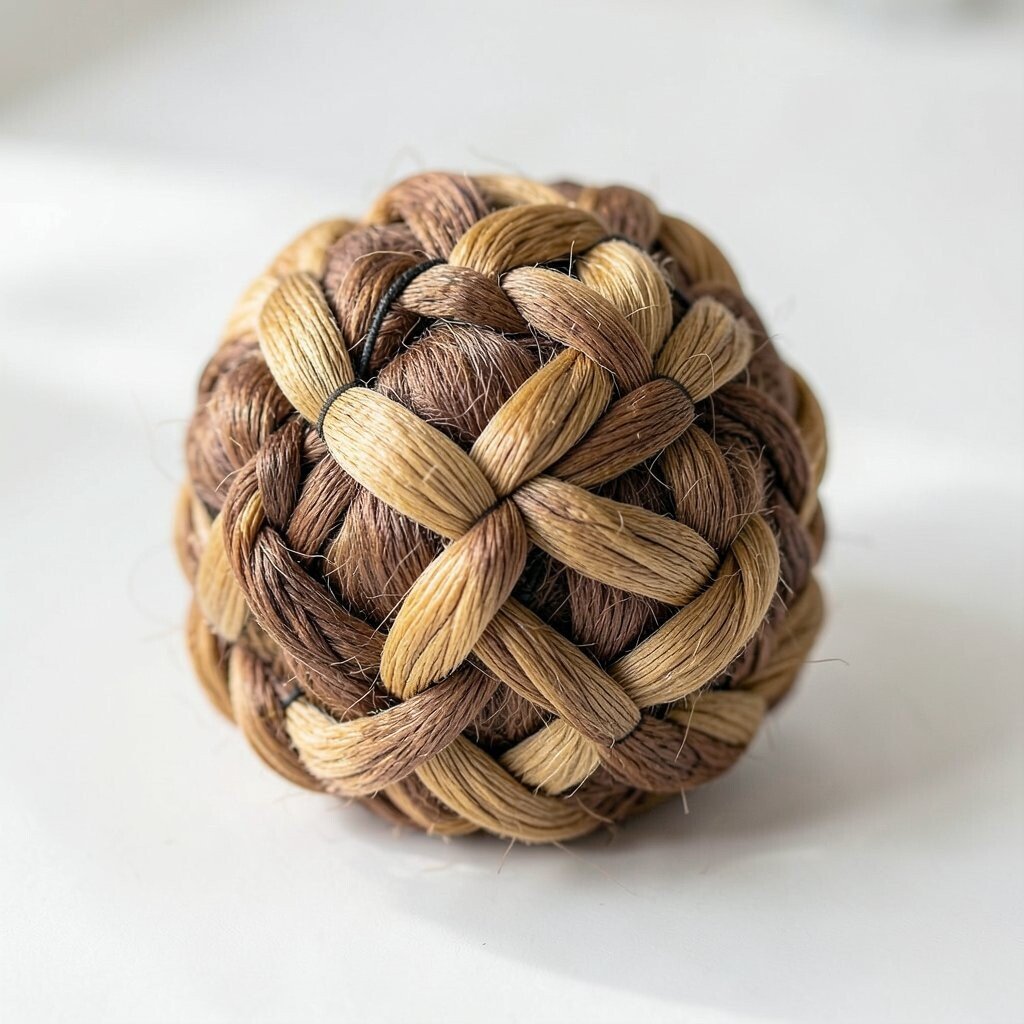
Bubble braids create a fun, bouncy shape that looks playful and modern. Wrapped into a bun, they feel like a hair party in the best way.
After braiding, secure small sections with elastic bands to form “bubbles.” Coil the bubble segments around a base bun and pin them in place. Keep the bubbles evenly spaced for a neat look, or loosen a few for a carefree vibe.
9. Lace-Effect Side Braid Bun
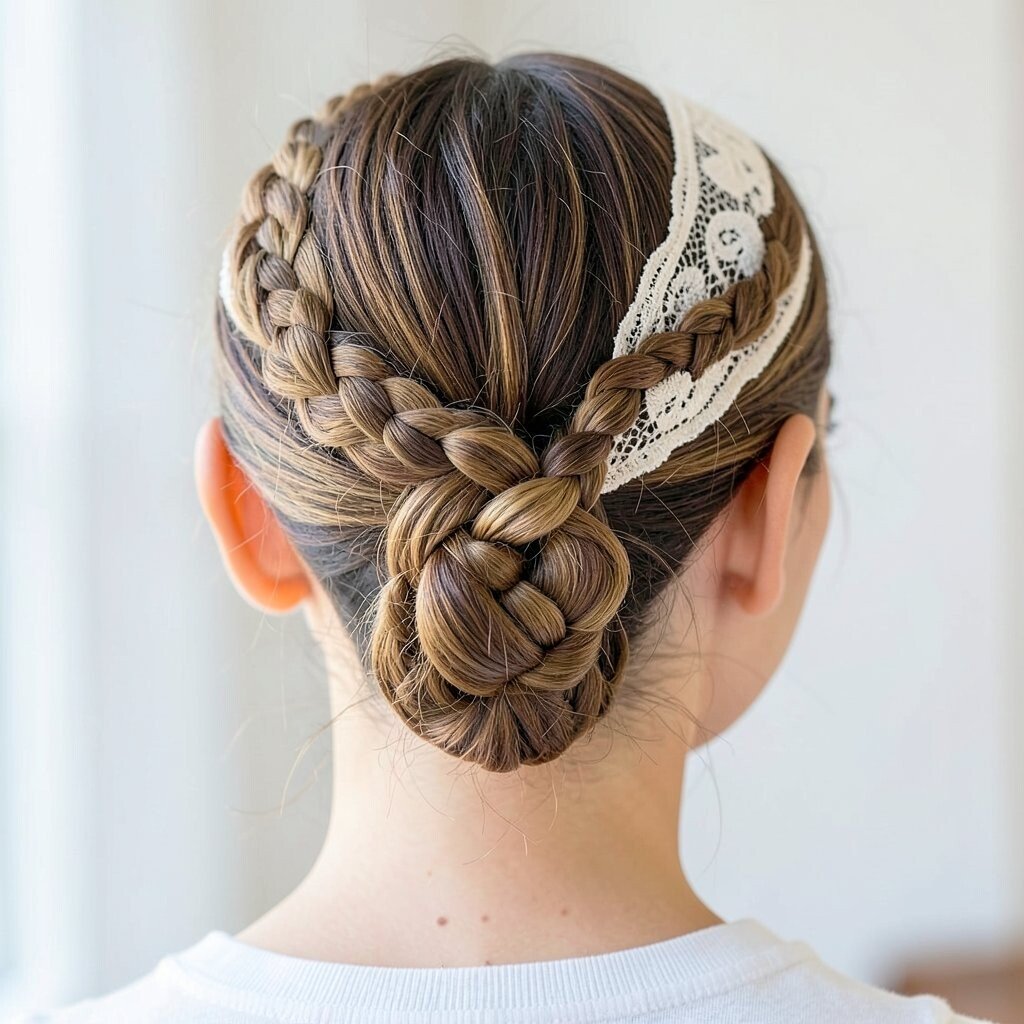
This lace-effect braid looks delicate, with a light, see-through texture. It’s a great choice when you want something pretty but still practical for a busy day.
Use small sections and gently pull them apart as you braid so the pattern looks airy. Wrap the braid into a bun at the side and secure with pins at the underside. For extra charm, tuck a few mini curls around the front.
If you’re styling for an occasion, add a subtle hair clip near the braid for sparkle. For cost considerations, you can use inexpensive costume clips that still look elegant in photos. Choose a slightly stronger hold spray if you plan to wear it through heat or humidity.
10. Two Braids Into One Bun
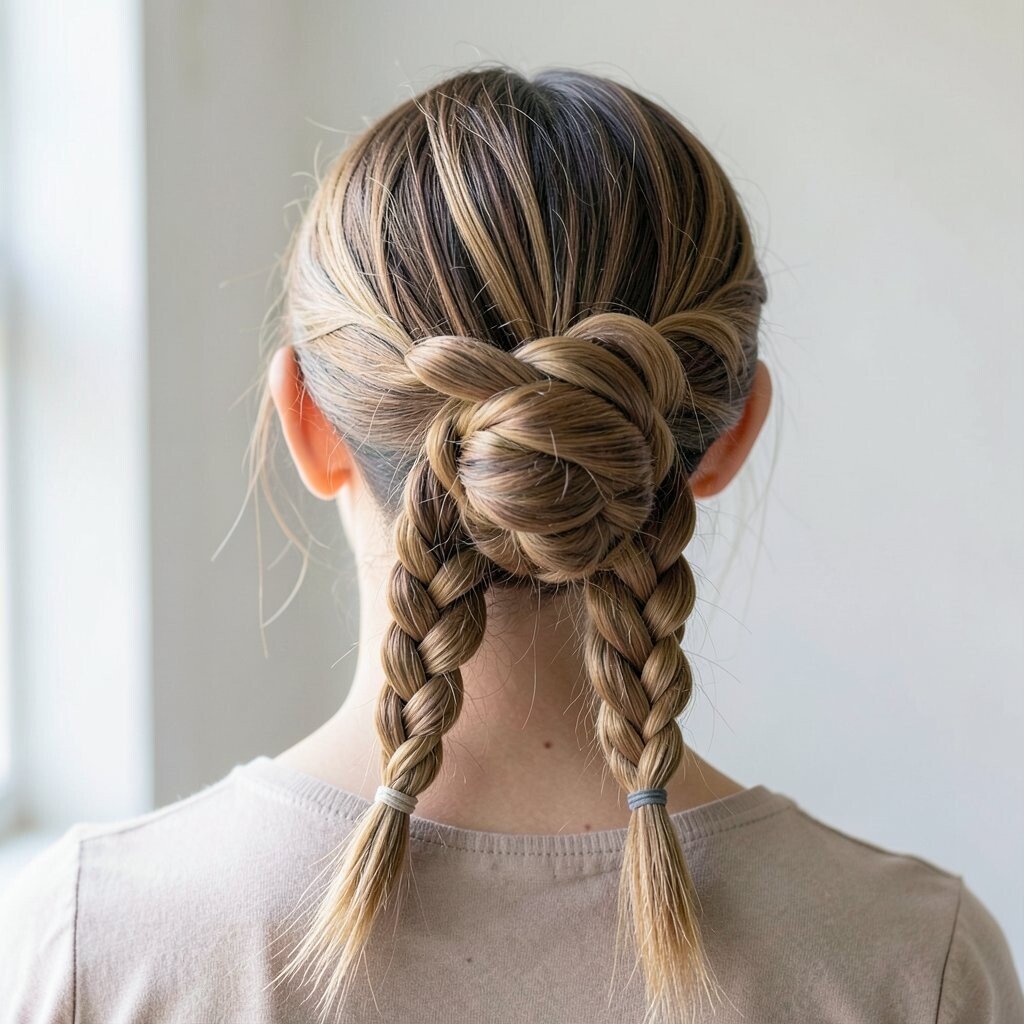
When you combine two braids into one bun, the result feels full and balanced. This is ideal if you love symmetry and want extra volume without teasing too much.
Part your hair down the middle, braid both sides, then overlap the braids and wrap them into a single bun. Pin the base so both braids feel anchored, and smooth the outer layer with a light smoothing serum. Let the ends blend into the bun for a seamless look.
11. Twisted Lace-Up Braided Bun
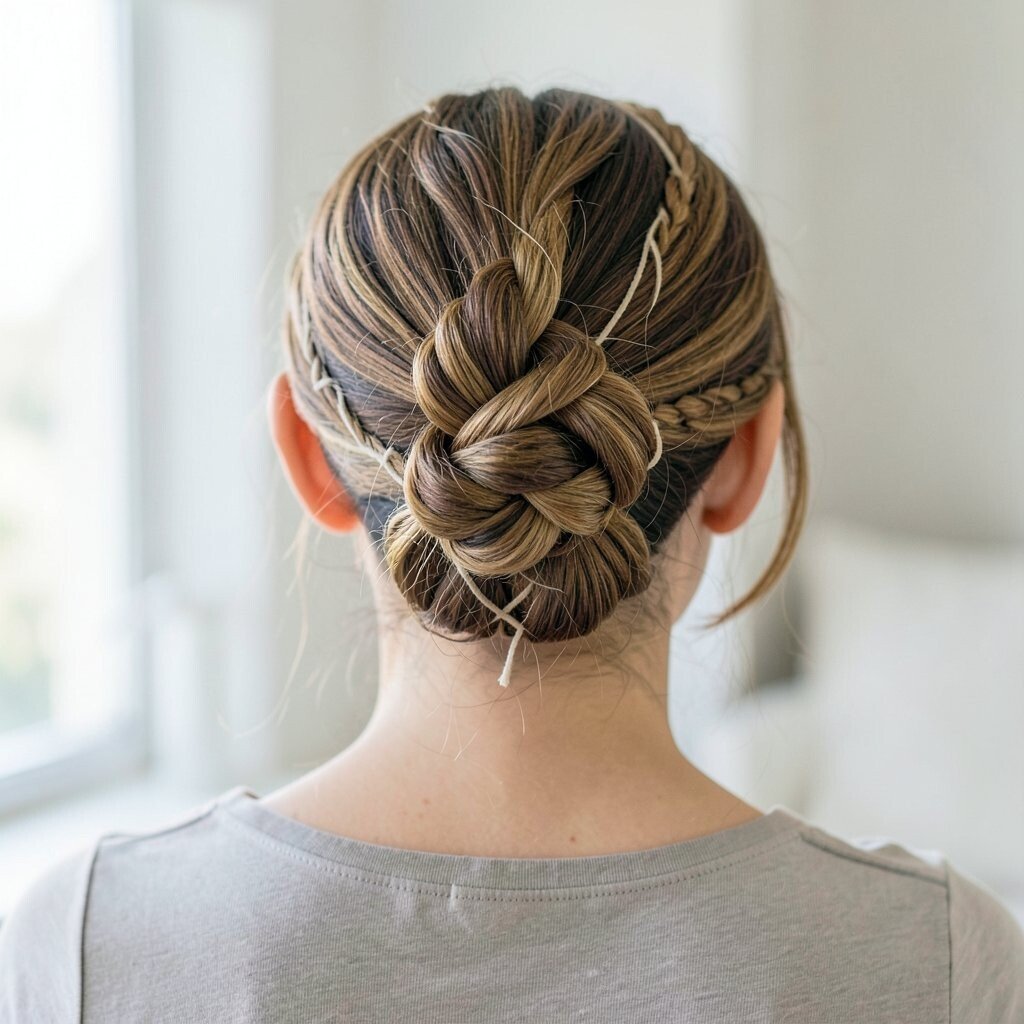
A lace-up vibe comes from crisscrossing sections that look woven and intentional. It’s unique because you get a “crafted” look without using complex tools.
Start with a basic braid or twisted base, then weave extra strands through the braid area as you wrap. Pin each cross point carefully so the woven pattern stays defined. Finish with a soft hairspray so the structure holds while the top remains touchable.
To personalize, choose thicker strands for a bold weave or thinner strands for a dainty look. If your hair is slippery, apply a little styling mousse before you begin. This look can feel high-end for events, but it’s usually budget-friendly with basic supplies like pins and elastic ties.
12. Braided Chignon Bun With Clean Lines
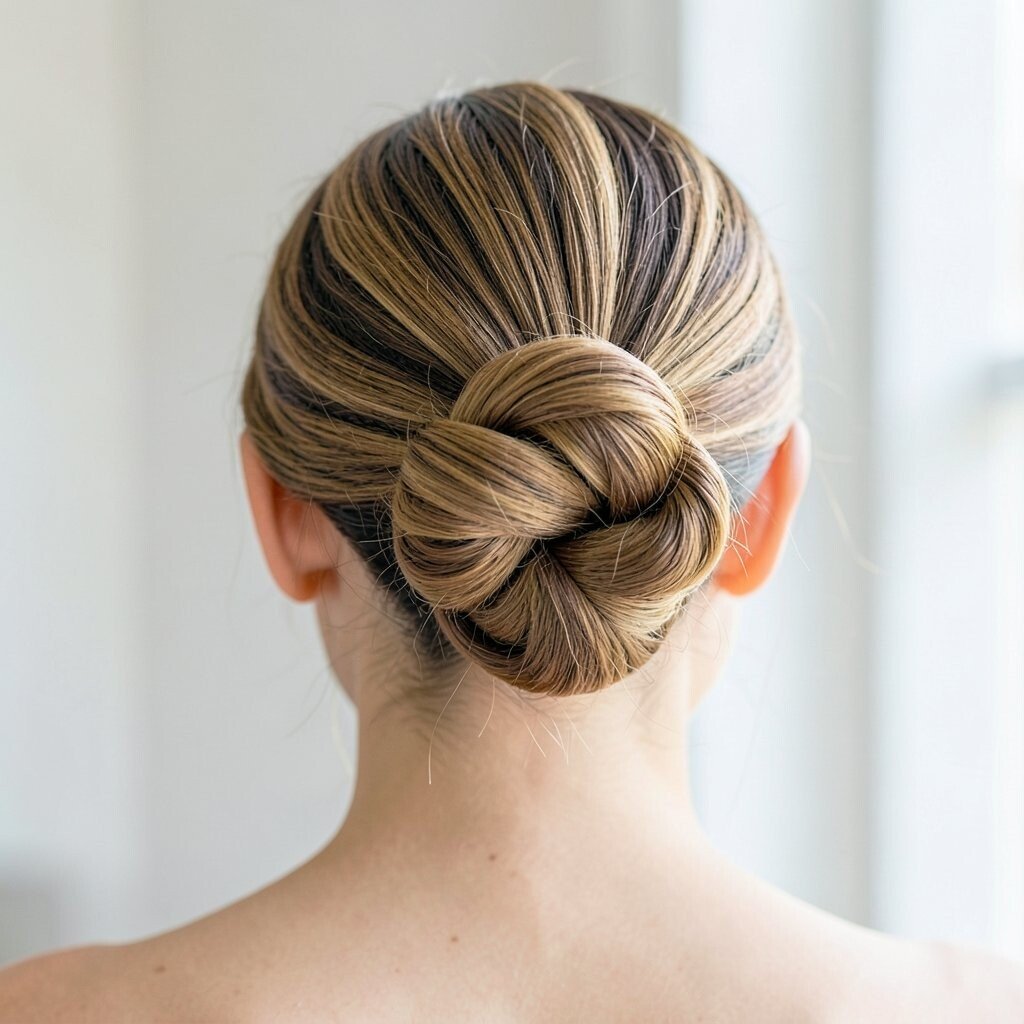
A chignon is all about clean, tidy lines, and braiding adds richness to the classic shape. You’ll love how it frames the back of your head neatly.
Create one braid or a braid-like twist, then coil it into a low chignon. Pin close to the scalp so it stays sleek, and tuck the ends under for a smooth finish. For a polished feel, add shine spray and avoid over-fluffing.
This bun suits work days, formal dinners, and any time you want your hair to look “perfectly settled.” If you’re worried about hair slipping, use a longer pin and secure the underside too. Choose a medium-hold hairspray so it lasts without stiffness.
13. Braided Bun With Mini Space Buns
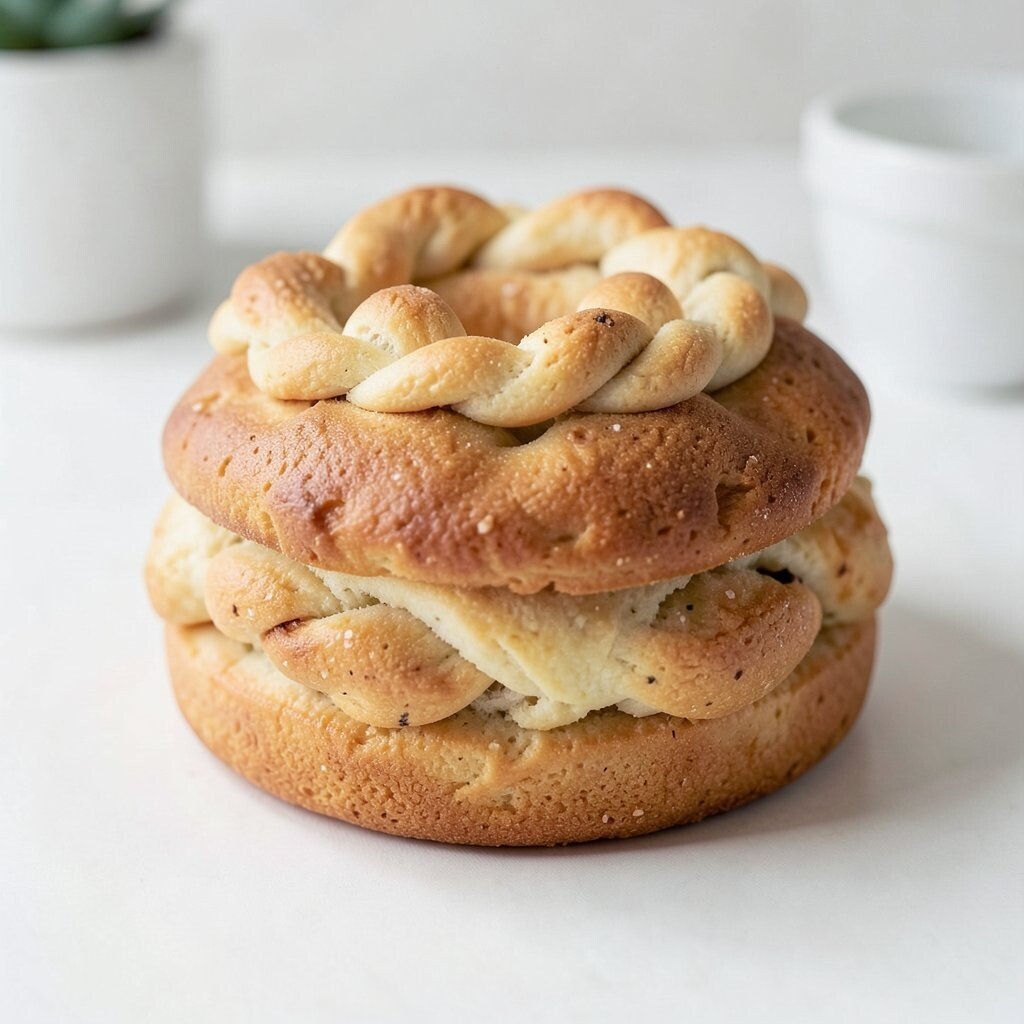
Mini space buns with braids mix playful energy with a tidy finish. Even though it’s fun, it still feels organized because the braids add structure.
Part hair into two sections, braid each side, then coil into two small buns. Leave a few braids slightly loosened for a relaxed, lived-in texture. Add a ribbon or small claw clip for extra charm if that matches your style.
Try this when you want a look that stands out in a crowd without needing a full costume. If you have thick hair, use thicker braids so the bun doesn’t feel crowded. For cost, inexpensive hair ties and pins do the job, and you can get creative with accessories later.
14. Braided Bun With Hidden Elastic Surprises
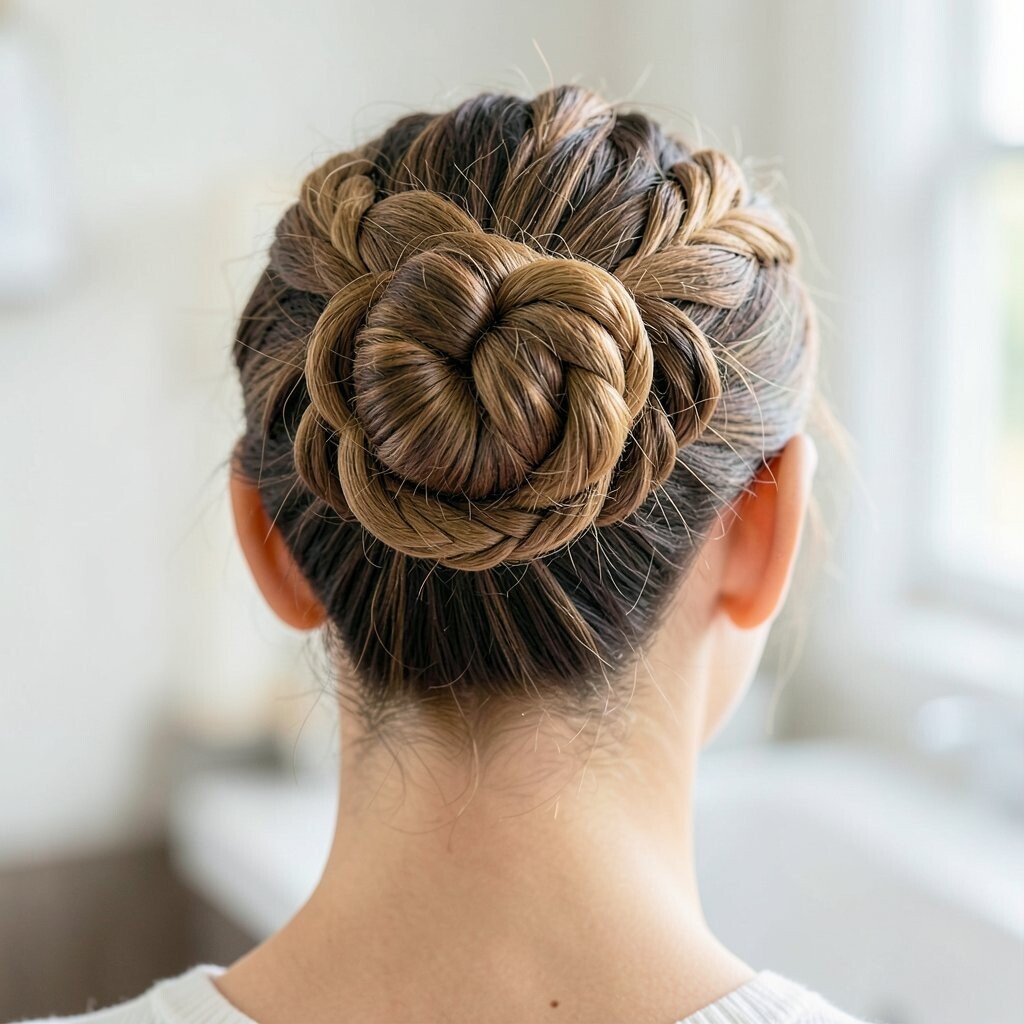
This look hides the ties so the bun appears smooth and elevated. It’s a clever styling trick that makes your braids feel more “finished.”
Secure each braided segment with small elastics, but tuck the elastic areas into the bun so they aren’t visible. Pin around the hidden spots to lock everything in place. If you want extra security, use one pin that goes through the bun and into the base of the elastic area.
To personalize, choose a loose bun for softness or a tighter coil for a more formal feel. This can help if your braid tends to loosen during the day. Use a strong grip spray on the inside only, so the outside stays smooth.
15. Side Dutch Braid Bun With Slick Finish
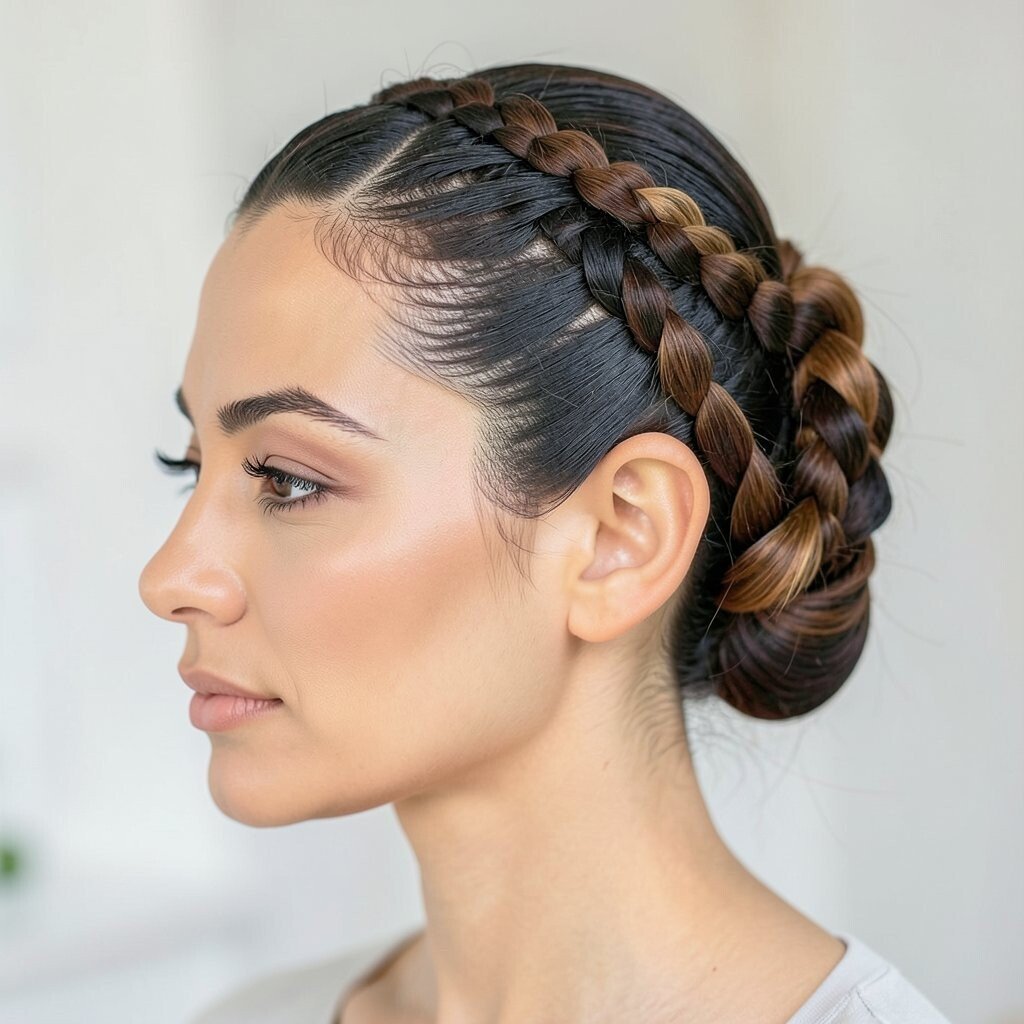
A slick side Dutch braid bun looks sleek and modern, like street style for everyday life. You get strong shape plus a clean, polished shine.
Brush hair back, then create a Dutch braid on one side so it sits close to the scalp. Wrap the braid into a low bun and keep the top sleek with gel. Press down flyaways and use a comb to make the part look crisp.
This is a great choice for interviews, evenings out, or any time you want your hair to look sharp. If your hair is curly, use a smoothing cream first so braiding feels easier. Consider a humidity-resistant spray if you live in a damp climate, because it helps the sleek finish stay intact.
16. Braided Bun With Half-Up Crown Twist

A half-up braided crown twist brings the best of two styles together. It gives your face a lifted frame while keeping the rest of your hair tucked or gathered.
Make a small braided crown at the top, then connect it to a bun at the back. Leave a few loose strands at the front and curl them lightly for a soft, blended look. Pin the bun low so it stays comfortable and doesn’t tug.
For personalization, add beads to the braid only, so the bun stays clean. This is often cheaper than buying elaborate hair accessories, because you can use a few small items you already own. It also works well on different hair lengths, from shoulder length to longer styles, with slight pin adjustments.
17. Braided Bun With Tucked-In Fringe Strands
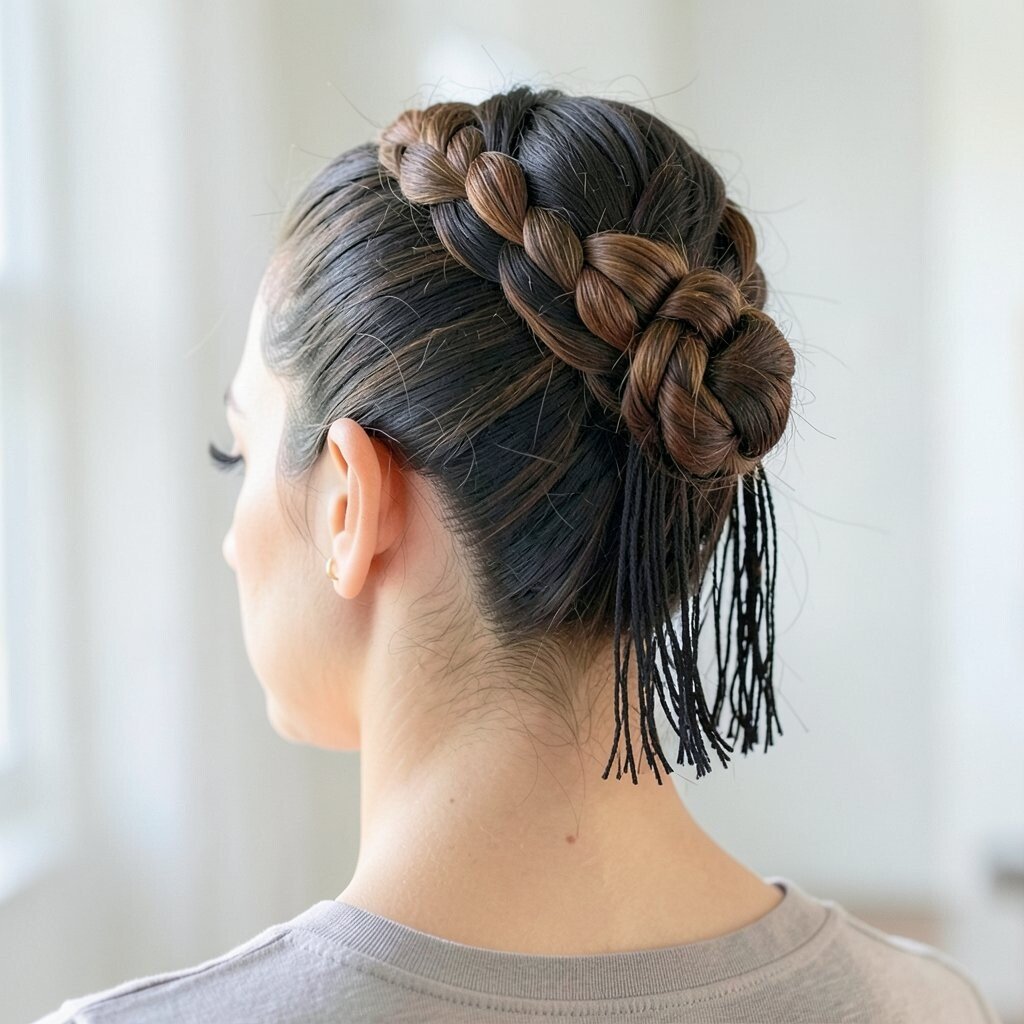
If you love a face-framing look, braided bun with tucked-in fringe strands is perfect. The fringe stays neat, and the braid adds extra detail behind it.
Pin or tuck your bangs and front layers while you braid the rest of the hair toward the bun. Wrap the braid into a mid or low bun and secure it firmly so the front pieces don’t shift. Use a small comb to guide the fringe into place.
This style is especially flattering when your bangs curl easily or get in your eyes. To personalize, keep the fringe tucked tightly for a sleek vibe or leave one side slightly loose for softness. For cost considerations, focus on good-quality pins, because they hold fringe and buns much better than cheap ones.
18. Braided Bun With Chunky Curls at the Ends
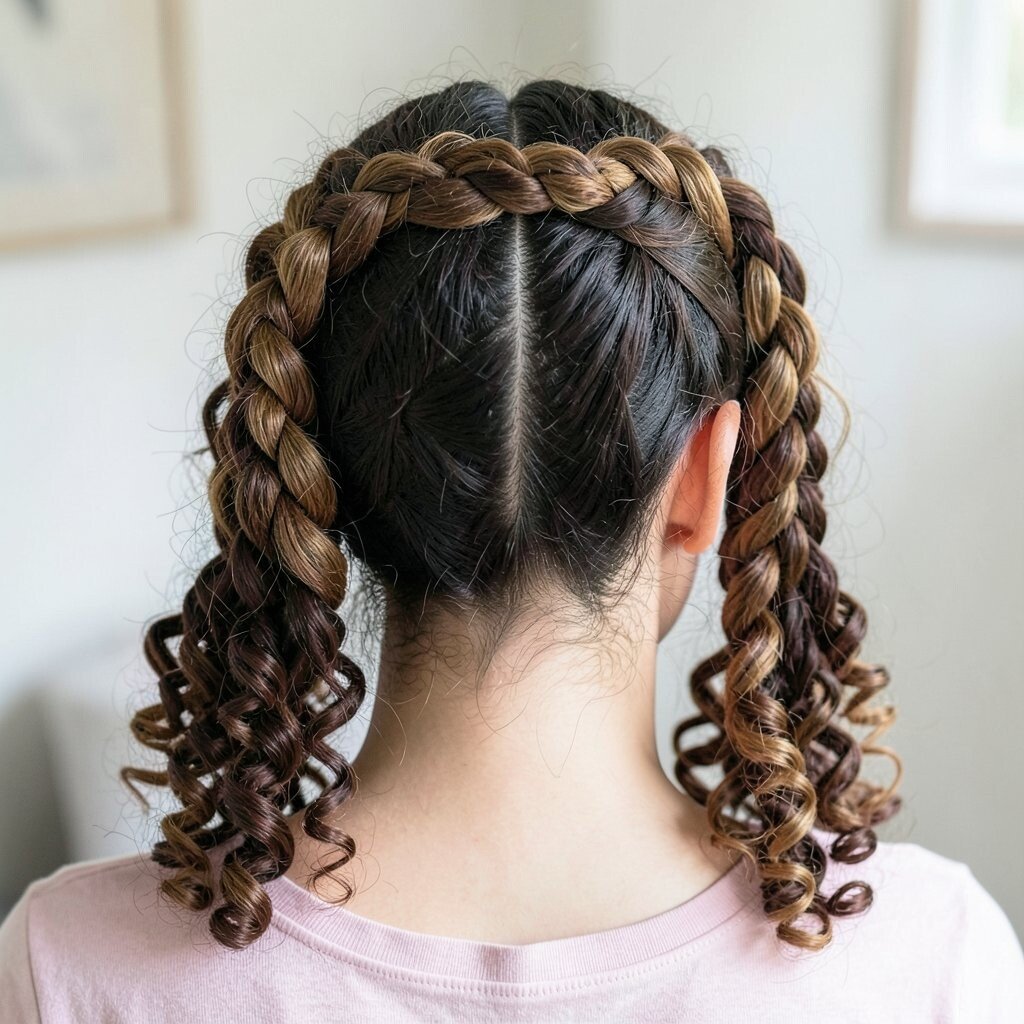
When braided bun ends are curled, the whole style feels richer and more festive. The contrast between tight braid and bouncy ends looks great in motion.
Create a braid, wrap it into a bun, then curl the tail ends before tucking them in. Secure the curled pieces with pins so they don’t spring out too early. Add a light oil to the ends for shine and a soft feel.
This look works for birthdays, date nights, and nights out when you want your hair to look extra. If your hair is straight, curl the ends first so they hold longer with less heat. Use a heat protectant every time, and keep the curl size medium for a balanced silhouette.
19. Braided Bun With Micro Braids Around the Base
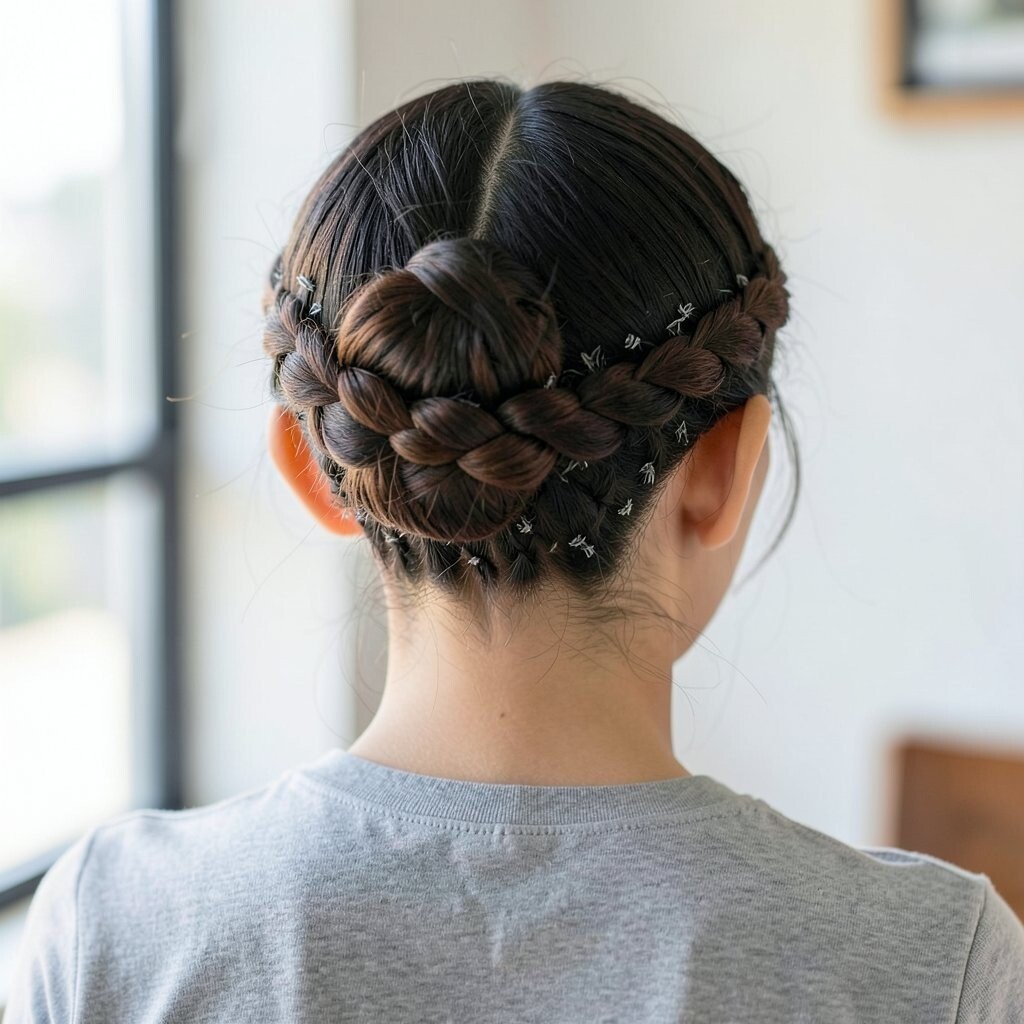
Micro braids around the bun base add a detailed halo effect. It feels unique because the texture wraps everything like a frame.
Start with a simple braided bun, then create small micro braids near the base and wrap them around the bun circumference. Pin each micro braid close to the base so it looks seamless. This takes a little more time, but the finished look feels high effort.
For personalization, match micro braid thickness to your hair type, using thicker sections for thick hair and thinner sections for finer hair. If you’re worried about time, do the micro braids only on one side or the front. Cost-wise, you only need basic braiding supplies, so it can be budget-friendly compared to salon-only styling.
20. Braided Bun With a Top Knot Texture Boost
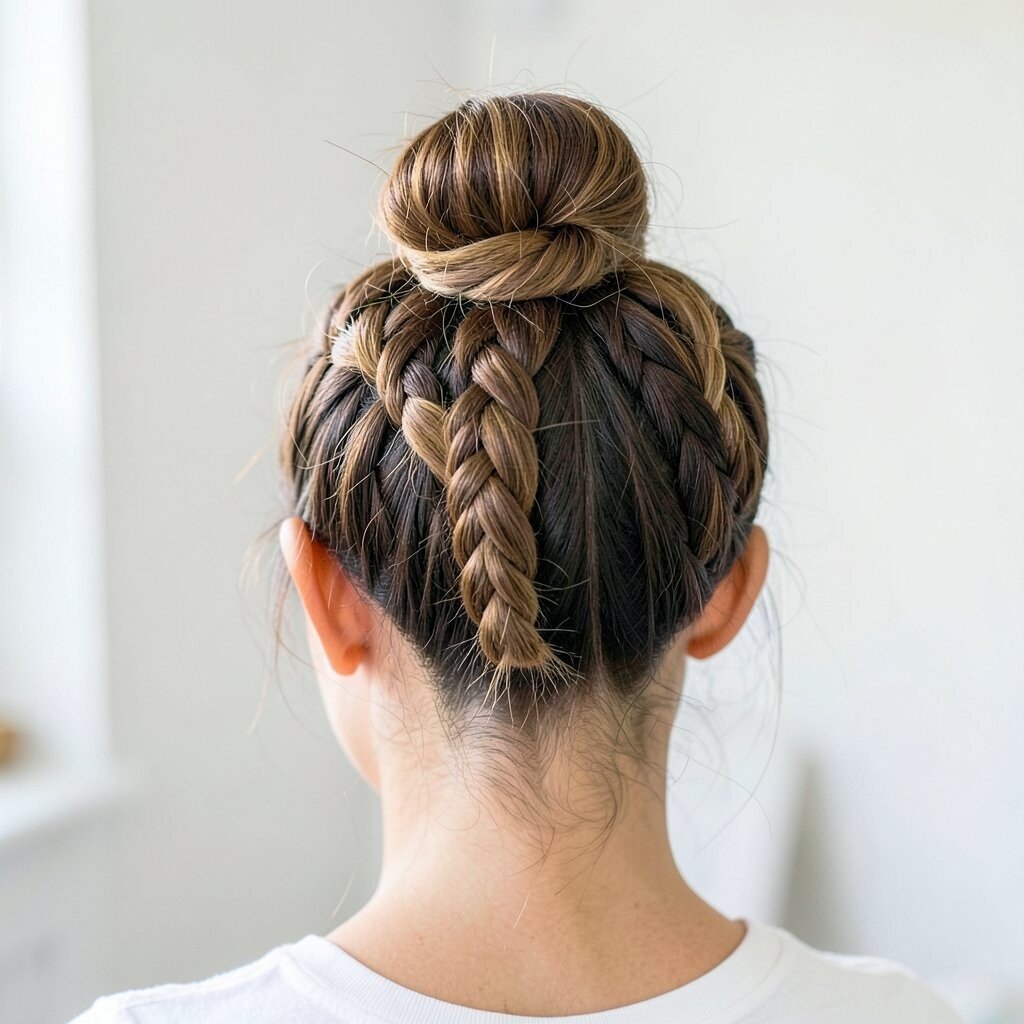
Top knot energy plus braid texture makes this bun feel bold and confident. It’s also great when you want height without a messy-looking base.
Gather hair at the top, create a braid, and coil it into a high bun. Tease the crown lightly before braiding for a stronger lift, then smooth the top layer so it still looks polished. Pin the bun securely so it doesn’t slide when you move.
This look suits casual weekends and sporty outfits, but it can also be dressed up with a sleek outfit. To personalize, leave the braid slightly looser for a relaxed, thicker appearance. Use a flexible-hold spray so you get lift without feeling stiff all day.
21. Braided Bun With a Headband-Like Braid Loop
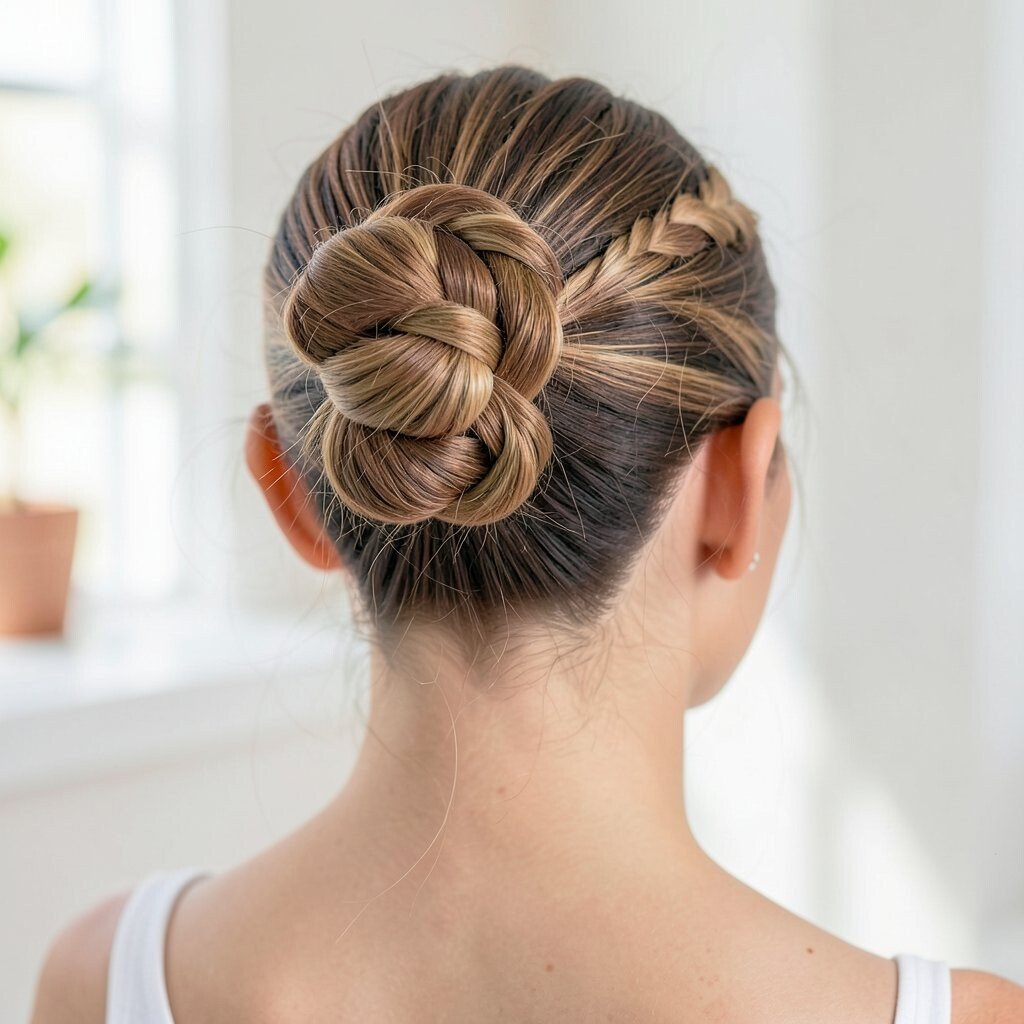
A looped braid that sits like a headband instantly frames your face. It’s a clever way to create a statement without covering the whole head.
Part your hair and braid a section that runs across the top, then loop it to form a headband effect. Secure the ends, then wrap the remaining braid into a bun at the back or side. Smooth the surrounding hair so the loop looks intentional and clean.
For personalization, add a small clip at the point where the loop meets the bun base. If your hair is fine, use a little dry shampoo at the roots first to give the braid more grip. Cost considerations are easy here, because the look mainly depends on good pin placement and a reliable spray.
22. Braided Bun With a Glimmering Hair Pin Accent
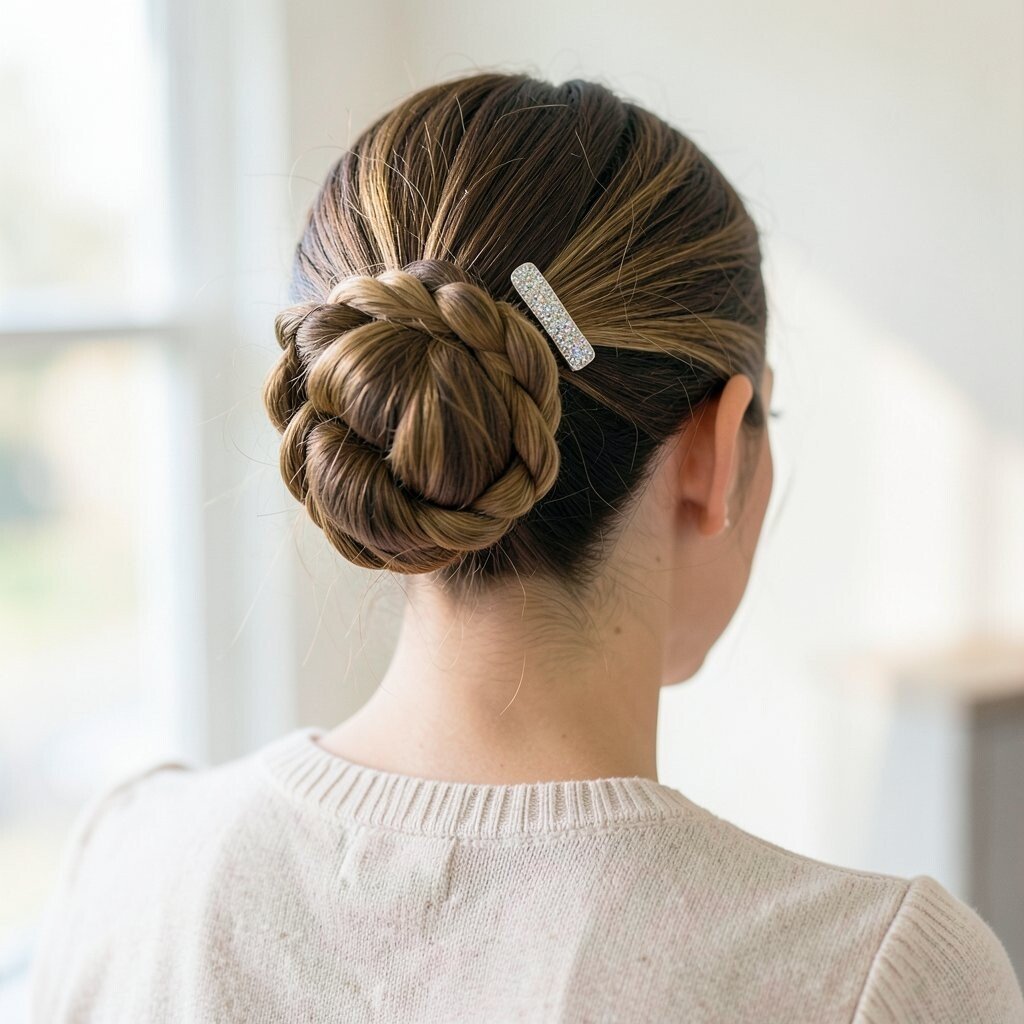
This look is all about shine and detail, with a braided bun acting as the perfect backdrop. A glimmering pin turns the style into something special without changing your whole process.
Make any braided bun you like, then place a decorative hair pin at the side where it catches light. Secure the pin firmly so it stays comfortable, and smooth the braid surface with a tiny amount of serum. Choose a pin color that matches your outfit jewelry for a coordinated look.
To personalize, pick a minimal pin for everyday elegance or a bold sparkling one for events. If you want it to last, use hairspray over the pin area and avoid touching it while it sets. This can be a cost-smart upgrade because even one good accessory can make your everyday hairstyle feel salon-fresh.