
The moment you notice one twist placed a little off center, the whole look feels intentional. It’s the kind of hairstyle detail that turns “just put-together” into “wow.”
Asymmetrical braided buns balance softness and edge, so they fit both busy weekdays and dressy nights.
1. Side-Swept Rope Braid Into a Low Asymmetrical Bun
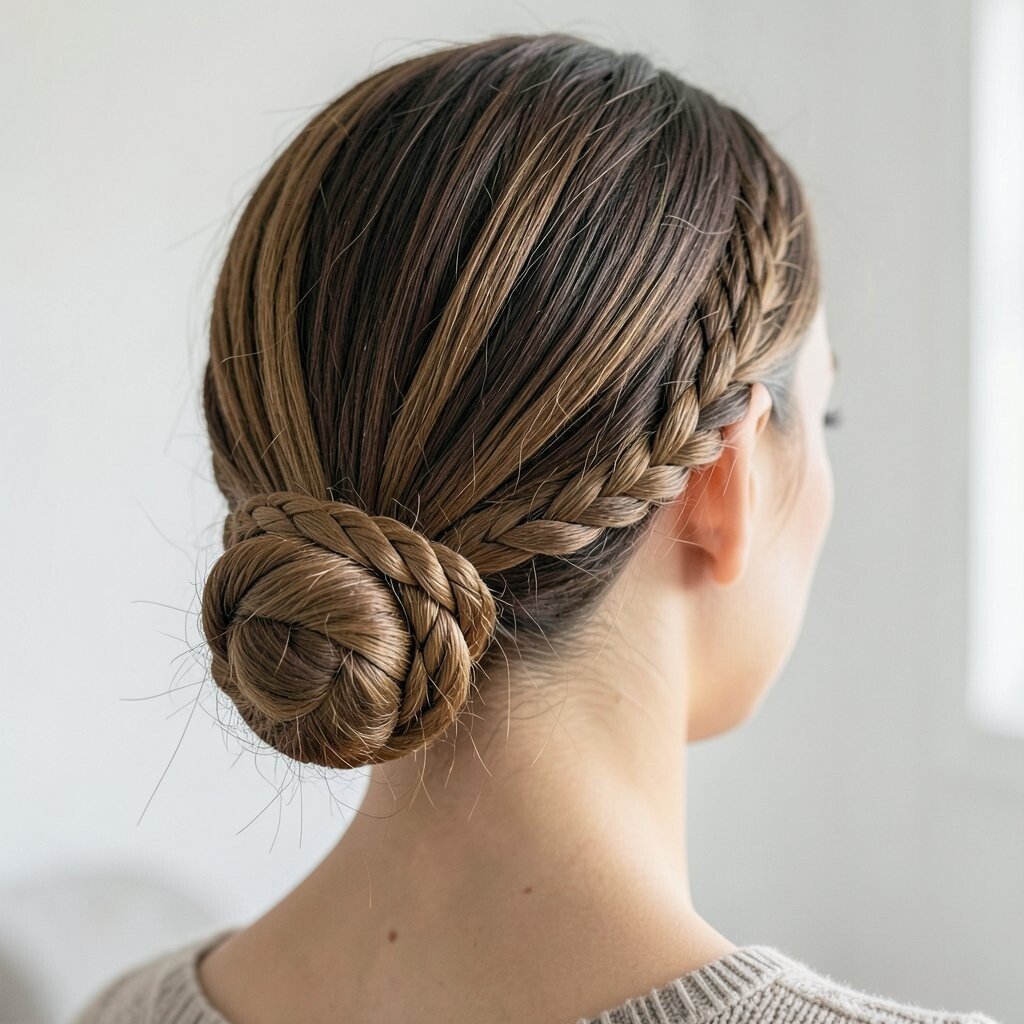
Start with slightly damp hair so the braid grips better and stays neat longer. Make a deep side part, then take a thick section and braid it like a rope by twisting two strands together.
Let the braid sweep across your head and coil it into a low bun on the opposite side for a playful mismatch. This look feels unique because the weight sits differently, and that visual tilt draws attention to your cheek and jaw. For a practical hold, secure with bobby pins in a cross pattern and finish with a light mist of hairspray to keep flyaways calm.
2. Dutch Braid Crown With a Curved Bun Twist
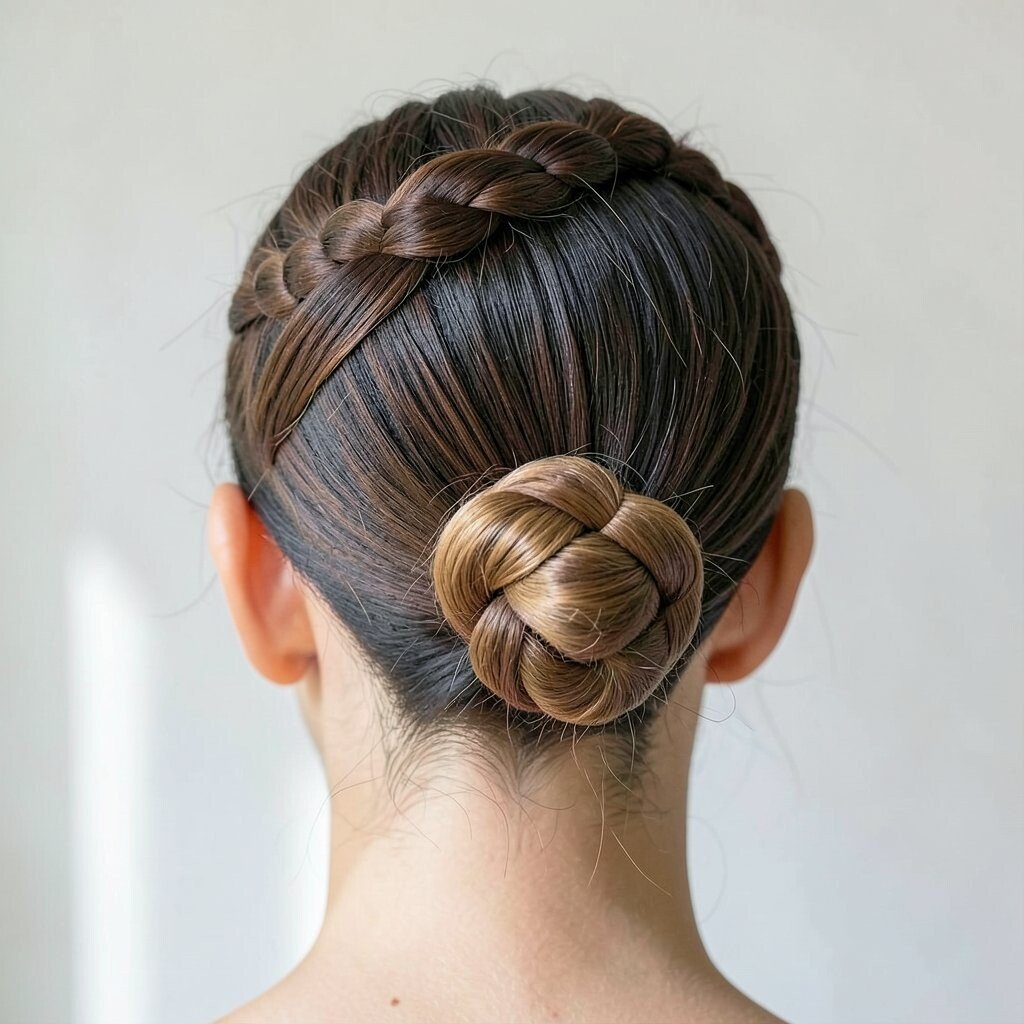
Begin near the top and Dutch-braid along one side, pulling in hair gradually for a smooth, sculpted ridge. As the braid travels toward the back, keep it slightly looser so it looks romantic, not rigid.
When you reach the side, gather the remaining hair and coil it into a curved bun that sits off center. This gives you a crown-like frame with an asymmetrical finish, which is a big current styling vibe. You can personalize the shape by choosing a tighter braid for a cleaner runway look or a softer braid for a more casual, lived-in feel.
If your hair is fine, tease the base of the bun very gently before pinning to add volume without bulking up the braid. Keep cost low by using the same bobby pins you already own and skipping expensive hair gadgets. A quick tip is to set one pin at an angle and add a second pin underneath, since that locks the coil without making it look bulky.
3. Waterfall Braid Into a High Asymmetrical Bun
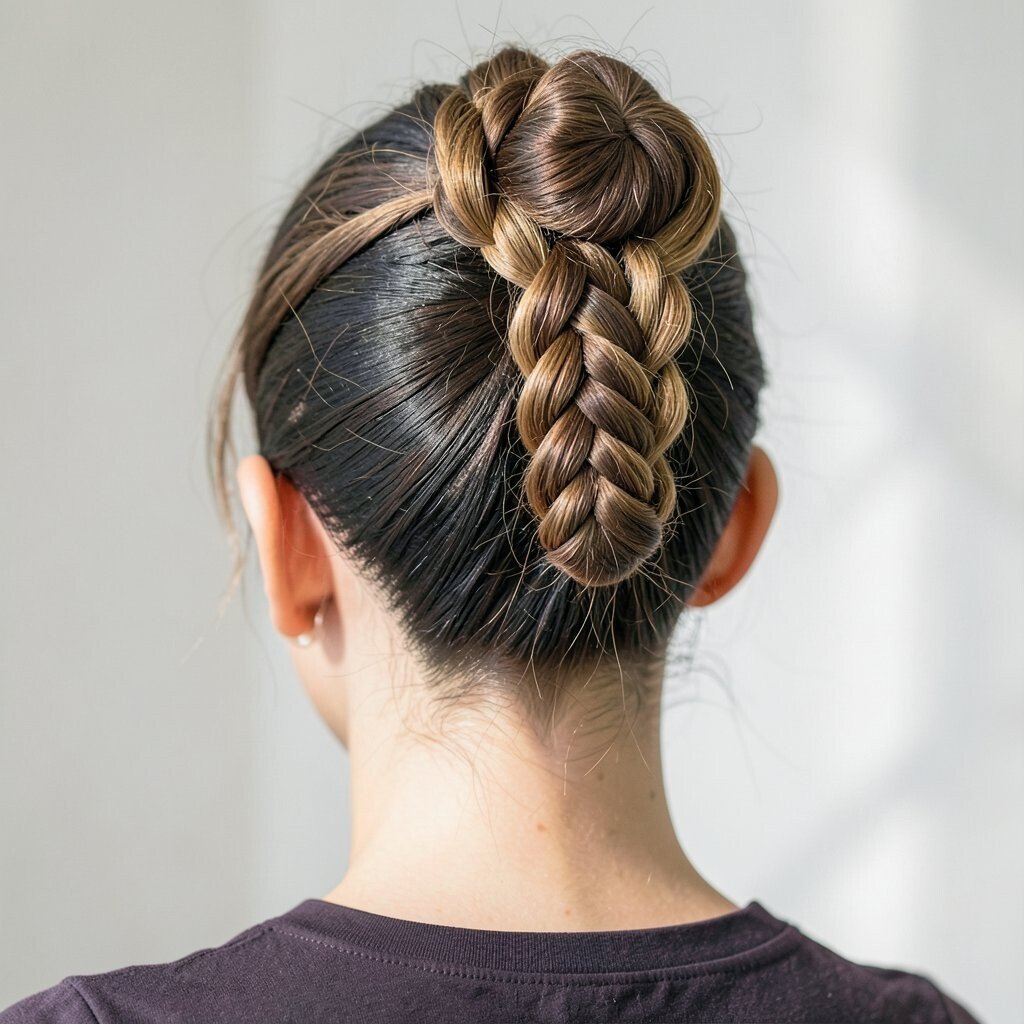
Use a waterfall braid technique by letting small sections fall forward while you braid, creating a ribbon-like effect. Position the braid so it starts on one side and moves diagonally, like a soft scarf across your hair.
Gather the rest of your hair into a high bun on the opposite side, so the bun and braid don’t mirror each other. The visual contrast looks fashion-forward because the “dropping” braid adds movement while the bun adds structure. For practical control, secure the falling sections with small clear bands so they don’t tangle on long days.
Personalize by adding tiny hair rings near the braid for a subtle glow, or keep it clean for a sleek look. If you have curly hair, stretch the roots slightly with your fingers while you braid so the pattern shows clearly. This style can save you money since you can get the effect with simple bands and bobby pins, not special extensions.
To help it last, braid early before you head out and mist lightly at the end, then press any flyaways down with a tiny amount of gel on your fingertips.
4. Fishtail Accent Braid With a Messy Off-Center Bun
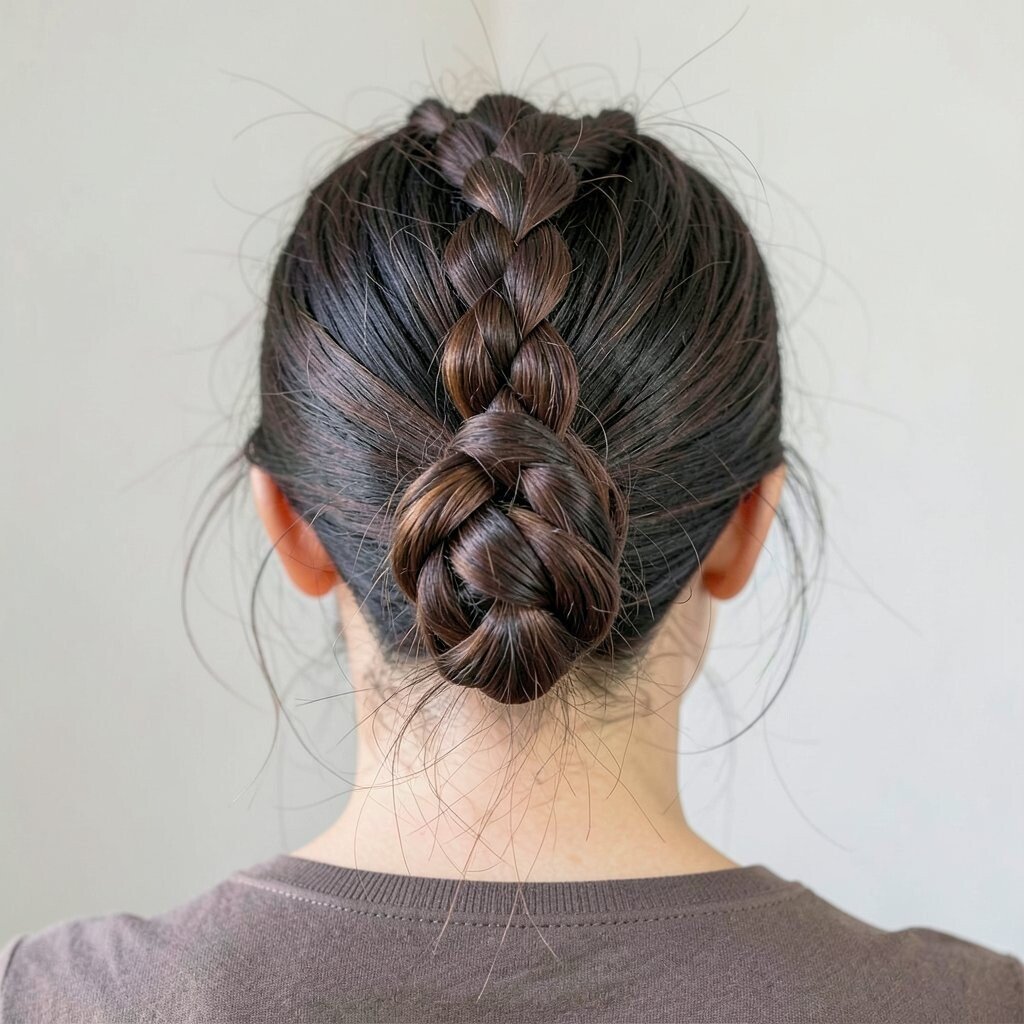
Fishtail braids look extra detailed, even when you keep them compact. Start a small fishtail braid from one side and weave it into the side of your bun area so it feels like an accent, not the whole hairstyle.
Form a messy bun slightly to the side, letting a few pieces slip out to frame your face. This asymmetry is perfect for a relaxed, trendy look, and it also helps hide any day-old texture. For a practical finish, pin the fishtail braid first, then build the bun around it so the accent stays visible.
5. Half-Up Diagonal Braid Into a Knotted Bun
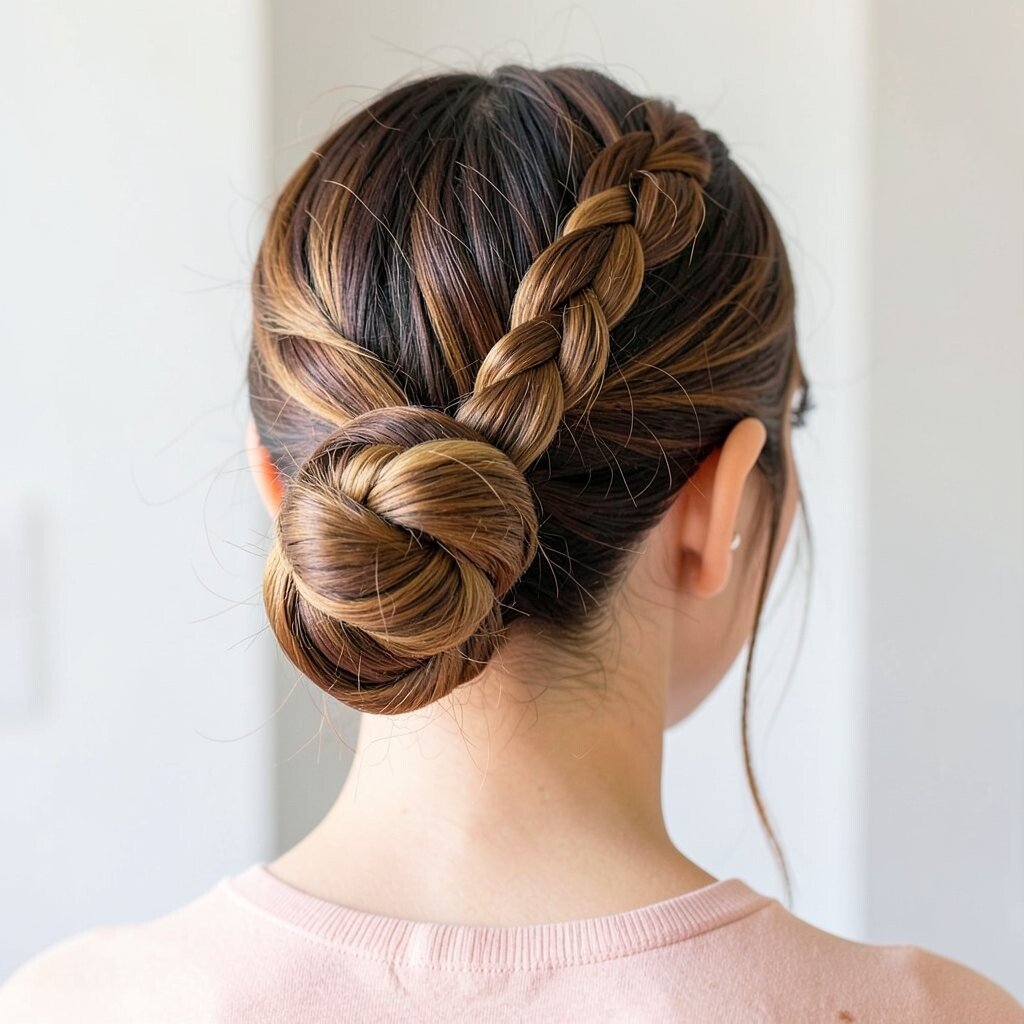
Create a half-up section and gather it diagonally, sweeping upward from one temple toward the crown. Braid that half-up section loosely so it looks airy, then twist the braid into a small knot bun off to the side.
The uniqueness comes from the diagonal start, which makes your head shape look sharper and your style look more intentional. This is a great practical option for school, work, or events because it keeps hair off your neck without feeling too tight. To personalize, widen the braid slightly by gently tugging the outer strands after you finish, which adds a soft, fashion editorial vibe.
If your hair is thick, use fewer braids pieces and secure with more pins to keep the knot from shifting. If your hair is thin, add a small hair donut only at the bun base so the knot looks fuller. A budget-friendly approach works here too, since the knot bun uses the same tools you already have and doesn’t require extra hair accessories.
6. Triple-Texture Asymmetrical Braided Bun With a Side Fringe
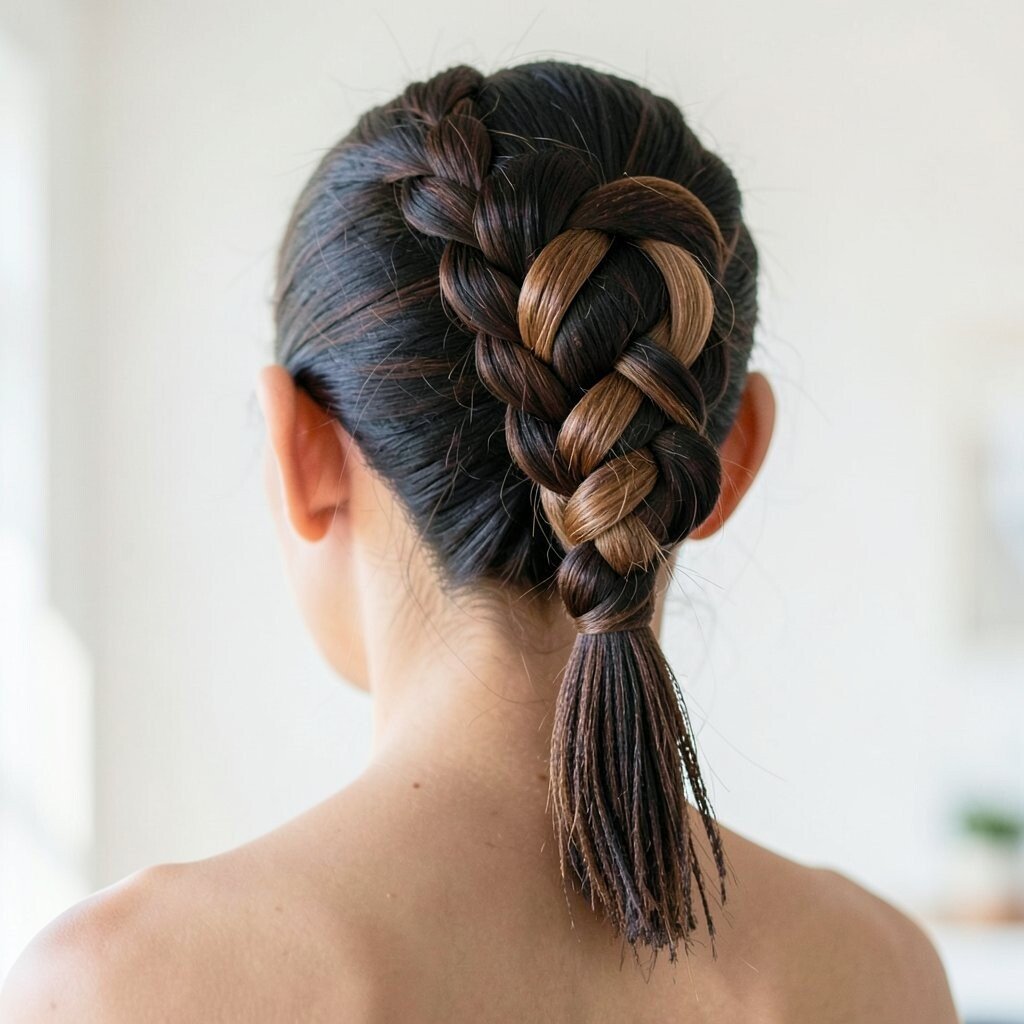
Choose three textures to play with contrast, such as a smooth braid section, a slightly wavy braid, and a looser twist near the bun. Start one braid on the left, another on the right, then connect them into one asymmetrical bun placed toward the back-left.
That mix of textures gives a fashion-forward feel because your eyes catch each different finish as you move. It also helps practical styling, since different textures can hide uneven layers and growing-out bangs. For personalization, style a side fringe by tucking it behind one ear so the braids and bun stay the star.
To keep it secure, pin the bun at the underside first, then wrap a final pin through the braid ridge so everything locks together. If you want a current trend touch, add a small braided detail near the front to echo the “micro braid” look seen everywhere lately. Cost stays friendly because the effect comes from technique, not expensive add-ons.
7. Asymmetrical Bubble Braid Bun With Elastic Loops
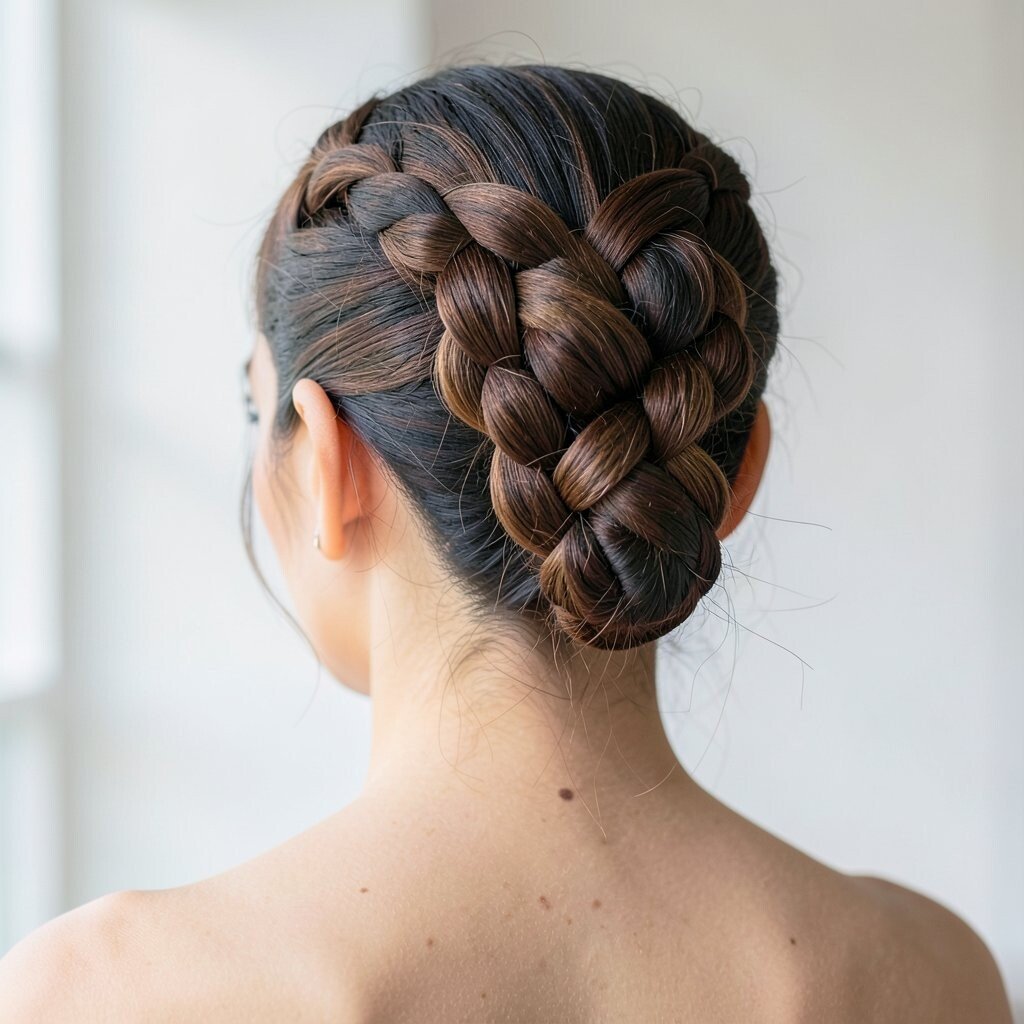
Start with an uneven side part, then braid sections using elastics to create bubble-like loops along the side. Once you have a chain of bubbles, coil them into a bun on the opposite side so the silhouette looks bold and playful.
This style stands out because the bubble texture creates dimension even from far away. It’s also practical for busy mornings since elastics make the braid hold its shape without careful tension every step. For personalization, use colored elastics for a fun weekend look, or choose clear elastics for a more polished, everyday vibe.
When pinning, tuck each bubble loop slightly inward so you get a rounded bun that doesn’t collapse. If your hair is fine, keep the bubbles smaller so they don’t stretch out, and add a tiny bit of dry shampoo at the roots for grip. This bun can stay budget-friendly because you only need elastics and bobby pins, which most people already have.
8. Side French Braid Into a Sleek Asymmetrical Bun With Shine
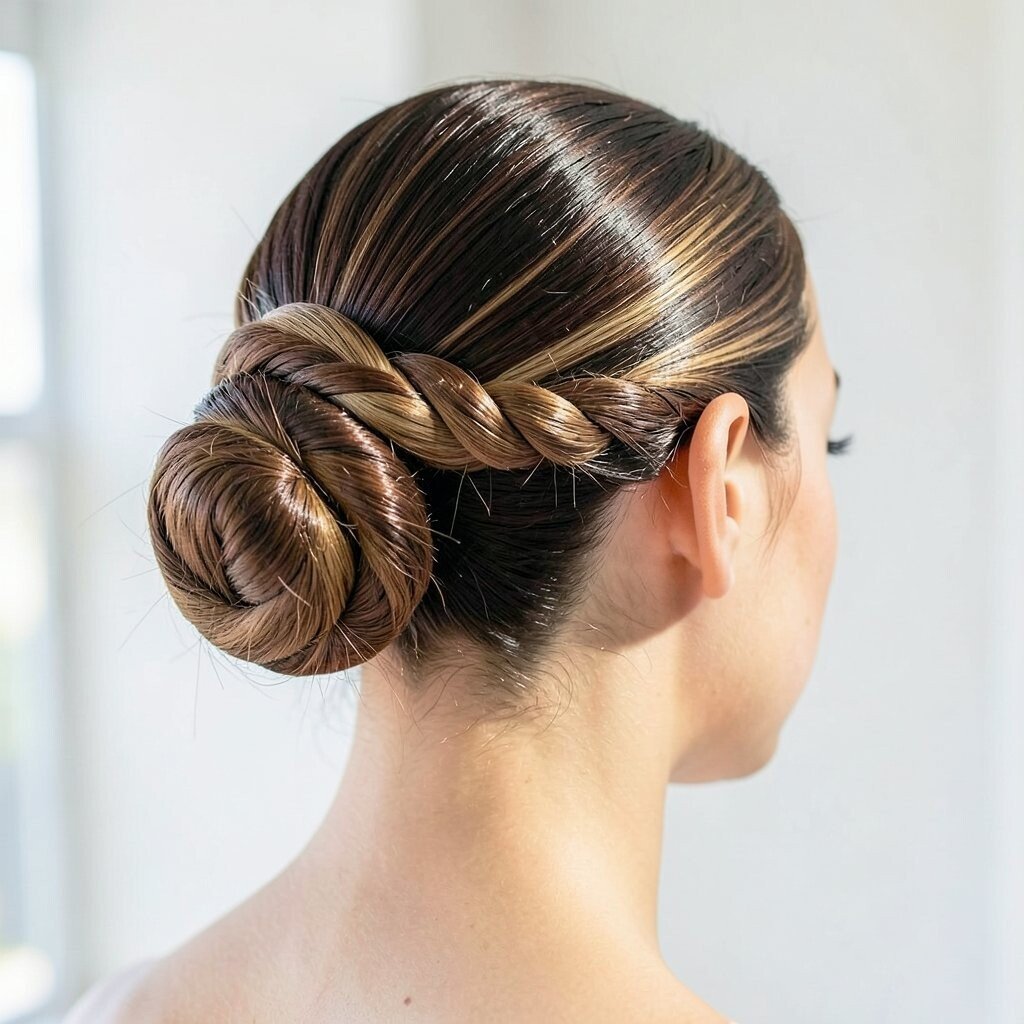
Apply a light smoothing serum to reduce frizz, then French-braid tightly from your side part. Let the braid travel back and gather all hair into a sleek bun that sits asymmetrically near the crown.
The benefit is a clean, fashion-forward look that still feels comfortable because the braid distributes tension more evenly than a plain bun. Uniqueness comes from the sharp diagonal line of the braid against the smooth bun surface. For personalization, add a small shine spray to make the bun look glossy, especially in photos and evening lighting.
To keep it practical, use a comb to tuck the underside neatly so you don’t get that “loose halo” effect. If you’re trying it for a formal event, pin the bun firmly at three points and finish with a flexible hold spray so it doesn’t go stiff. Cost considerations are easy here because good results come from product and technique, not styling tools you don’t need.
9. Curled-Loop Asymmetrical Braided Bun With Faux Volume
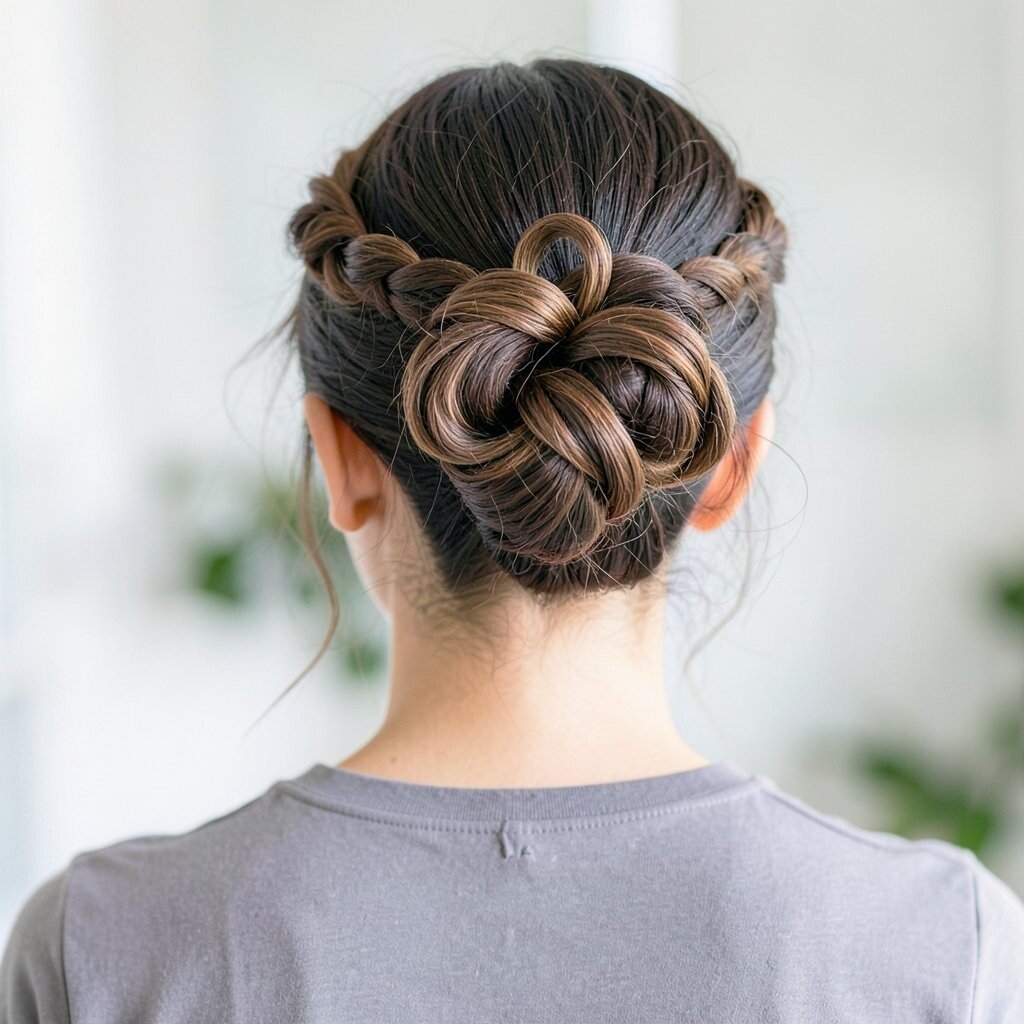
Begin by braiding a section on one side, then create curled loops by wrapping strands around your finger before pinning them into a bun. Place the loops so the bun rises higher on one side and lowers slightly on the other for a gentle off-balance effect.
This is visually striking because the looped texture catches light and looks more complex than it really is. It’s also great for practical volume since the loops create height without needing heavy extensions. Personalize the vibe by making the loops tighter for a sleek look or wider for a softer, romantic feel.
If your hair is straight, lightly curl the ends before looping so the structure stays bouncy. If your hair is thick, use smaller loops and more pins to prevent gaps. For cost, keep it simple with a few matching bobby pins and a hold mist, since the “fancy” look is mostly technique.
10. Scandi-Inspired Asymmetrical Braid Knot Bun
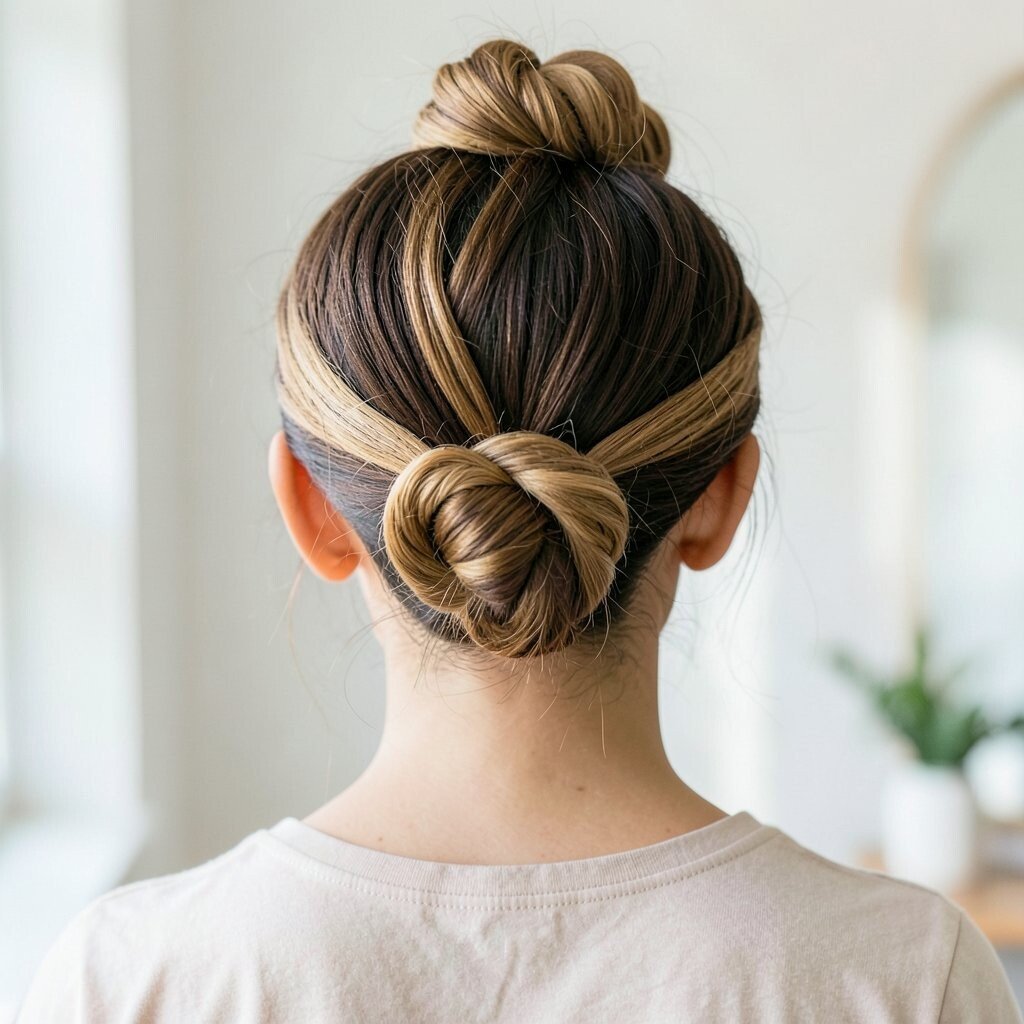
Start with a low side part and braid a slim strand from the front inward, keeping the braid tidy and narrow. Twist and knot the braided section into a bun that sits off center, then add extra pins to stabilize the base.
The uniqueness here is the Scandinavian feel created by clean lines and minimal bulk, which is a popular modern styling direction. This style is practical because it keeps hair out of your face while still looking soft and wearable. Personalize by leaving one thin braid strand loose near the cheek for a trendy, undone accent.
For a current look that feels fresh, pair it with a satin hair tie or a matching clip if you like small details. If you’re on a budget, skip fancy tools and focus on smooth brushing and pin placement, since those make the knot look expensive. A quick trick is to press the bun shape with your palms after pinning, which helps it set into place.
If you want it to last through the day, spritz lightly around the bun base, then avoid touching it too much until you’re ready to refresh.
11. Asymmetrical Side Braid Into a Twisted Low Bun With Pins
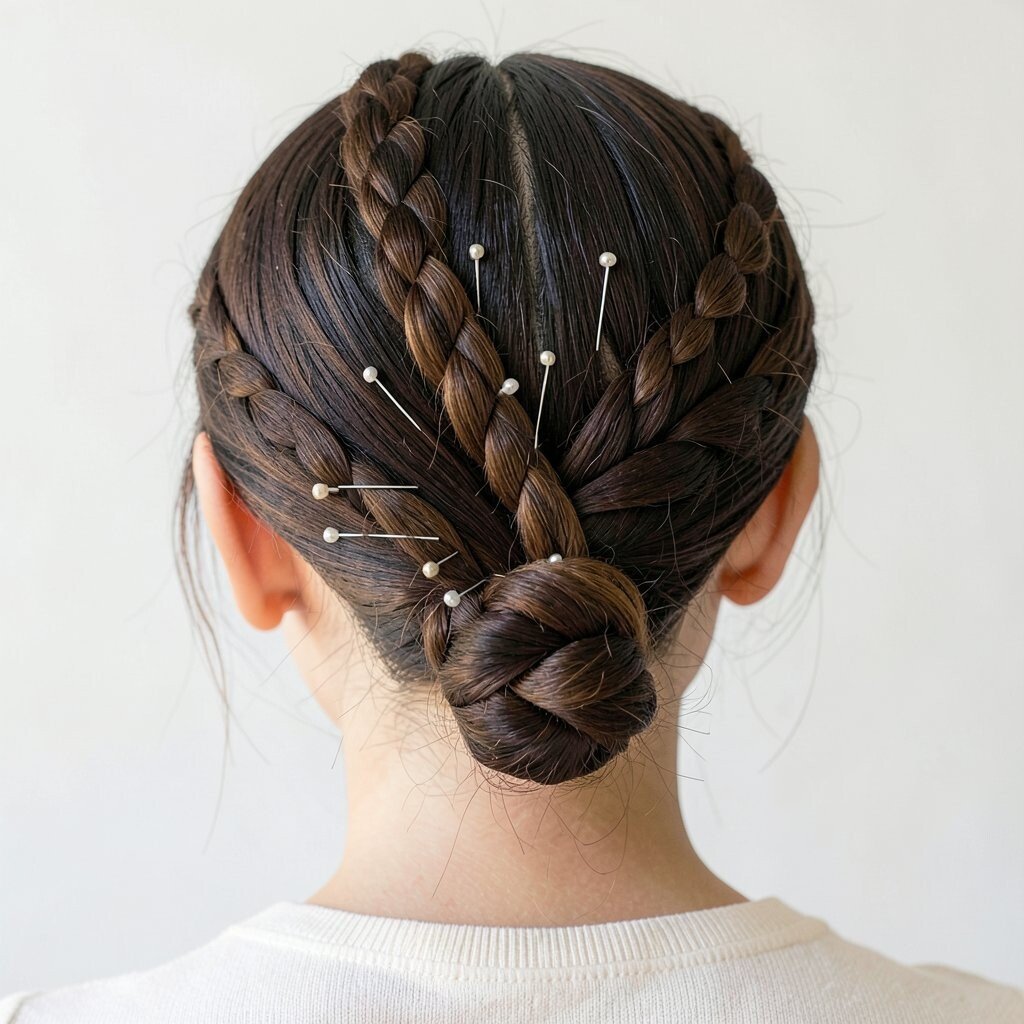
Pull hair into a low side gathering, then braid a section from the outside edge toward the back. Twist the rest of the hair into a low bun on the opposite side, letting the braid sit like a bold headline.
This works well because the braid adds structure while the twist bun adds comfort, so it doesn’t feel too stiff. The asymmetry flatters many face shapes by creating a diagonal line across your features. To personalize, add a braid wrap around the base using the braid tail, which makes the bun look extra intentional.
For practical tips, keep the braid slightly tighter than the twist, since that helps the bun hold its shape. If your hair slips, add one small section of hair from the twist into each pin so the pins “grab” more strands. Cost remains low because the style relies on simple pinning rather than accessories that can add up.
12. Halo Side Braid Meets an Off-Center Bun Pinwheel
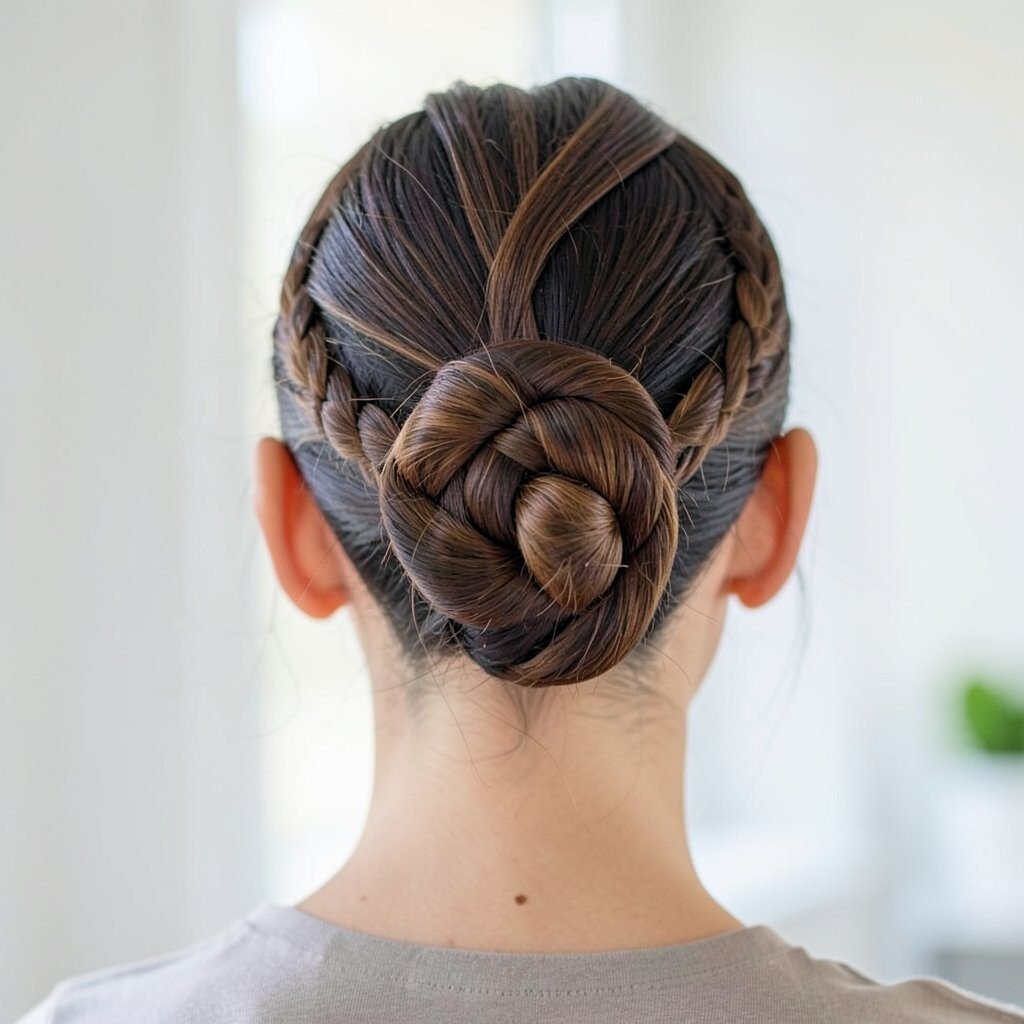
Make a side halo braid that wraps from one ear around the back, keeping the braid smooth and consistent. When you reach the other side, gather everything into a bun shaped like a pinwheel, placed off center for a dramatic look.
The benefit is that the halo braid frames your face while the pinwheel bun adds a fashion-forward focal point. It feels unique because the braid looks elegant from every angle, not just the front. Personalize it by deciding how visible you want the pinwheel to be, either showing more coils for drama or tucking more in for subtlety.
To make it practical for everyday wear, use a few hidden pins under the halo braid so it doesn’t shift when you move. If you have fine hair, lightly backcomb at the crown before braiding to help the halo feel fuller. You can keep costs down by using affordable styling mousse for grip and relying on bobby pins for structure.
13. Braided Bang Melt Into a Side Asymmetrical Bun With Texture Spray
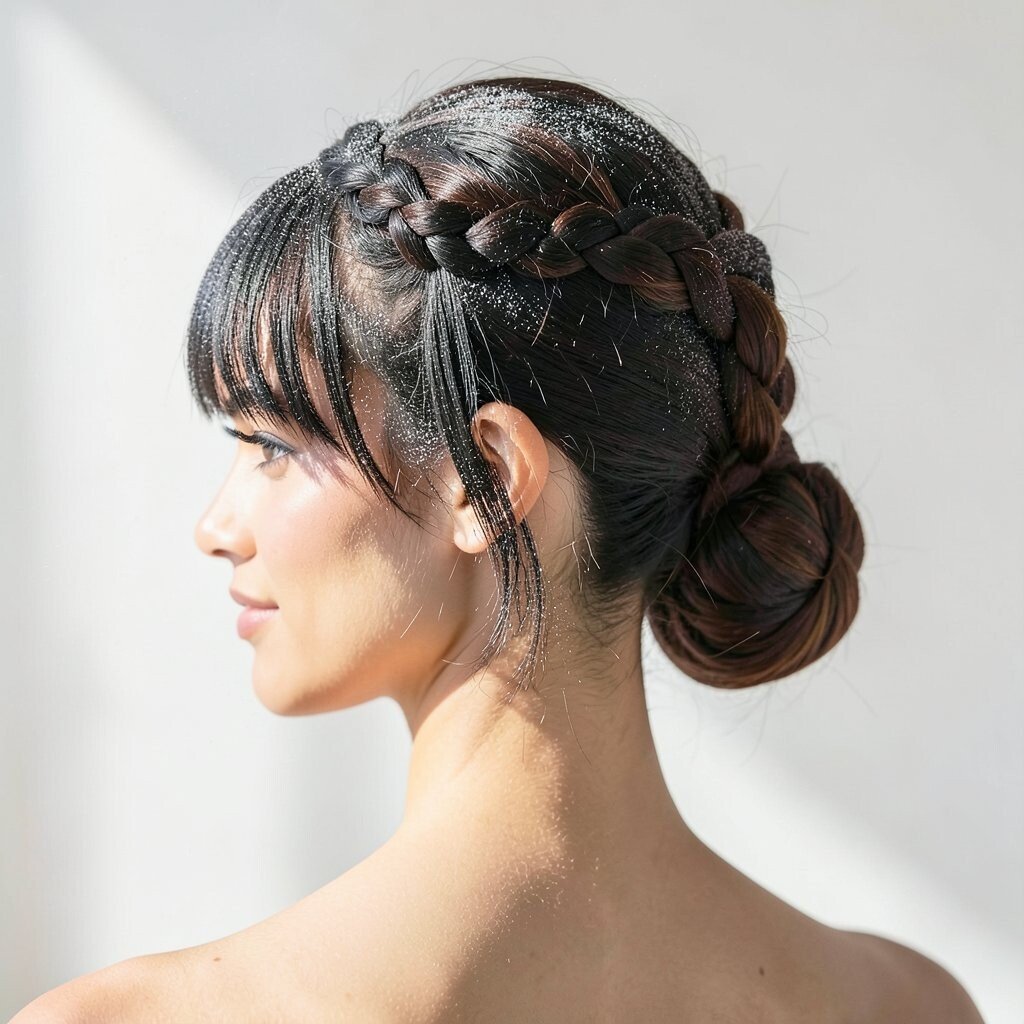
Start by braiding your fringe or front layers into tiny sections, then melt those braids into the rest of your hair as you gather it. Create a side asymmetrical bun that sits slightly higher on one side, so the “bang braid” leads into the bun like a ribbon.
This style is playful and very wearable because it controls front pieces while still looking airy. The uniqueness comes from treating your bangs as part of the braid design rather than something tucked away. For personalization, vary braid size depending on your hair thickness, and use a texture spray to add grip and keep the bun from sliding.
If your hair is curly, embrace the texture by letting some curls escape near the bun for a modern, effortless vibe. If your hair is straight, add a quick wave with a clipless wand or use a volumizing spray to prevent the bun from looking too flat. Cost-wise, you can achieve the whole look with a brush, elastics, bobby pins, and your regular styling spray.
To ensure it lasts, pin the bun base firmly and mist lightly over the braid area, then avoid heavy handling so the strands stay set.